New Zealand Corps A to N
This page and the next covers the badges worn by the New Zealand Corps.
Some of them came into existence in 1911, with the formation of the New Zealand Territorial Force, but a few had existed before, in smaller formations attached to Volunteer units throughout NZ.
The bulk of these units formed because of the First World War (NZ Army Ordnance Corps, NZ Provost Corps, NZ Machine Gun Corps to name a few), which enlarged the New Zealand Army ten-fold, and thus made a requirement for specialised units to support and manage the large amount of men and women in uniform.
Royal New Zealand Artillery
In 1911 the Territorial Artillery Force formed, which included the Regiment of New Zealand Field Artillery and the New Zealand Garrison Artillery Volunteers.
The Royal New Zealand Artillery still existed, and was part of the permanent New Zealand Army, which maintained a instructional and cadre role.
Motto: Ubique (Everywhere).
In early 1911, the General Officer Commanding (G.O.C) ordered a process of registration of all badges currently worn, and then a process of submitting new badges for the newly created force.
With regards to the Artillery, on the 10th of July 1911 it was recorded that:
"The G.O.C desires that there should be one badge for all Batteries and Companies as follows:-
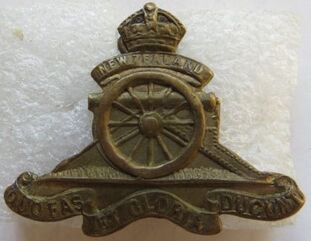
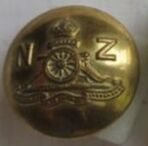
Hat or Cap.- Gun Surmounted by the letters "N.Z" and a crown.
Motto "Quo fas et gloria ducunt" on scroll at base.
Collar badges.- Artillery grenade only.
This effects the proposed badges of which sketches were submitted."
The Royal New Zealand Artillery still existed, and was part of the permanent New Zealand Army, which maintained a instructional and cadre role.
Motto: Ubique (Everywhere).
In early 1911, the General Officer Commanding (G.O.C) ordered a process of registration of all badges currently worn, and then a process of submitting new badges for the newly created force.
With regards to the Artillery, on the 10th of July 1911 it was recorded that:
"The G.O.C desires that there should be one badge for all Batteries and Companies as follows:-
Hat or Cap.- Gun Surmounted by the letters "N.Z" and a crown.
Motto "Quo fas et gloria ducunt" on scroll at base.
Collar badges.- Artillery grenade only.
This effects the proposed badges of which sketches were submitted."
|
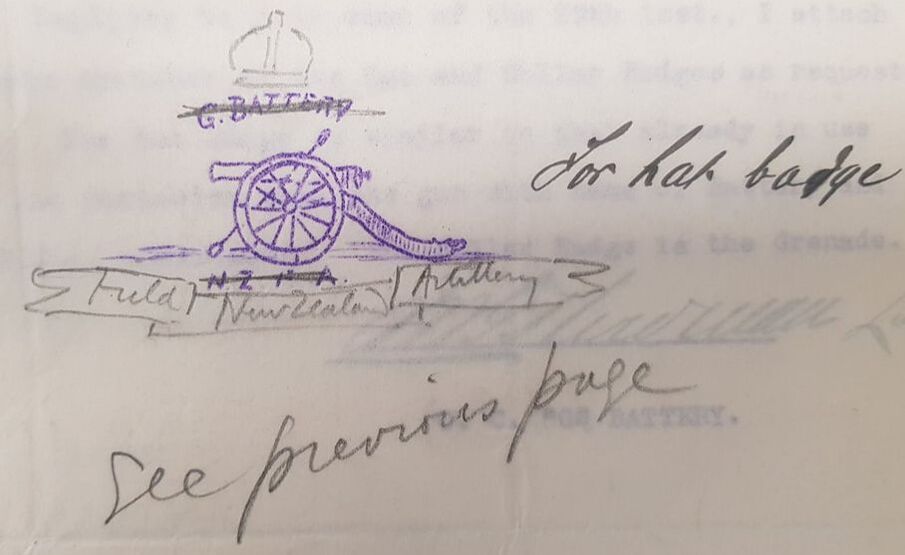
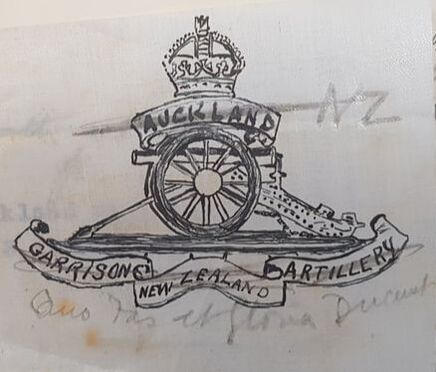
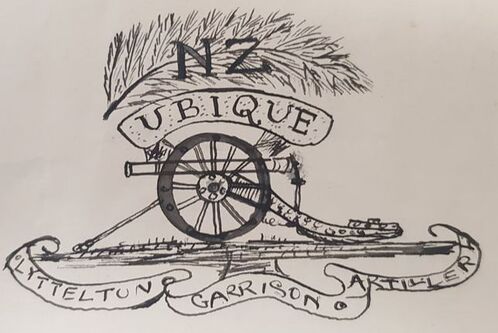
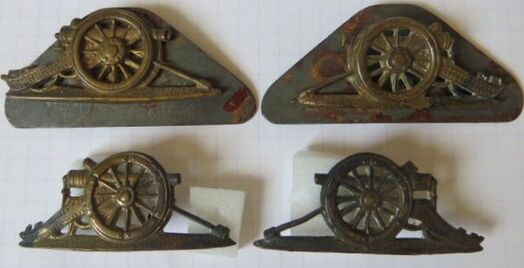
- Opposite & Above: Some of the original sketches still exists in Archive NZ. They include existing badges, with some units expressing the desire to continue to wear, but also new designs.
Note the pencil modifications, as per General Godley's (G.O.C) desire for a universal badge for the two branches of the Territorial Artillery. |
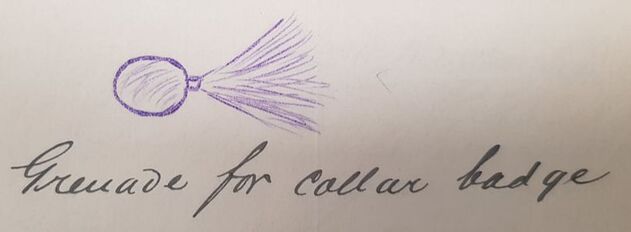
- Above: The design for the Artillery grenade Collar badge.
- Opposite: A superb design submitted in 1911 for Lyttelton Garrison Artillery, which was NOT approved. Sketch is held at Archive NZ. |
|
(Badges - Regimental - Territorial Force, R23534556 AD1 AAYS 13-13 Archives NZ).
The following badge exist, but fall outside the remit of the above. Corbett on Page 103 of his book "The Regimental Badges of New Zealand" indicates that these were introduced in 1911, possibly prior to the desire for the universal badge.
The following badge exist, but fall outside the remit of the above. Corbett on Page 103 of his book "The Regimental Badges of New Zealand" indicates that these were introduced in 1911, possibly prior to the desire for the universal badge.
|
|
|
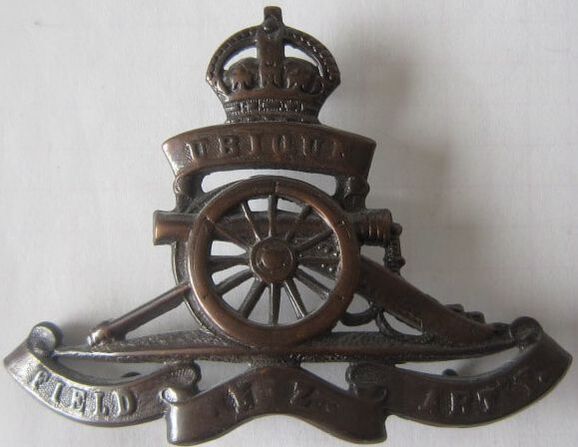
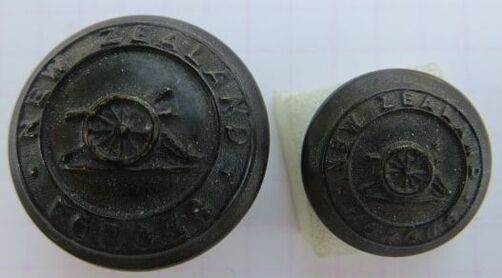
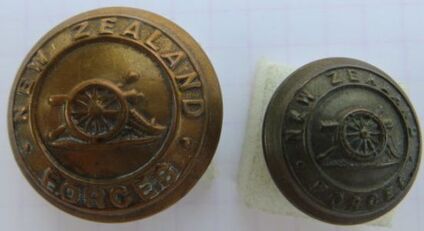
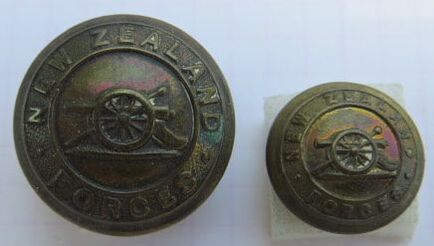
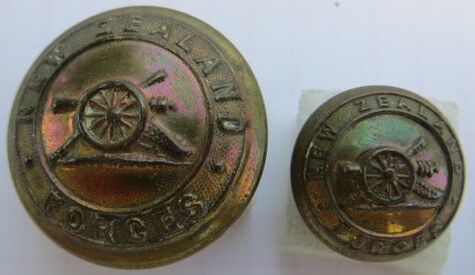
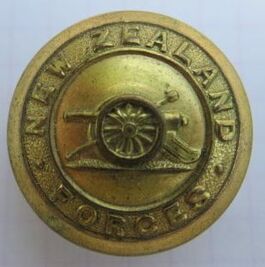
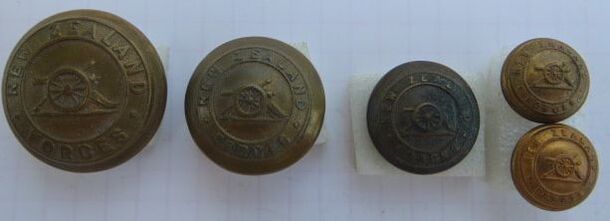
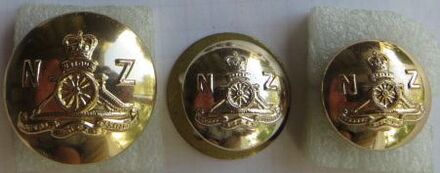
- Above: A 1911 pattern Cap badge in bronze (possibly Officers) to the New Zealand Field Artillery. Well polished to front, with three copper looped lugs to back. The shape of the lugs suggests a Stokes & Sons make, but no maker mark. Size 49mm by 66mm.
|
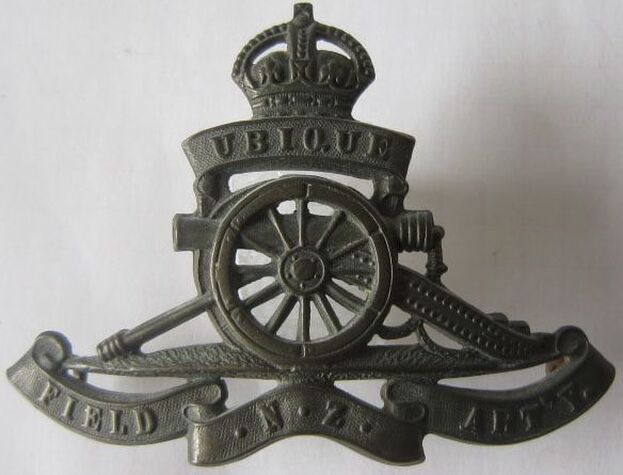
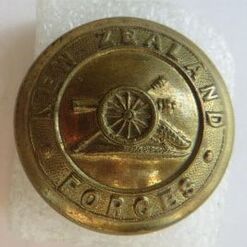
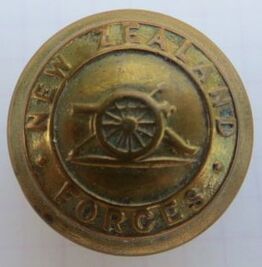
- Above: A similar pattern Cap badge in gilt brass to the New Zealand Field Artillery. The finish to front is well toned, with three copper looped lugs to back. The shape again of the lugs suggests a Stokes & Sons make, but no maker mark. Size 49mm by 66mm.
|
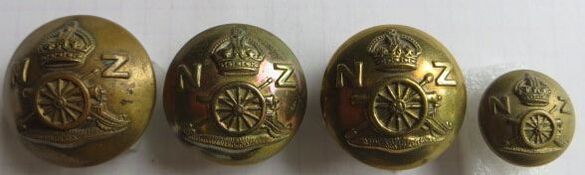
New Zealand Artillery
At the start of WW1, it was intended that one six-gun 18-pounder battery would form part of the initial contingent of the New Zealand Expeditionary Force (N.Z.E.F). But following large numbers of volunteers, the unit was expanded to a Brigade of three batteries, totaling twelve 18-pounders. This brigade left with the rest of the N.Z.E.F on the 16 October 1914.
As New Zealand increased its commitment to the Western Front and Middle East, this number would eventually swell to two New Zealand Field Artillery brigades (regiment-sized) serving with the New Zealand and Australian Divisions.
Motto: QUO FAS ET GLORIA DUCUNT (Whither right and glory lead).
As New Zealand increased its commitment to the Western Front and Middle East, this number would eventually swell to two New Zealand Field Artillery brigades (regiment-sized) serving with the New Zealand and Australian Divisions.
Motto: QUO FAS ET GLORIA DUCUNT (Whither right and glory lead).
|
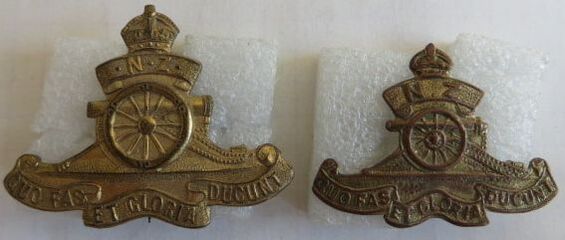
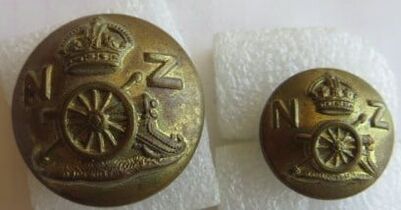
- Above: A semi-solid, bronze, Officers Cap badge with separate spinning wheel to center to the New Zealand Artillery. Maker marked to back in raised letters to "J R GAUNT, LONDON". It has two blades to back, at the base, behind the bottom scroll. Two dots to top banner, and size 47mm by 65mm.
|
- Above: A die stamped, darkened brass, Officers Cap badge, with separate spinning wheel to center. It has a maker plaque of "J R GAUNT LONDON" to back and 3 blades or tangs to back. Sadly the top blade has snapped off. Two dots to top banner and size 48mm by 65mm.
|
|
- Above: A die stamped, bronze Officers Cap badge to the New Zealand Artillery. Separate wheel to center, which is held on by two wires and does NOT spin. Three blades or tangs to back, with the bottom ones visable in the photo. No maker mark, with two dots to top banner. Size 48mm by 62mm (badge is curved).
|
- Above: A die stamped, darkened copper Officers Cap badge to the New Zealand Artillery. Separate wheel to center which has small tabs to back, so does not spin. Three thin blades or tangs are present to back, but no maker mark. One dot to top banner and size 51mm by 68mm.
|
|
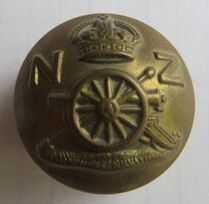
Above: A darkened brass Cap badge to the New Zealand Artillery. Likely a locally made (New Zealand) badge. Note the visible line down the center from Crown to lower banner. Three short brass tangs to back. It Is not maker marked, and size is 49mm by 67mm.
|
Above: A darkened copper Cap badge to the New Zealand Artillery. Note no dots to the top banner. This badge has three short copper looped lugs to back, characteristic of Stokes & Sons of Melbourne. It Is not maker marked, and size is 50mm by 68mm.
|
|
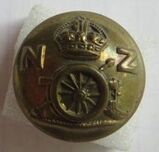
Above: A gilt brass Cap badge to the New Zealand Artillery. Note no dots to the top banner. Three thick copper looped lugs to back. It Is not maker marked, but likely a Stokes & Sons of Melbourne. Size 50mm by 67.5mm (note badge is curved).
|
Above: A gilt brass Cap badge to the New Zealand Artillery. Note no dots to the top banner. This badge has had its lugs clipped off, and a long pin, hinge and hook assembly attached to back. It Is not maker marked, but likely a Stokes & Sons of Melbourne. Size 49mm by 67mm (note badge is curved).
|
|
- Above: A gilt brass Cap badge to the New Zealand Artillery. Note two dots to top banner. Three copper looped lugs to back, along with the maker plaque of "J R GAUNT LONDON" behind the top banner. Size 47mm by 65mm (curved).
|
- Above: A darkened bronze Cap badge to the New Zealand Artillery. Note the two dots to top banner. Two copper looped lugs to back, but no maker mark. It is a mess to back, especially around the top banner. Size 50mm by 67mm.
|
|
- Above: A gilt brass Cap badge to the New Zealand Artillery. Note one dot to top banner. Three copper wire lugs to back. No maker mark, and with size 51mm by 69mm.
|
- Above: A darkened or blackened brass Cap badge to the New Zealand Artillery. Note one dot to top banner. Three copper wire lugs to back. No maker mark and size 50mm by 68mm.
|
|
- Above: A gilt brass Cap badge to the New Zealand Artillery. Note two dots to top banner. Three copper wire lugs to back. No maker mark and size 48mm by 66mm.
|
- Above: A gilt brass Cap badge to the New Zealand Artillery. Note one dot to top banner. Just two copper wire lugs to back, in center, in a East/West configuration. No maker mark and size 50mm by 68mm.
|
|
- Above: A gilt brass Cap badge to the New Zealand Artillery. Note one dot to top banner. The two copper lugs to center have been replaced with a large brass slider to back. No maker mark and size 51mm by 69mm.
|
- Above: A gilt brass Cap badge to the New Zealand Artillery. Note two dots to top banner. Long, thin brass slider to back. No maker mark and size 46mm by 62mm (curved).
|
|
- Above: A worn gilt brass Cap badge to the New Zealand Artillery. Note two dots to top banner. A likely a locally made, thin sheet metal example. This has a huge wide slider to back. No maker mark and size 51mm by 65mm (curved).
|
- Above: A British/Commonwealth Assistant Gunnery Instructors Sleeve Proficiency badge in gilt brass. Also worn by members of the New Zealand Artillery. Four copper looped lugs are two back.
|
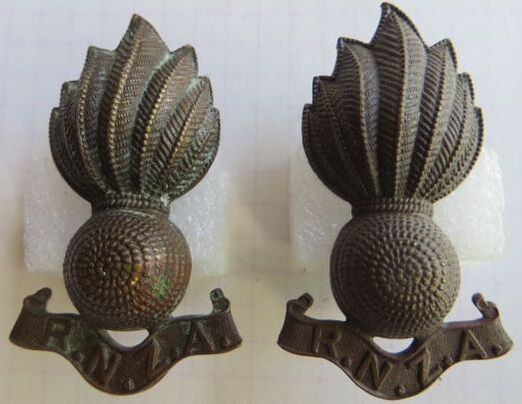
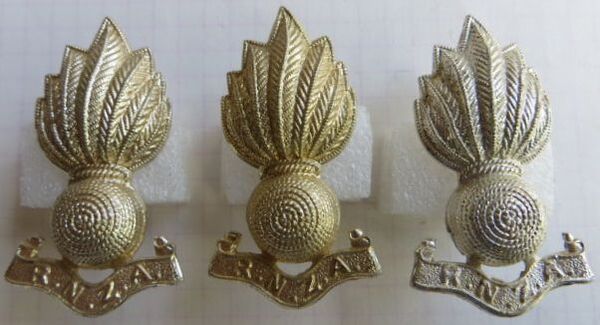
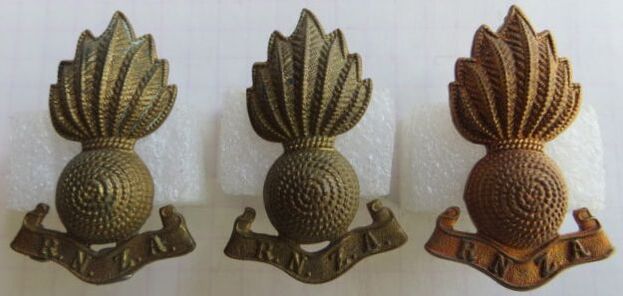
The following is a complicated Collar badge, which was worn in the Volunteer period, by the Permanent Force of Artillery, Volunteer Artillery units, the post - 1911 New Zealand Field Artillery, New Zealand Garrison Artillery, New Zealand Artillery, New Zealand Corps of Engineers, New Zealand Corps of Signals and the Railway Battalion of the New Zealand Corps of Engineers.
Instead of showing them all below, I will also show different types under the others units as well.
Instead of showing them all below, I will also show different types under the others units as well.
|
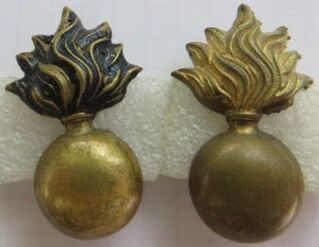
- Above: A pair of non-matching coppery bronze grenade collar badges. Just a slight difference in the flame pattern to top. Two copper looped lugs to back in a North/South configuration. No maker mark, and size 30mm by 18mm.
|
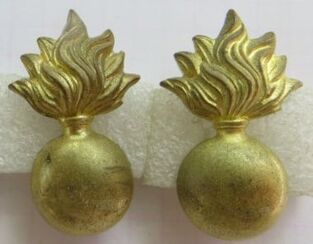
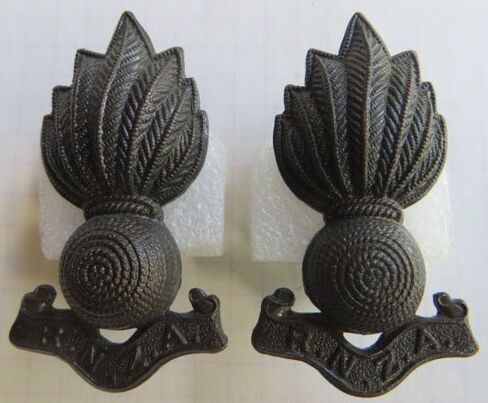
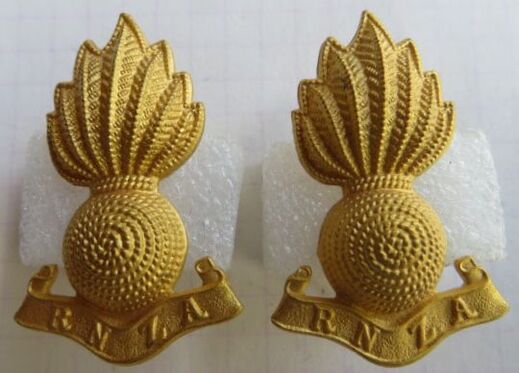
- Above: A pair of matching gilt brass grenade collar badges. Two copper looped lugs to back in a North/South configuration. No maker mark, and size 32mm by 19mm.
|
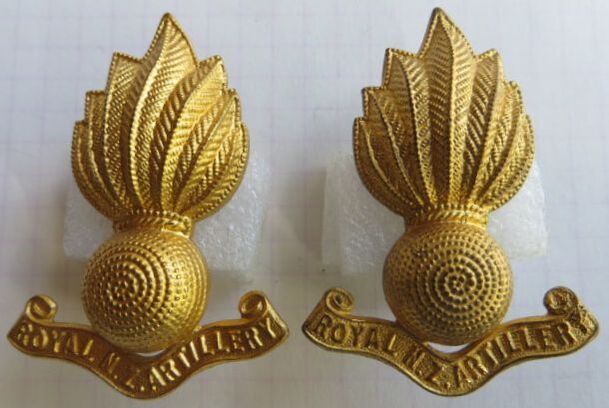
- Above: A pair of matching (in terms of construction) gilt brass grenade collar badges. Note the darkened finish applied to the left collar. Two copper looped lugs to back in a North/South configuration. No maker mark, and size 32.5mm by 19mm.
|
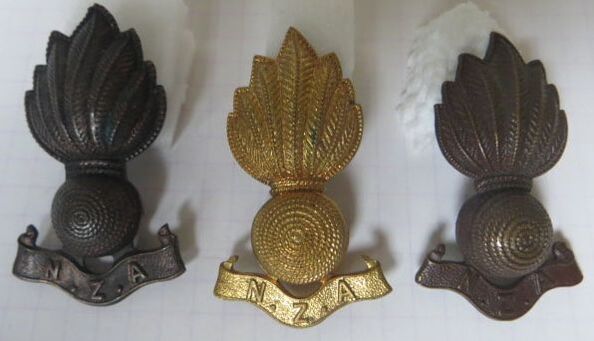
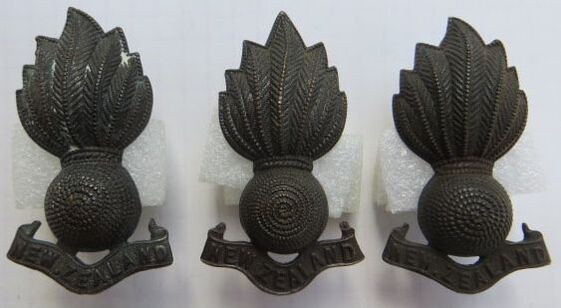
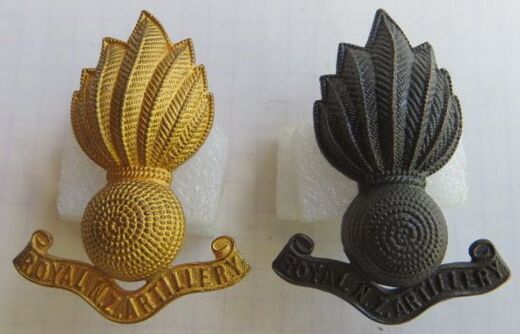
- Above Left: A single piece, 7 flame grenade Collar badge to the New Zealand Artillery. Made from darkened bronze, two loops to back, but no maker mark.
- Above Middle: A gilt brass, single piece, 7 flame grenade Collar badge to the New Zealand Artillery. Two loops to back, but no maker mark. - Above Right: A darkened brass, 7 flame grenade Collar badge to the New Zealand Artillery. Maker plaqued to back to "J R Gaunt, London". Two copper looped lugs to back. |
Above: Two gilt bass New Zealand Artillery Association badges to be worn on civilian clothes. Note both have "N.Z" to top banner.
- Above Left: A gilt brass, die stamped badge or pin. Roughly 30mm by 40mm, with a brooch fitting to back in a north/south configuration. No maker mark. - Above Right: Same again, but smaller. A gilt brass, die stamped badge or pin. Roughly 24mm by 32mm, with a brooch fitting to back in a north/south configuration. No maker mark. |
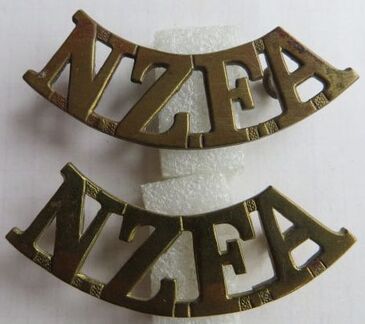
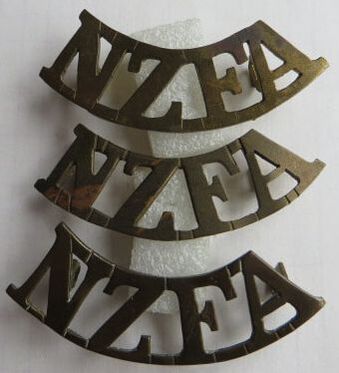
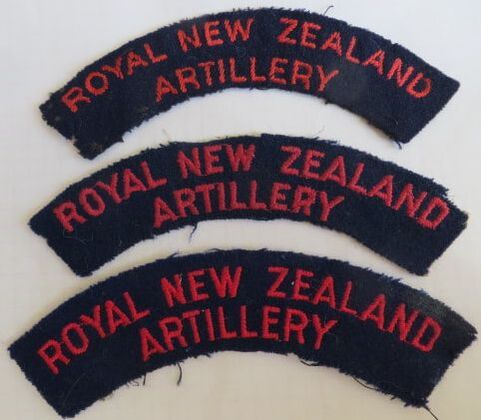
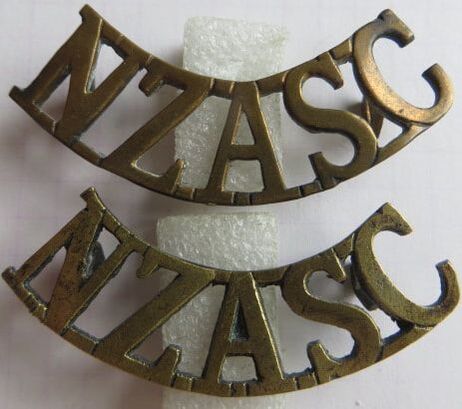
The following are shoulder titles to the New Zealand Field Artillery. These were worn widely during WW1 by the New Zealand Artillery in France, Belgium and the Middle East. Reinforcements to the New Zealand Artillery, trained in New Zealand as drafts to the New Zealand Field Artillery, but joined the New Zealand Artillery (N.Z.A) overseas.
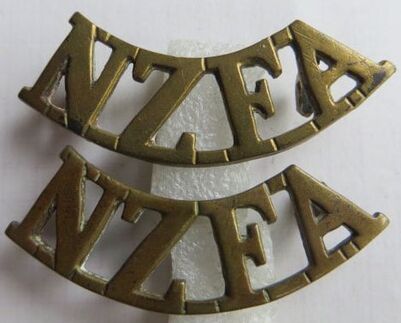
- Above: A curved, gilt brass pair of shoulder titles to the New Zealand Field Artillery (N.Z.F.A). Maker marked to "J R Gaunt London" on the back of the "Z", and with two short hex type brass lugs to back on each.
|
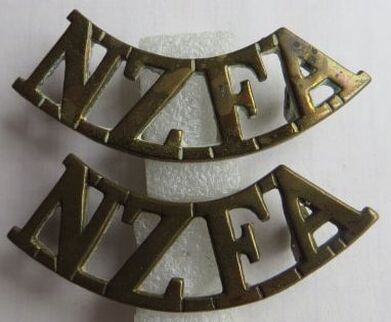
- Above: A curved, gilt brass pair of shoulder titles to the New Zealand Field Artillery (N.Z.F.A). One is maker marked to "J R Gaunt London" on the back of the "Z", the other has no maker. Both have two copper looped lugs to back.
|
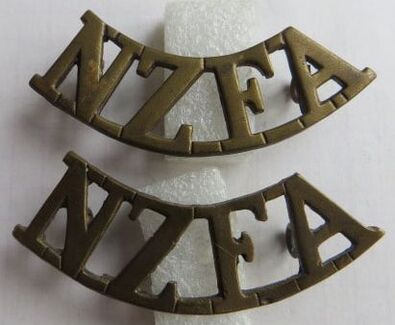
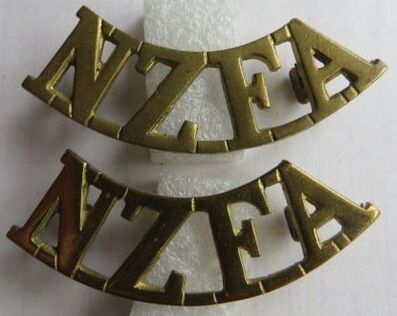
- Above: A curved, gilt brass pair of shoulder titles to the New Zealand Field Artillery (N.Z.F.A). One is maker marked to "Stokes & Sons" on the back of the "F" in a straight line. The other is marked "Stokes & Sons Melb" in a small oval maker mark to the back of the "Z". Both have two thick copper looped lugs to back.
|
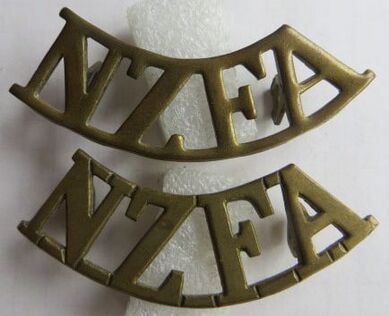
- Above: A curved, gilt brass pair of shoulder titles to the New Zealand Field Artillery (N.Z.F.A). Maker marked to "J R Gaunt London" on the back of the "F", and with two short hex type brass lugs to back on each.
|
- Above: A curved, gilt brass pair of shoulder titles to the New Zealand Field Artillery (N.Z.F.A). Maker marked to "Tiptaft" on the back of the "F", and with two short copper looped lugs to back of each.
|
- Above Top: A curved, gilt brass shoulder title to the New Zealand Field Artillery (N.Z.F.A). No maker mark, and well polished. It appears die stamped, and has two long hex type, thin, brass lugs to back.
- Above Base: A curved, gilt brass shoulder title to the New Zealand Field Artillery (N.Z.F.A). No maker mark, and two short hex type brass lugs to back. |
- Opposite are some hand-cut New Zealand Field Artillery (N.Z.F.A) shoulder titles
- Top: A curved, sheet brass shoulder title to the New Zealand Field Artillery (N.Z.F.A). No maker mark, and has two long hex type, thin, brass lugs to back.
- Middle: A curved, sheet brass shoulder title to the New Zealand Field Artillery (N.Z.F.A). No maker mark, and has two long hex type, thin, brass lugs to back.
- Base: A curved, sheet brass shoulder title to the New Zealand Field Artillery (N.Z.F.A). No maker mark, and has two short hex type, thin, brass lugs to back.
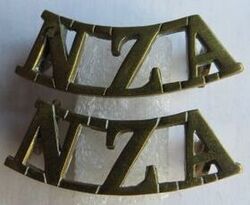
- Opposite: A matching pair of curved Brass shoulder titles to the New Zealand Artillery. These are Officer type, and just 10mm by 33mm, with two brass hex shaped lugs to back. No maker mark.
Normal sized (14mm high) curved titles to the NZA also exist, and are NOT cut-down RNZA titles, but look to have been made in such small quantities that they are not widely found. Maybe just worn by NZ Home Service members of the New Zealand Artillery.
Normal sized (14mm high) curved titles to the NZA also exist, and are NOT cut-down RNZA titles, but look to have been made in such small quantities that they are not widely found. Maybe just worn by NZ Home Service members of the New Zealand Artillery.
During WW1, the New Zealand Field Artillery wore a formation patch on both their service tunic and greatcoat. This was to be 1 1/2 inches below the shoulder strap on each sleeve.
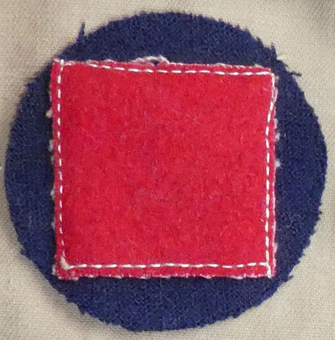
- Above: 1st Battalion, New Zealand Field Artillery - Red square on a Blue circle (Ian Hamilton Collection).
|

- Above: 2nd Battalion, New Zealand Field Artillery - Red diamond on a Blue circle (Ian Hamilton Collection).
|
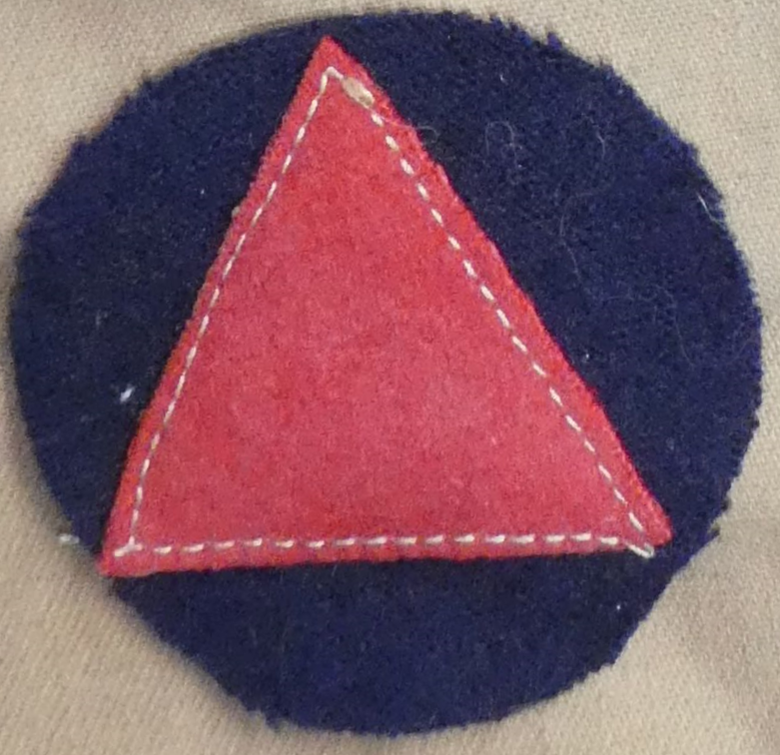
- Above: 3rd Battalion, New Zealand Field Artillery - Red triangle on a Blue circle (Ian Hamilton Collection).
|
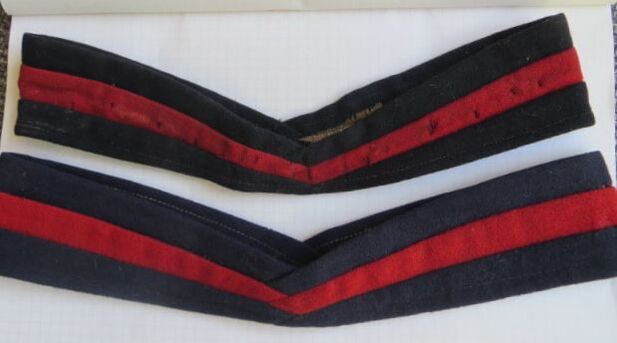
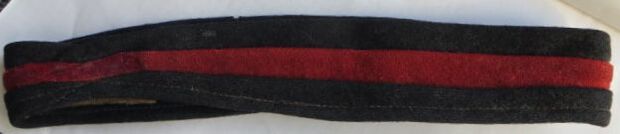
Opposite:
- Top: A puggaree to fit the Lemon Squeezer hat to all branches of the New Zealand Artillery. Dark Blue/Scarlet/Dark Blue. There is a chance that this is a WW1 one, and did have a number of badges attached, which formed a "glory belt" of some Kiwi's service. Sadly it came to me with all badges removed. Not marked inside. There is a faint "392" which might be part of a service number.
- Bottom: A WW2 era puggaree to fit the Lemon Squeezer hat to all branches of the New Zealand Artillery. This came from the effects of an Officer who lived in Southland. Sadly I don't have his details. Note the colour difference between the two. This has a purple ink size mark inside to 7 1/2.
|
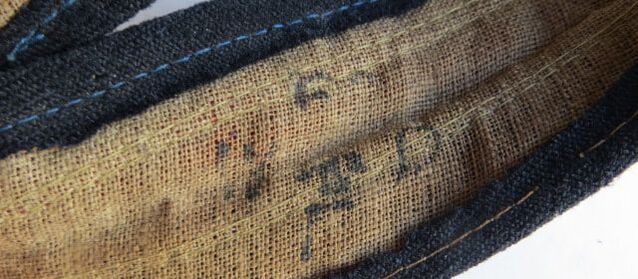
|
- Above Left & Right: A WW1 puggaree to fit the Lemon Squeezer hat to all branches of the New Zealand Artillery. Dark Blue/Scarlet/Dark Blue. This was worn by 43830 Cpl. William Albert Mackay. Part of the 27th Reinforcement draft to the New Zealand Field Artillery, and went on to serve with the 1st Brigade NZ Field Artillery in France and the Western Front, for 2 years and 25 days. This looks to be a "return home" Pug, with "WD" and broadarrow marks to inside, so British made. Its displayed on its side, and there are two holes to the front though which a NZA Cap badge would fit.
Regiment of New Zealand Artillery
In 1921 the Territorial New Zealand Artillery (N.Z.A) was designated the Regiment of New Zealand Artillery. They wore a Cap badge with "NEW ZEALAND" to top scroll, and "NEW ZEALAND" to the base of their collars.
Motto: Quo Fas Et Gloria Ducunt (Whither right and glory lead).
Motto: Quo Fas Et Gloria Ducunt (Whither right and glory lead).
|
- Above: A darkened bronze, 3 piece, die stamped Territorial Officers Cap badge to the Regiment of New Zealand Artillery. Separate wheel to center, and NEW ZEALAND to the top scroll. This badge has a separate top scroll and crown, from main body and a separate wheel. Two blades or tangs to back, at base. No maker mark.
- Opposite: A small gilt brass pin to the Regiment of New Zealand Artillery. Either a association pin or to be worn on civilian clothes, it has a brooch fitting to back. No maker mark.
|
- Above: Three collar badges to the Regiment of New Zealand Artillery. All are darkened bronze, with no maker marks to back. All have two copper looped lugs in a North/South configuration. They also have a separate lower banner attached.
|
Royal New Zealand Artillery
The Royal New Zealand Artillery was established on the 15 October 1902. It was the permanent Artillery Force in the New Zealand Army. From its inception until 1947, it maintained a instructional and cadre role to the New Zealand Garrison Artillery, New Zealand Field Artillery and the Regiment of New Zealand Artillery.
Motto: Ubique (Everywhere).
In January 1947 all remaining territorial Regiments of New Zealand Artillery were amalgamated into the Royal New Zealand Artillery.
Motto: Ubique (Everywhere).
In January 1947 all remaining territorial Regiments of New Zealand Artillery were amalgamated into the Royal New Zealand Artillery.
|
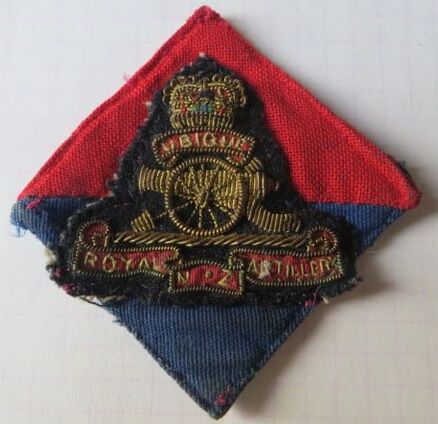
- Above: A bronze, curved, Officers Cap badge worn by Captain Henry Dale of the Royal New Zealand Artillery. Die stamped, with separate wheel to center (which is attached by two wires, so does NOT spin), it has three long tangs or blades to back and the maker plaque of "J R GAUNT LONDON". His other WW2 service items are further below. Size 47mm by 66mm.
|
- Above: A rare gilt fire brass, solid backed Cap badge to the Royal New Zealand Artillery. Three short D shaped lugs to back, and a separate wheel to center. Faint maker marked to back to "J R GAUNT LONDON" to back of lower banner. Size 47mm by 65mm.
|
|
- Above: A single piece, other ranks, gilt brass Cap badge to the Royal New Zealand Artillery. Three copper looped lugs to back.. Maker plaqued to back of top scroll to "J R GAUNT, LONDON". Size 47mm by 66mm.
|
- Above: A single piece, other ranks, gilt brass Cap badge to the Royal New Zealand Artillery. Long tapered brass slider to back, but no maker mark. Size 50mm by 66.5mm.
|
|
- Above: A single piece,.other ranks, gilt brass Cap badge to the Royal New Zealand Artillery. Long slider to back, which is maker stamped to "J. W. TIPTAFT & SONS LTD, BIRMINGHAM". Size 50mm by 67mm.
|
- Above: A gilt fire, solid backed Beret badge to the Royal New Zealand Artillery. Two long looped lugs to back, and a separate wheel to center. Maker marked to back to "J R GAUNT, LONDON" to lower base. Size 35mm by 46mm.
|
|
- Above: A single piece, gilt brass, other ranks, Beret badge to the Royal New Zealand Artillery. Wide brass slider to back, but no maker mark. Size 33mm by 44.5mm.
|
|
|
- Opposite: A dated image of a Royal New Zealand Artilleryman, wearing a kings crown beret badge to his Lemon Squeezer. Image is sadly not named, but date "17 March 1953" to back. A faint Palmerston North address also.
|
|
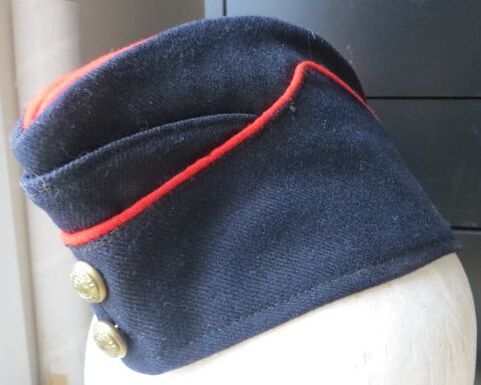
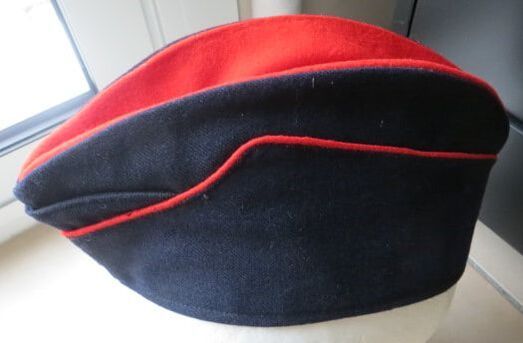
- Above: In October 1941 a optional Side Hat was introduced for members of the Royal New Zealand Artillery and their Territorial counter-parts. Apparently these were worn with a Flaming grenade Artillery Collar to the side. The above hat came out of a Auckland RSA, and does not appear to have ever had a badge attached.
|
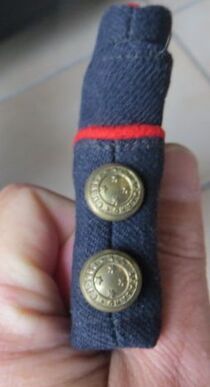
- Above: To front of the Side Hat are two 12mm Brass New Zealand Forces Buttons. Both are fixed shank and marked to "Buttons Limited" over crossed swords.
|
|
|
|
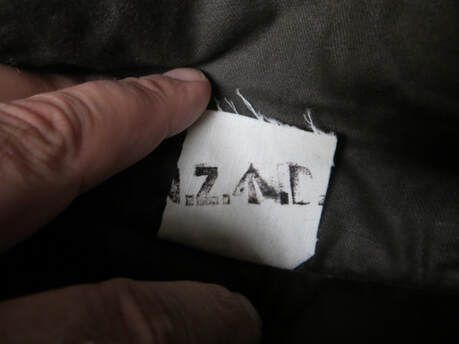
- Above: Dark material liner with just a white label sewn into the peak fold of the hat. It is stamped "N.Z (Broadarrow). D" for New Zealand Defence.
|
- Above: Just a top photograph of the piping to side on the hat and its Red Crown.
|
- Above: Items collected during his service in WW2 by Captain Henry Dale, Royal New Zealand Artillery. His wife was a family friend, and gave these items in 2002.
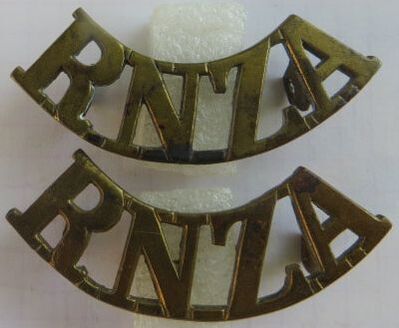
- Above Top: A gilt brass shoulder title to the Royal New Zealand Artillery. Two hex type brass lugs to back and a maker mark on the "N" to "J R GAUNT LONDON". Size 15mm by 54mm.
- Above Bottom: A gilt brass shoulder title to the Royal New Zealand Artillery. Two small, thin hex type brass lugs to back, with no maker mark. Size 15mm by 55mm. |
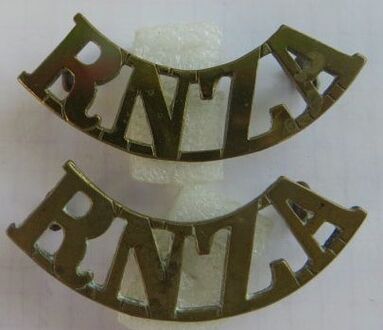
- Above: A matching pair (in terms of construction) of gilt brass shoulder title to the Royal New Zealand Artillery. Two D shaped copper looped lugs to back to each. No maker mark. Size 15mm by 54mm.
|
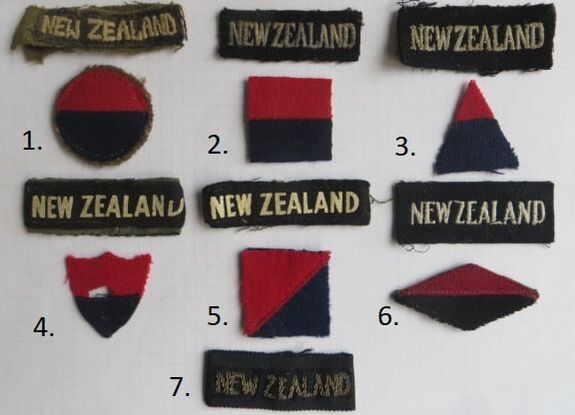
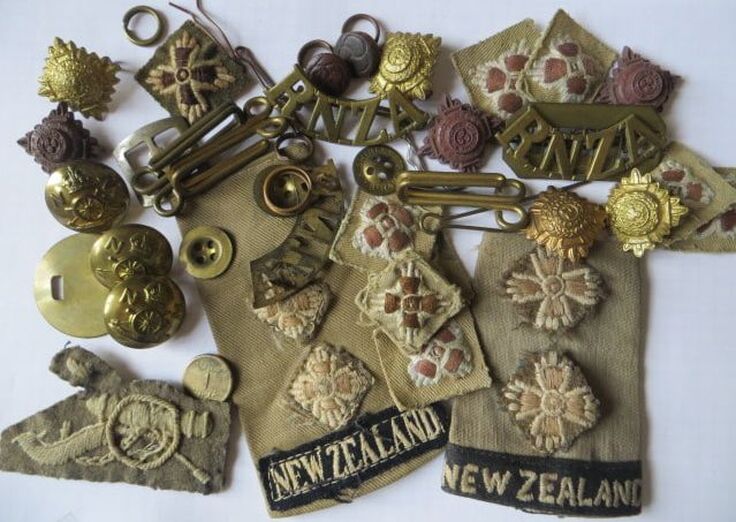
Opposite are some unit patches to the Royal New Zealand Artillery worn during WW2. Formation patches to the 2NZEF are complex, and during WW2, New Zealand looks to have changed its patch system three times. Opposite are a few from the 2nd and 3rd iterations, worn on the upper sleeve of their battledress with the New Zealand title above:
1. NZ H.Q Divisional Artillery - Circular unit patch, red over blue on a khaki backing. Above a sun-bleached embroidered New Zealand title of white on black background, attached to a khaki wool loop.
2. NZ 4th Field Artillery Regiment - Square unit patch, red over blue. Above is a white embroidered thread New Zealand title on black, with a black backing cloth. The black die looks to have run into the white after a wash/getting wet. Sew on type.
3. NZ 6th Field Artillery Regiment - Triangular unit patch, red over blue.
Above is a white embroidered thread New Zealand title on black, with a black backing cloth. Again the sew on type, which was attached just below the shoulder strap on the battledress.
4. NZ 14th Light Anti-Aircraft Regiment - Shield shape unit patch of red over blue. Above is a white paint/printed New Zealand title on black material which has been then sewn onto a dark khaki ribbon material which is in a loop. This would slip onto the shoulder strap of the battle dress.
5. NZ 36th Survey Company N.Z.A - Square unit patch, with red over blue at a angle. Above is a white paint/printed New Zealand title on black material which has been then sewn onto a dark khaki ribbon material. This has been trimmed and used as a sew on type.
6. NZ 7th Anti-Tank Regiment - A possible unit patch. The colours are quiet dark, a diamond of red over blue. Above is a white embroidered thread New Zealand title on black, with a black backing paper.
7. A silver bullion embroidered New Zealand title on black material, which has then been attached to a black ribbon loop. These were a unofficial title, worn on walkout dress while troops were stationed overseas in places like Italy during WW2 and after.
|
|
|
- Above: Three association pins to units within the Royal New Zealand Artillery, with Red over Blue. These pins would be worn by veterans with pride on the lapels of their jacket. Roughly 10 to 12mm in size, in enamel and brass, with a long pin to back. No maker mark.
With change of monarch in 1952, the Royal New Zealand Artillery Cap badge was also updated with the new crown.
With change of monarch in 1952, the Royal New Zealand Artillery Cap badge was also updated with the new crown.
|
- Above: A gilt fired brass Officers Cap badge to the Royal New Zealand Artillery. A separate wheel to center, semi-solid to back, and three long copper looped lugs. No maker mark.
|
- Above: A darkened bronze, Officers Cap badge to the Royal New Zealand Artillery. Separate wheel to center, semi-solid to back, and three long copper looped lugs. No maker mark.
|
|
- Above: A gilt brass other ranks Cap badge to the Royal New Zealand Artillery. Three copper looped lugs to back. No maker mark.
|
- Above: A heavy, modern, die stamped gilt brass Cap badge to the Royal New Zealand Artillery. Queens crown, with three thread posts to back, and nuts. No maker mark.
|
|
- Above: A study in size. Like the King crown versions of the Royal New Zealand Artillery badge, a Queens crown badge was also produced. Left is a standard sized gilt fired Cap badge to the Royal New Zealand Artillery, while right is a Beret badge to the Royal New Zealand Artillery in gilt brass.
|
- Above: A Beret badge to the Royal New Zealand Artillery. Gilt brass, and probably from around the 1950's in manufacture, with pressed type looped lugs to back in a North/South config. No maker mark. Note the style of crown.
|
|
- Above: A heavy, semi-solid, gilt brass Beret badge to the Royal New Zealand Artillery. Two copper looped lugs to back, in a north/south configuration, but no maker mark.
|
- Above: A heavy, semi-solid, gilt brass Beret badge to the Royal New Zealand Artillery. Two copper looped lugs to back, in a north/south configuration, but no maker mark.
|
- Above: Two darkened bronze collar badges to the Royal New Zealand Artillery. 48mm by 29mm. Slight different wear between the two, but both have separate lower banners attached to the grenade. Both also have a maker plaque attached to back with "J R Gaunt London". Two copper loops in a North/South configuration to back.
|
- Above: Two darkened bronze collar badges to the Royal New Zealand Artillery. Both are single piece, with no separate banner to base, and both have two copper loops in a North/South configuration to back. No maker mark.
|

- Above: Two darkened bronze Collar badges to the Royal New Zealand Artillery. Both are single piece, with no separate banner to base, but both have two pins to back, used with clutches, in a North/South configuration to back. Maker mark, in raised letters to "J R Gaunt London" to back of banner.
|
- Above: Two gilt fired brass Collar badges to the Royal New Zealand Artillery. 48mm by 34mm. Both are two piece, with separate banner to base and two long looped lugs, in a North/South configuration to back. No maker mark to back.
|
- Above: Two different finishes of Collar badges to the Royal New Zealand Artillery. Left is in gilt fired brass, and is single piece. Right is in darkened finish, but two piece, with separate banner to base. Both have two long looped lugs, in a North/South configuration to back. No maker mark to either.
|
- Above: Two different types of anodised aluminium Collar badges to the Royal New Zealand Artillery. All are a gold tone finish, which sadly fades with time. Left and Center have two pins to back, to be used with clutches, and the maker mark of "J R Gaunt London" in raised letters at the back of the banner. The Right has no maker mark and Aluminium lugs in a North/South configuration.
|
- Above: Two different types of brass Collar badges to the Royal New Zealand Artillery. Smaller type, 39mm by 25mm. The Left and Center have two lugs to back. The Right has pins to back to be used with clutches, in a North/South configuration. All are not maker marked.
|
- Above: Again smaller sized gilt brass collar badge to the Royal New Zealand Artillery. Single piece, with two pins to back, to be used with clutches. No maker mark.
|
- Above: A Queens Crown, Officers Beret badge to the Royal New Zealand Artillery. Multi piece, with Bullion threaded badge to center over the Corps colours of Red over Blue. No maker mark.
|
- Above: Three post 1961 shoulder titles to the Royal New Zealand Artillery. Post Office Red embroidered letters on a Purple Navy background. Just variation in thread and letter size.
|
|
- Above: A large printed on felt blazer badge to a veteran of the Royal New Zealand Artillery. With Kings crown to top, it measures 110mm by 100mm
No maker mark to back. |
- Above: A large cloth and silver bullion thread blazer badge to a veteran of the Royal New Zealand Artillery. With what looks to be a Queens crown to top, it measures 100mm by 100mm
No maker mark to back, and has a black paper backing. |
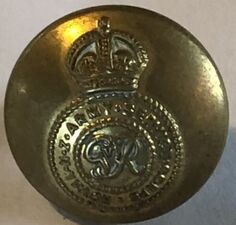
The following buttons were worn by all formations of the New Zealand Artillery.
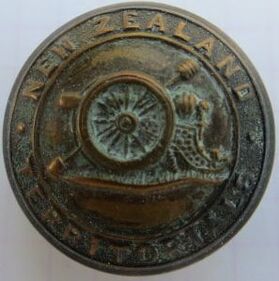
- Above: A rather rare 1911 pattern "New Zealand Territorial" Artillery Button. Produced in 1911 for the establishment of the Territorial Force, but not widely worn, rather the below/opposite buttons were worn by all. 25mm (also come in 25.4mm) with a Fixed shank to back, maker mark to "THE NEW ZEALAND CLOTHING FACTORY".
|
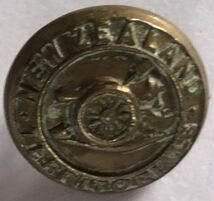
- Above: A 17mm, gilt brass 1911 pattern "New Zealand Territorial" Artillery Button. Maker mark to "THE NEW ZEALAND CLOTHING FACTORY" (B Jones Collection).
|
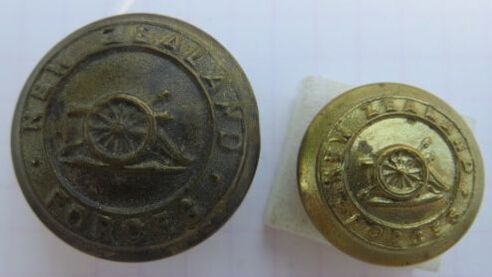
- Above Left: A 1911 pat New Zealand Artillery 23 mm, fixed shank brass button. Maker marked to "Smith & Wright Ltd, Birmingham".
- Above Right: A 1911 pat New Zealand Artillery 17 mm, fixed shank brass button. Maker marked to "Smith & Wright Ltd, Bham". |
- Above Left: Same again, but in darkened finish, a 1911 pat New Zealand Artillery 23 mm, fixed shank brass button. Maker marked to "Smith & Wright Ltd, Birmingham".
- Above Right: Again, a 1911 pat darkened New Zealand Artillery 17 mm, fixed shank brass button. Maker marked to "Smith & Wright Ltd, Bham". |
- Above Left: A 1911 pat New Zealand Artillery 23 mm, flexible shank brass button. Maker marked to "Smith & Wright Limited, Birmingham".
- Above Right: A 1911 pat New Zealand Artillery 17 mm, fixed shank brass button. Maker marked to "Buttons Limited, Bham". |
- Above: A 1911 pat New Zealand Artillery 25mm, fixed shank brass button. No maker mark to back.
|
- Above Left: A 1911 pat New Zealand Artillery 23 mm, fixed shank brass button. Maker marked to "Special Quality".
- Above Right: A 1911 pat New Zealand Artillery 17 mm, fixed shank brass button. Maker marked to "Supere Quality". |

Buttons by Firmin London.
- Above Left: A darkened bronze 24mm fixed shank button to the New Zealand Artillery. Maker marked to back to "Firmin & Sons Ltd, London". - Above Center: A darkened brass 24mm fixed shank button to the New Zealand Artillery. Maker marked to back to "Firmin, London". - Above Right: A gilt brass 24mm fixed shank button to the New Zealand Artillery. Maker marked to back to "Firmin, London". |
- Above Left: A gilt brass, 24mm fixed shank button to the New Zealand Artillery. Maker marked to back to "Stokes & Sons, Melbourne".
- Above Right: A gilt brass, 16mm fixed shank button to the New Zealand Artillery. Maker marked to back to "Stokes & Sons, Melb". |
|
A study in sizes of Gaunt made buttons:
- Opposite Left: A 24mm 1911 Patt, flexible shank gilt brass button to the NZ Artillery. Maker marked to back to "J R Gaunt & Son Ltd, London".
- Opposite 2nd Left: A 21mm 1911 Patt, flexible shank, gilt brass button to the NZ Artillery. Maker marked to "J R Gaunt & Son Ltd, London".
- Opposite 2nd Right: A 17mm 1911 Patt, flexible shank, gilt brass button to the NZ Artillery. Maker marked to "J R Gaunt & Son Ltd, London".
- Opposite Right: A pair of 12mm, flexible shank, Officers peaked cap side buttons (for the chin-strap) to the NZ Artillery. Maker marked to "J R Gaunt & Son Ltd, London".
At some stage in the 1930's or 40's, the pattern of Artillery button was changed to the opposite versions.
- Left: A 26mm gilt brass, fixed shank button to the NZ Artillery with maker mark to "J. R. Gaunt & Son, London".
- 2nd Left: A 24mm gilt brass, fixed shank button to the NZ Artillery with maker mark to "J. R. Gaunt & Son Ltd, London Engld".
- 2nd Right: A 24mm gilt brass, fixed shank button to the NZ Artillery with maker mark to "J R Gaunt & Son Ltd, London".
- Above Right: A 17mm Gilt brass version to the NZ Artillery with maker mark to "J R Gaunt & Son Ld, London Eng".
- Above Left: A 24mm gilt brass, fixed shank button to the NZ Artillery with maker mark to "Firmin London".
- Above Right: A 16mm gilt brass, fixed shank button to the NZ Artillery with maker mark to "Firmin London". |
- Above: A 23mm gilt brass, fixed shank button to the NZ Artillery with maker mark to "Buttons Limited, Birmingham".
|
- Above: A 16mm gilt brass, fixed shank button to the NZ Artillery with maker mark to "B & P Ltd, B'ham".
|
- Above: A post 1947 19mm, gilt brass, fixed shank Kings crown button to the Royal New Zealand Artillery. Maker mark to "GAUNT, LONDON".
Also found in a 14mm size. No maker mark to back (B Jones collection). |
- Above Left: A post 1952 26mm, anodised aluminium, fixed shank Queens crown button to the Royal New Zealand Artillery. Maker mark to "GAUNT LONDON".
- Above Middle: A post 1952 19mm, anodised aluminium, silver tone, shoulder strap button, with Queens crown to the Royal New Zealand Artillery. Large brass flang, with thread bolt, and maker mark to "GAUNT LONDON". - Above Right: A post 1952 19mm, anodised aluminium, gold tone, fixed shank Queens crown button to the Royal New Zealand Artillery. Maker mark to "GAUNT LONDON". |
- Above Left: A post 1952 17mm, anodised aluminium, silver tone button, with Queens crown to the Royal New Zealand Artillery. Fixed shank, with maker mark to "FIRMIN LONDON".
- Above Right: A pair of post 1952 14mm, anodised aluminium, silver tone, fixed shank Queens crown button to the Royal New Zealand Artillery. Maker mark to "GAUNT LONDON" to both. |
- Above: Gunner qualification badges, worn on the sleeve of NCO's in the New Zealand Artillery (Corporal and above). They are the same as the British worn badges, with the above opposing pairs just showing the slight differences in patterns (cannon, spokes etc) and the top pair have their metal backing plates.
|
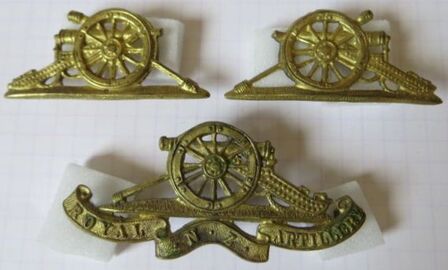
- Above: Variation again in Gunner qualification badges. These are in gilt brass. Below is a Cap badge, with crown removed. I am told that the RNZA wear these in place now-a-days on their sleeves.
|
|
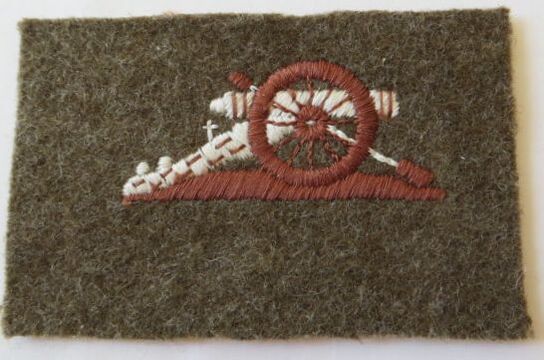
- Above: A cut, cloth sleeve badge worn by the Royal New Zealand Artillery. Embroidered field gun on a dark khaki wool background. It has a cotton backing to back. No maker label.
Opposite: Two types of cloth sleeve badge worn by the Royal New Zealand Artillery, which are unissued/uncut. Above on a dark khaki wool background, while below light khaki coloured cotton. This lower one has a newspaper liner to back, which shows that this is New Zealand made, and still talking of Pounds and Shillings, so pre 1967 (when New Zealand then moved to dollars and cents). No maker mark to either. |
|
Fakes & Forgeries
Below is a cast copy of the Kings crown New Zealand Artillery Cap badge.
- Detail is as usual OK to good to front.
- To back, its all wrong in terms of lug configuration. Most originals, have three lugs, one to back of crown, and then one each side on back of base banner.
- To back is stippled and pitted, with a flat filed area (red circles), where the excess brass has been removed and filed down flat from the mold. Generally, it lacks all detail a die stamped version should have.
- Two short copper brass lugs are either brazed or soldered on.
- Size 49mm by 67mm.
|
|
|
|
Below is a cast copy of the Queens crown Royal New Zealand Artillery Cap badge.
- Detail is actually not bad front, but colour is wrong, and a orangey-yellow.
- To back, also wrong in terms of lug configuration. Most originals, have three lugs, one to back of crown, and then one each side on back of base banner.
- To back is stippled and pitted, with a flat filed area (red circles), where the excess brass has been removed and filed down flat from the mold. The blue circles show where the original lugs were on the original badge it has been cast from. Some detail, but not the same as a die stamped version should have.
- Two short copper brass lugs that are soldered on.
- Size 45mm by 63.5mm.
|
|
|
|
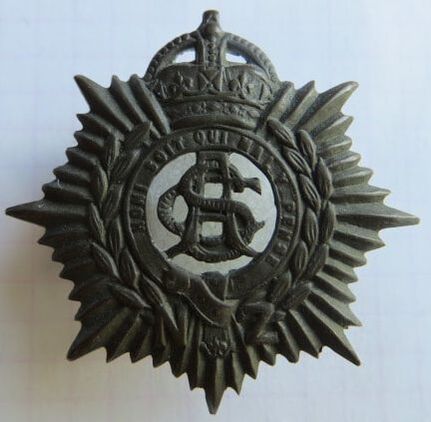
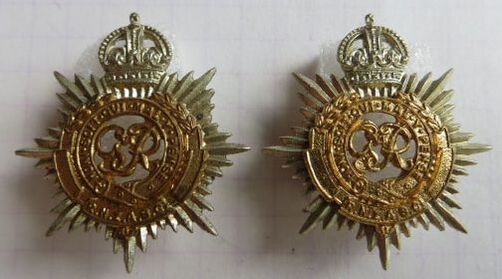
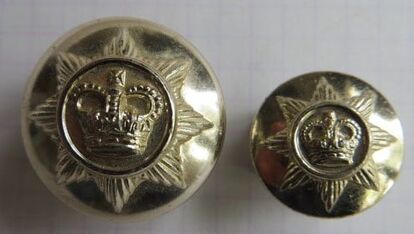
Royal New Zealand Army Service Corps
The New Zealand Army Service Corps formed on the 1st March 1913.
Motto: HONI SOIT QUI MAL Y PENSE (Shame on him who thinks evil of it).
Motto: HONI SOIT QUI MAL Y PENSE (Shame on him who thinks evil of it).
|
- Above: A solid back, darkened bronze Officers Cap badge to the New Zealand Army Service Corps. This badge has 2 tangs or blades to back (one sadly broken off) and is impressed in a convex curve to "J R GAUNT LONDON". Size 42.5mm by 42mm.
|
- Above: A solid backed, darkened bronze Officers Cap badge to the New Zealand Army Service Corps. Maker impressed behind the crown in two tiers to "J R GAUNT, LONDON". Note this badge is lugged, with two copper loops to back. Size 43mm by 43mm.
|
- Above: A pair of matching (in terms of construction), darkened bronze Officers Collar badges to the New Zealand Army Service Corps. Solid to back and impressed in a convex curve to "J R GAUNT LONDON". Both have two copper D shaped looped lugs to back. Size 28mm by 29mm.
|
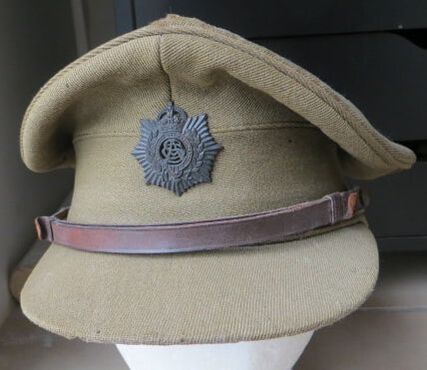
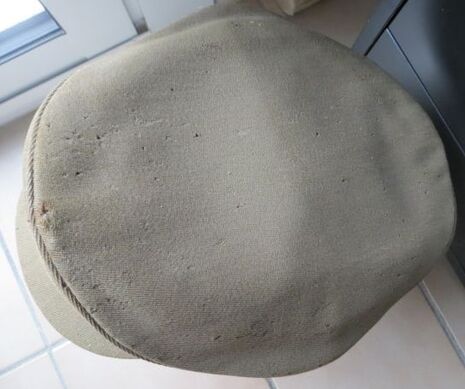
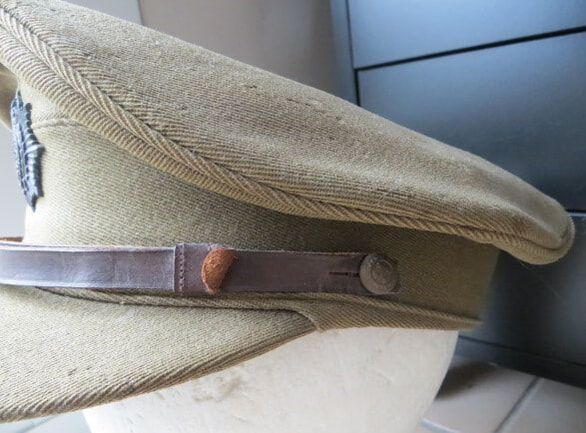
- Above: A WW2 New Zealand Army Service Corps Hat to 808521 Capt Ernest Lycette. The Cap badge is a bronze version, with two looped lugs to back.
|
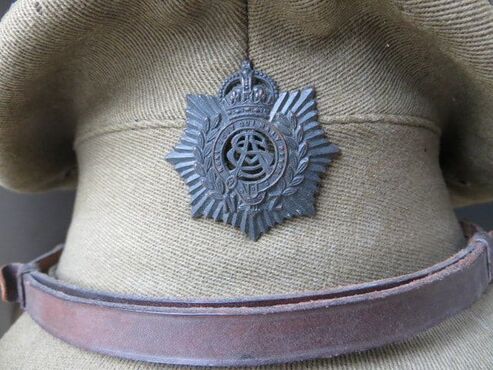
- Above: A close up of the bronze Cap badge to front.
|
|
|
|
- Above: Top of the hat showing some Moth damage.
|
- Above: To either side are two brass New Zealand Forces, 4 star buttons holding the leather chins-strap to
|
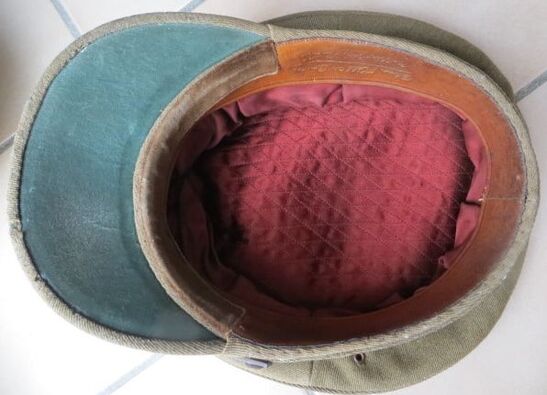
- Above: A picture of the inside of the Officers hat, with red material padding. Extra reinforcing in the form of a velvet strip has been added to the front of the hat.
|
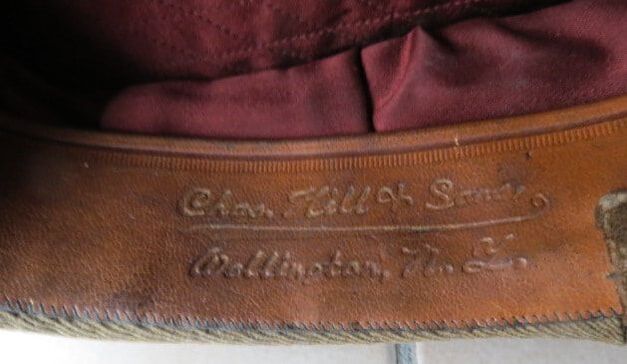
- Above: The hat has the maker mark of "Chas. Hill & Sons, Wellington N.Z."
|
|
|
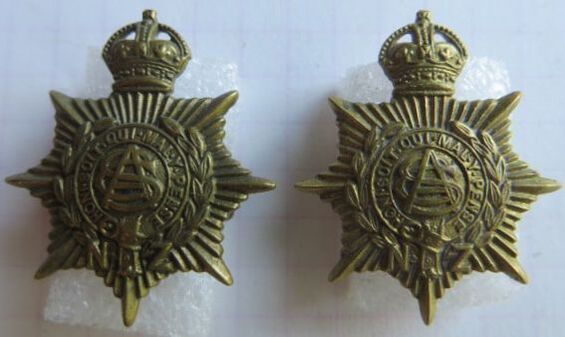
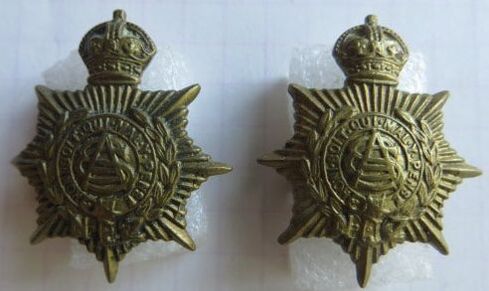
- Opposite & Above: A other ranks Cap and Collar badge set in gilt brass to the New Zealand Army Service Corps. The Cap has two copper looped lugs, while the two collars have D shaped Copper looped lugs. All have a brass plaque to back with the maker details of "J R Gaunt, London"
|
- Above: A slight variation to the Gaunt Collars, with a non-void crown to top to the New Zealand Army Service Corps.
Both have D shaped copper loops to back and a brass plaque with the maker details of "J R Gaunt, London" |
- Above: Another variations to the Collar badges to the New Zealand Army Service Corps. Note the spiky arms to the star. Both have Copper wire lugs to back, no marker mark. Size 27mm by 25mm.
|
|
- Above: Two different variations to the Collar badge to the New Zealand Army Service Corps. Different crowns and shape. Both have Copper wire lugs to back, no marker mark. Left size 27mm by 24mm, right size 27mm by 23mm.
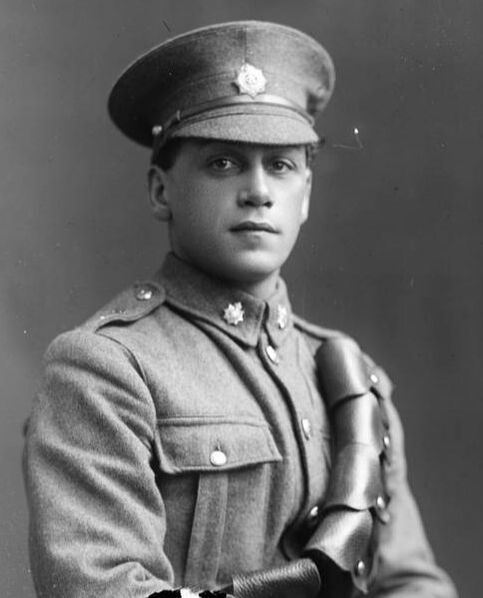
- Opposite: A WW1 era image of a chap in the New Zealand Army Service Corps. He has the NZASC gilt brass Cap badge to his peaked cap, and two NZASC Collar badges. Sadly his shoulder board can't be seen (Auckland Libraries Heritage Collections 7003-043). |
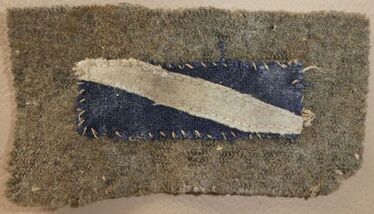
- Opposite : A WW1 formation patch to the New Zealand Army Service Corps stationed in Egypt. A diagonal White stripe on a dark blue background.
This looks to be still attached to a piece of uniform. (Ian Hamilton Collection).
This looks to be still attached to a piece of uniform. (Ian Hamilton Collection).
|
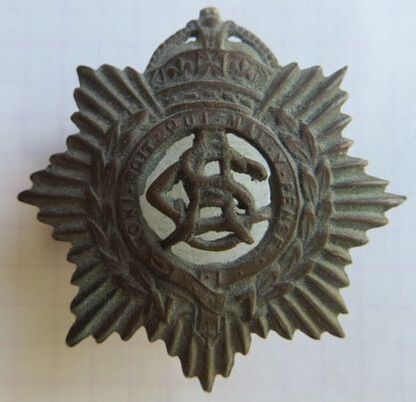
- Above: A silvered or silver plated Cap badge to the New Zealand Army Service Corps. No maker mark to back, but two round looped lugs used by Stokes & Sons of Melbourne. Someone has added a piece of red felt backing.
|
|
|
|
- Opposite & Above: A gilt brass Cap and Collar badge set to the New Zealand Army Service Corps. Note the crowns on the Collar badges sit lower on the Star, similar to the Cap badge. No maker mark to back, but they have thick wire looped lugs in copper, which is found on marked badges by Mayer & Kean of Wellington. Size of Collar is 28mm by 25mm.
|
- Above: A gilt brass Cap badge to the New Zealand Army Service Corps. No maker and thin wire looped lugs to back.
|
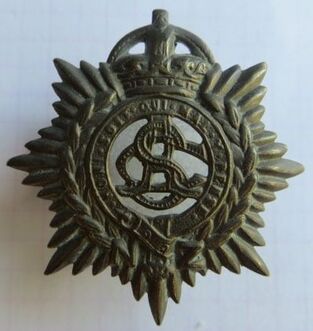
- Above: A gilt brass Cap badge to the New Zealand Army Service Corps. No maker and pressed type, copper lugs to back. These type are found on post WW2 badges.
|
- Above: A gilt brass Cap badge to the New Zealand Army Service Corps. No maker and brooched to back. Slight variation on the crown, with much wear to front finish.
|
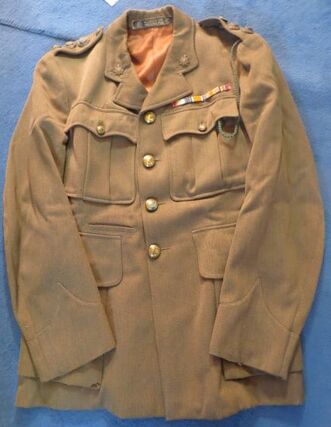
- Above: A WW2 era tunic to 808521 Capt Ernest Lycette of the 2nd Res (M.T.) Coy, New Zealand Army Service Corps.
|
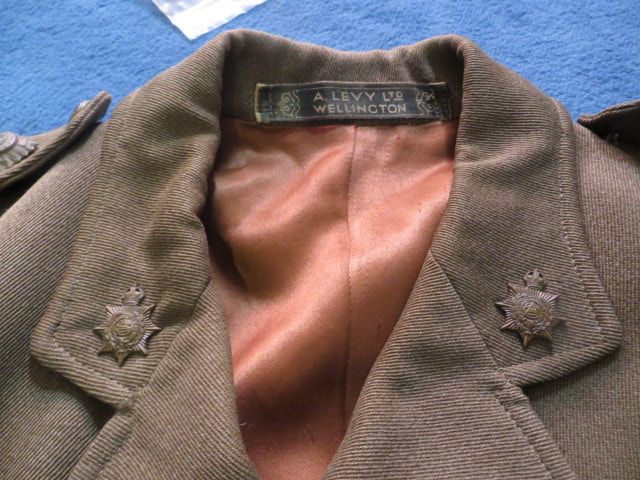
- Above: Two bronze officers collars attached to a tailor made tunic by "A Levy Ltd, Wellington".
|
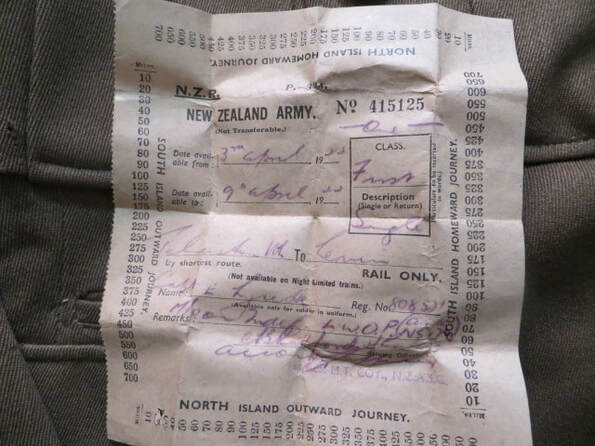
- Above: In the small pocket on the right, under the belt was a travel pass dated the 3rd to 9th of April 1944 to Capt Ernest Lycette.
|
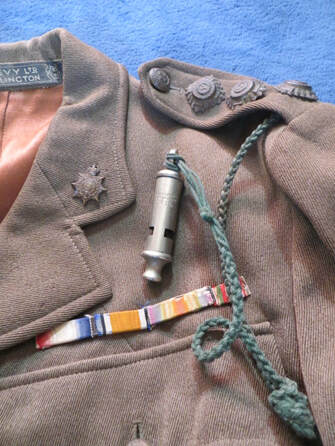
Ernest saw action during WW1 at Gallipoli, in France and Italy, with the British Army. Attached to his tunic are his WW1 medal ribbon trio, also attached to a green lanyard is a 1915 dated Officers Trench whistle.
|
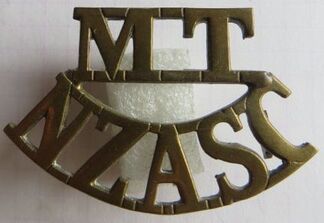
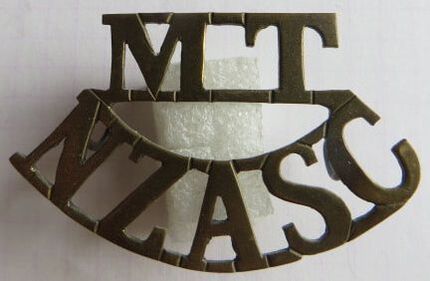
- Above: A 2 piece gilt brass shoulder title to the Motor Transport Company of the New Zealand Army Service Corps. 2 hex lugs to back on the lower title, along with the maker details of "J R Gaunt London". Brazed rather than soldered together. Missing the foot of the "C". Size roughly 35mm by 55mm.
|
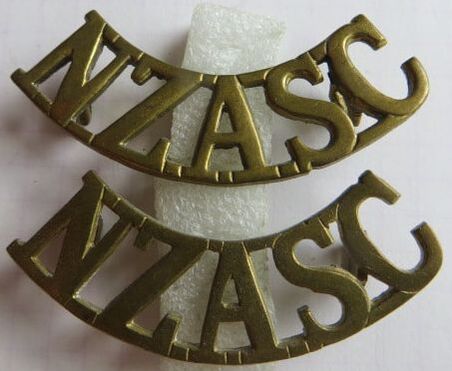
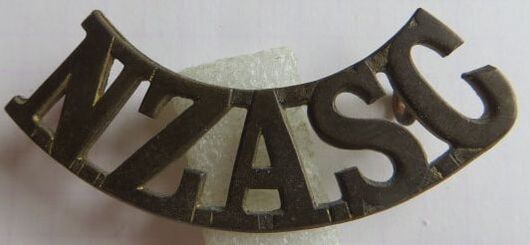
- Above: A single piece shoulder title to the Motor Transport Company of the New Zealand Army Service Corps. Two copper wire looped lugs to back. No maker mark. Size 34mm by 54mm.
|
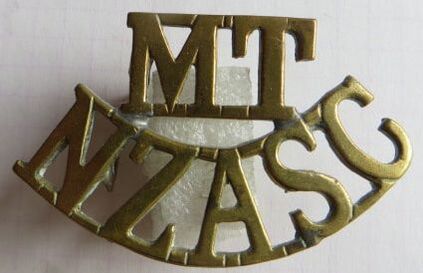
- Above: A 2 piece shoulder title to the Motor Transport Company of the New Zealand Army Service Corps. Separate "MT" title soldered onto a N.Z.A.S.C title. 4 lugs to back (2 D shaped to the MT title, 2 hex type to the NZASC title). No maker mark and missing one hex lug to back.
Size 33mm by 53mm. |
- Above: A pair of curved gilt brass title to the New Zealand Army Service Corps. Hex lugs to back and the maker mark impressed to "J R Gaunt, London". Size 15mm by 53mm.
|
- Above: A curved gilt brass title to the New Zealand Army Service Corps. Thick copper looped lugs to back and the maker mark impressed to "Stokes" for Stokes & Sons of Melbourne. Note the stippling to front, between the letters, which is a feature of this maker. Size 15mm by 55mm.
|
- Top: A curved gilt brass title to the New Zealand Army Service Corps. Thin hex lugs to back. No maker mark. Size 15mm by 53.5mm.
- Bottom: A curved cast brass title to the New Zealand Army Service Corps. Hex lugs to back. No maker mark. Size 14mm by 52.5mm. |
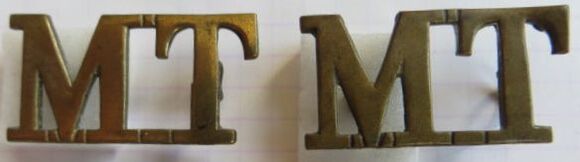
- Above: Separate "MT" or Motor Transport titles, worn above NZASC titles on some shoulder straps (I have seen a WW2 Officers with two separate titles). Two loops to back to each, no maker mark.
- Opposite: A 9 ct Gold tie pin to the New Zealand Army Service Corps. It has a earlier raised crown type Collar sized badge to center, mounted on a Gold bar with long brooch fitting to back. The bar has "9ct" stamped to back. |
|
|
- Above: A Trade Sleeve badge to that of a Wheeler or Carpenter. Light brown thread on a khaki wool backing. Thin wax like paper backing, with no maker mark (Ian Hamilton Collection).
|
- Above: A Trade Sleeve badge to that of a Wheeler or Carpenter in gilt brass. Two copper looped lugs to back, but no maker mark.
|
WW1 Camp Quarter Masters Stores (C.Q.M.S)
The Camp Quartermasters Stores was a unit within the New Zealand Army Service Corps during WW1. Its personnel were stationed within the training camps dotted around New Zealand. They where in charge of issuing and maintaining all Army related kit and items used by the reinforcement drafts in the Camps. They were permitted to wear a unique badge in New Zealand while serving as members of this unit.
|
|
- Opposite & Above: A Cap and Collar badge set to the Camp Quartermasters Stores. The Cap badge is a single piece, brass with two copper wire looped lugs to back. The the above left Collar also has two copper loops, while the above right collar is brooch fitted.
|
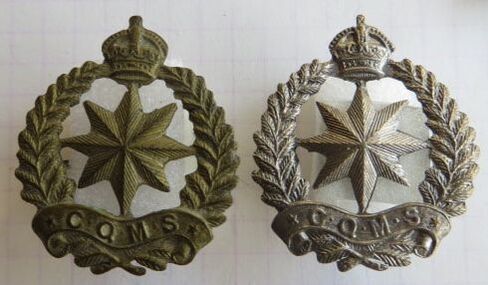
- Above: Voided collar size CQMS badges, with one in gilt brass to the left and Stirling Silver to the right. The Silver badge has a small rectangular shape to the back of the star, which I presume would be a hallmark, but I cannot read. Both the pins are missing to both badges.
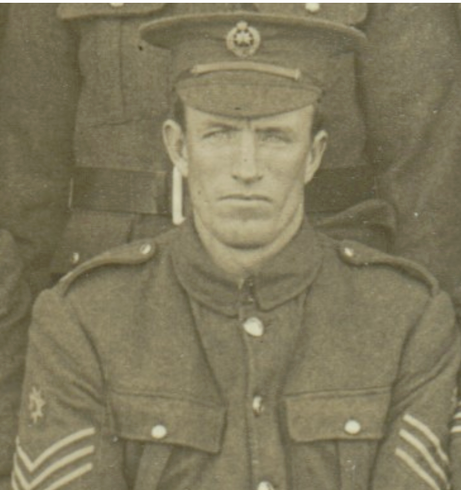
- Opposite: A Camp Quartermaster Sergeant photographed with Hut 32, C Company, 18th Infantry Reinforcements. Sadly unnamed, but note his Camp Quarter Masters Stores Cap badge to his hat, and the Quartermaster Star sleeve trade patch just above his sergeants stripes. |
|
- Above: A Embroidered thread and khaki wool backed Quartermaster Sergeants (QMS) rank star, worn above the rank chevrons on the sleeve, as per the picture above. This was a Army wide rank, with a QMS assigned to each oversea serving unit. A specialised course was run by the Army, and the Solider need to pass to obtain the rank and title. To back is a white cotton hessian backing cloth. No maker mark (Ian Hamilton Collection).
|
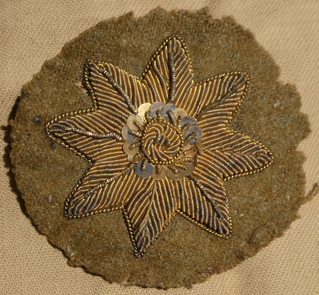
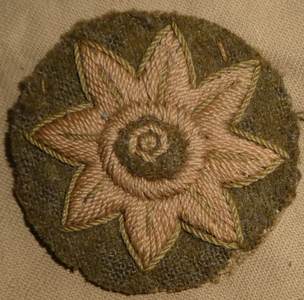
- Above: A variation to the Quartermaster Sergeants (QMS) rank star. This could be much earlier than WW1, and in fact Volunteer period, with the use of bullion thread and sequins to center. It also has a white paper backing, but sadly no maker mark (Ian Hamilton Collection).
|
Royal New Zealand Army Service Corps (continued).
In 1947 the N.Z.A.S.C was awarded the prefix "Royal" and thus became the Royal New Zealand Army Service Corps. This meant a change to their Corps badge.
Motto: Honi Soit Qui Mal Y Pense (Shame on him who thinks evil of it).
Also: Nil Sine Labor (Nothing without work).
Motto: Honi Soit Qui Mal Y Pense (Shame on him who thinks evil of it).
Also: Nil Sine Labor (Nothing without work).
|
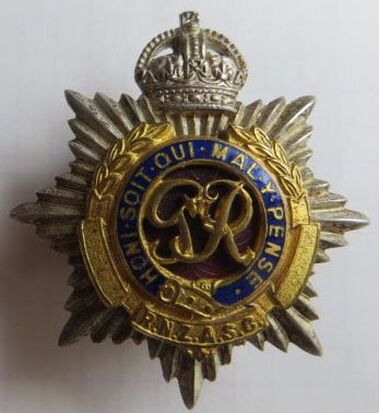
- Opposite & Above: A Officers Silver (marked S to back), gilt brass and enamel multi piece Cap and Collar badge set to the Royal New Zealand Army Service Corps. Much of the frosting has worn off on the silver, which is now a dark tone. All three have the letter "S" marked to back (for Silver) and the maker mark of "J R Gaunt, London". Size Cap Badge 46mm by 41.5mm.
|
|
|
- Opposite & Above: A gilt brass and white metal Cap and Collar set for the other ranks to the Royal New Zealand Army Service Corps. No maker mark, with two copper looped lugs brazed to back of each. The Collars are harder to get, compared to the Cap badge.
|
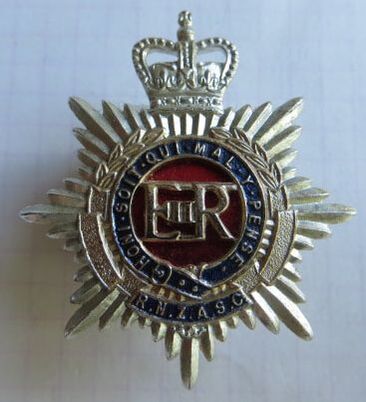
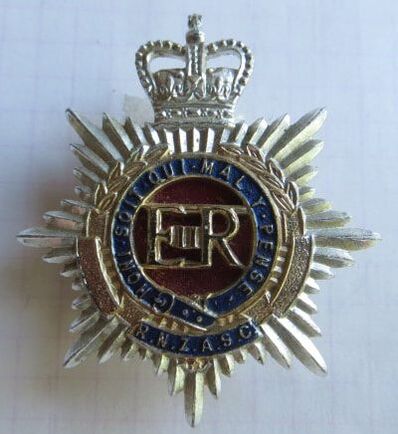
With the death of George VI in 1952, the badge changed again to accommodate the new monarch and cypher.
|
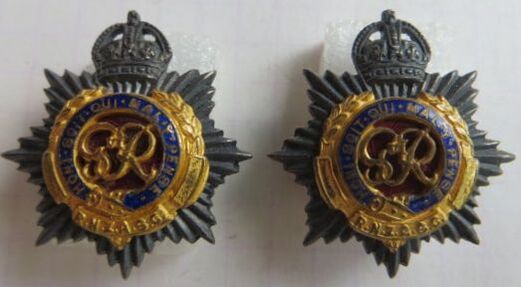
- Above & Opposite: A Officers Silver (? - not marked), gilt brass and enamel multi piece Cap and two Collar badge set to the Royal New Zealand Army Service Corps. Queens crown, with ERII cypher. The Cap and bottom Collar pair are impressed to "J R Gaunt London. The top pair of Collars have raised letters to back to "J R Gaunt London". D shaped copper loops to all collars, while the Cap has long Copper loops to back. Size of Cap badge is 47mm by 42mm, while Collars are 29mm by 26mm.
|
|

- Above: A gilt brass, enamel and chromed Cap badge to the Royal New Zealand Army Service Corps. This badge has had its lugs removed and 2 long pins affixed to back to be worn as a brooch? No maker mark.
|
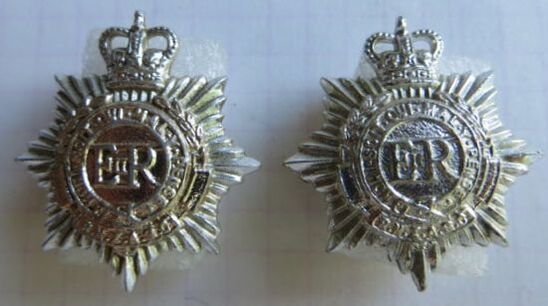
- Opposite: A gilt brass and white metal Queens crown Cap badge for a other ranks to the Royal New Zealand Army Service Corps. No maker mark, with two copper looped lugs brazed to back.
I have not yet seen any matching collars for this badge in gilt brass and white metal. |
|
- Opposite & Above: A anodised aluminium Cap and Collar Badge set to the Royal New Zealand Army Service Corps. The Cap is 2 piece, with a brass and enamel backing plate to center, stamped "T", but no maker mark. The two collars are single piece, but two tone, with a gold tone to center and silver toned frame. Both have two looped lugs to back and the raised letter maker mark of "J R Gaunt London".
|
|

- Opposite & Above: A similar anodised aluminium Cap and Collar Badge set to the Royal New Zealand Army Service Corps. The Cap is again stamped "T" to back, with no maker mark. The two collars are single piece, and two tone, All are not maker marked, and have two pins to back of each to be used with clutches.
|
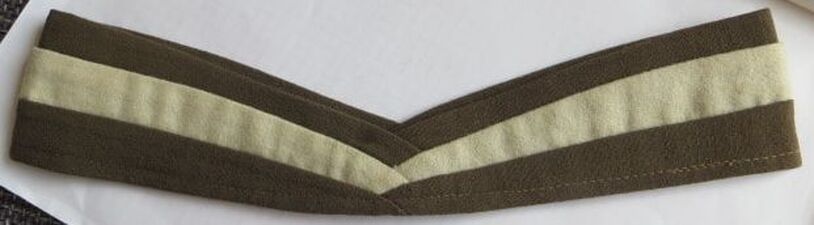
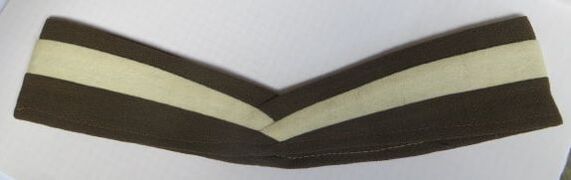
Above: A puggaree to fit the Lemon Squeezer hat to the Royal New Zealand Army Service Corps. Khaki/White/Khaki. Marked to inside with size only, in purple ink to "7 1/8". Note this is a much finer material puggaree especially to the White band.
|
|
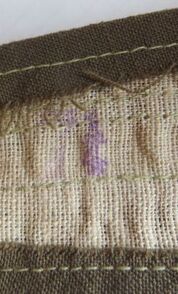
Above: A small puggaree to fit the Lemon Squeezer hat to the Royal New Zealand Army Service Corps. Marked to inside in purple ink to "6 7/8".
|
- Above: A two piece, gilt brass Drivers Trade sleeve badge. Looks to be hand made, and soldered together. Prongs or lugs which were on back have long gone. Size 68mm by 40mm.
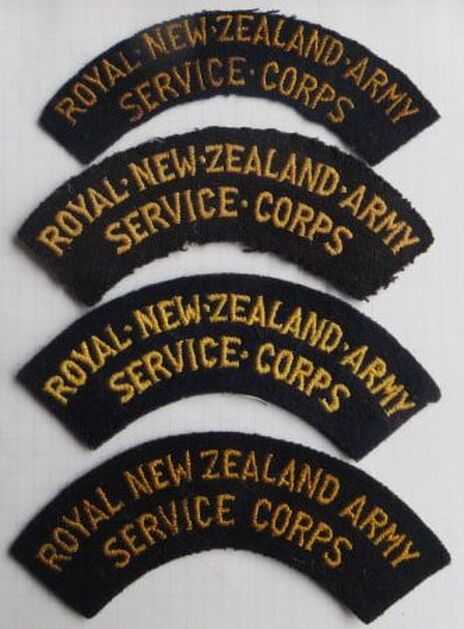
- Opposite: Post 1961 cloth shoulder titles to the Royal New Zealand Army Service Corps. Note Indian Yellow embroidered letters on a Midnight Blue background. Variations in colour and letter size. |
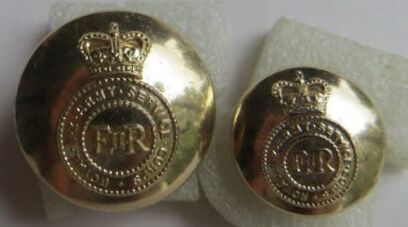
In 1947, with the award of the "Royal" prefix to the Corps title, New Zealand's Army Service Corps had a quantity of 19mm Gilt brass buttons made. These were not made in great quantites and are rather scarce. It is likely that they continued to wear the Gilt brass NZ Forces 4 star buttons.
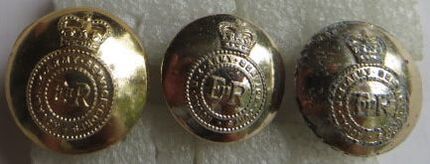
Then in 1954 the Royal NZ Army Service Corps sort to update the crown. These again seem scarce, and certainly don't turn up often. The following have a Queens Crown, with "ERII" to center and "ROYAL NZ ARMY SERVICE CORPS" to wreath.
Then in 1954 the Royal NZ Army Service Corps sort to update the crown. These again seem scarce, and certainly don't turn up often. The following have a Queens Crown, with "ERII" to center and "ROYAL NZ ARMY SERVICE CORPS" to wreath.
- Above: A gilt brass 19mm button to the Royal NZ Army Service Corps. Kings crown, with George VI cypher to center. Maker marked "GAUNT LONDON" (B Jones collection).
|
- Above Left: A silver toned, anodised aluminium 26mm button to the Royal NZ Army Service Corps. Fixed shank on a brass backing, with the maker mark of "GAUNT, LONDON".
- Above Right: A silver toned, anodised aluminium 19mm button to the Royal NZ Army Service Corps. Fixed shank on a brass backing, with the maker mark of "GAUNT, LONDON". |
- Left: A gilt toned, anodised aluminium 19mm button to the Royal NZ Army Service Corps. Fixed shank on a brass backing, with the maker mark of "FIRMIN, LONDON".
- Center: A silver toned, anodised aluminium 17mm button to the Royal NZ Army Service Corps. Fixed shank on a brass backing, with the maker mark of "GAUNT, LONDON".
- Right: A silver toned, anodised aluminium 17mm button to the Royal NZ Army Service Corps. Fixed shank on a brass backing, with the maker mark of "FIRMIN, LONDON".
On May the 12th 1979, the Corps was disbanded and became the Royal New Zealand Corps of Transport.
Fakes & Forgeries
Below is a fake or reproduction cap badge to the New Zealand Army Service Corps.
- OK detail to front, but colour is off and not found on real gilt brass badges.
- To back is a mess, with little detail, and thick edges. Stippling and file marks are also present.
- Two copper looped lugs are to back, but are ribbon like and not found on originals. Lugs also look to be soldered on.
- Size 43mm by 42mm.
|
|
|
|
Another fake or reproduction cap badge, but this time to the Royal New Zealand Army Service Corps.
- OK detail to front, but colour is off to both the white metal and gilt brass portions of the badge.
- To back, the white metal backing has little detail, and thick edges. Stippling and file marks are also present.
- Probably the most telling issue, is the wire hooks used to affix the gilt brass section onto the white metal. Originals are sweated together and do not use wires.
- Two copper looped lugs are to back, but are ribbon like and not found on originals. Lugs also look to be soldered on.
- Size 47mm by 41mm.
|
|
|
|
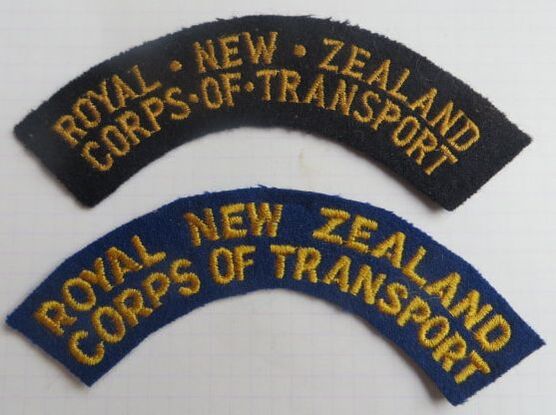
Royal New Zealand Corps of Transport
The Royal New Zealand Corps of Transport formed on the 12th of May 1979.
Motto: Honi Soit Qui Mal Y Pense (Shame on him who thinks evil of it).
Motto: Honi Soit Qui Mal Y Pense (Shame on him who thinks evil of it).
|
|
- Opposite & Above: A Cap and Collar badge set to the Royal New Zealand Corps of Transport. Chromed and gilt metal, with a separate gilt metal and resin center. The Cap has a metal lug bar to back, while both collars have pins and clutches. No maker mark to either.
|
- Above Left: A 26mm, anodised aluminium and brass button to the Royal New Zealand Corps of Transport. Maker marked to "Buttons Limited, Birmingham".
- Above Left: A 17mm, anodised aluminium and brass button to the Royal New Zealand Corps of Transport. Maker marked to "Badge & Button, London". |
|
- Opposite: Two different Post 1961 coloured titles to the Royal New Zealand Corps of Transport. Top is gold letters on a Midnight Blue background. Bottom is gold letters on a dark blue background.
The Royal New Zealand Corps of Transport was disbanded on the 9th of Dec 1996, and its personnel and function absorbed into the Royal New Zealand Logistics Regiment.
The Royal New Zealand Corps of Transport was disbanded on the 9th of Dec 1996, and its personnel and function absorbed into the Royal New Zealand Logistics Regiment.
Royal New Zealand Army Logistics Regiment
The Royal New Zealand Army Logistics Regiment formed on the 9th Dec 1996 with the amalgamated 3 Corps
- Royal New Zealand Electrical and Mechanical Engineers (R.N.Z.E.M.E)
- Royal New Zealand Army Ordnance Corps (R.N.Z.A.O.C)
- Royal New Zealand Corps of Transport (R.N.Z.C.T)
- Royal New Zealand Electrical and Mechanical Engineers (R.N.Z.E.M.E)
- Royal New Zealand Army Ordnance Corps (R.N.Z.A.O.C)
- Royal New Zealand Corps of Transport (R.N.Z.C.T)
|
|
- Opposite & Above: Single piece Cap and Collar set in gilt metal and resin to the Royal New Zealand Army Logistics Regiment. Note the smaller stars to center, the Cap badge has screw posts to back, in a north/south configuration, while the 2 Collars have pins and clutches. No maker marks.
|
|
- Above: A two piece Cap and Collar badge with "large stars" to center in gilt metal and resin to the Royal New Zealand Army Logistics Regiment. Separate oval shield with swords on a gilt metal background. The Cap badge has screw posts to back, in a north/south configuration, while the Collar has pins and clutches. No maker mark to either.
|
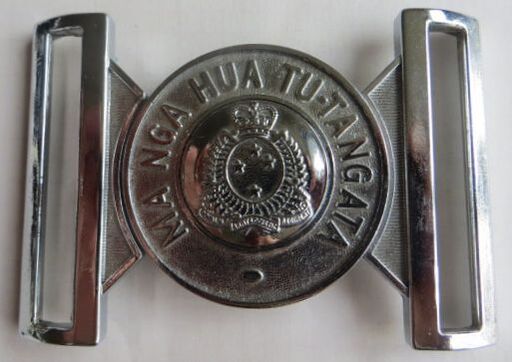
- Above: A chromed metal, 2 piece belt buckle to the Royal New Zealand Army Logistics Regiment. Cap badge to center, with Queens crown, and motto to wreath "Ma Nga Hua Tu-Tangata" - By our actions we are known.
To back is the maker mark of "Hobson & Son (London) Ltd". Size 70mm by 100mm. |
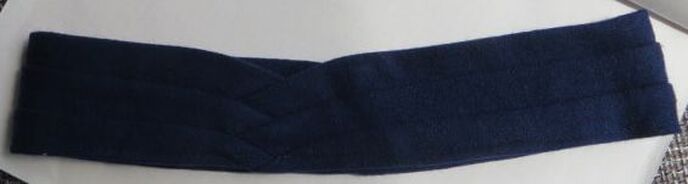
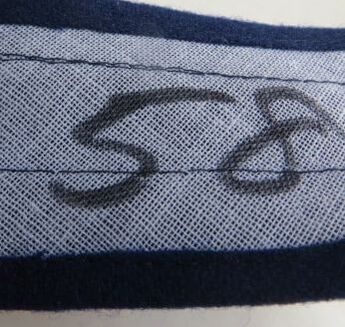
- Opposite & Above: A possible puggaree to fit the Lemon Squeezer hat to the Royal New Zealand Army Logistics Regiment, issued in 1998, and borrowed from the Royal New Zealand Provost Corps. Dark Blue/Dark Blue/Dark Blue. A slightly different shape to front to the usual puggaree, and marked inside to "58" in pen for 58cm in size.
|
|
New Zealand Cadets
The system of "Cadets" has been around in New Zealand since Volunteer times (pre-1911) and promoted through the School Educational system. In 1902 the Education Department took control of the Public School Cadets.
It was divided into two levels
- Junior School Cadets - Boys from 12 to 14 years old
- Senior School Cadets - Boys 14 years and older.
Some of these individual units had their own school or unit cadet badge, while others wore the generic pattern of the time.
It was divided into two levels
- Junior School Cadets - Boys from 12 to 14 years old
- Senior School Cadets - Boys 14 years and older.
Some of these individual units had their own school or unit cadet badge, while others wore the generic pattern of the time.
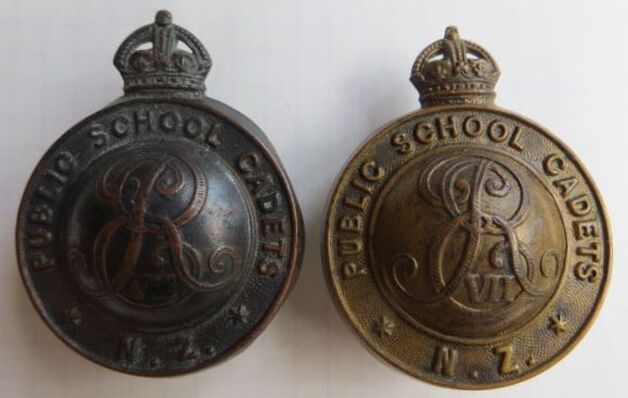
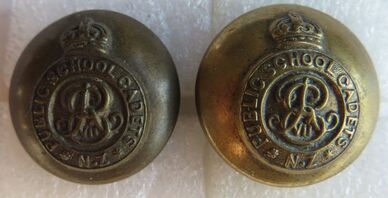
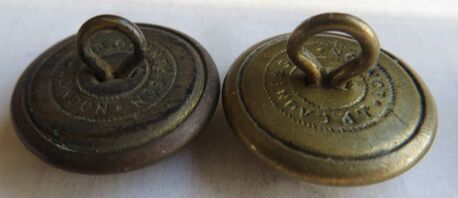
- Above Left: A darkened bronze Edward VII Cap badge to the New Zealand Public School Cadets. Two D shaped copper looped lugs to back, no maker mark.
- Above Right: A gilt brass Edward VII Cap badge to the New Zealand Public School Cadets. Two D shaped copper looped lugs to back, no maker mark. |
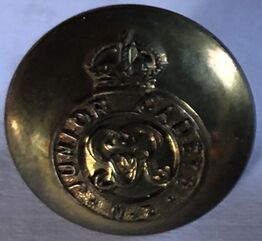
- Above: A gilt brass George V Cap badge to the New Zealand Junior Cadets. Two D shaped copper looped lugs to back.
|
|
|
|
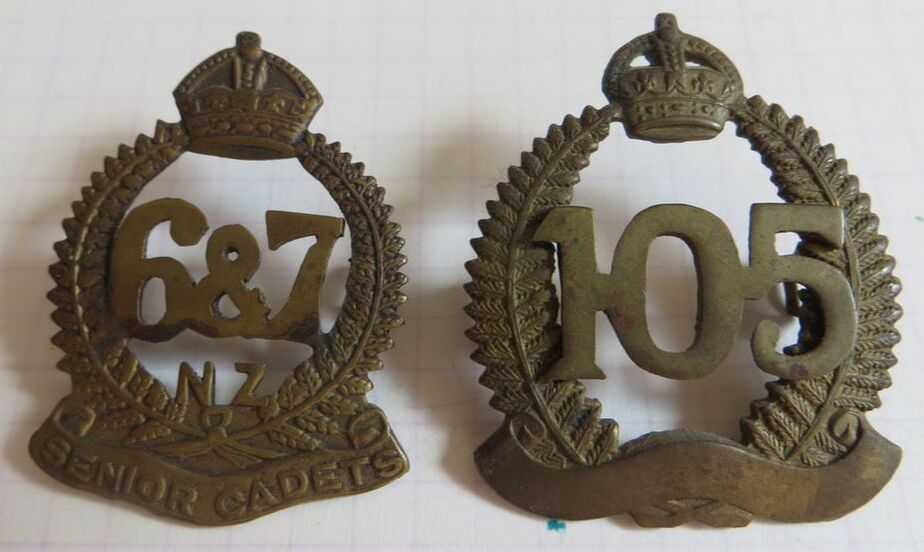
- Above Left: A generic Senior Cadets framed Cap badge with a separate "6 & 7" numbers to center. Two copper looped lugs to back with no maker mark.
- Above Right: A WW1 reinforcements Cap badge frame used by the 105th Senior Cadets. Two hex type brass lugs to back. |
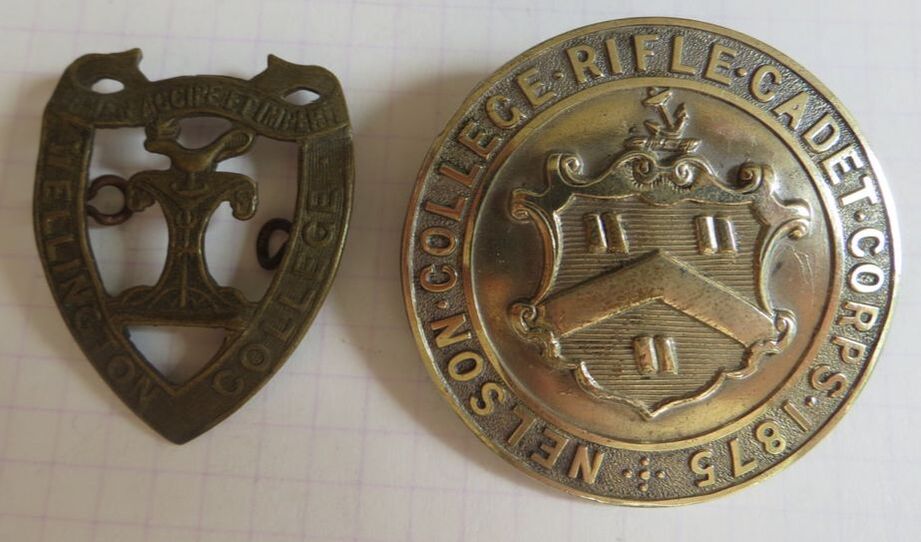
Some of the larger schools in New Zealand issued their own Army Cadet Insignia.
- Above Left: A gilt brass, die stamp Cap badge to the Wellington Collage Cadets. Two copper wire loops to back. - Above Right: A large silver or silver plate (not marked to back) to the Nelson College Rifle Cadet Corps, with the school founding date of 1875. Two looped lugs to back. |
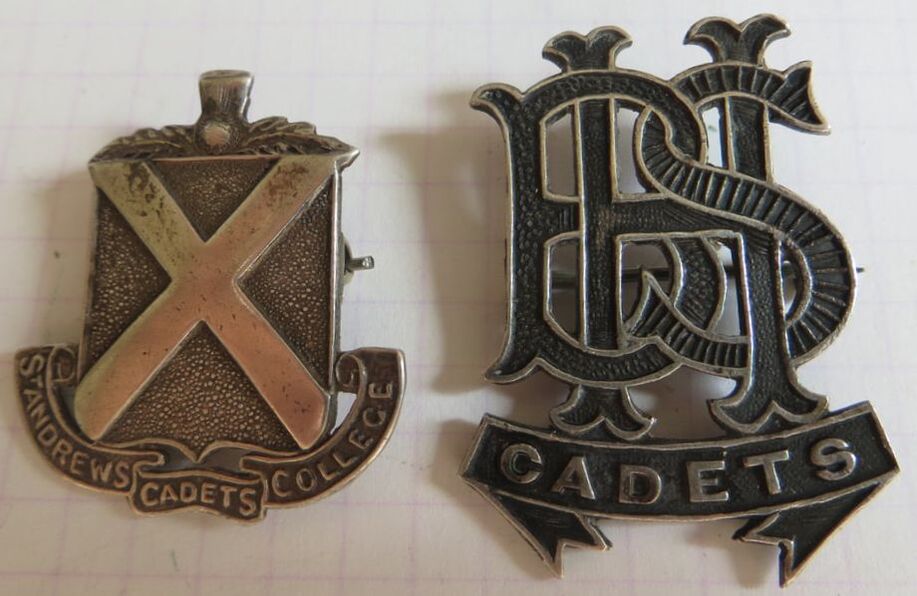
- Above Left: A silver badge to St Andrews College Cadets, which is in Christchurch, New Zealand. Pin backed and maker marked to "WATSON" and marked "SILVER".
- Above Right: A silver badge to Christchurch Boys High School (BHS) Cadets. Pin backed with maker mark to "R. F. Martin" and marked "Stg Silver". |
- Above: A silver badge (not marked) to the Christchurch Boys High School (BHS) Cadets. Two copper looped lugs to back, but no maker mark.
|
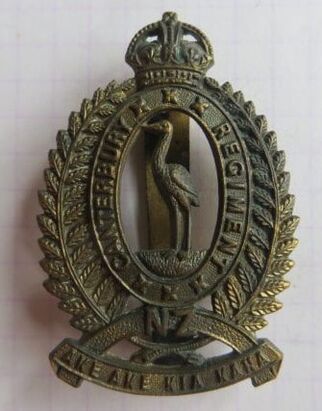
- Above: A Cap badge to the 4th (Cadet Battalion) of the 1st (Canterbury) Infantry Regiment. Very similar design to its Regular Army counter-part, but has a void area around the Heron to center and different wording to oval banner. Gilt brass badge with slider to back. No maker mark.
|
|
- Above: A generic, Kings crown Cap badge to the New Zealand Army Cadet Corps. Two small copper looped wire lugs to back. No maker mark and size 37.5mm by 32mm.
|
- Above: A post 1952 generic, Queens crown Cap badge to the New Zealand Army Cadet Corps. Two thick copper looped lugs and a maker mark of "MAYER & KEAN LTD WTON". Size 37mm by 31.5mm.
|
- Above: A gilt brass, Queens crown Cap badge to the New Zealand Army Cadet Corps. Two thick type copper wire lugs to back. No maker mark and size 37mm by 32mm.
|
|
- Above: A gilt brass, Queens crown Cap badge to the New Zealand Army Cadet Corps. Two pressed type, brass lugs to back. No maker mark and size 37mm by 31.5mm.
|
- Above: A modern, Queens crown Cap badge to the New Zealand Army Cadet Corps. Solid back, in gilt metal with bar lug fastener. No maker mark and size 37.5mm by 31.5mm.
|
- Above: A modern, Queens crown Cap badge to the New Zealand Army Cadet Corps. Solid back, in gilt metal with two screw posts, with nuts. No maker mark and size 37mm by 31mm.
|
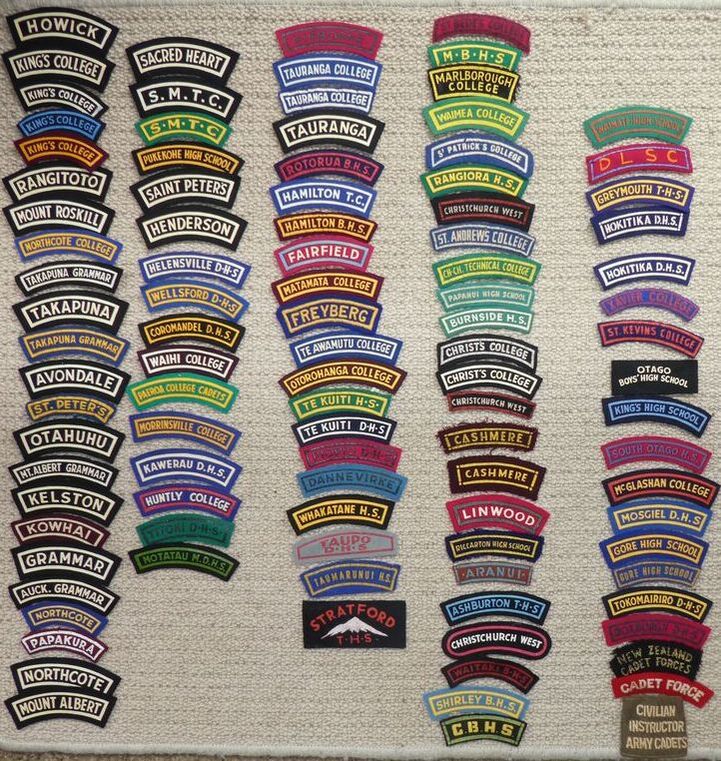
- Above: A superb collection of 1950's and onwards, New Zealand School Cadet Force shoulder titles. A mixture of embroidered, but also applied paint on wool fabric (Ian Hamilton Collection).
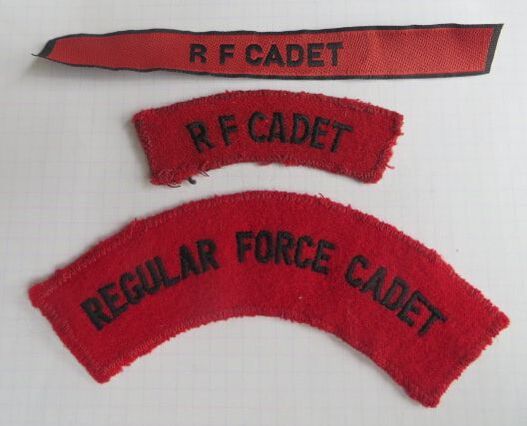
Above are shoulder titles to the New Zealand Regular Force Army Cadets.
- Top: A cloth ribbon type shoulder title to the Regular Force Cadets. - Center: A abbreviated embroidered letter title. - Bottom: A standard sized shoulder title to the Regular Force Cadets. Jet Black on a Post Office Red background. |
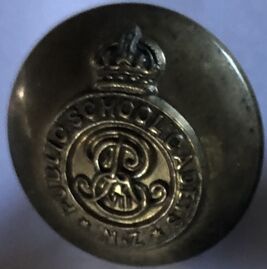
- Above: A 20.7mm, gilt brass button with Edward VII cypher, to the New Zealand Public School Cadets. Maker marked to "J R GAUNT & SON LONDON" (B Jones collection).
Other Sizes/makers for the NZ Public School Cadet Button: - 15.6mm "JR Gaunt & son London, 16.5mm "JR Gaunt & son Ltd London", 17mm "C Kenning & son London", 17mm "JR Gaunt & son Ltd London" (B Jones Collection). |
- Above: A pair of Edward VII cyphered, gilt brass , fixed shank 19mm buttons to the New Zealand Public School Cadets.
|
- Above: Both are 19mm, but just slightly different to back, with one with a thicker shank. Both are marked to "J R Gaunt & Son, London".
|
- Above: A 17mm, gilt brass button with George V cypher, to the New Zealand Junior Cadets. Maker marked to "J R GAUNT & SON LONDON" (B Jones collection).
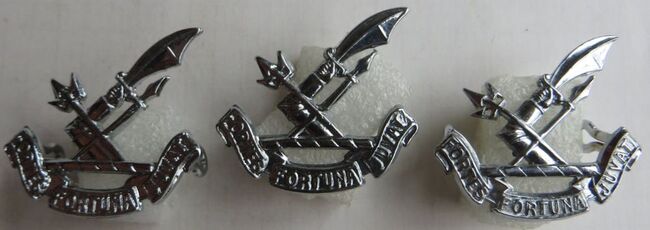
The following is a complicated badge.
Used by:
- NZ Senior Cadet Officers - 1911 to 1921
- Training Cadets at Trentham Camp from 1927
- Unposted Regular Service Recruits from 1932 until 1950
- Troops stationed on Fanning Island during WW2.
In around 1912, it was described as:
"Senior Cadet - Officers - Unattached List B
"Dickson" Crest from Lord Islington's Arms and motto "Fortes Fortuna Juvat" on a scroll beneath."
(Cadets, Regimental Badges and Uniforms R21078962 Box 19 AD37 24 c1912 Archives N.Z.).
Motto: Fortes Fortuna Juvat (Fortune favours the brave)
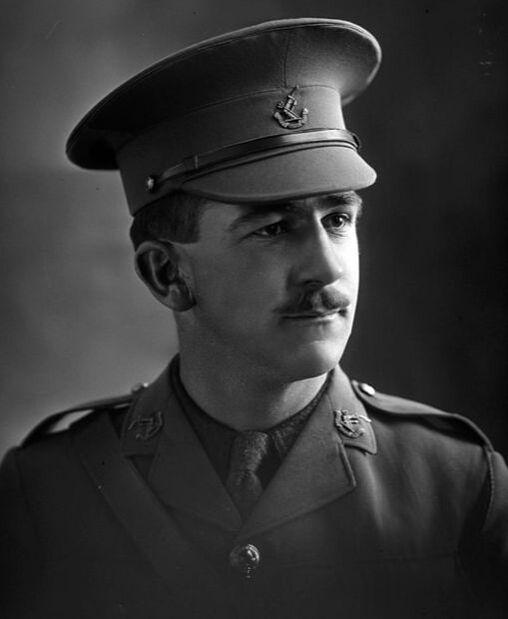
- Opposite: A image of 4/78A Lieutenant Acland Withiel Thomas MC, wearing a set of the Dickson Crest badges and dated about 1916. Note the Collar badges he wears are opposing (image taken from the Auckland Cenotaph).
Used by:
- NZ Senior Cadet Officers - 1911 to 1921
- Training Cadets at Trentham Camp from 1927
- Unposted Regular Service Recruits from 1932 until 1950
- Troops stationed on Fanning Island during WW2.
In around 1912, it was described as:
"Senior Cadet - Officers - Unattached List B
"Dickson" Crest from Lord Islington's Arms and motto "Fortes Fortuna Juvat" on a scroll beneath."
(Cadets, Regimental Badges and Uniforms R21078962 Box 19 AD37 24 c1912 Archives N.Z.).
Motto: Fortes Fortuna Juvat (Fortune favours the brave)
- Opposite: A image of 4/78A Lieutenant Acland Withiel Thomas MC, wearing a set of the Dickson Crest badges and dated about 1916. Note the Collar badges he wears are opposing (image taken from the Auckland Cenotaph).

- Above: A set of gilt fired brass badges. All have maker details impressed for "J R Gaunt, London" to back, with D shaped looped lugs. Size 30mm by 30mm.
|
- Above: A pair of darkened bronze versions of the same badge. Maker details impressed for "J R Gaunt, London" to back, with D shaped looped lugs. Size roughly 30mm by 30mm.
|
- Above: A chromed plated Cap or collar badge set to the Regular Force Cadets. The badge was adopted by the Regular Force Cadets in 1950 and was either plated or in chrome from 1952.
The left and right badges have chromed looped lugs to back, with one maker marked to "Mayer & Kean Ltd, Wellington, N.Z". The center badge has two thread bolts to back, to be used with a nut. I have yet to see a opposing collar badge like the opposite gilt fired set. Size 30mm by 30mm.
The left and right badges have chromed looped lugs to back, with one maker marked to "Mayer & Kean Ltd, Wellington, N.Z". The center badge has two thread bolts to back, to be used with a nut. I have yet to see a opposing collar badge like the opposite gilt fired set. Size 30mm by 30mm.
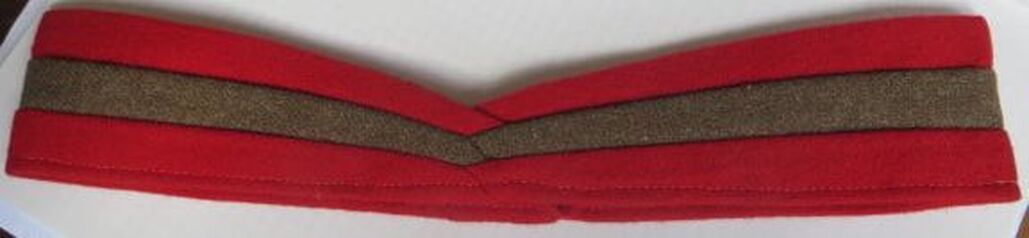
- Above: A puggaree to fit the Lemon Squeezer hat to the New Zealand Regular Force Cadets from 1952. Red/Khaki/Red. Marked to inside with size only, in purple ink to "7 5/8".
Note this puggaree colour combination has also be used by:
- Fanning Island Infantry.
Note this puggaree colour combination has also be used by:
- Fanning Island Infantry.
Fakes and Forgeries
Below is a fake or reproduction Dickson Crest Cap or Collar badge.
- OK detail to front, but colour is off and there is stippling to lower banner.
- To back is correct in that its solid, but there are faults and stippling, note the file marks and unclear makers mark, which is clear and impressed to originals.
- Two copper looped lugs are to back, but are ribbon like and not found on originals.
- Size 30mm by 30mm.
|
|
|
|
Royal New Zealand Engineers
The New Zealand Engineers have a long history prior to 1911 as part of New Zealand Volunteer System.
In 1909, the Volunteers were reformed into the New Zealand Engineer Regiment as follows:
No. 1 Company - Canterbury
No. 2 Company - Dunedin
No. 3 Company - Auckland
No. 4 Company - Wellington
The NZE Volunteers continued past 1911, and became a "Corps" after WW1 on 1st of June 1923 with their title changing to the Corps of New Zealand Engineers.
On the 12th of June 1947, the Corps were awarded the prefix "Royal", and became the Corps of Royal New Zealand Engineer.
Motto: HONI SOIT QUI MAL Y PENSE (Shame on him who thinks evil of it).
also QUO FAS ET GLORIA DUCUNT (Whither right and glory lead).
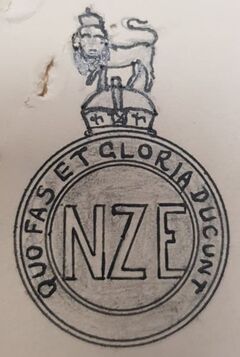
The regiments Cap badge was put forward on the 10 July 1911, with a caveat that "The G.O.C. (General Officer Commanding) desires that all Companies should adopt the one badge as follows.-
Hat or Cap.- Monogram N.Z.E. surrounded by circle bearing the motto "Quo fas et gloria ducunt", and surmounted by a crown & lion".
Collar Badge - Plain Engineer grenade."
- Opposite: A hand drawn representation of the New Zealand Engineers Cap badge attached to a 6th of June 1912 memo asking for the design when its received from the Government Printers. The design of the badge appears to be approved on the 24th of April 1912.
(Badges - Regimental - Territorial Force, R23534556 AD1 AAYS 13-13 Archives NZ).
|
- Above Left: A darkened copper (?) Officers Cap badge to the New Zealand Engineers. Die stamped, with two tangs to back. No maker mark and size 40mm by 25mm.
|
|
- Above: A darkened bronze Officers Cap badge to the New Zealand Engineers (Ian Hamilton Collection).
|
|
|
- Above: A darkened brass Cap badge to the New Zealand Engineers. Maker marked to back, upper center to "M & K, W" or Mayer & Kean, Wellington. Two thick type copper wire lugs to back. Size 41mm by 25mm.
|
|
|
|
|
- Above: A silver (not marked) sweethearts badge in the shape of a New Zealand Engineers Cap badge. Brooch fitting to back, which is in a North/South configuration. Though missing the pin. No maker mark and size 41mm by 25mm.
|
|

- Opposite Right: A image of Sapper 37478 John William Ryan of the New Zealand Engineers. He joined the 4th of Oct 1916 as part of the 3rd Tunneling Reinforcements, and was to spend 2 years and 161 days overseas. When he got to England, he received further training as part of the general 19th NZE Reinforcement draft at Boscombe (NZE's Depo UK).
John is wearing a gilt brass NZE Cap badge, with flaming grenade collars and a "NZE" curved brass shoulder title to his shoulder boards. He has gilt brass NZ Forces "4 star" buttons to his tunic. John remained with the New Zealand Engineers Tunneling Company for the duration of the war, and returned to New Zealand at its end, sadly passing away, aged 51 in 1934 (image from the Auckland Libraries).
John is wearing a gilt brass NZE Cap badge, with flaming grenade collars and a "NZE" curved brass shoulder title to his shoulder boards. He has gilt brass NZ Forces "4 star" buttons to his tunic. John remained with the New Zealand Engineers Tunneling Company for the duration of the war, and returned to New Zealand at its end, sadly passing away, aged 51 in 1934 (image from the Auckland Libraries).
New Zealand Engineer Tunnelers Company WW1.
The New Zealand Engineers Tunnelers Company formed in September 1915 on the Western Front. It disbanded 24th of April 1919.
Many Kiwi's served with it or were attached to other Commonwealth Tunneling companies during WW1.
There is much debate as to why they have a larger badge, as it was not sanctioned, but there are pictures of it being worn.
The Tunnelers Cap badge is approximately 48mm high by 30mm wide.
The standard NZE Cap badge is 40mm high by 24mm wide.
(Measurements taken from two Gaunt plaqued examples).
Motto: QUO FAS ET GLORIA DUCUNT (Whither right and glory lead).
Also: INGA WAHI KATOA (Everywhere).
|
- Above: A rather scarce gilt fired brass Officers Cap badge to the New Zealand Engineers Tunnelers Company. Solid to back (which is rough), with two tangs. No maker mark.
|
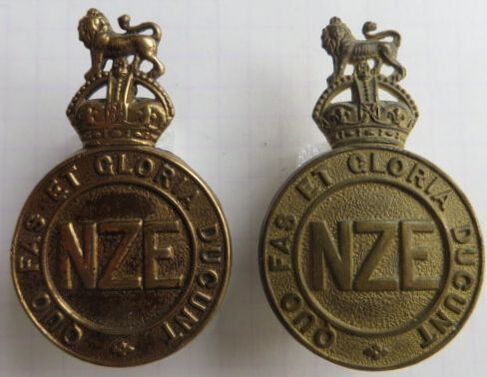
- Above Left: A gilt brass Cap badge to the New Zealand Engineers Tunnelers Company. Die stamped, it has been polished and then coated in lacquer, which has browned with age. Two D shaped copper looped lugs to back, but no maker mark. Probably J R Gaunt.
- Above Right: A gilt brass Cap badge to the New Zealand Engineers Tunnelers Company. Two D shaped copper looped lugs to back, with maker plaque to "J R Gaunt London". |
- Above: A gilt brass Cap badge to the New Zealand Engineers Tunnelers Company. Long brass slider to back with the maker impressed mark of "Tiptaft Bham" stamped on it.
|
|
- Above: Another example of a Gilt brass Cap badge to the New Zealand Engineers Tunnelers Company. Long brass slider to back (Ian Hamilton Collection).
|
- Above: A pair of very scarce Officers Collars to the New Zealand Engineers Tunnelers Company. Estimated at maybe 40 to 50 Officer to the unit, these are rarely seen. Inga Wahi Katoa (Everywhere - Ian Hamilton Collection).
|
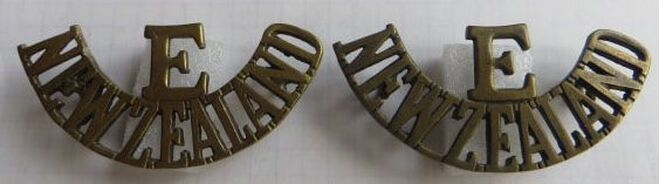
- Above: A pair of New Zealand Engineer Tunnelers Company shoulder titles. The "E" is brazed to the top of the "New Zealand" title. Both titles have two copper looped lugs to back and the maker stamp of "J R Gaunt London".
There are no lugs to the back of the "E"'s. - Opposite: A similar pair of shoulder titles to the New Zealand Engineer Tunnelers Company (Ian Hamilton Collection). |

|

|
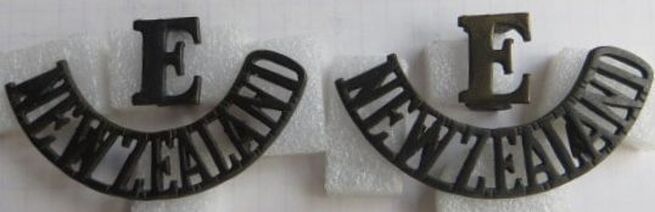
- Above: A pair of darkened New Zealand Engineer Tunnelers Company shoulder titles. These have separate "E"and "New Zealand" titles. Both titles have two copper looped lugs to back but are not maker marked.
There are hex type lugs to the back of the "E"'s. - Opposite: A superb French made silk card sent by 28015 Herbert (Jack) John Jelley to his wife (Maude) at some stage in late 1916, early 1917. Jack was a Bricklayer, who joined the New Zealand Engineers from England, via the Hornchurch Depo. He spent 1 year and 198 days overseas, in France. Sadly Jack was gassed on the 23rd of June 1917 while part of No. 1 Coy, NZ Field Engineers. He was evacuated out of France and returned to England, where he was struck off strength on the 6th of Dec 1917, as "No Longer Fit". The card depicts the New Zealand Engineers Cap badge, with a "E" over "NEW ZEALAND" shoulder title at base. To back, Jack has written "Love to all Jack, my dear Maude, you need not send me anything out here. I am alright, if I want anything I will let you know. Love to you and the children from your loving husband Jack. I am sending you a note with the card. XXXXXXX". Jack had two children at the time in England. Card is maker marked to back to "E. C., Boulogne-sur-Mer, Lillie". |

- Above: A rare thing, a page to the British issued New Zealand Silver War badge roll. It only contains a few hundred names, but as 28015 (Jack) Herbert John Jelley was demobilised in England, and deemed unfit due to being Gassed, he was issued SWB NZ166. The New Zealand issued SWB roll which would contain 1000's of names of the recipients who were issued their badges in New Zealand has been lost (so far - above page supplied by Ray Butler).
New Zealand Engineer Railway Battalion WW1.

The New Zealand Railway Battalions formed in Oct 1911, and were part of the NZ Engineers.
No. 1 Company - North Island
No. 2 Company - South Island
On the 10th of May 1912, their proposed badge was described as:
"Cap Badge: An engine, railway line and crossed guns within a collar inscribed "New Zealand Railway Corps". A crown above.
Collar Badge: Smaller, omitting crown".
(Cadets, Regimental Badges and Uniforms R21078962 Box 19 AD37 24 c1912 Archives N.Z.).
They would deploy with the Samoa Advance Force in 1914 and then go on to France and the Western Front. The unit was disbanded in 1921.
- Opposite: A superb image of 4/257 John Selwyn Bell, who was a railway clerk prior to WW1, and was also in the Territorial Force. When war broke out, he joined the New Zealand Railway Ballation, and was sent to Samoa, as part of the Samoan Expeditionary Force, with the ballation.
John is wearing his NZE Railway Ballation Cap badge to his peaked cap, with flaming grenade collars. To his shoulder is a curved, gilt brass "NZE" shoulder title. He wears the NZ Forces "4 star" buttons to his tunic. The 2 chevrons to his sleeve indicate the rank of Corporal.
John returned to NZ after the 14th of April, 1915, whereby he enlisted again, as part of the 5th Reinforcements, and saw action at Gallipoli in September that year, he would then go onto serve in Egypt and on the Western front, totaling some 4 years overseas as a Signaler. In WW2 he re-enlisted, with service number 800769. He would be stationed on Norfolk Island, as part of N Force with the Army. A number of New Zealanders were stationed there from October 1942 to Febuary 1944, as the Island was seen as a stratigic target to the Japanese in that it housed a cable station which linked New Zealand with Australia.
At teh peak of hostilities, N Force consisted of 1,488 NZ personel under the command of Lieutenant-Colonel J. W. Barry.
From 1944, the RNZAF took over protection of the Island, and all New Zealand Forces were withdrawn by July 1946.
Care needs to taken when purchasing this badge, as sadly it has been faked considerably in recent years.
|
- Above: A die stamped, gilt brass Cap badge to the NZE Railway Battalion. Round copper looped lugs to back, with a maker plaque to back of the crown to "J R GAUNT LONDON". Size 45mm by 27mm.
|
|
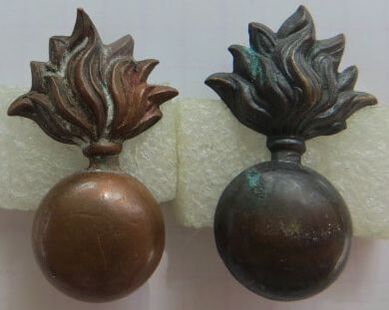
- Above: A pair of matching coppery bronze grenade collar badges. Two copper D shaped looped lugs to back in a North/South configuration. No maker mark, and size 30mm by 19mm.
|
|
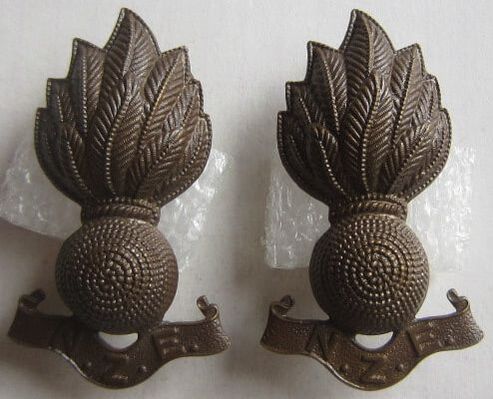
- Above: A pair matching of 10 flame, darkened bronze Officers Collar badges to the New Zealand Engineers. Two piece, with separate lower banner attached to grenade. Both have two looped lugs in a north/south configuration. Both have a plaque to back with "J R GAUNT LONDON". Size 47mm by 27mm.
|
|
|
- Above: A pair of single piece gilt brass Collar badges to the New Zealand Engineers. 10 flame, but a rough strike, lacking detail, they both have two pressed type copper looped lugs to back. No maker mark, and size 47mm by 27mm.
|
- Right: A darkened brass Collar badge to the New Zealand Engineers. 10 flame, with separate bottom banner attached, with two copper looped lugs. No maker mark and size 45.5mm by 27mm.
|
- Above: A gilt brass, single piece Collar badge to the New Zealand Engineers. Two copper wire loops to back. No maker mark and size 45mm by 27mm.
|
- Above: A single piece, darkened copper Collar badge to the New Zealand Engineers. Two copper looped lugs to back, with no maker mark. Size 47mm by 27.5mm.
|
|
- Above: A pair of gilt fired brass, Collar badges to the New Zealand Engineers. Two loops to back (Ian Hamilton Collection).
|
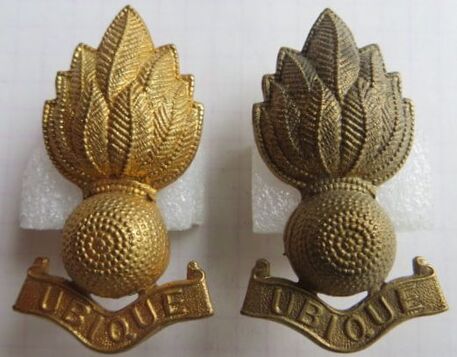
- Above: At some stage the New Zealand Engineers moved to wearing the British style of Royal Engineers Collar badge, with the "Ubique" in lower banner. This pair are the large gilt brass type, single piece, with two long loops to back. No maker mark.
|

- Above: A pair of fine bronze Officers shoulder titles to the New Zealand Engineers. Thin copper wire loops to back. No maker mark.
|
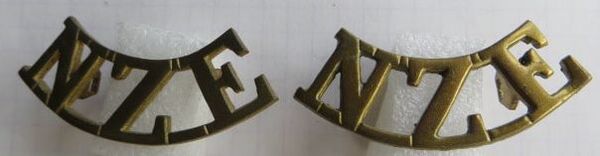
- Above: A pair of gilt brass shoulder titles to the New Zealand Engineers. Hex lugs to back, with the maker mark impressed to the back of the "Z" to "J R Gaunt London". I have also seen it impressed to bottom edge.
|
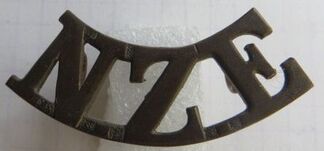
- Above: A Australian made, "Stokes & Sons" marked shoulder title to the New Zealand Engineers. Two copper looped lugs to back. Note the stippling between the letters, which is a feature of this maker.
|
|
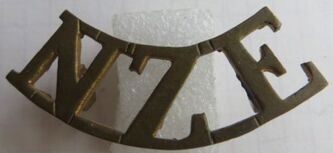

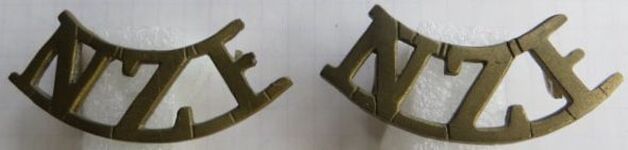
- Above: When supplies were short, you had to make do with what you could lay your hands on. The above titles are actually, New Zealand Rifle or "N.Z.R" titles, which have had the "R" modified at the end to create a "E" for New Zealand Engineers.
- Opposite: A Army memo dated the 30th of Jan 1947, bringing up the issue of when the New Zealand Engineer Cap badge should be changed. It eludes to the fact that back in 1924, there was talk then of New Zealand adopting the British Royal Engineer Cap badge, with just a base banner change in title. This was not followed up, and it seems now too, there would be no change. The Corps in 1947 were granted the prefix "Royal", to their title, but the the Corps of Royal New Zealand Engineers did not change their badge. It wasn't until the 8th of March 1954 that a Queens crown badge was submitted to the Queen for aproval (Archive NZ - "Badges & Buttons - New Zealand Regiment" - FL48958703 & FL48958595). |
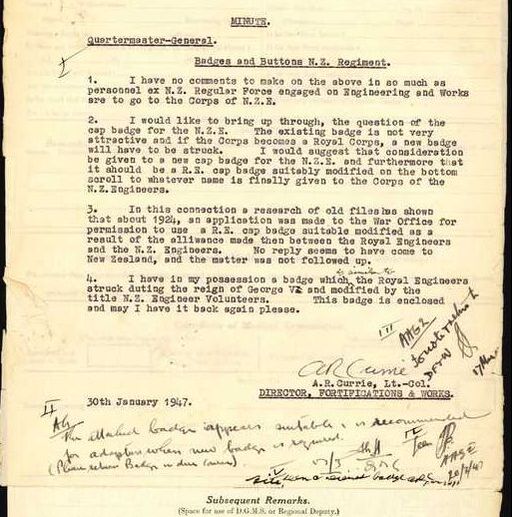
|
|
- Above: A bullion beret badge worn by Officers of the Royal New Zealand Engineers. Much toning to finish, with "UBIQUE" to lower banner. Size 53mm by 40mm roughly.
|
|
|
Above: A similar two piece, bi-metal Cap badge to the Royal New Zealand Engineers. This is Gilt fired, with an enamel center, with frosted silver wreath. Solid to back, with two long lugs. No maker mark.
|
|
|
- Above: A two piece, anodised aluminium Cap badge to the Royal New Zealand Engineers. Gold tone and dark blue paint center, with a silver toned wreath. Two pins to back which would hold the badge on with clutches. No maker mark.
|
- Above: A two piece, anodised aluminium Cap badge to the Royal New Zealand Engineers. Gold tone and dark blue paint center, with a silver toned wreath. Two long looped lugs to back. No maker mark.
|
- Above: A two piece, anodised aluminium Cap badge to the Royal New Zealand Engineers. Gold tone and dark blue paint center, with a silver toned wreath. Two long looped lugs to back. Seems to be a heavier strike of the badge in this metal. No maker mark.
|
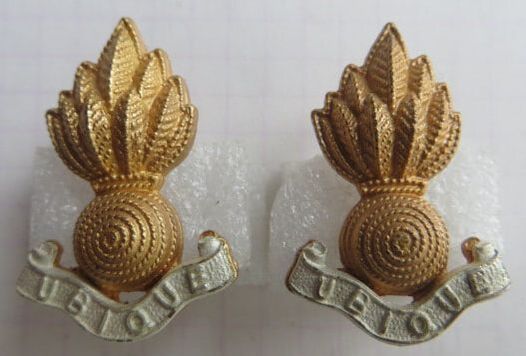
- Above: A pair of small gilt fired and matt silvered Collar badge to the New Zealand Engineers. One piece Gilt Brass backing with separate attached "Ubique" lower banner. One has long lugs to back, the other two pins, to be used with clutches. No maker mark.
|
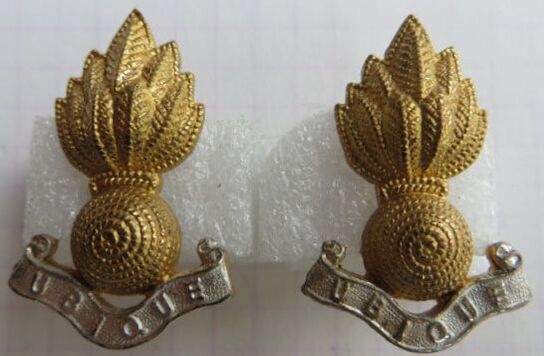
- Above: A pair of small gilt fired and polished silvered Collar badge to the New Zealand Engineers. One piece Gilt Brass backing with separate attached "Ubique" lower banner. Both have long looped lugs to back. No maker mark.
|
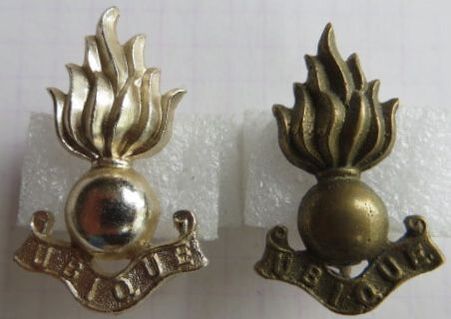
- Above Left: A anodised aluminium gold tone Collar badge to the New Zealand Engineers. Single piece, with two long pins to back to be used with clutches. No maker mark.
- Above Right: Similar Collar badge in gilt brass to the New Zealand Engineers. Single piece, with two copper looped lugs. No maker mark. |
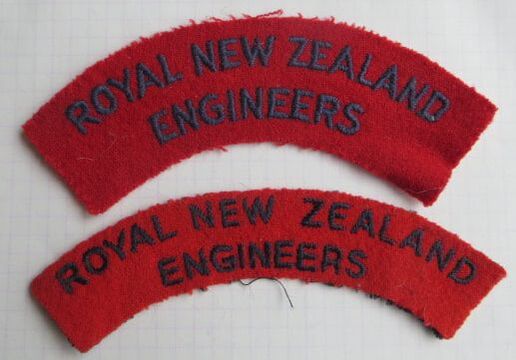
- Above: Post 1961, shoulder titles to the Royal New Zealand Engineers. Purple Navy on a Post Office Red felt background.
- Opposite: A car or truck badge to the Corps of Royal New Zealand Engineers. The Gaunt plaqued cap badge is for scale. This huge aluminium badge would be mounted via the bolt at the base through the bumper of the car/truck. No maker mark to back. |
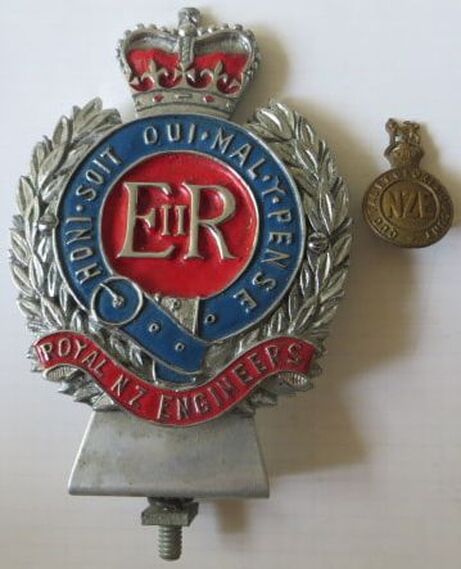
|
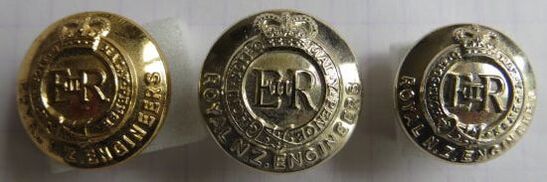
- Opposite Left: A anodised aluminium, gold toned 19mm button to the Royal New Zealand Engineers. Queens Crown, so post 1952, it has the maker details for "Gaunt, London".
- Opposite Middle: A anodised aluminium, silver toned 19mm button to the Royal New Zealand Engineers. Queens Crown, it has the maker details for "Badge & Button, London".
- Opposite Right: A anodised aluminium, silver toned 16mm button to the Royal New Zealand Engineers. Queens Crown, it has the maker details for "Gaunt, London".
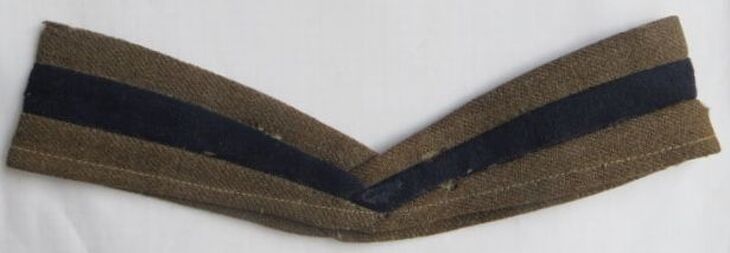
- Above and Opposite: A puggaree to fit the Lemon Squeezer hat to the Royal New Zealand Engineers. Khaki/Dark Blue/Khaki. Marked to inside with size only, in purple ink to "6 3/4". Note the puggaree has been folded front side on.
|
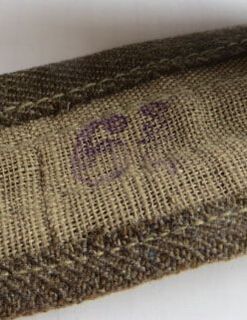
|
|
|
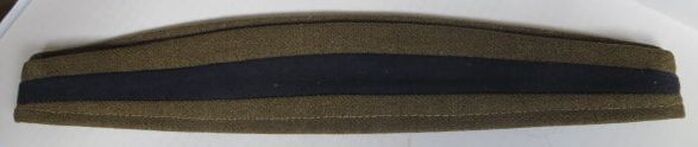
- Above: A puggaree to fit the Lemon Squeezer hat to the Royal New Zealand Engineers. Khaki/Dark Blue/Khaki. Marked to inside with size only, in purple ink to "7". Note the puggaree has been folded side-on.
- Opposite: A rare cloth and embroidered thread Engine Trade sleeve badge. Light Khaki thread on a darkened khaki wool background (Ian Hamilton Collection). |
Fakes and Forgeries
Below is a fake New Zealand Engineers Cap badge. Its a bit pointless as this is fairly common and had such a long life in use. Anyway someone has done it.
- Lacking detail to front, with stippling on the letters, especially the "NZE" which is not correct.
- Back has OK detail to back, better than some casts, but the Lion and crown to top lack the back detail and have flat areas.
- Two copper looped lugs are soldered on and are ribbon like.
- Size 40mm by 25mm.
|
|
|
|
WW1 Base Records

- Opposite: A gilt brass, 2 piece Cap badge and single Collar to the WW1 New Zealand Base Records. A uniquely WW1 worn badge, this unit was established in June 1915, and were responsible for the mountain of paperwork generated by a greatly expanded Army. They were also responsible for demobilsation and War grave registration.
Both badges have two brass, flat type lugs to back. The Cap with the standard hex type, while the collar has rectangular, flat type lugs to back. The Collar is much much harder to get than the Cap badge, and there has been a few rumors that some collectors are prepared to remove the center off the Cap badge to make a Collar!!!
Both badges have two brass, flat type lugs to back. The Cap with the standard hex type, while the collar has rectangular, flat type lugs to back. The Collar is much much harder to get than the Cap badge, and there has been a few rumors that some collectors are prepared to remove the center off the Cap badge to make a Collar!!!
WW1 Army Interpreters
- Opposite: A single piece, gilt brass sleeve proficiency badge for British Army/Commonwealth Interpreter badge to translate between English and Egyptian. Two strips of brass to back, one at top and one at base to create 4 tangs to hold the badge onto the uniform sleeve. Worn by New Zealanders during WW1 stationed in Egypt and the surrounding area (Ian Hamilton Collection).
New Zealand Machine Gun Corps
The New Zealand Machine Gun Corps was forming January 1916 in Egypt. Prior to this, each regiment had their own Machine Gun Section.
There were 2 New Zealand formations, one deployed to France, and the other to Palestine and the Middle East during WW1.
The NZMGC in France went with the newly formed New Zealand and ANZAC Divisions in April 1916. They were disbanded at the end of the war in 1918.
The NZMGC in the Middle East would form a Mounted Squadron and ride with the NZ Mounted Rifles and NZ Camel Corps. They disbanded in 1919.
During WW2, the NZMGC formed again as the 27th (Machine Gun) Battalion of the 2NZEF in 1940 and would go on to fight in Greece, Crete, North Africa and Italy. They disbanded in 1945, and as a overseas serving unit in the 2NZEF, would have worn the NZ "Onwards" Badge.
Initially, when the NZMGC arrived in France in April 1916, they wore the British MGC badge.
Motto: (none in the 1st NZEF - as noted in R17187868 AALI W3508 7291 Archives NZ)
|
- Above: A single piece, semi-soild Bronze British/New Zealand Officers Cap badge to the Machine Gun Corps. Three blades or tangs to back and maker plaqued to "J R Gaunt, London". Size 44mm by 50mm.
|
- Above: A other ranks, single piece British/New Zealand Machine Gun Corps Cap badge in gilt brass. Three copper looped lugs to back, with no maker mark. Size 45mm by 51mm.
|
|
|
- Opposite: A scarce 3 tanged/bladed WW1 New Zealand Machine Gun Corps Officers Bronze Cap badge. Sadly not maker marked, but has a interesting double tang to top, back of crown, more commonly found on Canadian Badges.
- Above: A matching pair of solid bronze Officer collar badges to the WW1 New Zealand Machine Gun Corps. Both have been repaired, as they were mounted on a wooden shield, with a bolt attached, and lugs removed. Three looped lugs to the back of each, with the maker mark impressed to center to "J R Gaunt London". Size 31mm by 37mm. |
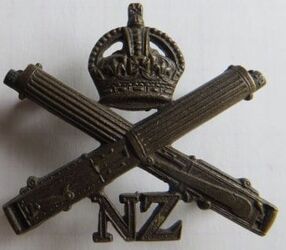
- Above: A cast, semi-solid bronze Officers Collar badge to the WW1 New Zealand Machine Gun Corps. Maker plaqued to back to "Firmin London". Four copper looped lugs to back. Size 32mm by 36mm.
|
- Above: A two piece, gilt brass Cap badge to the WW1 New Zealand Machine Gun Corps. Note the solid area beneath the crown. The "NZ" is separately attached. Three copper looped lugs to back. Size 46mm by 50mm.
|
|
|
- Opposite & Above: A gilt brass Cap and Collar badge set to the WW1 New Zealand Machine Gun Corps. All are maker marked, with a plaque to back to "J R Gaunt London". The Collars have a oval shaped plaque. All have three copper looped lugs to back. Size of Cap is 45mm by 51mm, while the Collars are 32mm by 37mm.
|
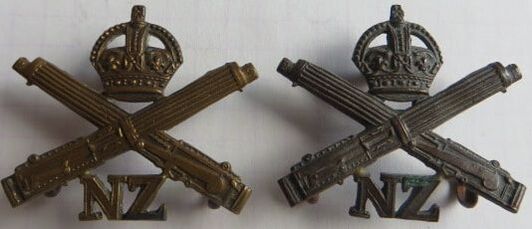
- Above: A pair of gilt brass Collar badges to the WW1 New Zealand Machine Gun Corps. Maker marked, with a rectangular plaque to back to "J R Gaunt London". Size of Collar is 31.5mm by 36mm.
|
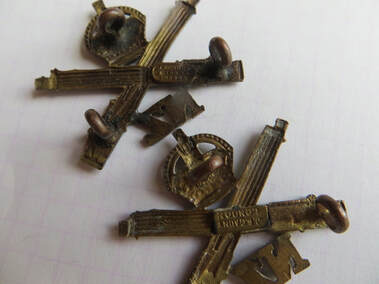
- Above: A back shot showing the two types of maker plaque found on the New Zealand Machine Gun Corps Collar badge by J R Gaunt London. Top is the oval type, while bottom is the more common, rectangular type.
|
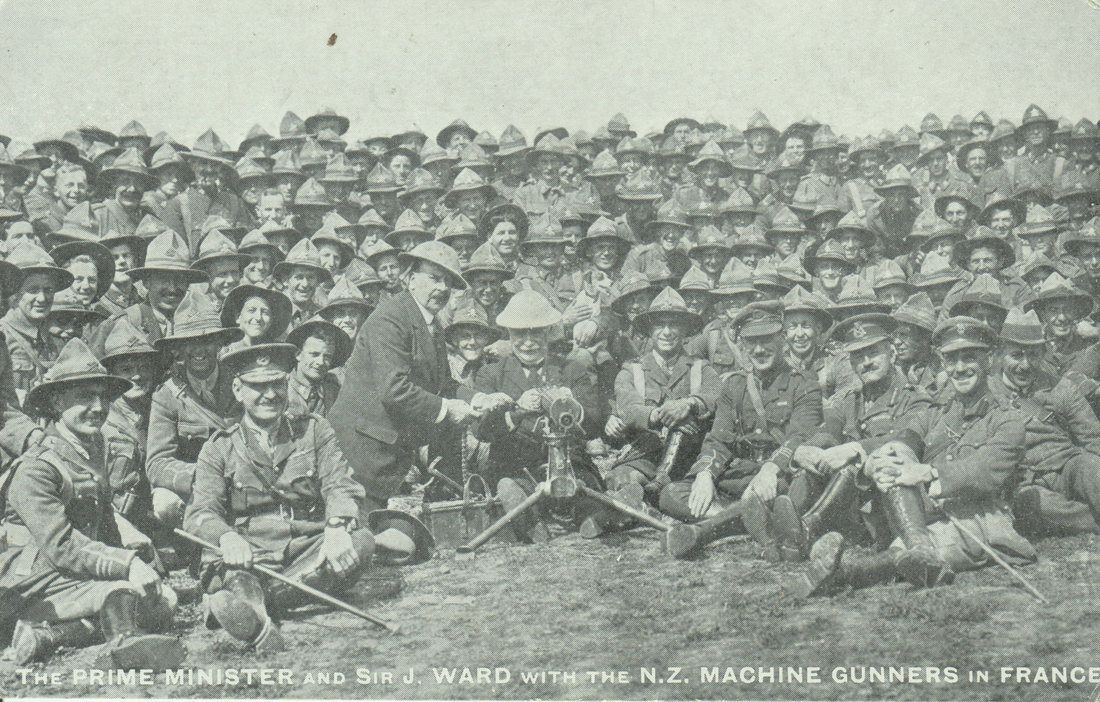
- Above: A classic image taken of the time during WW1. Bill Massey is behind the Machine Gun (at the time, Prime Minister of New Zealand), while Sir Joseph Ward is feeding in the belt to the gun (he was deputy leader throughout WW1, with New Zealand having a coalition Government). A sprinkling of Staff Officers seated to front, with red bands to their caps and tabs to their collars. To back are members of the New Zealand Machine Gun Corps. Many wear the crossed gun Cap badge with NZ below to their Lemon Squeezers.
|
- Above Left: A solid, gilt brass, three piece Collar badge to the WW1 New Zealand Machine Gun Corps. Size 32mm by 36mm.
|
- Above: Same Collar badge to just show the back, with the impressed maker mark of "J R Gaunt London". Note the unusual reinforcement bars to back of crown, and the separate "NZ" brazed to back. Three copper looped lugs to back.
|
|
- Above: A unmarked Collar badge in gilt brass to the WW1 New Zealand Machine Gun Corps. Three D shaped copper looped lugs to back, so likely Gaunt, but not marked. Size 31mm by 36mm.
|

- Above Left: A small, cast brass Collar badge to the New Zealand Machine Gun Corps. Likely Middle Eastern made, it has two copper looped lugs to back, with no maker mark. Note missing the right barrel end. Size 28mm by 24mm.
- Above Right: Again, a cast brass Collar badge to the New Zealand Machine Gun Corps. Two ribbon like copper looped lugs to back, with no maker mark. Size is 30mm by 35mm. |
|
- Above: A collar size 9ct Gold sweethearts badge to the New Zealand Machine Gun Corps. Brooch fitting to back and a hallmark stamp of "9ct".
|
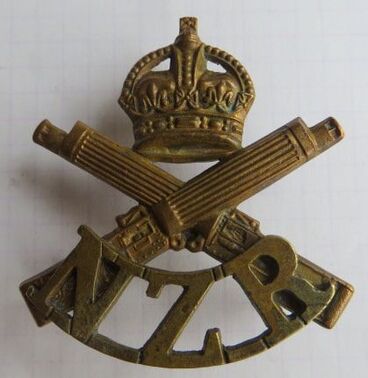

- Above: A pair of WW1 shoulder titles to the New Zealand Machine Gun (N.Z.M.G). Two hex type brass lugs to back to each, and a maker marked to "J R Gaunt, London" to back of "Z".
|
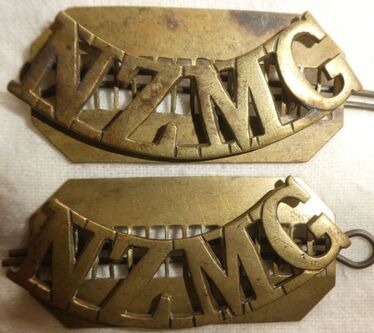
- Above: A similar pair of WW1 shoulder titles to the New Zealand Machine Gun (N.Z.M.G) with their backing plates and pins (Ian Hamilton Collection).
|
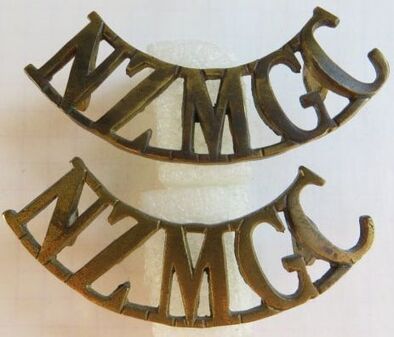
- Above: A pair of WW1 shoulder titles to the New Zealand Machine Gun Corps (N.Z.M.G.C). Two hex type brass lugs to back to each, and a maker marked to "J R Gaunt, London" to back of "Z" on one and "M" on the other.
|
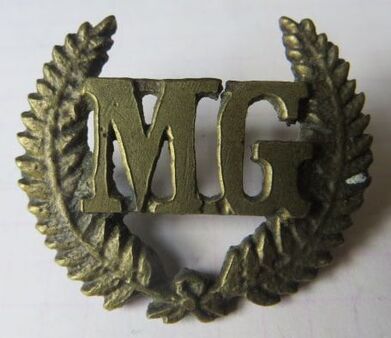
- Above: Machine Gun (MG) in cast brass, within Fern leaves. Two Copper looped lugs to back cast or integrated into the back.
|
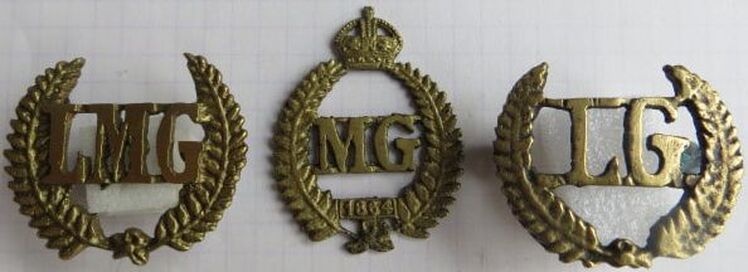
|
|
- Above and Opposite: Cast brass sleeve qualification badges for a New Zealand Machine Gun Corps. The New Zealand Army adopted many of the British sleeve qualification badges throughout its history, but also sometimes personalised its own awards. Possible a private purchase item sold to the troops station in the middle East.
- Above Left: Light Machine Gun (LMG) in cast brass, within Fern leaves. Two Copper looped lugs to back.
- Above 2nd from Left: A Canterbury Battalion Machine Gun sleeve badge. Cast brass, within Fern leaves and a kings crown. This badge has no lugs, they have been clipped off. The date 1864 is the founding of the Canterbury Regiment in New Zealand.
- Above 2nd from Right: Lewis Gun (LG) in cast brass, within Fern leaves. Two Copper looped lugs to back.
- Above Right: Hotchkiss Gun in cast brass, within Fern leaves (Ian Hamilton Collection).
|
- Above: A British cloth sleeve trade badge for the "Lewis Gun" (LG) worn by Kiwi gunners on their lower sleeve. Embroidered thread on a khaki wool background. No maker to back, but someone has written on the back in pen the date "12-10-33". 62mm by 50mm.
|
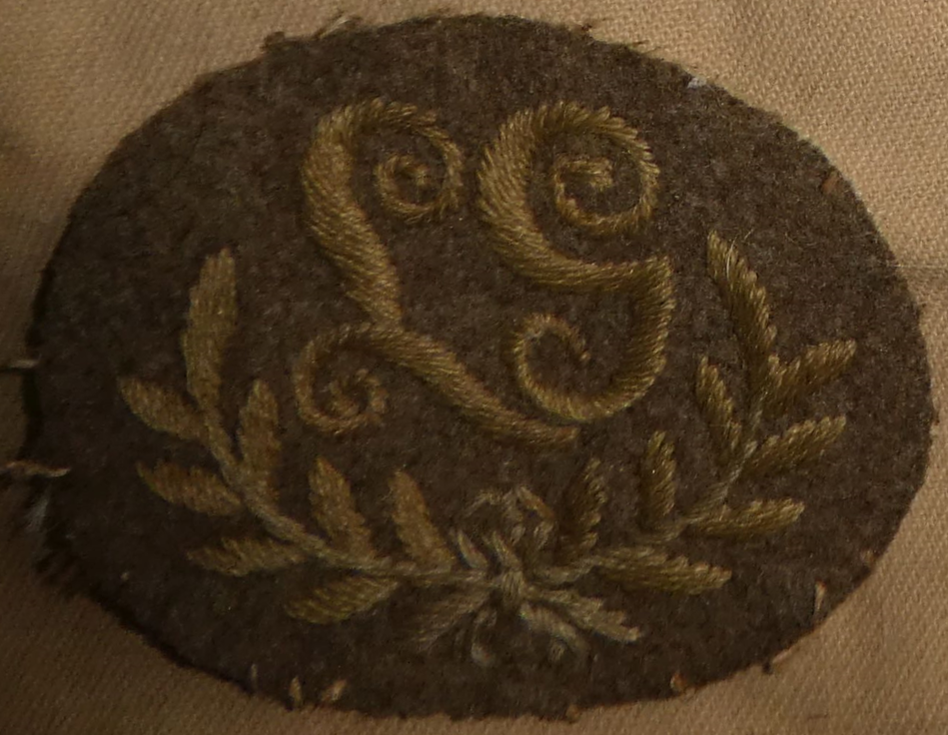
- Above: A similar cloth sleeve trade badge for the "Lewis Gun" (LG). Embroidered thread on a khaki wool background. No maker to back (Ian Hamilton Collection).
|
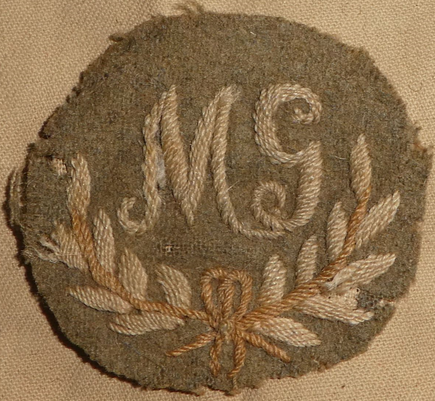
- Above: A British sleeve trade badge for the "Machine Gun" (MG), again, worn by Kiwi gunners on their lower sleeve. Two tone embroidered thread on a khaki wool background. No maker to back (Ian Hamilton Collection).
|
- Above:
- Left: A British sleeve trade badge for the "Lewis Gun" (LG) worn by Kiwi gunners on their lower sleeve. A gilt brass badge, one piece, with two short looped lugs to back. - Right: A British sleeve trade badge for the "Machine Gun" (MG), again, worn by Kiwi gunners on their lower sleeve. A gilt brass badge, two piece, with separate "MG", brazed onto Laurel leaf frame, with two short looped lugs to back. |
The following patches were permitted to be worn by the New Zealand Machine Gun Corps as per General Order 496 dated the 31st Jan 1918.
Like their Infantry counterparts, they were to be worn on the center back of the tunic, directly below the collar.
Like their Infantry counterparts, they were to be worn on the center back of the tunic, directly below the collar.
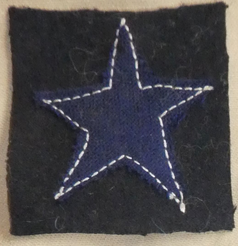
- Above: Headquarters New Zealand Machine Gun Corps - Blue Star on Black square (Ian Hamilton Collection).
|
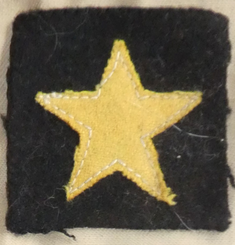
- Above: 1st Coy New Zealand Machine Gun Corps - Yellow Star on Black square (Ian Hamilton Collection).
|
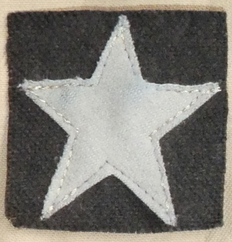
- Above: 2nd Coy New Zealand Machine Gun Corps - Grey Star on Black square (Ian Hamilton Collection).
|
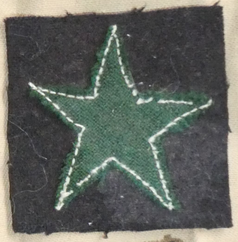
- Above: 3rd Coy New Zealand Machine Gun Corps - Green Star on Black square (Ian Hamilton Collection).
|
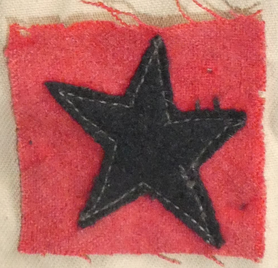
- Above: 4th Coy New Zealand Machine Gun Corps - Black Star on Red square (Ian Hamilton Collection).
|
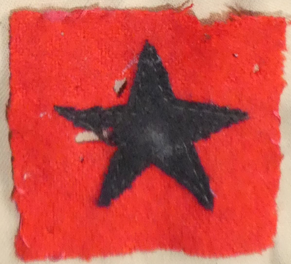
- Above: 4th Coy New Zealand Machine Gun Corps - A variation, this patch is much larger than the others (Ian Hamilton Collection).
|
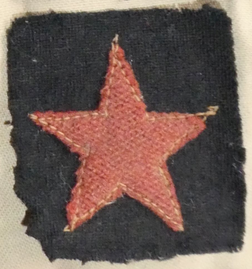
- Above: 5th Coy New Zealand Machine Gun Corps - Red Star on Black square (Ian Hamilton Collection).
|
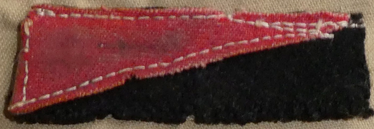
- Opposite: New Zealand Machine Gun Squadron - Red over Black rectangle worn by Machine Gunners who were stationed with the New Zealand Mounted Rifles in the Middle East in WW1. Permited to be worn from the 15th of July 1917 as per General Order 359, and on the left side of the slouch hat, on the Puggaree (Ian Hamilton Collection).
Fakes & Forgeries
Below is a copy of the New Zealand Machine Gun Corps Cap badge. This is not the only one. For many year a gilt brass, die stamped version has been produced in the UK, I presume from original dies, which has a slider to back. This version has
- Detail is OK to front, but one piece. Originals have the "NZ" brazed to base of the crossed guns.
- To back, its all wrong. Usually the NZMGC badge has three lugs, and this can be seen in the blue circles to the below center picture.
- To back is stippled and pitted, with a flat filed area (red circles), where the excess brass has been removed and filed down flat from the mold.
- Two short copper brass lugs are brazed on, but are not a type encountered on the originals, which should be three anyway.
- Size 45mm by 50mm.
|
|
|
|
New Zealand Cycle Corps
The New Zealand Cyclist Corps was formed in April 1915, though units of cyclist had existed prior to 1911 as part of the Volunteer Militia throughout New Zealand.
During WW1 the Kiwi's combined with the 2nd Australian Divisional Cyclist Company to form the 2nd ANZAC Cyclist Battalion.
The New Zealand Cyclist Corps was disbanded in England in May 1919.
Motto: (none in the 1st NZEF - as noted in R17187868 AALI W3508 7291 Archives NZ)
During WW1 the Kiwi's combined with the 2nd Australian Divisional Cyclist Company to form the 2nd ANZAC Cyclist Battalion.
The New Zealand Cyclist Corps was disbanded in England in May 1919.
Motto: (none in the 1st NZEF - as noted in R17187868 AALI W3508 7291 Archives NZ)
|
- Above: A bronze, darkened, Officers Cap Badge to the New Zealand Cyclist Corps. It has three tangs or blades to back, with one at the top, behind the crown, and one either side, at base. Maker plaque behind crown, to "J R Gaunt London". Size 42mm by 45mm.
|
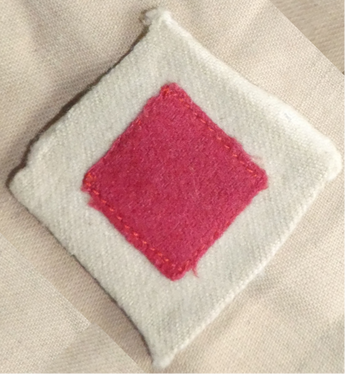
- Above: New Zealand General Order 495 allowed for the New Zealand Cycle Corps to wear a distinctive patch from the 31st of Jan 1918. A Red diamond within a White diamond. This was worn on either sleeve, 1 1/2" below the shoulder strap (Ian Hamilton Collection).
|
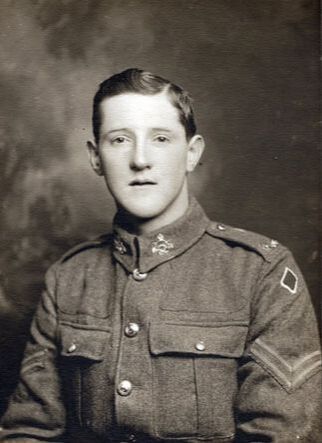
- Opposite: A superb image of 22594 Oscar Bicknell who haled from Greytown in the Wairarapa. He started his serice on the 10th of May 1916, as part of the F Coy, 16th Reinforcements at Trentham. On the 16th of June, he transferred to the Army Service Corps, and was shipped with them to Sling in the UK. It was there that he transferred to the New Zealand Cyclist Corps Reserve on the 15th of Nov 1916. He then left for France on the 9th of Dec 1916.
Oscar was sadly gassed on the 11th of Sept 1917, and evacuated out of the line to Hospital in France. He later joined his unit again on the 10th of Nov 1917.
He would remain with the NZ Cyclist Corps, where he was promoted to Corporal, and the given UK duty in May 1918. He would return to New Zealand on the 30th of that month, and was provisionally discharged on the 16th of Aug 1918, to allow him to work on the Famliy farm under "L.W.P" (Leave Without Pay), but did not prevent him from be called up for further service. He was then finally discharged from the NZ Army on the 8th of Dec 1918.
He served 1 year and 331 days overseas.
Oscar is photoed with his Corporal's chevrons and the NZ Cycle Corps formation patch on his sleeves. He also appears to be wearing the curved brass "N.Z.C.C" title to his shoulder board and a pair of NZCC Collar badges to his tunic (image taken from the Wairarapa Archive).
|
|
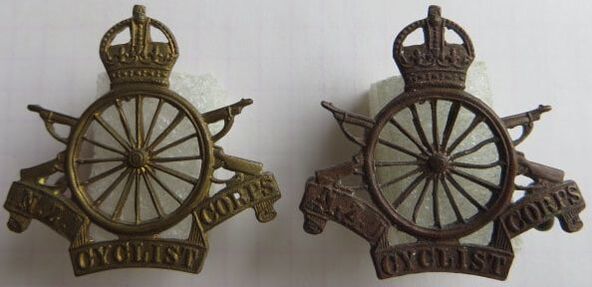
- Opposite & Above: A gilt brass Cap and collar badge set to the New Zealand Cyclist Corps. All are made by J R Gaunt, and have a plaque ether to lower back, behind the "CYCLIST" part of the banner (Cap badge) or behind the crown (Collar badges). All have D shaped copper looped lugs to back. Cap badge size 42mm by 45mm, and Collar badge size 39mm by 35mm
|
|
|
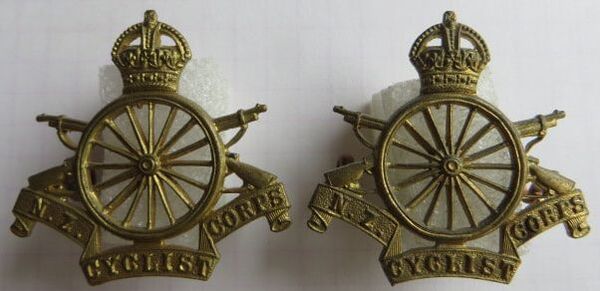
- Opposite & Above: A gilt brass Cap and Collar badge pair to the New Zealand Cyclist Corps. Copper looped lugs to back to Cap badge, while the Collars have two D shaped looped lugs. No maker mark. Cap badge size 44mm by 47mm, while Collar badge size is 34.5mm by 35.5mm
|
|
- Above: A variation in brass Collar badge to the New Zealand Cycle Corps. Thicker detail, with non-void crown and less definition between the spokes. This is die stamped, with two copper looped lugs to back. No maker mark. Size 33mm by 35.5mm.
|

- Above: A pair of gilt brass shoulder titles to the New Zealand Cycle Corps. Both are marked "J R Gaunt, London" to back, and have two hex type lugs. Size 14.5mm by 52mm.
|
Fakes and Forgeries
Below is a copy of the New Zealand Cyclist Corps Cap badge. Relatively easy to spot as quality is not great.
- Detail is OK to front, but note the finish to the spokes to center, with small rough patches of brass between the spokes.
- To back, its all wrong, with lack of die-stamped, reverse detail.
- To back is stippled and pitted, with a flat filed area at base, behind the lower banner, where the excess brass has been removed and filed down flat from the mold.
- Two looped lugs are brazed on, but are not a type encountered on the originals.
|
|
|
Long Range Desert Group
The Long Range Desert Group formed in June 1940 in Egypt with the goal of carry out deep penetration, covert reconnaissance patrols and intelligence missions from behind Italian lines, although sometimes they also engaged in combat operations.
Initially the unit was made up of mainly New Zealanders, and called the Long Range Patrol (LRP). This changed as numbers were also augmented with Southern Rhodesian and British volunteers.
They were highly successful, and the unit became legendary.
The kiwi's were to remain with the unit until just after May 1943, when they were withdrawn back to their original units.
|
- Above: A cast brass cap badge to the Long Range Desert Group. Worn to detail to front, but correctly fretted between the letters, with the legs of the Scorpion in the correct places. Size 34mm diameter.
|
- Above: Another Cap badge in Gilt brass to the Long Range Desert Group. Much better detail, with the finish now toned (Ian Hamilton Collection).
|
- Above: A British made, cast brass Cap badge to the LRDG (Ian Hamilton Collection).
|
|
- Above: A Cap badge worn by 1290 Trooper L. A. (Bill) Willcox, MM, of the 2NZEF. Bill was part of 2 Divisional Cavalry Regiment, which became the LRDG. His MM was gazetted on the 31st Jan 1941 for action at Ain Dua, Libya (Ian Hamilton Collection.
|
- Above: A LRDG Cap badge purportedly made in New Zealand (Ian Hamilton Collection).
|
- Above: A Cap badge size, sweethearts badge in Silver to the LRDG. Brooch fitting to back (Ian Hamilton Collection).
|
|
- Above & Opposite: A gilt brass Cap badge with backing cloth to the Long Range Desert Group. It is accompanied with a letter of authenticity from the Secretary of the New Zealand Long Range Desert Group Association (Tim Vincent Collection).
|
|
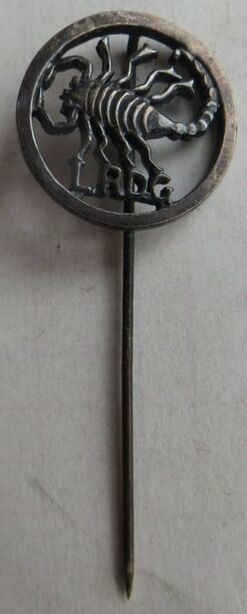
- Above: A small Silver unit lapel badge to the Long Range Desert Group. Marked "Stg Sil" and "TMJ". It was made by Taranaki Manufacturing Jewelers of Stratford. Size 19mm diameter.
|
|
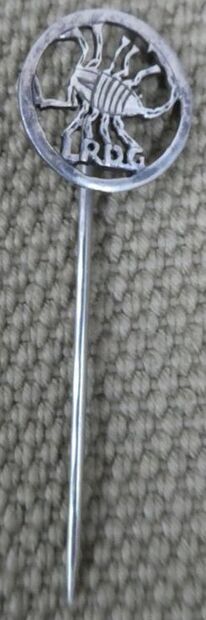
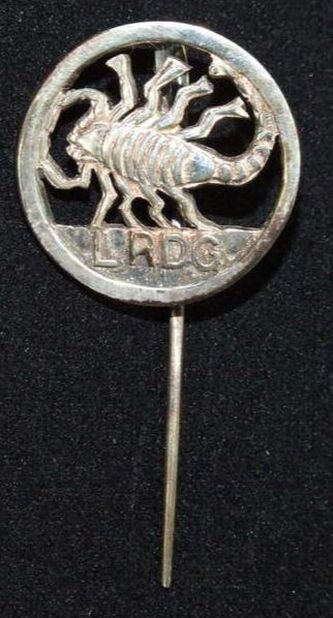
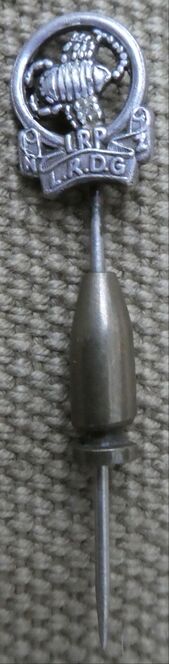
|
- Opposite: A extremely rare New Zealand Long Range Patrol lapel pin in Silver (Ian Hamilton Collection).
- Above: Another extremely rare badge, a New Zealand Long Range Patrol Association badge. Its estimated that some 70 odd Stirling Silver badges were made in Egypt during the war, and presented to surviving members to wear at the time. In Feb 2019, one of these badges came up for sale on a New Zealand Auction site, and sold for $17, 180 NZD or just under 10,000 euros. An amazing sum for a piece of Silver no larger than 35mm in height! |
|
- Above: A period LRDG Sweethearts badge made in Egypt in Silver, for a Kiwi. Note the "Kia Ora" or Hello in Maori to the top. Brooch fitting with a safety chain attachment (Ian Hamilton Collection).
|
- Above: A darkened bronze, small than a regular Cap badge pin, to the LRDG. Made by "Bock" of Wellington, with brooch fitting to back (Ian Hamilton Collection).
|
- Above: A 1980's reunion badge, given to veterans of the LRDG (Ian Hamilton Collection).
|
|
- Above: A New Zealand made (Hansen & Berry) 50th Reunion badge to the LRDG (Ian Hamilton Collection).
|
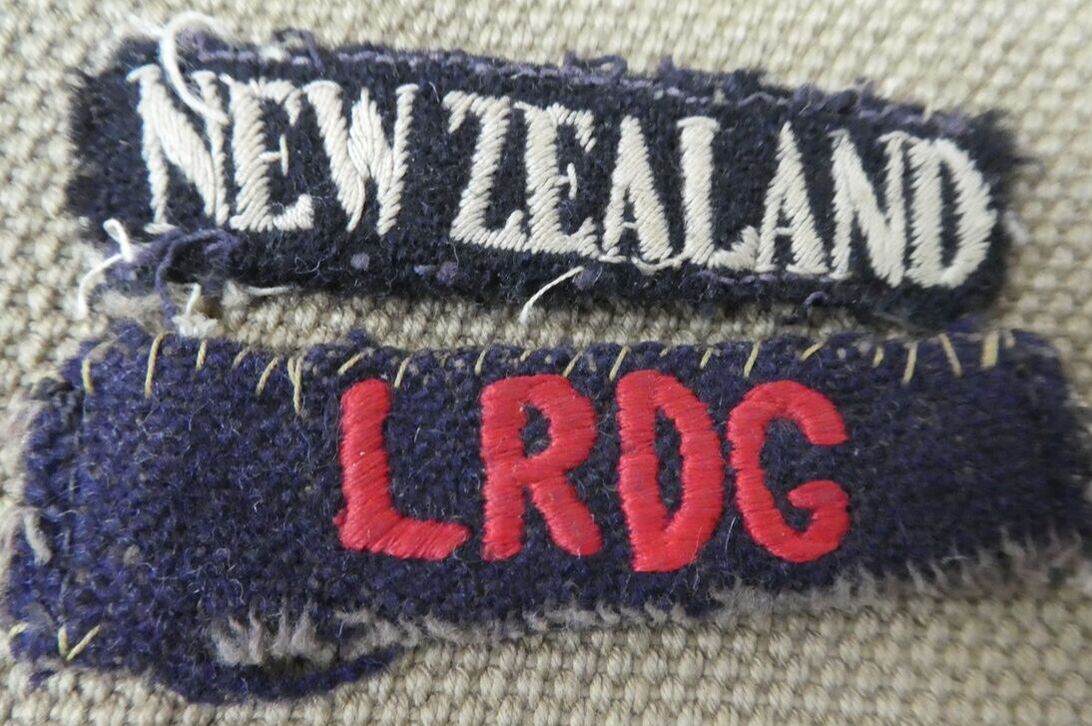
- Above: A WW2 era shoulder title set to a Kiwi member (obtained from a Vets Sister) of the LRDG (Ian Hamilton Collection).
- Opposite: A LRDG NZ made Veterans blazer badge. Approximately 100mm in diameter (Ian Hamilton Collection. |
|
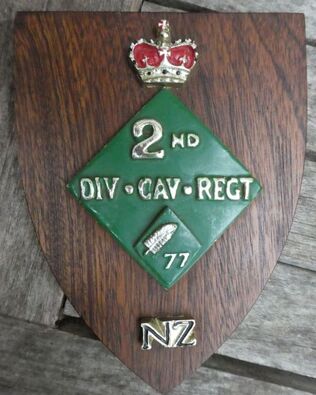
|
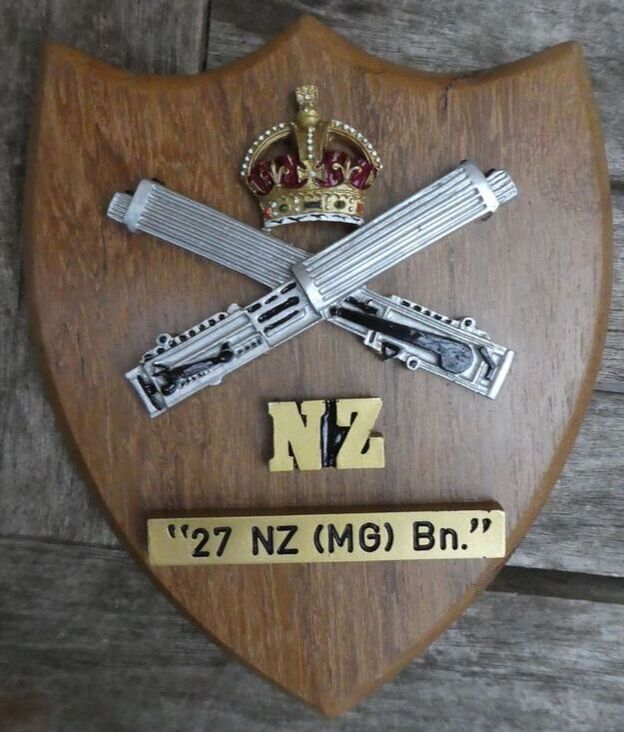
|
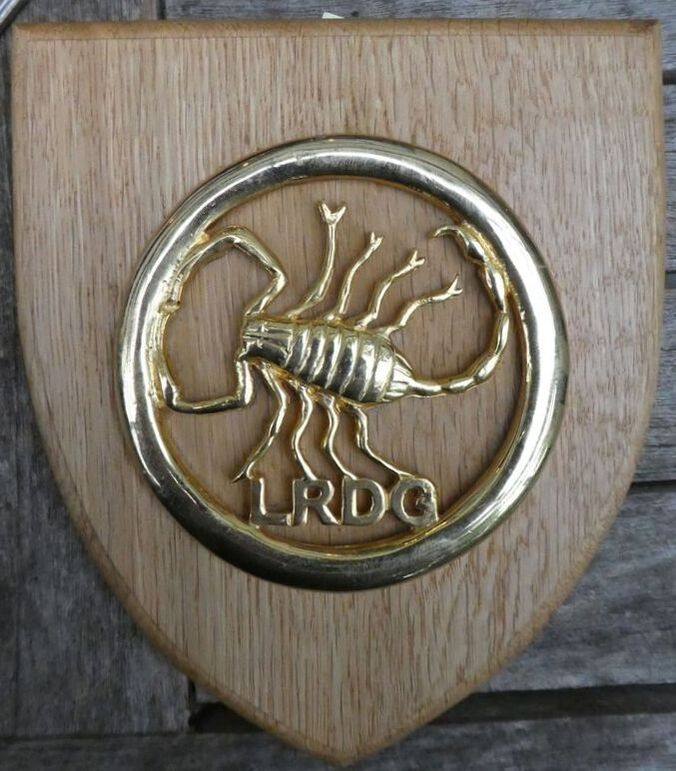
|
- Above: Three wooden Veterans plaques from members of the LRDG. The right was owned by Ian Judge, a ex member of the LRDG (Ian Hamilton Collection).
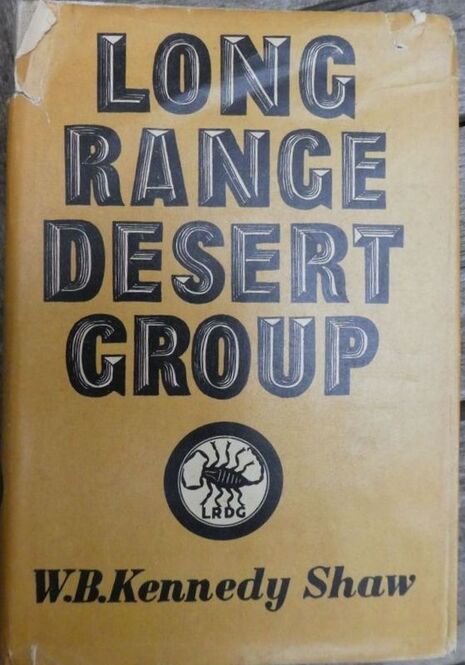
- Above & Opposite: A book taken by 1290 Trooper L. A. (Bill) Willcox, MM to LRDG reunions for Ian Hamiton, and where Bill was able to collect signatures of veterans for him (Ian Hamiton Collection).
|
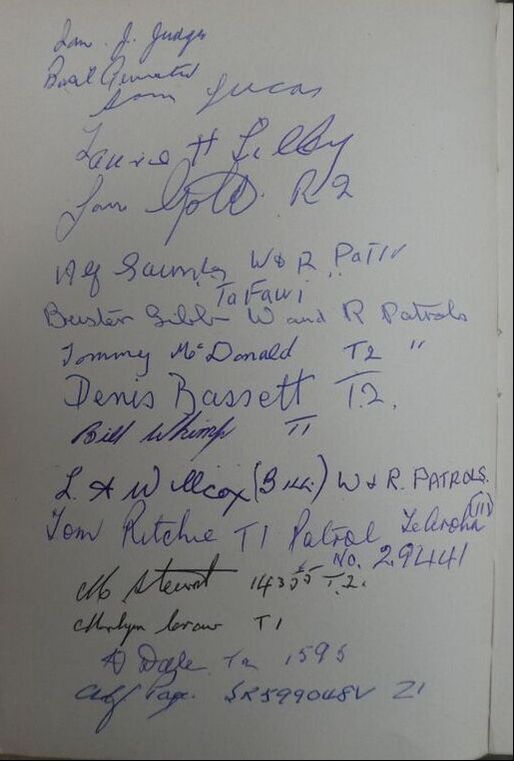
|
Fakes and Forgeries
- Opposite: Anything Long Range Desert Group is faked, with the most common being the Cap badge. Opposite is probably around the 1980's in make, its in brass, which has toned with 40 odd years of age. This is by no means a definitive list of what to look for, but its a start. The likelihood of finding a badge from a Vet, with 100% provenance is slim now-a-days, and with price between $1000 to $3500+ NZD for a genuine badge, the fakers are getting better.
1. Note the stippling to outer border wreath, originals are smooth.
2. This is currently the biggest give-a-way. On originals, the tail of the Scorpion does NOT touch its 3rd leg.
3. On this fake, there seems to be two ridges on the inner and outer edge. The above examples have a single ridge on the inner edge.
4. On originals, the letters are fretted out for the inside of the top of the "R", "D" and inside of the "G", plus they are joined at the lower base between each other. Note I have recently seen a badge which sold with the tail touching the foot, but with the letters fretted out possibly by hand. It did have a smooth border, with the inner ridge. Fakers getting better?
Royal New Zealand Army Medical Corps
The New Zealand Medical Corps has a long history, with volunteer units or companies forming in the early 1900's in the 5 Volunteer Military districts.
From 1911, the New Zealand Army Medical Corps formed, with its Territorial counterpart, the New Zealand Medical Corps.
From 1911, the New Zealand Army Medical Corps formed, with its Territorial counterpart, the New Zealand Medical Corps.
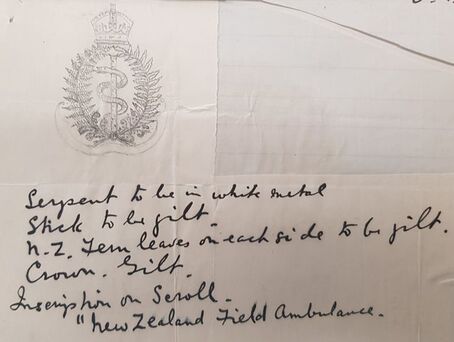
- Opposite: In 1911, the New Zealand Army Headquarters asked all units to submit badge designs for their units. The G.O.C (General Officer Commanding - General Godley) reviewed and approved most designs. He pushed back on units such as the NZ Field Artillery, New Zealand Garrison Artillery, Corps of Signals and the units of the New Zealand Field Ambulance, who wanted individual badges. General Godley was in favour of universal patterns for most Corps. This design by the New Zealand Field Ambulance was rejected in favour of a similar badge described as follows:
Cap Badge - On the 10th of July 1911, approval was given for a "Badge of the R.A.M.C. (substituting lettering "New Zealand Medical Corps" below), & Motto "Semper agens - Semper quietus"".
(Badges - Regimental - Territorial Force, R23534556 AD1 AAYS 13-13 Archives NZ).
Motto: SEMPER AGENS - SEMPER QUIETUS (Always alert, always calm).
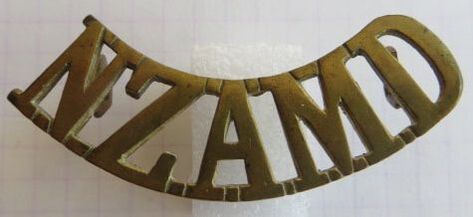
The badge has had a long life, but there are numerous variations in style of crown, materials used, and the wording to the lower banner of the badge.
- Opposite: A pre 1911 shoulder title to the New Zealand Amy Medical Department (N.Z.A.M.D). This was part of the Permanent Force of the New Zealand Army.
- Opposite: A pre 1911 shoulder title to the New Zealand Amy Medical Department (N.Z.A.M.D). This was part of the Permanent Force of the New Zealand Army.
|
- Above: A gilt brass Cap badge to the New Zealand Army Medical Corps. Worn from 1911, by the permanent Force of the New Zealand Army. These badges are scarce , as the Corps must have been very small. Hex type brass lugs to back.
Opposite: A pair of gilt brass New Zealand Army Medical Corps Collar badges. Note one has a void crown. Both have two hex type brass lugs to back (Ian Hamilton Collection). |
- Above: A matching pair of gilt brass collar badges to the New Zealand Army Medical Corps. Note the lower banner and just the letters "N.Z.A.M.C" opposed to the full wording to the Cap badge opposite. Two brass looped lugs to the back of each.
|
The wording to the badges falls broadly into the following periods:
- From 1911 the Permanent Forces Medical Department was formed into the New Zealand Army Medical Corps (N.Z.A.M.C).
- From 1911 the Territorial Medical Force was formed into the New Zealand Medical Corps (N.Z.M.C).
- From about 1915 – 1923 a badge with the words N.Z Medical Corps in the lower banner was worn.
- During WW1 - a badge with the words New Zealand Medical Corps in lower banner was worn.
- In 1947, the Territorial and Permanent Force Medical units combined to form the Royal New Zealand Army Medical Corps.
|
- Above: A gilt fired brass and Silver (not marked) Officers Cap badge to the Territorial "N.Z.M.C." (New Zealand Medical Corps). Blade or tangs to back, but no maker mark.
|
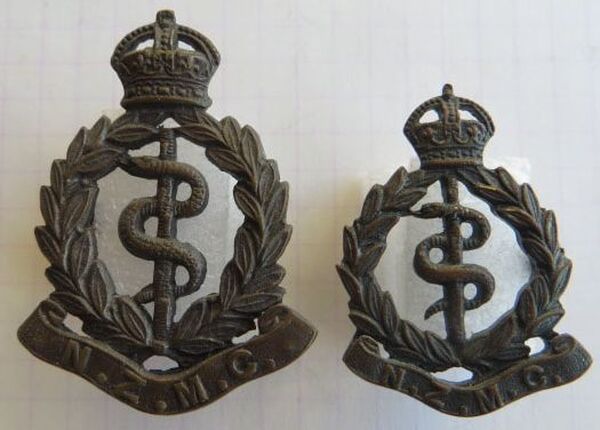
- Above: A interesting matching Cap and Collar badge in darkened bronze to a Officer in the Territorial "N.Z.M.C." Note these are two piece, with a separate lower banner held on by wires. No maker mark. Copper looped lugs to the back of each.
|
|
Stokes & Sons of Melbourne made a number of badges for the New Zealand Army around the period of WW1. Above are two Cap badges to the N.Z.M.C.
- Left: A gilt brass, solid backed Cap badge to the N.Z.M.C. Two copper round looped lugs to back and the maker mark, stamped into the lower back if the banner to "Stokes & Sons, Melb". - Right: A darkened bronze, solid backed Cap badge to the N.Z.M.C. Two copper round looped lugs to back and the maker mark, stamped into the lower back if the banner to "Stokes & Sons, Melb". |
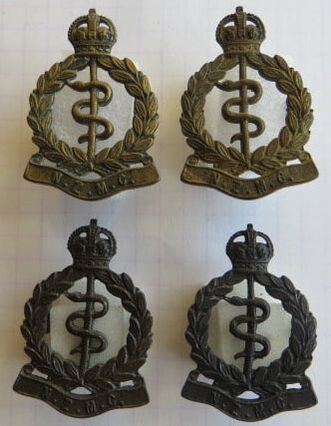
- Above Top: Gilt brass collar badges to the Territorial "N.Z..M.C." Both have two copper round looped lugs to back, and the maker mark of "Stokes & Sons, Melb". One has its stamped into back, while the other has it in raised letters. Both are solid backed.
- Above Bottom: Same as above, but in a darkened bronze finish. Solid backed and with the maker mark of "Stokes & Sons, Melb". They too, come in stamped or raised letters. |
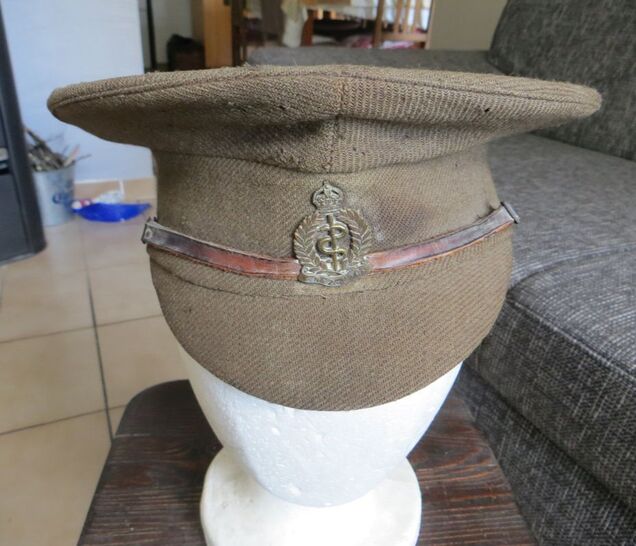
- Above: A rare NZ made WW1 era peaked cap, with a N.Z.M.C Cap badge to front. The badge is the solid backed type, in gilt brass, made by "Stokes & Sons, Melb".
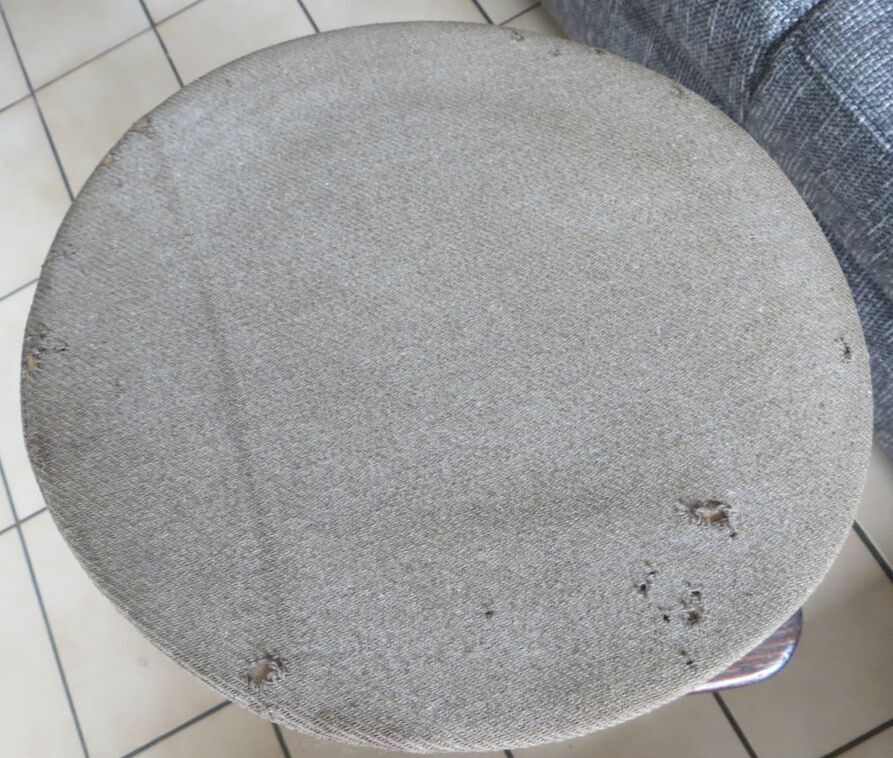
- Above: Same hat, showing the top, which is reinforced to edge, inside, with a metal ring, to hold its shape.
|
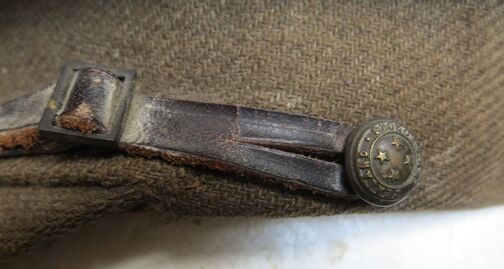
- Above: Same hat, showing the small Post 1911 patt New Zealand Forces buttons to side, securing the chin-strap.
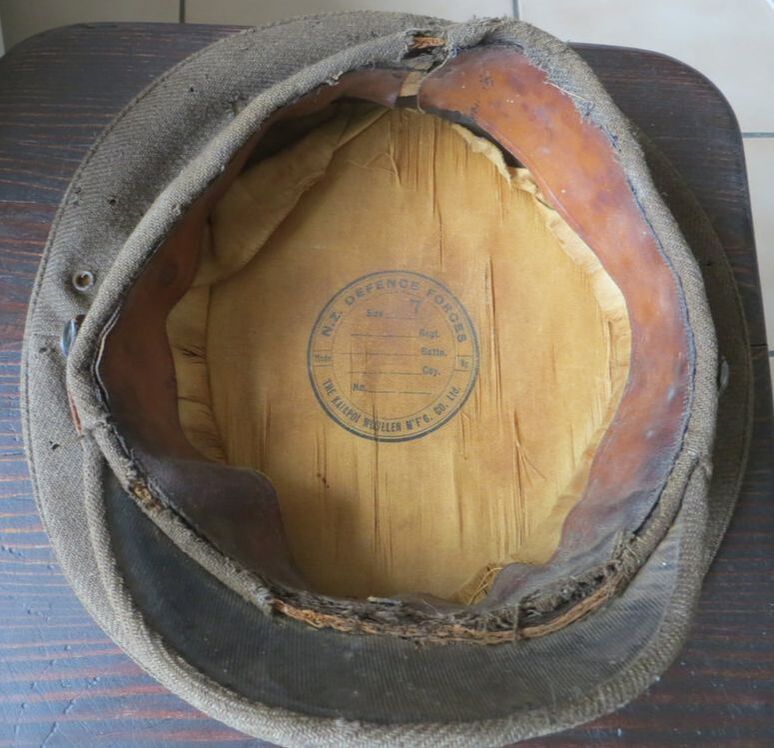
- Above: Showing the inside of the hat with lining and leather sweat band. Note the duel riveted vent holes to side.
|
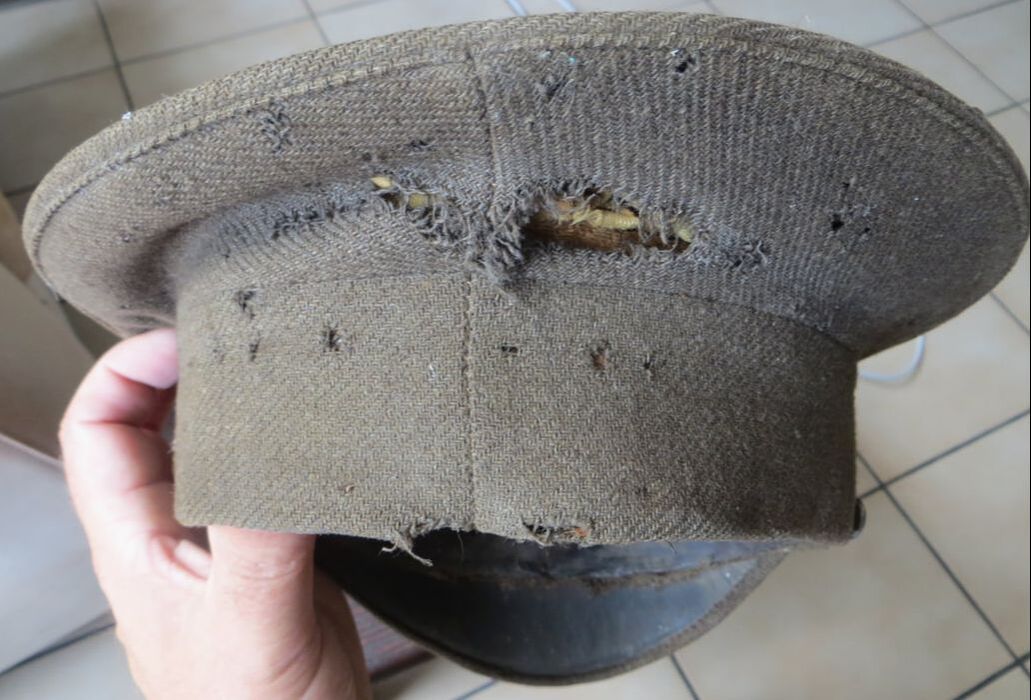
- Above: Time and moth have been hard on this hat. Just a rear view
|
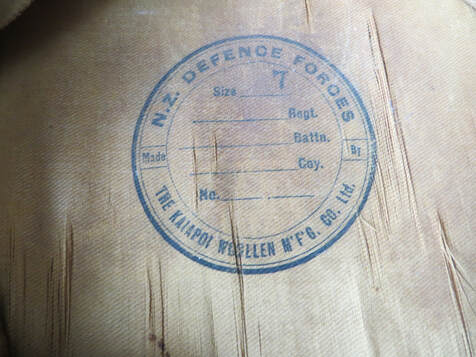
- Above: A close-up of the make mark, stamped to the inside of the liner indicating a size "7" and made by the Kaiapoi Woolen M.F.G. Co Ltd. Sadly the details of the owner were not filled out.
|
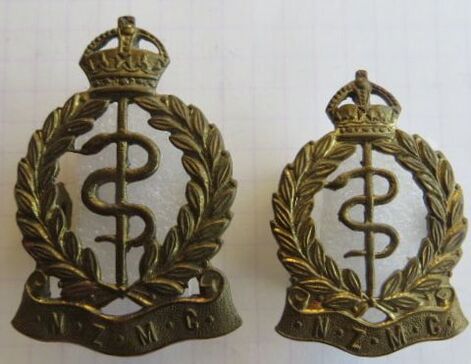
- Above: A die stamped, gilt brass Cap and Collar badge to the N.Z.M.C.
A slightly elongated style of badge, with both having two hex type brass lugs to back. |
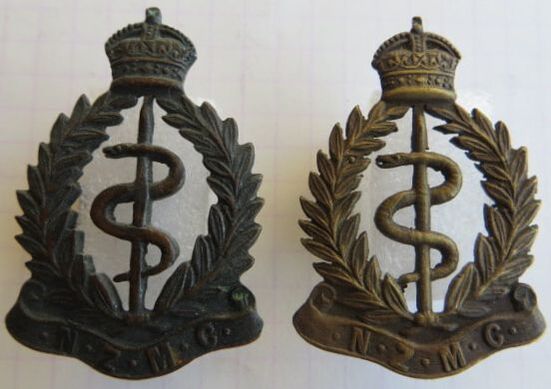
- Above: Another variation in style of the N.Z.M.C Cap badge. The badge on the left, is solid to back and in darkened copper, while the right is in die stamped brass. Both have thin wire type lugs to back. Note the crown, which is in a different style.
|

|
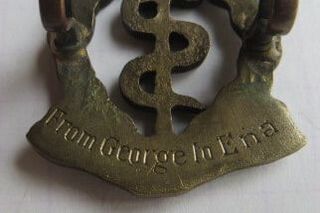
- Opposite Left: A solid backed Cap badge to the New Zealand Medical Corps. This is in gilt version, which has been brooched to back. No maker mark.
- Opposite Right & Above: A solid backed Collar badge to the New Zealand Medical Corps. Two copper looped lugs to back, and a inscription has been engraved "From George to Ena". |
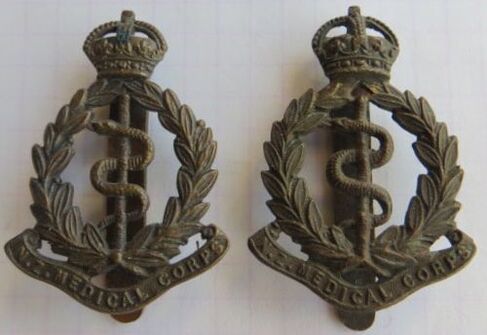
From 1915 to 1923, badges were also worn with "N.Z. Medical Corps" to lower banner.
- Above Left: A darkened brass Cap badge, with slider to the N.Z. Medical Corps. No maker mark. - Above Right: Same again, a darkened brass Cap badge, with slider to the N.Z. Medical Corps. No maker mark. Just light difference in crown and wreath. |
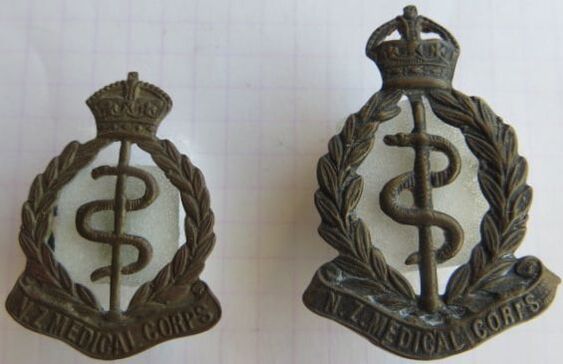
- A die stamped gilt brass Cap and Collar badge to the N.Z. Medical Corps. Both have two thin wire loops to back. Not matching, as they have different crowns and wreaths. No maker mark.
|
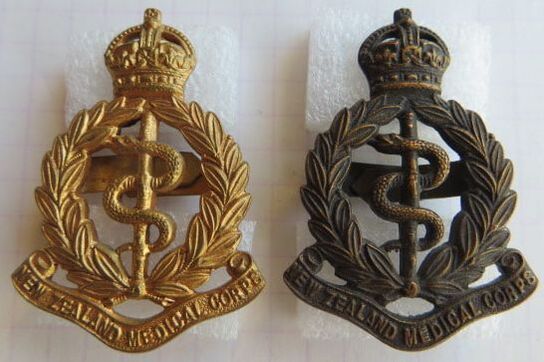
During WW1 and beyond, the badge with the title "New Zealand Medical Corps" was worn.
- Above Left: A semi-solid gilt brass Officers Cap badge to the New Zealand Medical Corps. Maker plaque to the back of the crown to "J R Gaunt, London". Two tangs to back. - Above Right: A semi-solid darkened bronze Officers Cap badge to the New Zealand Medical Corps. Maker plaque to the back of the crown to "J R Gaunt, London". Two tangs to back. |
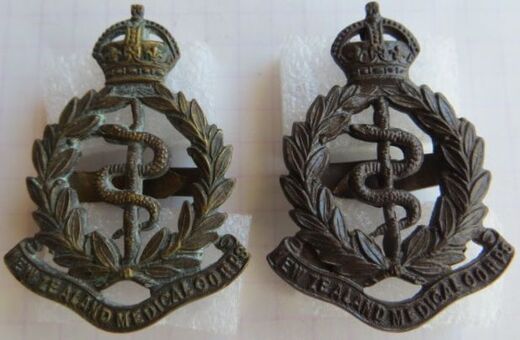
- Above Left: A semi-solid darkened brass Officers Cap badge to the New Zealand Medical Corps. Maker impressed to to back to "J R Gaunt, London". Two tangs to back.
- Above Right: A semi-solid darkened bronze Officers Cap badge to the New Zealand Medical Corps. No maker and two tangs to back. |
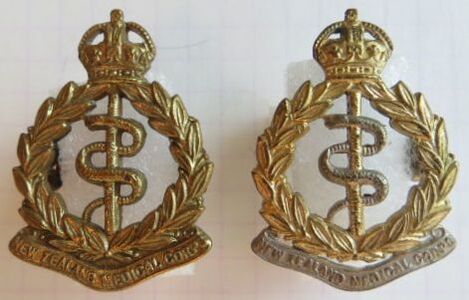
- Above Left: A solid backed, gilt brass Collar badge to the New Zealand Medical Corps, with the maker mark impressed in a curve to back to "J R Gaunt London". Two D shaped looped copper lugs.
- Above Right: A scarce single piece, Silver with gilt finish Collar badge to the New Zealand Medical Corps. Maker mark to top back to "J R Gaunt London", which is impressed. Two D shaped copper looped lugs to back. |
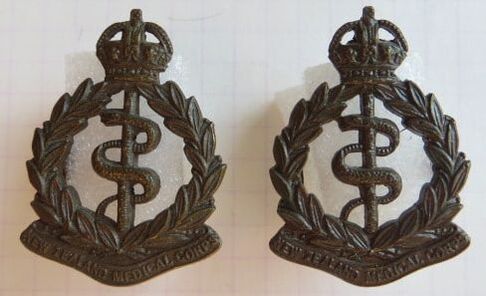
- Above: A pair of darkened bronze collar badge to the New Zealand Medical Corps. Solid to back, with both having a maker mark impressed to "J R Gaunt London". One maker mark is straight, while the other is in a curved pattern. Both have two copper looped D shaped lugs.
|
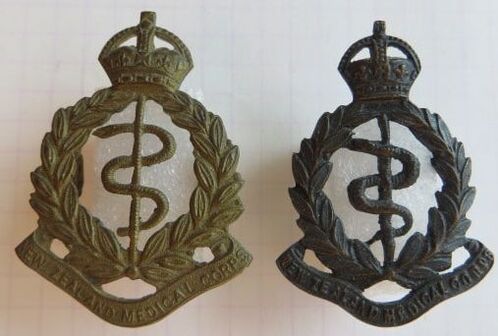
- Above Left: A die stamped, gilt brass Cap badge to the New Zealand Medical Corps. Not maker marked and with two hex type brass lugs to back. Probably New Zealand made.
- Above Right: A darkened Copper Cap badge to the New Zealand Medical Corps. This is solid to back, with two long copper looped lugs. No maker mark. |
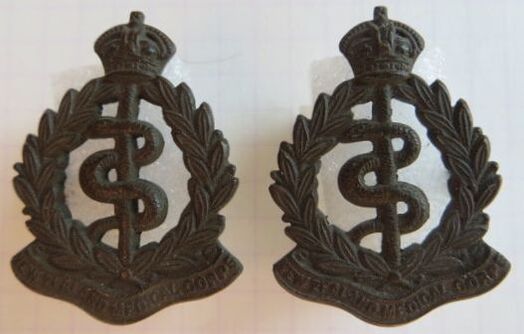
- Above: A matching par of darkened Collar badges to the New Zealand Medical Corps. Solid to back, but with no maker mark. They have thick copper wire lugs to back, similar to what is found on Stokes & Sons of Melbourne made badges.
|
|
- Above: A gilt brass Cap badge to the New Zealand Medical Corps. Two D shaped looped lugs to back and a maker plaque, behind crown to "J R Gaunt, London".
|
- Above: A matching pair of gilt brass Collar badges to the New Zealand Medical Corps. These both have D shaped copper looped lugs to back and a maker plaque, at base back to "J R Gaunt, London".
|
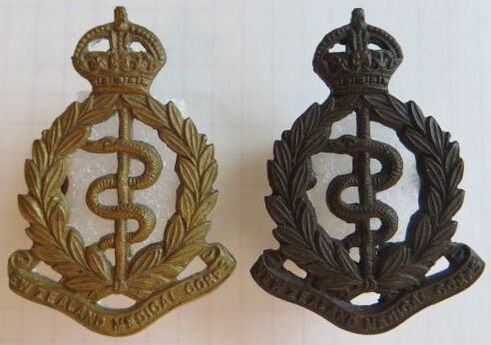
- Above Left: A gilt brass Cap badge to the New Zealand Medical Corps. Two looped lugs to back, but no maker.
- Above Right: A semi-solid Copper Cap badge to the New Zealand Medical Corps. Similar design to the gilt badge, but again no maker mark and two looped lugs to back. |
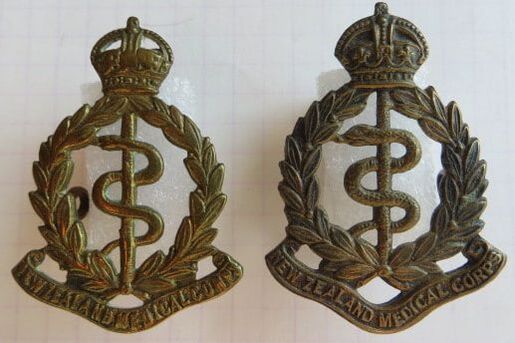
- Above Left: Variations in design. A gilt brass Cap badge to the New Zealand Medical Corps. Narrower crown, with two copper looped lugs. No maker mark.
- Above Right: A solid crowned gilt brass Cap badge to the New Zealand Medical Corps. Two copper looped lugs and no maker mark. |
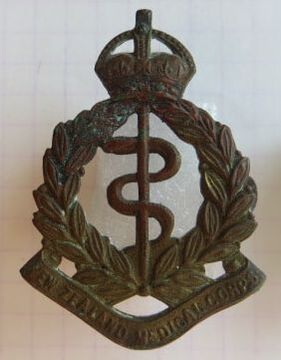
- Above: Another one of these WW1 New Zealand made NZ Medical Corps Cap badges. This has twisted copper wire lugs to back, which are also found on the NZMP Cap Badge and a number of other badges of the era.
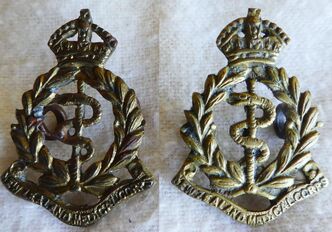
|
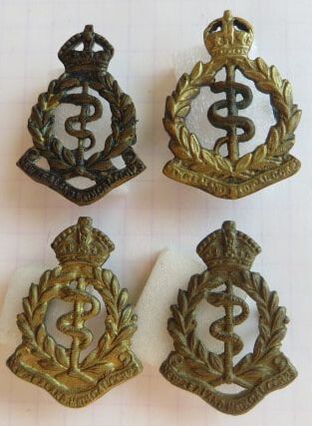
- Above Top Left & Bottom Row: A slightly small Collar badge to the New Zealand Medical Corps. All three are slightly different as they have various parts voided, but no two are the same. Short copper looped lugs to back and no maker mark.
- Above Top Right: A sand cast Collar badge to the NZ Medical Corps. Two ribbon like lugs are cast into the back of the badge. No maker mark. - Opposite: A matching pair of small type Collar badge with the banner "New Zealand Medical Corps". Voided crowns with copper looped lugs to back (Ian Hamilton Collection". |
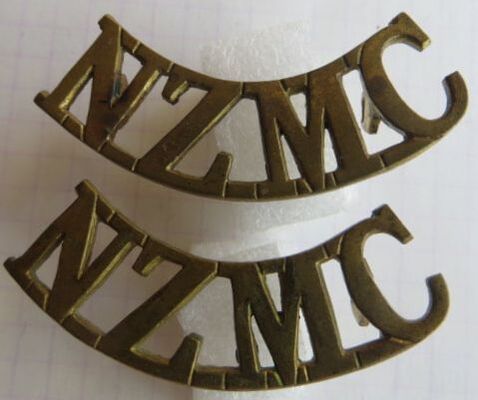
- Above: A pair of matching gilt brass shoulder titles to the New Zealand Medal Corps. Impressed to back to "J R Gaunt, London". Short hex type brass lugs to back.
|
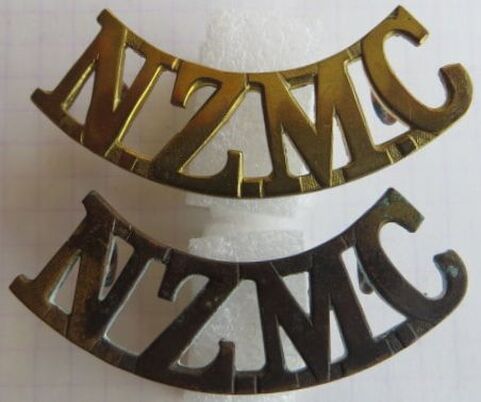
- Above: A pair of brass shoulder title to the New Zealand Medical Corps by "Stokes & Sons, Melb". Copper looped lugs to back. Note the stippled finish between the letters to front, a characteristic of this manufacturer.
|

- Above: A group shot of 4 New Zealand Medical Corps chaps taken in 1915. To back is the note in pen "Dear Millie, Have not received that promised photo of yours yet. This was taken in Cairo (Egypt) by gas light the other night. We are still in the land of sand script sorrow. Love from Bill." It was to a Miss M Kirkman, P.O, Napier, N.Z.
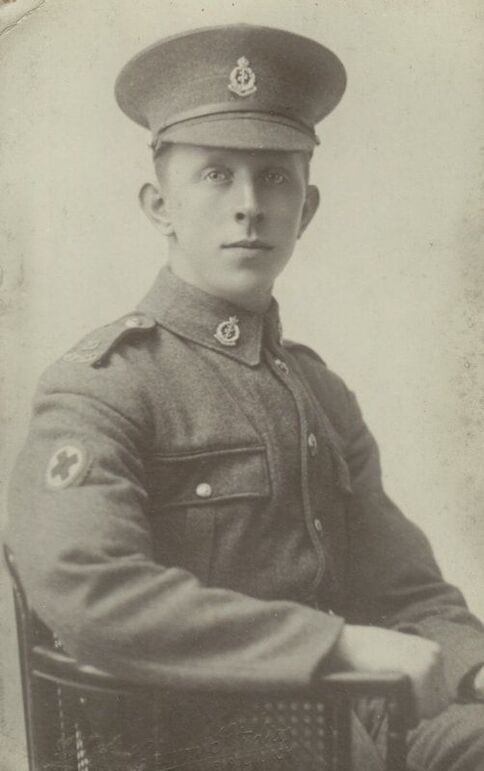
|

|
- Above: Two images of 3/2611 Pte. William Henry Barker, who started his service as part of the 20th Reinforcements, New Zealand Medical Corps. In the photo on the left, he wears a peaked cloth cap with a NZMC Cap badge, and matching collars to his tunic (what type of banner, I cannot see). On his shoulder boards are the number "20" for 20th Reinforcements, and "N.Z.M.C" in brass. He also has a Medical trade patch, in the form of a "Geneva Cross" to his upper left sleeve. The right image is similar, but without the cap.
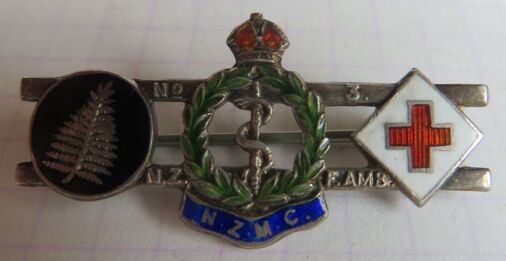
- Opposite: A WW1 era Stirling Silver bar broach commemorating the 3rd New Zealand Field Ambulance which served in France and the western front. To the left is the New Zealand Division Symbol, center a New Zealand Medical Corps Cap badge, and right a Red Cross Symbol. On the bar of the brooch are the words "No 3. N.Z. F Amb".
From the Auckland Star - 15th Feb 1918 - Page 3
"Mr. J. F. Bailey, of Auckland, has received a very striking tribute of the esteem and liking with which his brother Lee, Corporal Joseph Bailey, of the New Zealand Medical Corps, who was killed in the Somme Battle, was regarded. The unit of which Corpl. Bailey was a member has sent a gold brooch, very tastefully designed, bearing a small reproduction of the Medical Corps regimental badge, flanked by a red cross and a fern leaf. In an accompanying letter Lieut.-Colonel Hardie Neil says: "The brooch is a token of the affection and esteem with which Corporal Bailey was regarded. We have not forgotten him and the New Zealand Divisional Orchestra, which undoubtedly owes its origin to him... I personally cannot help regretting his death still, for he was responsible for some of our happiest hours, and was very loyal and helpful." Corporal Bailey enlisted with the Rifle Brigade, to which he was attached in the Medical Corps."
- 3/1752 Lance Corporal Joseph Bailey was Killed in Action on the 16th of September 1916 at age 44. His occupation prior to WW1 was a Musician. He was assigned to the 3rd New Zealand Field Ambulance on the 15th of March 1916, but there is no mention of him ever being with the New Zealand Rifle Brigade on his service record. Joseph is buried at Caterpillar Valley Cemetery, Longueval, the Somme, France.
- 3/1307 Lieutenant-Colonel James Hardie Neil. A long service Officer, who saw action in the Boer War, WW1 and WW2. He commanded 3rd New Zealand Field Ambulance during WW1.
Not only did this brooch come in gold and enamel, silver and enamel, but also a gilt brass and enamel version exists.
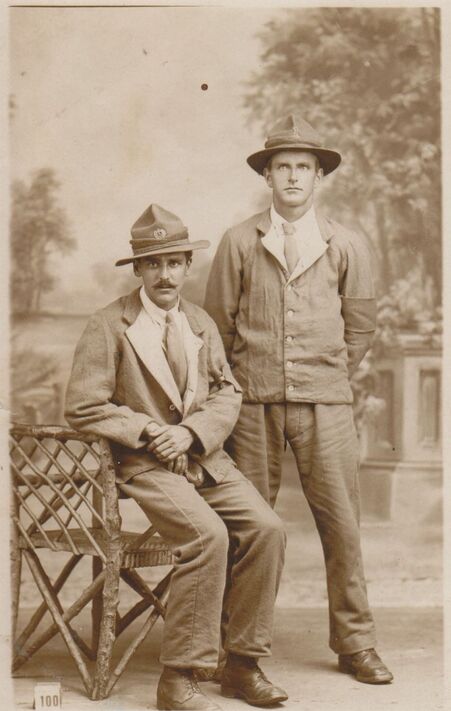
|
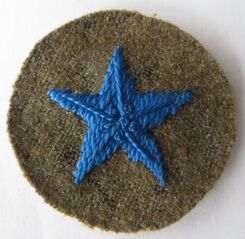
- Opposite: Two New Zealand Soldiers who are Hospital "out-patients", and therefore wearing their hospital blues. This was to be worn while a soldier was attending a hospital or while convalescing.
The uniform consisted of a blue-serge tunic and trousers, with the tunic having white lapels. A white shirt was to be worn with a red tie. I believe they are also wearing a blue band on their left upper arms. The soldier on the left is wearing a 12th (Nelson) Infantry Regiment Cap badge, while the chap on the right, standing, is wearing a NZ Rifle Brigade Collar as a Cap. Sadly not named to back, but taken by "The Fancy Dress Studio, 37 Oxford Street. W". In 1918, if a Soldier was permitted to wear his uniform, two blue stars (see above), which were to be sewn to his tunic collar. This order came in in 1918 and then withdrawn in June 1919. The above star is approximately 40mm in diameter with a pale cotton backing. I have yet to see a photo of these being worn and this could possibly be a proficiency star. |
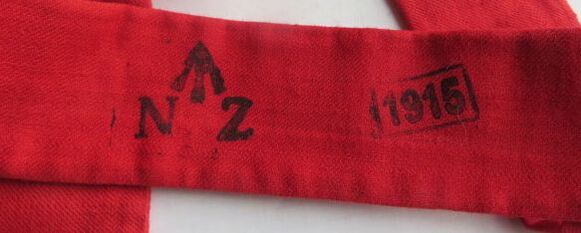
- Above and Opposite: A New Zealand Army marked tie, dated 1915, in Red to be worn with the hospital blues. Approximately 40mm wide at the ends, it narrows to 25mm around the middle, where it would fit on the back of the neck. 1020mm long.
|

|
In August 1916, a special badge was approved to be worn by Officers and Men to indicate whether they had been wounded in the War. The badge consisted of a strip of Russian Braid No. 1, which was 2 inches (50mm) in length. It was to be worn on the left cuff of the sleeve of the tunic, vertically. The Soldier was able to add a additional stripe for every additional wound, but 1/2 and inch to either side of the first (up to 3 could be worn). The award was retrospective, and covered all wounds from the beginning of the war (4th Aug 1914). The Officer or Soldier "qualified" by being mentioned as wounded on the causality lists, and this included being gassed and shell-shock. No award was given for self-inflicted wounds.
A number of metal versions of the stripe were available for purchase at the time, and were more popular than the cloth, which got dirty and was less easily cleaned.
A number of metal versions of the stripe were available for purchase at the time, and were more popular than the cloth, which got dirty and was less easily cleaned.
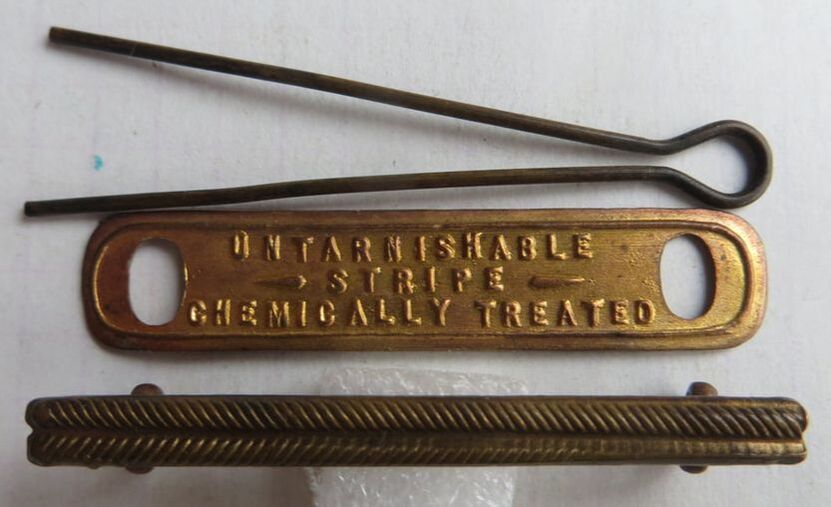
|
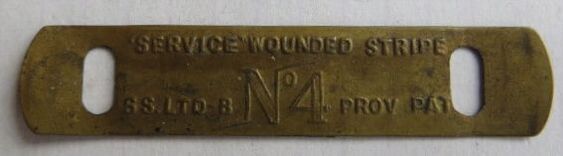
- Above: A backing plate for a gilt brass wound stripe. It states "Service Wounded Stripe No. 4. SS Ltd - B, Prov Pat". It would have a lugged stripe to fit. Size 13mm by 60mm.
- Opposite A similar, complete gilt brass Wound stripe with backing plate and pin. No maker mark to the stripe, which has two looped lugs. The backing plate is marked "Untarnishable Stripe Chemically Treated". Plate size is 10mm by 53mm. Stripe size is 4mm by 52mm. |
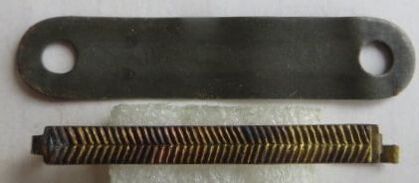
- Above: A two piece, small, plain backing plate type, gilt brass wound stripe. This stripe has two tangs at its ends, which push through the uniform sleeve fold through the backing plate. Plate size is 11mm by 54mm
|
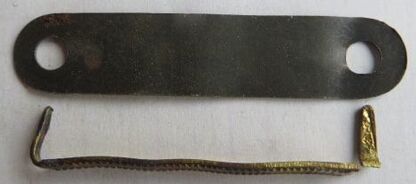
- Above: The same stripe, but side on, which shows the issue with this design, and the folding and unfolding of the tangs eventually causes them to break. No maker mark. Stripe size is 5mm by 40mm.
|
In 1947, the New Zealand Medical Corps was awarded the prefix "Royal" to their title. This then meant a change to their badges.
|
|
- Opposite and Above: A matching Silver and gilt brass set (all marked "S" to back of crown for "Silver" ) to the Royal New Zealand Army Medical Corps with Kings Crown. The cap has long silvered lugs to back, while both Collars have D shaped silvered lugs. Otherwise not maker marked.
|
|
- Above: A gilt brass, other ranks Cap badge to the Royal New Zealand Army Medical Corps with Kings Crown. This a relatively common badge, and it seems to have been issued in large numbers. This badge has two pressed type brass lugs to back. No maker mark.
|
- Above: A similar gilt brass, other ranks Cap badge to the Royal New Zealand Army Medical Corps with Kings Crown. This badge has two thick copper wire lugs to back. No maker mark.
|
- Opposite: A pair of gilt brass, other ranks Collar badges to the Royal New Zealand Army Medical Corps, with Kings Crown.
These Collars are super rare, and were not it seems, issued in great numbers. They are different from the Cap badge, not only in size (smaller), but also as they only have one void area to the center above the lower banner, whereas the Cap badge has three.
This comes in handy when spotting them for sale, as often they are miss-described as Cap badges.
Two thick copper wire lugs to the back of each, with no maker mark.
|
|
- Opposite and Above: A matching set of Cap and Collars badges in gilt fired brass and silver (not marked) to the Royal New Zealand Army Medical Corps with Queens Crown. The Cap has long silvered lugs to back and is impressed to "J R Gaunt London", while both Collars have D shaped silvered lugs, but are not maker marked.
|
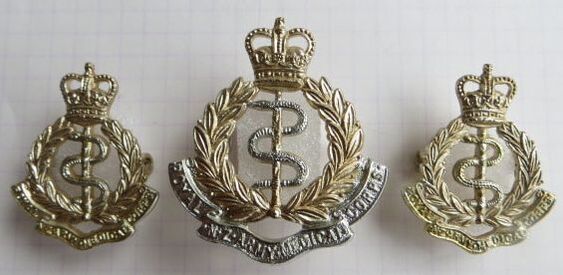
- Opposite: A anodised aluminium staybrite set to the Royal New Zealand Army Medical Corps. These have lugs to back, and the Cap is maker marked to "J R Gaunt, B'ham".
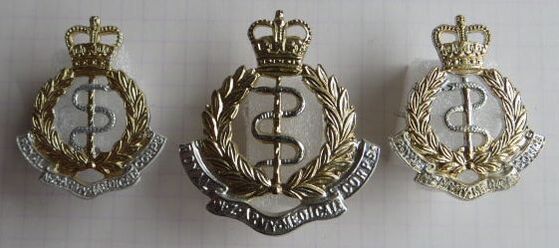
- Opposite: A anodised aluminium staybrite set to the Royal New Zealand Army Medical Corps. These are single piece, two tone, with pins and clutches to back.
The Cap is maker marked to "J R Gaunt, B'ham".
Note the collars are opposing, with the serpents head facing inwards.
The Cap is maker marked to "J R Gaunt, B'ham".
Note the collars are opposing, with the serpents head facing inwards.
|
- Above: A multi-piece gilt and frosted silver Cap badge to the Royal New Zealand Medical Corps. A modern strike of the badge, with slightly enlarged Queens crown. Two long looped lugs to back. No maker mark.
|
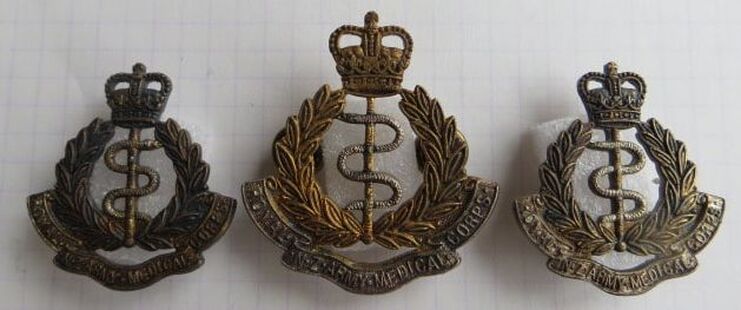
- Above: Again, a modern strike , single piece, darkened metal Cap and Collar badge set to the Royal New Zealand Army Medical Corps. The Cap has screw posts and nuts to back, while both Collars have pins to be used with clutches. Note the opposing heads of the serpents to center. No maker mark.
|
|
- Above: A New Zealand Medical Officers rank collar tab or NZMC Staff Officers collar tab. The New Zealand Forces button measures 13mm in diameter. Backed with red material. No maker mark and size is 79mm long by 33mm wide.
|
- Above: A 1908 pattern, 26.3mm, gilt brass button to the "New Zealand Medical Corps. Maker marked to "J R GAUNT & SON LONDON" (also found in a 25.7mm FIRMIN & SON LD LONDON" - B Jones collection).
|
- Above: A unusual, 1908 pattern, 25.7mm anodised button (with Kings crown) to the "New Zealand Medical Corps" Maker marked to Back to "J R GAUNT & SON LONDON ENGLAND (B Jones Collection).
|
- Opposite Left: A darkened brass, 1908 pattern 19mm button to the "New Zealand Medical Corps" to edge and the maker details for "J R GAUNT & SON, LONDON" to back.
Also comes in (B Jones collection):
- 17mm "E STILLWELL BIRMINGHAM"
- 18.8mm FIRMIN & SON Ltd LONDON
- 19mm J R GAUNT & SON LONDON ENGD
- 19mm J R GAUNT & SON Ltd LONDON ENGD
- Opposite Right: A gilt brass 19mm button to the "Royal New Zealand Army Medical Corps", with Kings Crown and makers details for "GAUNT, LONDON" to back. Post 1947.
- Above Left: A anodised aluminium, in silver tone, with fixed shank and brass backing, 25mm button to the "Royal New Zealand Army Medical Corps". Marker mark to back to "FIRMIN LONDON".
- Above Right: A anodised aluminium, in silver tone, with fixed shank and brass backing, 19mm button to the "Royal New Zealand Army Medical Corps". Marker mark to back to "LONDON BADGE & BUTTON". |
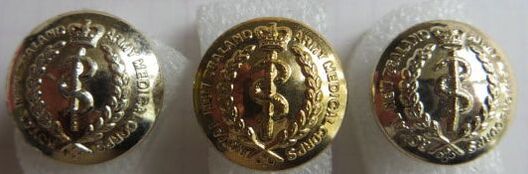
- Above Left: A anodised aluminium, in silver tone, with fixed shank and brass backing, 17mm button to the "Royal New Zealand Army Medical Corps". Marker mark to back to "GAUNT LONDON".
- Above Center: A anodised aluminium, in gilt tone, with fixed shank and brass backing, 16.5mm button to the "Royal New Zealand Army Medical Corps". Marker mark to back to "GAUNT LONDON". - Above Left: A anodised aluminium, in silver tone, with fixed shank and brass backing, 14mm button to the "Royal New Zealand Army Medical Corps". Marker mark to back to "GAUNT LONDON". |

|
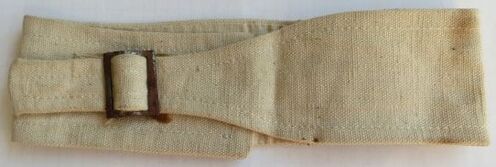
|
- Above Left & Right: A cloth Stretcher Bearer (SB) worn by personnel tasked with retrieving wounded on the battlefield. At the beginning of WW1 this role was usually given to Regimental Band members, but over time it became a specialised role, with members needing basic medical training and the fitness required to rescue soldiers from truly inhospitable conditions. This according to references is probably a WW2 era band, as it has a tapered end which fits into a smaller buckle. Also the letter are printed on in red paint. No other maker marks.
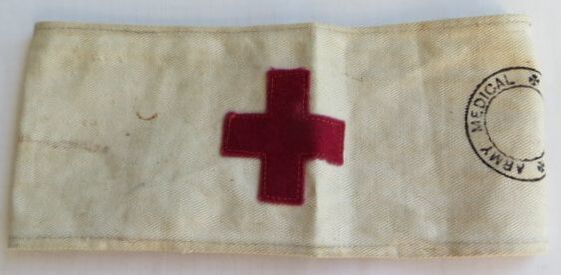
|
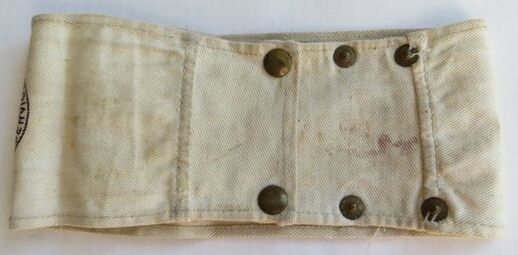
|
- Above Left & Right: A Red Cross armband worn by British and other Commonwealth nations, including New Zealand. This is a British Armband, as it came with a set of WW2 medals to a chap who was in the R.A.M.C and also a Church Cadet. He saw service in North Africa, France and Germany (I have his medals) as part of the Royal Army Medical Corps. White cotton material, with a dark red Cross, sewn separately on to front. 6 poppers to back, to allow for adjustment. It is stamped "Army Medical Service" in ink to front. Some references also say that this pattern of band was worn in WW1.
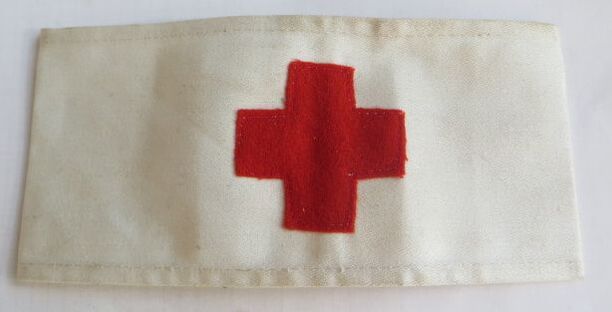
|
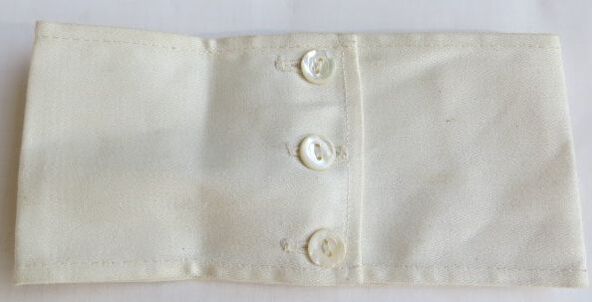
|
- Above Left & Right: A Red Cross armband worn by British and other Commonwealth nations, including New Zealand. This is a two piece band, with a separate red cross sewn to front. Three buttons to back to attach and unattach the band. There are no marking to inside or out.
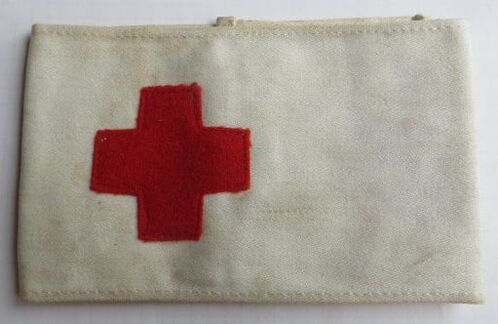
|
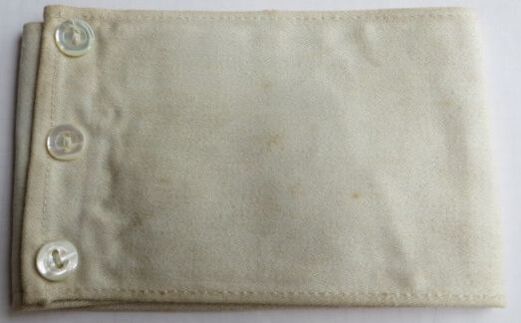
|
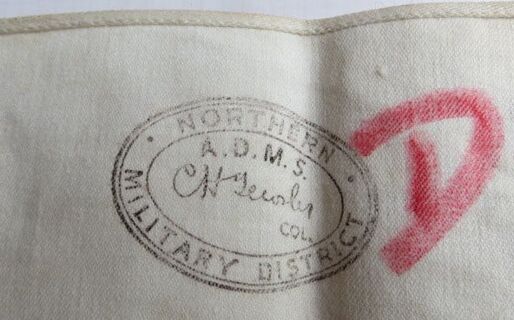
- Above & Opposite: A WW2 date-able Red Cross armband. Typical of the WW2 era, with separate Red Cross emblem sewn onto a white cotton band with three buttons to attach/close the band. On the inside is a black ink stamp to the "Northern Military District, A.D.M.S. C H Tewsley Col."
809516 (3/298 in WW1) Colonel Cyril Hockney Tewsley was the Assistant Director of Medical Services (A.D.M.S.) for the New Zealand Medical Corps in the Northern Military District in 1942. The Northern Military District would have covered the top of the North Island, with the Central Military District covering the other half and included Wellington. The Southern Military District covering the South Island.
(Papers Past - Auckland Star, Issue 34, 10th Feb 1942)
Medical Corps Trade Patch
The following are a selection of Medical Corps Cloth Trade patches. They range from pre WW1 to now. Most are British or Commonwealth patches worn by Medical Corps personnel, including New Zealand, but there are a few from different countries too.
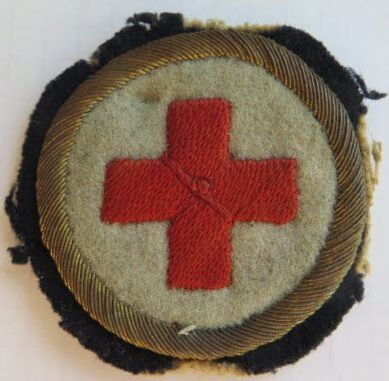
- Above: A early New Zealand Volunteer Medical patch, with red thread cross, on a white background with gold bullion thread to outer boarder on a dark material background. Roughly 42mm in diameter.
|
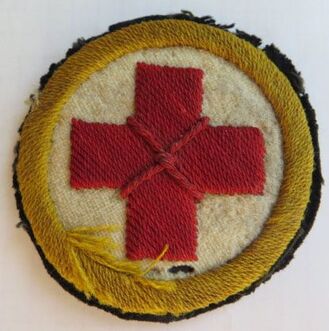
- Above: A medical patch with red thread cross, on a white background, with yellow thread to outer boarder on a dark background. Roughly 52mm in diameter.
|
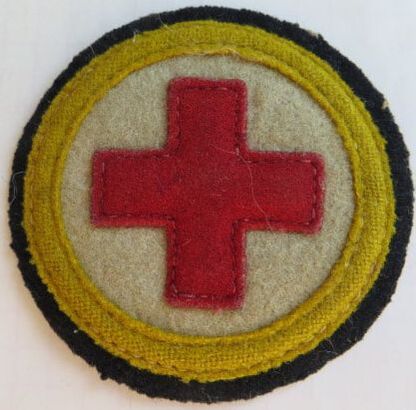
- Above: A medical patch with red felt cross, on a white background, with yellow felt to outer boarder on a dark background. Roughly 49mm in diameter.
|
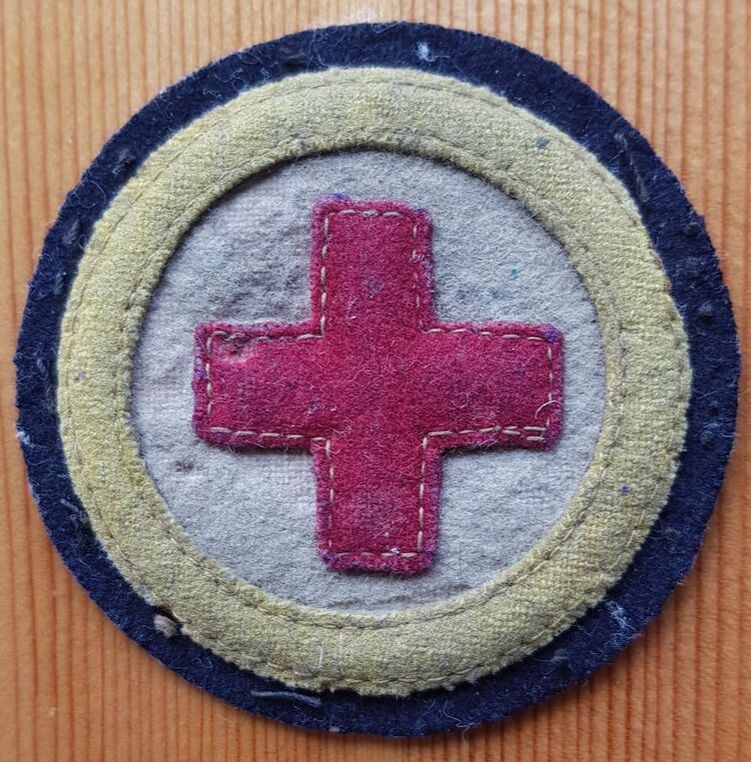
- Above: Another medical patch with red felt cross, on a white background, with yellow felt to outer boarder on a dark background. This patch was owned by 3/1082 Pte. Willian Roy Robson. William attested on the 10th of Aug 1915 and served overseas in no. 2 Field Ambulance, initially in the middle East and then France and the Western Front. Total service overseas was 3 years and 283 days.
|
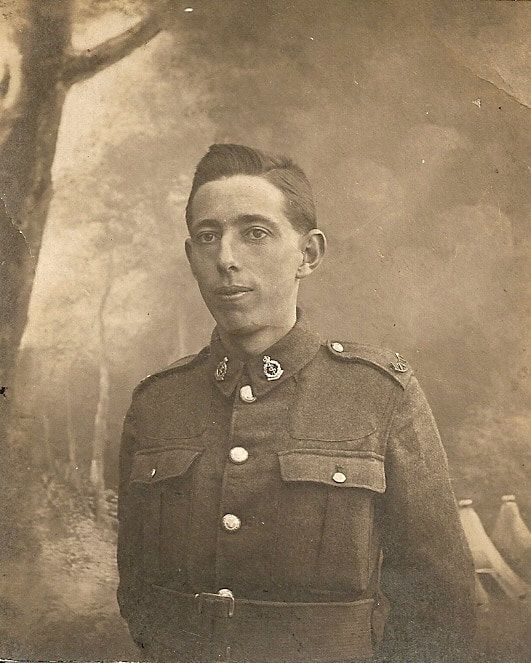
- Above & Opposite: two images of William in uniform, wearing NZ Medical Corps Collar badges and NZMC curved metal shoulder titles (above). Opposite also just shows his medical patches to both sleeves (Nigel Robson Collection).
|
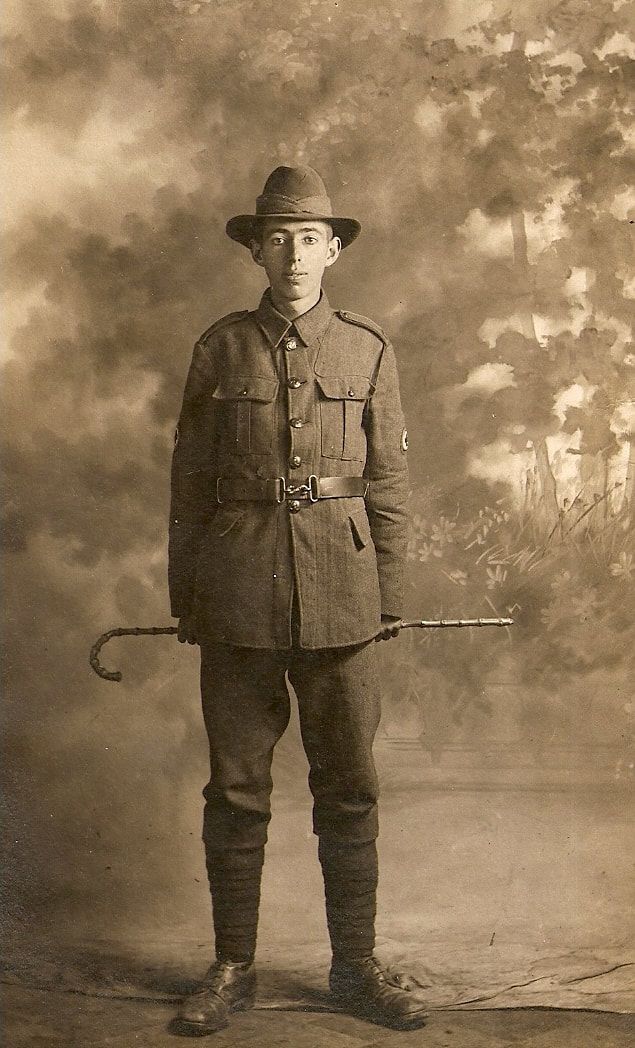
|
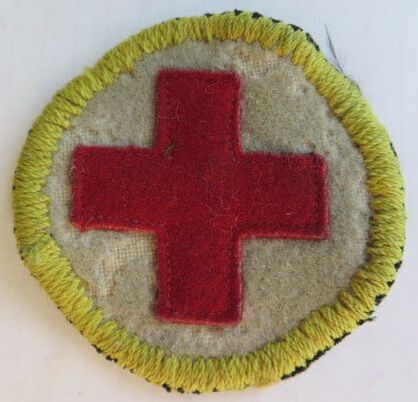
- Above: A medical patch with red felt cross, on a white background, with yellow thread to outer boarder on a dark background. Possibly the border has been repaired, as its pukered the patch. Roughly 52mm in diameter.
|
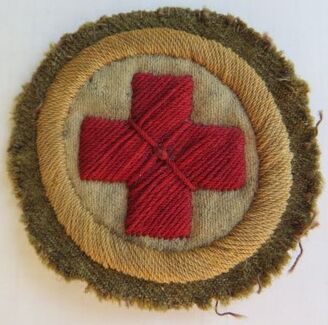
- Above: A medical patch with red thread cross, on a white background, with yellow thread to outer boarder on a khaki wool background. Roughly 51mm in diameter.
|
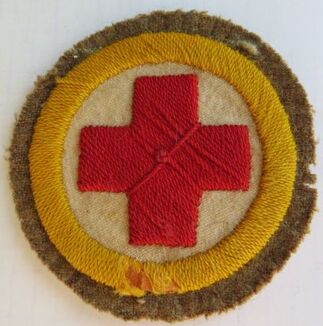
- Above: A medical patch with red thread cross, on a white background, with yellow thread to outer boarder on a khaki wool background. Roughly 56mm in diameter.
|
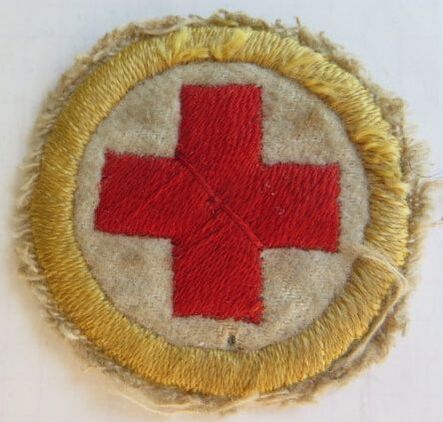
- Above: A medical patch with red thread cross, on a white background, with yellow thread to outer boarder on a pale background. Roughly 51mm in diameter.
|
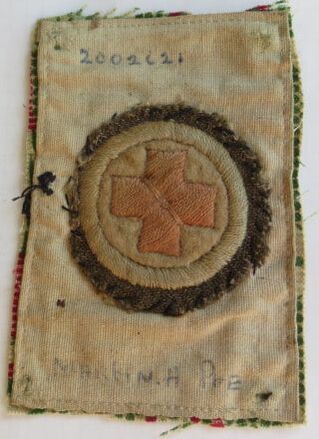
|
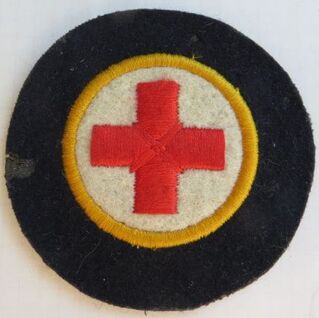
- Above: A medical patch with red thread cross, on a white background, with yellow thread to outer boarder on a large dark blue background. Royal Navy or Royal NZ Navy. Roughly 47mm in diameter.
|
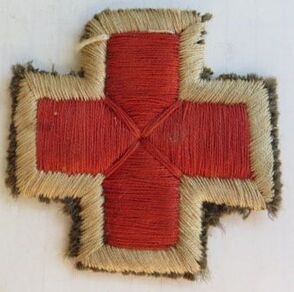
- Above Center: A medical patch with red thread cross, on a white background, with yellow thread to outer boarder on a khaki wool background. Roughly 47mm in diameter. This patch is faded, but thankfully sewn roughly on a piece of cloth, which has also record the soldiers details who wore it, a Pte. H Martin, 2002621.
- Opposite: A sleeve patch to the Australian Army Medical Women's Service (A.A.M.W.S) , with red thread cross, on a white border, with a khaki wool background. Roughly 44mm x 44mm in size.
- Opposite: A sleeve patch to the Australian Army Medical Women's Service (A.A.M.W.S) , with red thread cross, on a white border, with a khaki wool background. Roughly 44mm x 44mm in size.
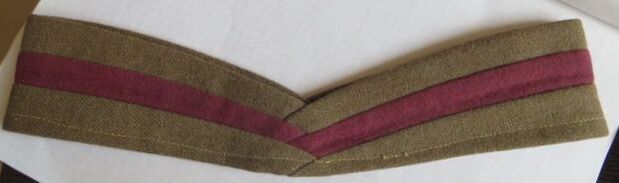
- Opposite: A puggaree to fit the Lemon Squeezer hat to the Royal New Zealand Medical Corps. Khaki/Cherry Red/Khaki. Marked to inside with size only, in purple ink to "7 1/4".
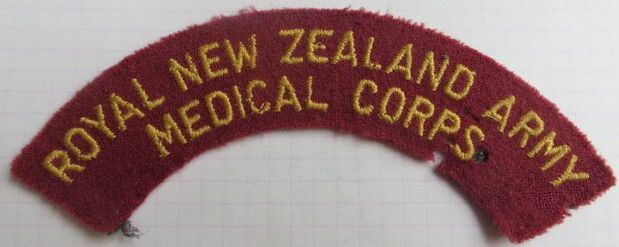
- Opposite: A older style, post 1961 cloth shoulder title to the Royal New Zealand Army Medical Corps. Gold embroidered letters on a Ruby felt background.
Fakes and Forgeries
The following is not the definitive list, and I'm sure there will be others. But the following I have come across.
A fake New Zealand Medical Corps Cap badge
- OK detail to front, but colour is wrong, and a orangey-yellow.
- To back is stippled and pitted, with a flat filed area, where the excess brass has been removed and filed down flat from the mold.
- Two short copper brass lugs are brazed on, but are not a type encountered on the originals.
- Size 43mm by 30mm.
|
|
|
|
Below is a relatively common badge, yet someone has taken the time to fake this Royal NZ Army Medical Corps Cap badge.
- Detail is good to front, and matches what is found on originals.
- To back is stippled and pitted, with a flat filed area, where the excess brass has been removed and filed down flat from the mold.
- Two short copper brass lugs are brazed on, but are not a type encountered on the originals.
- Size 47mm by 45mm.
|
|
|
|
Royal New Zealand Nursing Corps
The Corps first formed in 1908 as the New Zealand Medical Corps Nursing Reserve. Its title was changed in 1915 to the New Zealand Army Nursing Service (NZANS).
|
- Above: On 27th of Feb 1915, a judging committee was set up, consisting of three members to judge the designs for the new Army Nurses badge (First World War - Badge file, R21079057 AAYS 8682 18 Archives NZ).
|
- Above: On the 2nd of March 1915, the committee had narrowed the proposed design down from 143 to 5! An impressive task (First World War - Badge file, R21079057 AAYS 8682 18 Archives NZ).
|
Presumably this was the design chosen, as sadly there is no records of what the other designs were.
Motto: (none in the 1st NZEF - as noted in R17187868 AALI W3508 7291 Archives NZ)
Motto: (none in the 1st NZEF - as noted in R17187868 AALI W3508 7291 Archives NZ)
|
- Above: A early WW1 Silver and enamel badge to the New Zealand Army Nursing Service (N.Z.A.N.S.). Solid and brooched to back, with a marker mark at back base to "Stg. Silver" and "C.M.Bay". A short length of the original safety chain is still attached at base. Note the opaque red enamel to center.
|
- Above: A similar, but later badge to the New Zealand Army Nursing Service, Again, solid and a brooch fitting to back, with maker marked to "Stg. Silver" and "C.M.Bay". A flatter, clearer, red enamel to center.
|
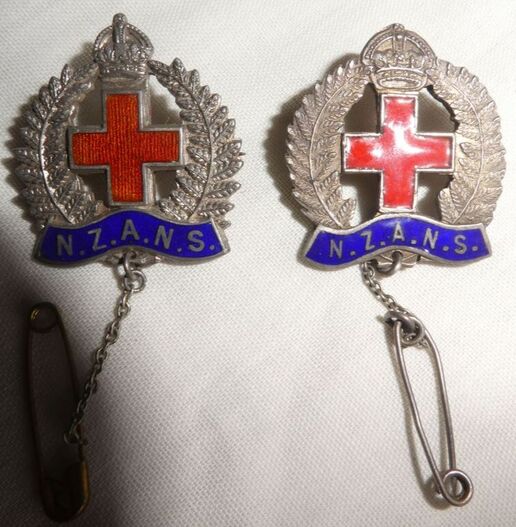
C M Bay was one of the earliest WW1 manufacturers of these early badges, with some also having the "registration number" of the nurse engraved to the back of the crown.
The registration number differs to the nurses service number, for example 22/327 is the service number of Nurse Elizabeth Fanny Stanton, who qualified in 1911, but attested on the 18th of Jan 1916 to the NZ Army Nurses Service.
She was assigned the registration number of 1062, as Elizabeth was the 1062th person to join the Service.
Her badge may have had "1062" engraved to back, but this is a exception, as normally they are blank, with only a handful of examples seeming to have the owners registration number to back.
- Opposite: Two Silver N.Z.A.N.S badges, with the left being marked to "M & K" or Mayer and Kean and "SILVER". The right is made by "YOUNG & CO, AUCKLAND" and is again marked "SILVER". Note the difference in crown and enamel to center (Ian Hamilton Collection).
|
- Above: A superb cover-letter from Ceil M Bay himself, dated 20th July 1917, querying payment for badges already produced. He indicates the first 72 N.Z.A.N.S badges were made by his firm and delivered by himself to a Hospital Ship. At the end of the letter, he indicates the price of each badge at follows:
N.Z.A.N.S badge by itself - 5 shillings Number engraved to back - 3 pence extra Silver chain & pin - 1 shilling extra Total for each badge 6 shillings and 3 pence each (First World War - Badge file, R21079057 AAYS 8682 18 Archives NZ). |
- Above: But not all was what it seemed, with a complaint from Egypt making its way back to New Zealand. The Red enamel to the center of the badge apparently melted with the heat in Egypt!
When tested, it turned out to be Wax and not Red Enamel (First World War - Badge file, R21079057 AAYS 8682 18 Archives NZ). |
|
- Above: A later kings crown badge to the New Zealand Army Nursing Service. Solid to back and a brooch fitting, but with different "sprung"pin and hook. Marked to "M & K Ld" and "Silver". Note the ribbing to background of red center enamel. Safety chain is attached to the brooch pin.
|
- Above: A unknown purpose of solid gilt brass badge to the New Zealand Army Nursing Service. Looks to have the same construction as the M & K Ld or Mayer and Kean Limited made example to the left, but a darker colour of red and dark blue enamel, and note some red to crown. Maybe a association badge. Same size, with brooch fitting to back, but no maker mark.
|
- Above: A unknown badge clearly to the New Zealand medical services, with a "NZ" to base and the fern leaves wreath. But purpose unknown. It is semi-solid to back with a brooch fitting. Apparently these originated in the UK, and are maybe a sample badge made by one of the manufacturers there.
|
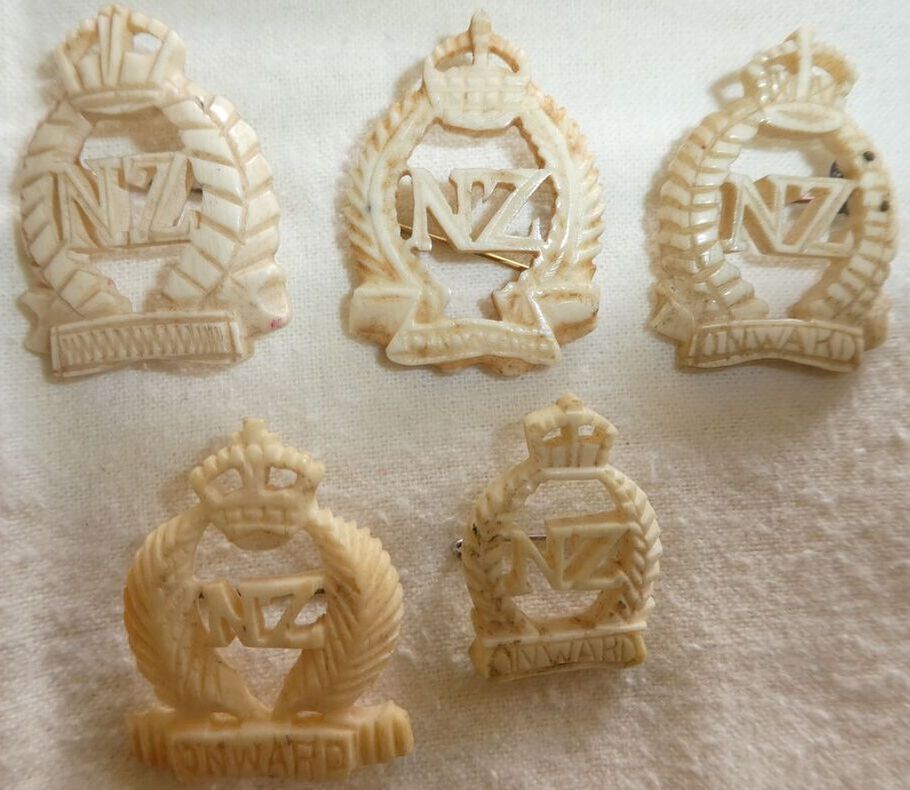
- Above: A selection Bone or Ivory crafted Onwards badges, often associated and worn by Nurses as a unofficial badge (Ian Hamilton Collection).
|
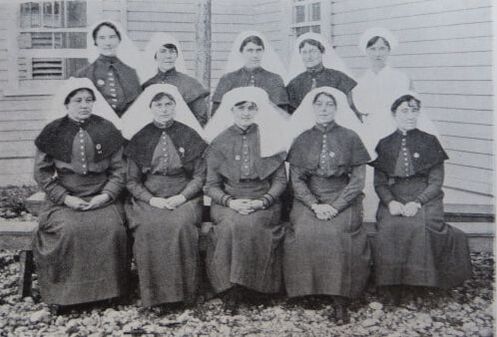
- Above: A group photo of NZ Army Nursing Service staff at Trentham Military Camp in New Zealand around 1917. Note they wear their NZANS badges to the front of their Cape, though it seems which side of the cap could vary. Note that you can also just make out the safety pin and chain deployed below the badge to the front of their uniform.
|
Other early makers:
- A collector has showed me a NZANS badge marked "Kramer - Cairo" and "Stirling". It has a pin to back similar to the WW1 SWB (Silver War/Wound Badge). There was a L Kramer, who was a silversmith/jeweler at the beginning of the 1900's in Cairo, Egypt, making Government awards and selling to the general public.
In 1953 the service was reorganised into the Royal New Zealand Nursing Corps (R.N.Z.N.C.).
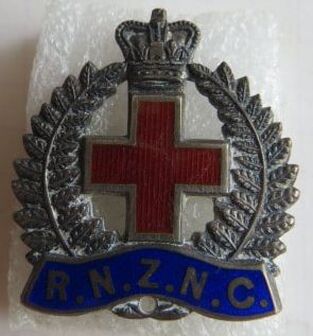
- Above: A brooch badge to the Royal NZ Nursing Corps (R.N.Z.N.C.) in silver and enamel, with Queens Crown. Maker marked to back to "M & K Ld" and "Silver".
|
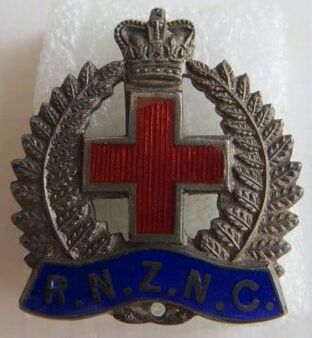
- Above: Another brooch badge to the Royal NZ Nursing Corps (R.N.Z.N.C.) in silver and enamel, with Queens Crown. Maker marked to back to ""Stg Silv"".
|
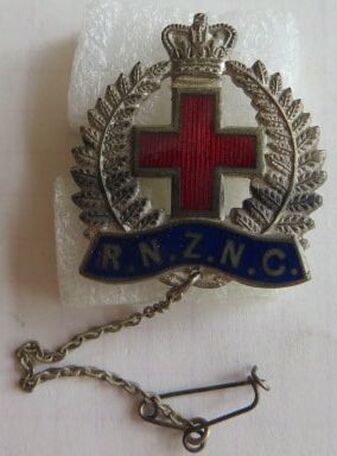
- Above: A modern, silver washed metal and enamel brooched badge with safety chain and pin attached to the R.N.Z.N.C. No maker mark.
|
|
|
- Opposite & Above: A gilt brass and Silver (not marked) Cap and Collar badge set to the Royal New Zealand Nursing Corps. The Cap badge has two short thread bolts to back, while the collars have short looped lugs. All are solid to back, with no maker mark. All have separate bottom banners.
|
|
Above: A gilt brass and white metal Cap badge to the Royal New Zealand Nursing Corps. Die stamped, it has two thick copper looped lugs to back. Separate white metal banner, which has been riveted on to back. No maker mark.
|
Above: A white metal Cap badge to the Royal New Zealand Nursing Corps. Die stamped, it has two thick copper looped lugs to back. Separate white metal banner, which has been riveted on to back. No maker mark.
|
Above: A single piece, two tone, anodised aluminium Cap badge to the Royal New Zealand Nursing Corps. Two aluminium looped lugs to back, but no maker mark.
|
|
|
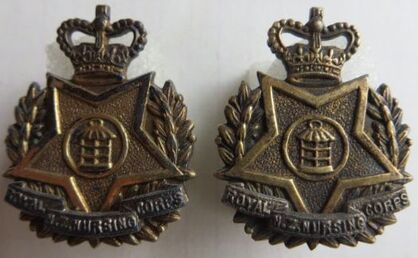
- Opposite: A modern, gilt & chromed metal Cap to the Royal New Zealand Nursing Corps. Flat back, it has two thread bolts to back and nuts. No maker mark.
- Above: A pair of darkened Collar badges to the Royal New Zealand Nursing Corps. Both are two piece, with separate banner. Two copper looped lugs to back, with no maker mark. |
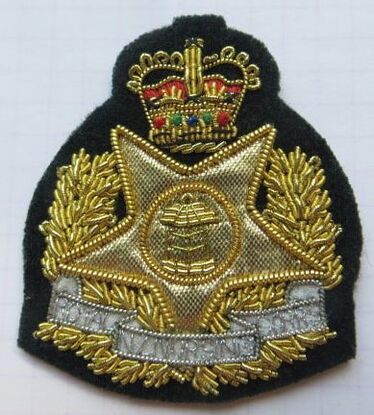
- Above: A Officers bullion thread and cloth Beret badge to the Royal New Zealand Nursing Corps.
No maker label to back. |
- Above: A rank disk worn on the right breast, on medical whites. Worn by NCO's in the Royal New Zealand Nursing Corps. The above is a Corporals rank, with a safety pin glued (repaired) to back. Other ranks appear to be Staff Sargent, Sargent and Lance Corporal.
|
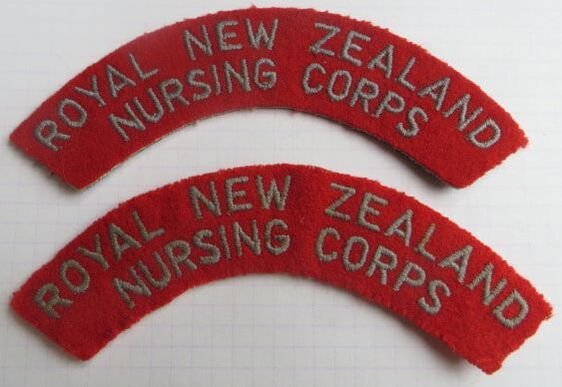
- Above: A pair of post 1961 cloth shoulder titles to the Royal New Zealand Nursing Corps. Grebe embroidered letters on a Post Office Red background.
|
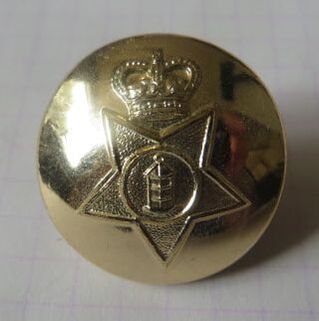
- Above: A 26mm anodised aluminium staybrite button to the Royal New Zealand Nursing Corps. Maker marked to "Gaunt, London".
|
Fakes and Forgeries
Below is an annoying fake, as from first glance it looks good from front, with correct silver toned lower banner.
- Detail is good to front, and matches what is found on originals.
- To back is where it all comes apart. Detail is lost to back, and there is no depth. There is also stippling and pitting, and the edge is thick and flat.
- Note the banner is just held on by wire hooks. Originals are riveted to the brass backing.
- Two short, ribbon like copper brass lugs are soldered on, but are not a type encountered on the originals.
- Size 45mm by 36mm.
|
|
|
|
Royal New Zealand Electrical & Mechanical Engineers
The New Zealand Electrical and Mechanical Engineers formed in September 1946 as a permanent corps in the New Zealand Defence Force.
They were granted the prefix "Royal" in July 1947.
Motto: ARTE ET MARTE (By skill and fighting).
The 2nd pattern of UK REME badge was adopted by the Corps, with the only distinguish feature being the title on the Cap badge, otherwise the collars are the same as what the UK and Canada wore.
They were granted the prefix "Royal" in July 1947.
Motto: ARTE ET MARTE (By skill and fighting).
The 2nd pattern of UK REME badge was adopted by the Corps, with the only distinguish feature being the title on the Cap badge, otherwise the collars are the same as what the UK and Canada wore.
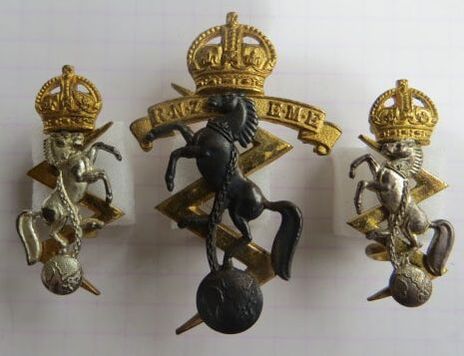
- Above: A gilt fired brass and Silver Cap and collar set to the Royal New Zealand Electrical and Mechanical Engineers. All are maker marked with "J R Gaunt, London" to back, and the collars are marked with a "S" for Silver.
|
|
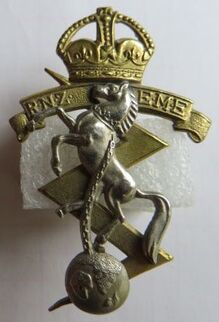
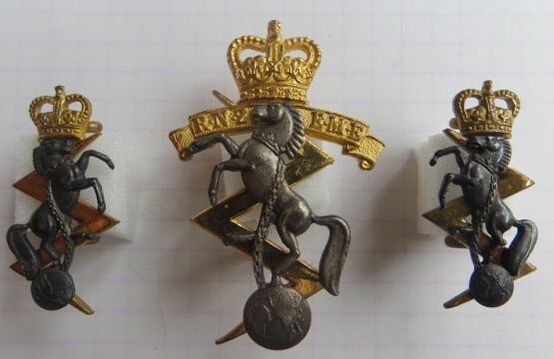
- Above: A post 1952 set in gilt fired brass and silver to the Royal New Zealand Electrical and Mechanical Engineers. Cap badge is maker marked to "J R Gaunt, London". Both collars are not marked to back.
|

- Above: A anodised aluminium staybrite Cap and collar set to the Royal New Zealand Electrical and Mechanical Engineers. The Cap badge is lugged and marker marked to "J R Gaunt London". The two collars have pins to back.
|
|
- Above: A two tone, anodised aluminium staybrite Cap badge to the Royal New Zealand Electrical and Mechanical Engineers, on Corps colours backing. Two long looped lugs in a North/South configuration along with the maker mark of "J R GAUNT LONDON" in raised letters to back. Cap badge size 48mm by 31mm. Backing size 53mm by 49mm.
|
- Above: The last pattern of Cap and collar badges to the Royal New Zealand Electrical and Mechanical Engineers. All are gilt metal with a frosted silver colour center. All have screw posts to back, which are used with round nuts. Not maker marked to back. Cap badge size 48mm by 32mm. Opposing Collar badge size is 33mm by 15mm.
|
The following are buttons to the Royal New Zealand Electrical and Mechanical Engineers. They appear the same as the British worn pattern of button.
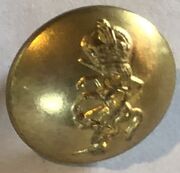
- Above: A 19mm, gilt brass button to the RNZEME. Maker marked to back to "GAUNT LONDON".
Also in the same size is a "METALINKS 1951" maker marked RNZEME button (B Jones collection). |
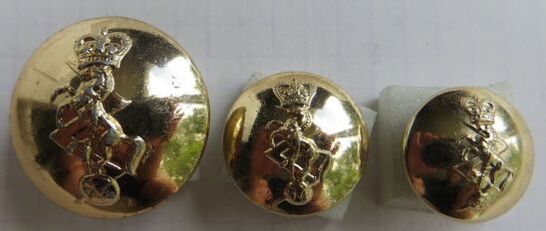
- Above Left: A 25.5mm gilt anodised aluminium fixed shank button to the RNZEME. Maker marked to "GAUNT LONDON" to back.
- Above Center: A 19mm gilt anodised aluminium fixed shank button to the RNZEME. Maker marked to "GAUNT LONDON" to back. - Above Right: A 17mm gilt anodised aluminium fixed shank button to the RNZEME. Maker marked to "FIRMIN LONDON" to back. |
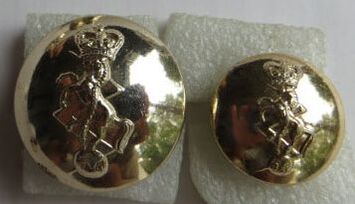
Silver tone, which could be dulling with age.
- Above Left: A 25.5mm silver tone anodised aluminium fixed shank button to the RNZEME. Maker marked to "GAUNT LONDON" to back. - Above Center: A 19mm silver tone anodised aluminium fixed shank button to the RNZEME. Maker marked to "GAUNT LONDON" to back. - Opposite: Post 1961, cloth shoulder titles to the Royal New Zealand Electrical and Mechanical Engineers. Both are Indian Yellow letters on a Purple Navy background. Note the variation in letter sizing due to manufacturer variation. |
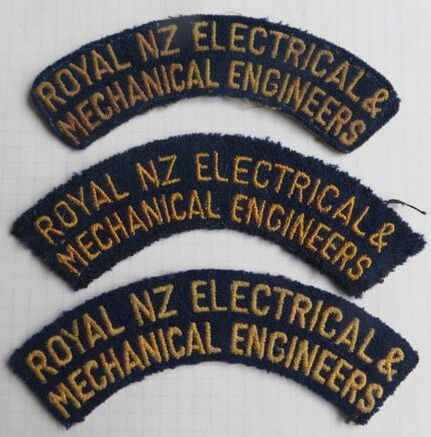
|
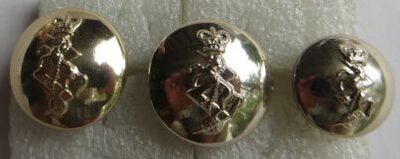
- Left: A 17.5mm silver tone anodised aluminium fixed shank button to the RNZEME. Maker marked to "FIRMIN LONDON" to back.
- Center: A 17mm silver tone anodised aluminium fixed shank button to the RNZEME. Maker marked to "GAUNT LONDON" to back.
- Right: A 14mm silver tone anodised aluminium fixed shank button to the RNZEME. Maker marked to "GAUNT LONDON" to back.
- Center: A 17mm silver tone anodised aluminium fixed shank button to the RNZEME. Maker marked to "GAUNT LONDON" to back.
- Right: A 14mm silver tone anodised aluminium fixed shank button to the RNZEME. Maker marked to "GAUNT LONDON" to back.

- Above & Opposite: Initially the first puggaree of the NZEME was that of the New Zealand Amy Ordnance Corps (Red/Blue/Red), as they were formed from that unit in 1942 for the 2NZEF. In 1943, to distinguish themselves, they adopted the above. So this is the 2nd pattern of puggaree for the unit to fit the Lemon Squeezer hat - Red/Green/Red. Marked to inside with size in purple ink to "6 3/4".
|
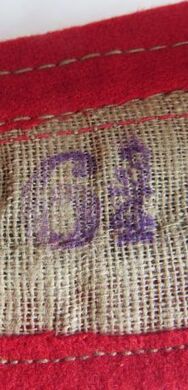
|
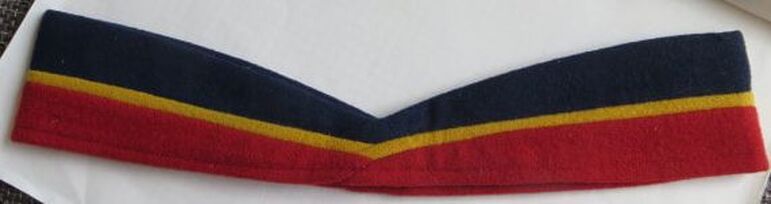
- Above & Opposite: A 3rd pattern of puggaree adopted post 1948 to fit the Lemon Squeezer hat in the colours of the Royal New Zealand Electrical & Mechanical Engineers - Dark Blue/Yellow (thin)/Red. Marked to inside with size in blue ink to "7 1/8". Apparently the adoption of the new 3rd pattern was to aline with the Corps colours, but was not instantaneous, and old stocks of the 2nd pattern were "washed out" of stores before the new 3rd pattern was issued. This looks to have been completed by 1951 (source Robert McKie - RNZAOC.com)
|
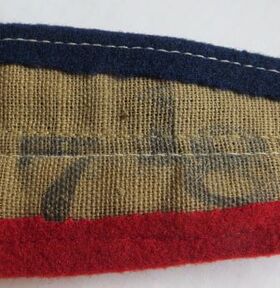
|
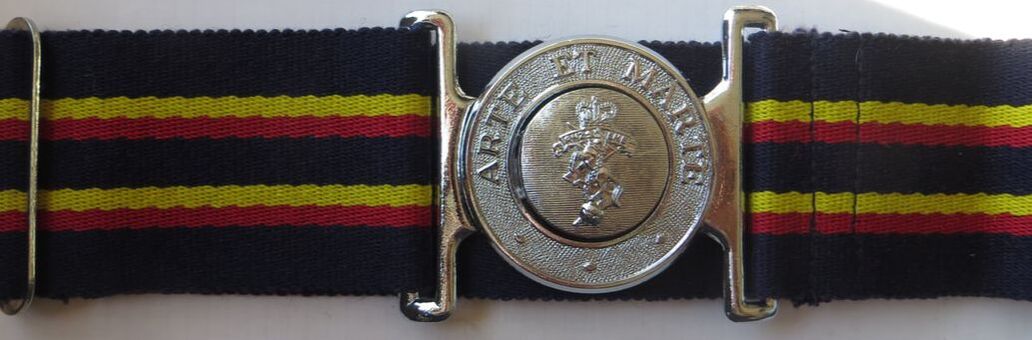
- Above: A unissued stable belt to the Royal New Zealand Electrical and Mechanical Engineers. Chromed metal fittings, with a belt center with the Corps Cap badge and "R.N.Z.E.M.E" to banner. The Corps motto is also to center with "ARTE ET MARTE" from the Latin meaning "By Skill and by Fighting". All is mounted on the Corps' colours.
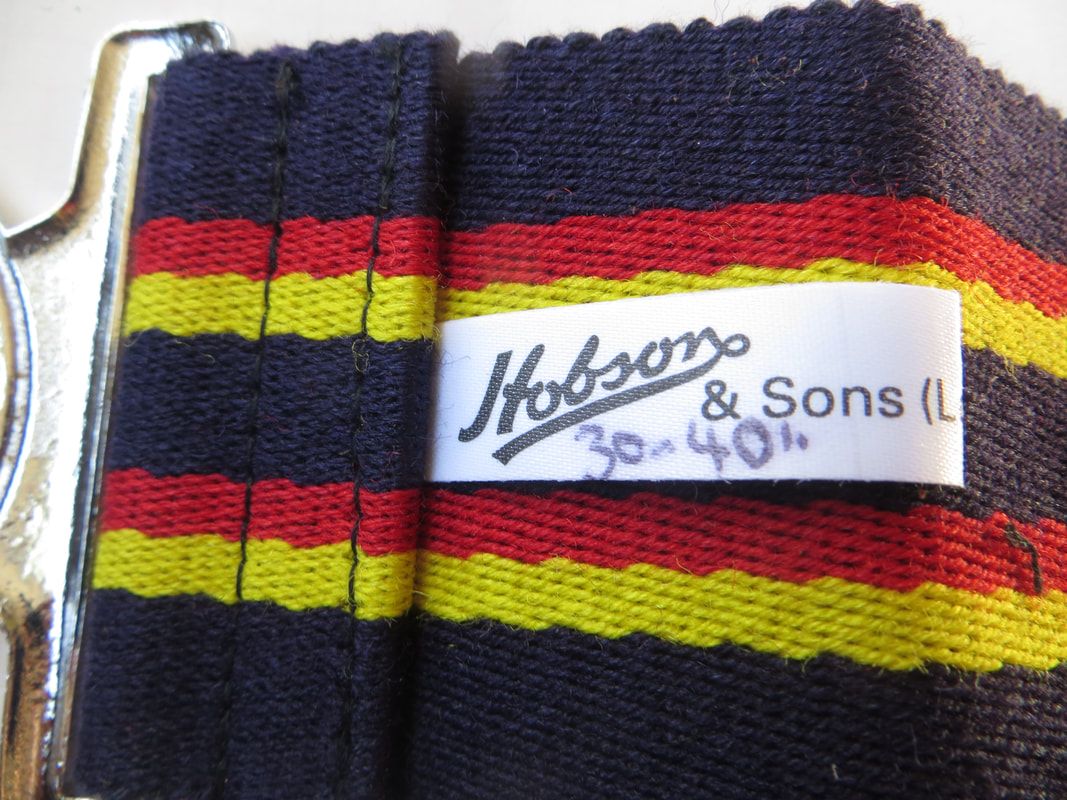
- Above: No maker markings to the metal fittings to the belt, but a label is sewn in, with the details "Hobson & Sons (London) Ltd...... Large". In pen is written "30 x 40"".
|
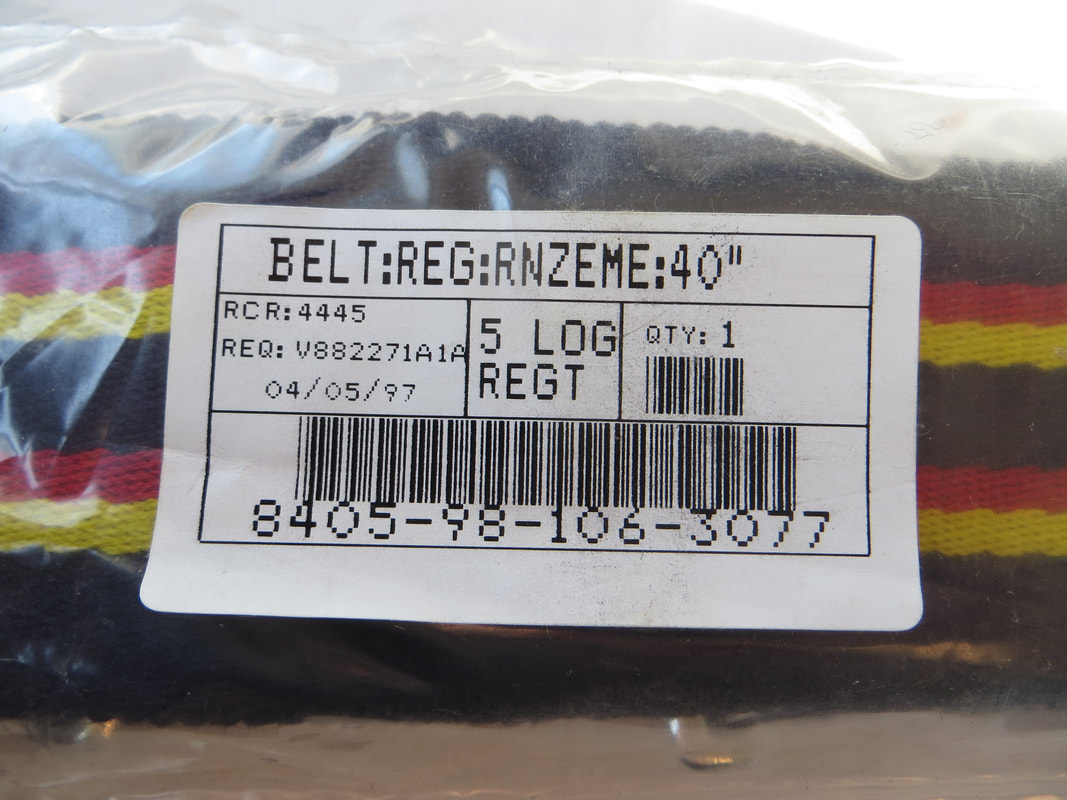
- Above: The belt is in its original plastic packet, with the above label attached. Note the manufacture date of 4th of May 1997 and size 40".
|
The Corps was absorbed into the Royal New Zealand Logistic Regiment on the 9th of December 1996, and its badges and insignia no longer worn.
Fakes & Forgeries
Below is a fake cast bi-metal Cap badge to the Royal New Zealand Electrical & Mechanical Engineers
- Detail to front to both metals is OK to poor, and lacks a lot of detail.
- To back has lack of detail too, and there is also stippling and pitting, and the edges are thick and flat.
- Note the white metal Horse and Globe are just held on by wire hooks. Originals are sweated on to front.
- Two short, ribbon like copper brass lugs are soldered on, but are not a type encountered on the originals.
- Size 47mm by 30mm.
|
|
|
|
Royal New Zealand Education Corps
The New Zealand Army Education Welfare Service was established towards the end of WW1. On the 15th of Sept 1954, the unit was retitled the New Zealand Army Education Corps.
|
|
- Opposite & Above: A gilt fired brass and silver Cap and Collar badge set to to the New Zealand Army Education Corps. All have Copper loops to back in a north/south configuration. The gilt fired brass center to each is held on by brass wires bent through the silver back. Raised lettered maker mark of "Mayer & Kean Ltd, NZ".
|
|
|
- Opposite & Above: A gilt brass and white metal Cap and Collar badge set to to the New Zealand Army Education Corps. All have Copper loops to back in a north/south configuration, with a raised letter maker mark of "Mayer & Kean Ltd, NZ".
|
|
- Above: A gilt brass and white metal Collar badge pair to to the New Zealand Army Education Corps. Both have long looped wire lugs to back in a north/south configuration, with a impressed maker mark of "APW".
Avon Plate Works (APW) was based in Rathbone and Cyde Street, in Wangarei, New Zealand. It looks to have started in the 1940's. - Opposite: On the 22nd of May 1952, APW replied to a request for samples as part of the bidding process for tender of Government contracts to make and supply gilt New Zealand Regiment Badges. I believe they were unsuccessfully (19th of May 1952 - FL48958700) , and Mayer and Kean Ltd got the contract (Archive NZ "Badges & Buttons - New Zealand Regiment" - FL48958653). Interesting to note then that all supplied "samples" were property of the New Zealand Army and therefore had to be returned. It was part of Fisher & Sons (Jewelers) that later merged with Michael Hill. |
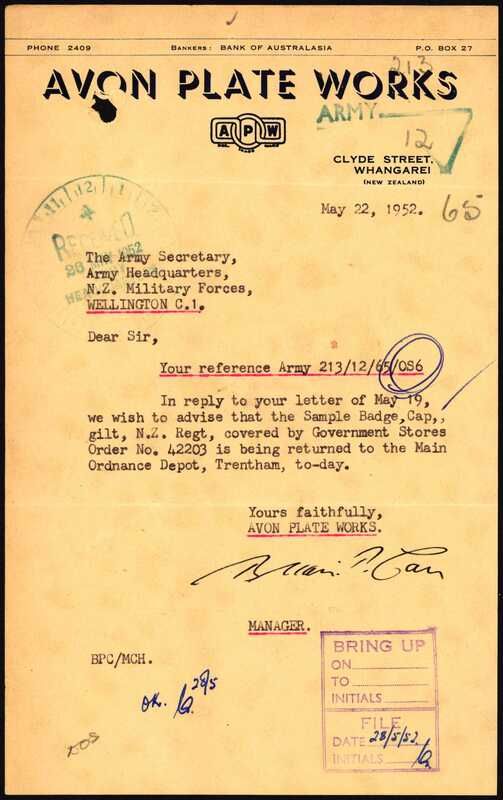
|
|
|
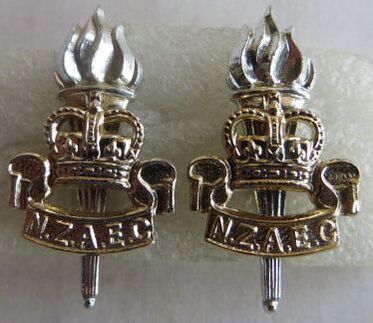
- Opposite & Above: A two piece, anodised aluminium staybrite Cap and Collar badge pair to to the New Zealand Army Education Corps. No maker mark to either, with two long pins to back of the Cap badge which easily break off. The Collars have two single lugs to the back, which is usually found on British Collars. Size 32mm by 17mm. No maker marks.
|
|
In November 1963, the Corps was awarded the prefix "Royal".
As per Army memo 213/12/5/Q(A), dated the 23rd of Sept 1965, the new "Royal" New Zealand Army Education Corps insignia was ready for issue. The document indicates that the AA or Anodised Aluminium insignia was to be given in the opposite quantities to each Officer and Other Ranks in the Corps. Ligne refers to button size (22 ligne =14mm, 27 ligne =16.8mm, 30 ligne =19mm, 40 ligne =25.4mm - Archive NZ entitled "Badges & Buttons - New Zealand Regiment" - FL48958529). |
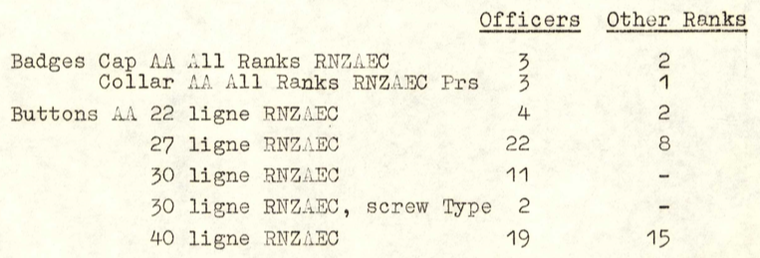
|
|
|
- Opposite & Above: A two piece, anodised aluminium staybrite Cap and Collar badge set to to the Royal New Zealand Army Education Corps. No maker mark, and two long pins to back on each.
|
|
- Above: A two piece anodised aluminium staybrite Cap to the Royal New Zealand Army Education Corps. Two pins to back, and the maker mark of "Firmin London".
|
- Above: A two piece anodised aluminium staybrite Cap with slider to the Royal New Zealand Army Education Corps. Maker marked to "London Badge & Buttons Co Ltd."
|
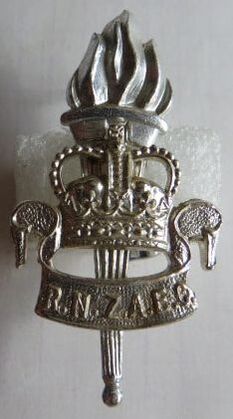
- Above: A two piece anodised aluminium staybrite Cap to the Royal New Zealand Army Education Corps. Two aluminium lugs to back, and the maker mark of "Firmin London".
|

|

- Above: A puggaree to fit the Lemon Squeezer hat to the New Zealand Army Education Corps, Dark Blue/Light Blue/Dark Blue (Image from internet).
|
- Above: Post 1961, supposedly White (though it appears Light Blue) embroidered letter on Cambridge Blue background cloth shoulder title to the Royal New Zealand Army Education Corps. Note the lower title is the more modern version, with a embroidered border or edge.
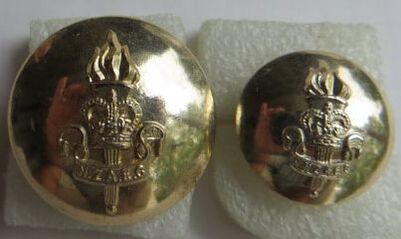
- Above Left: A 25.4mm (40 ligne) silver tone anodised aluminium fixed shank button to the NZAEC. Maker marked to "GAUNT LONDON" to back.
- Above Right: A 19mm (30 ligne) silver tone anodised aluminium fixed shank button to the RNZAEC. Maker marked to "FIRMIN LONDON" to back. |
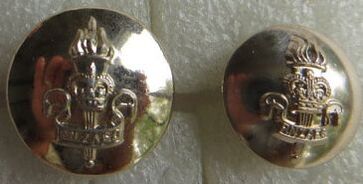
- Above Left: A 16.8mm (27 ligne) silver tone anodised aluminium fixed shank button to the RNZAEC. Maker marked to "FIRMIN LONDON" to back.
- Above Left: A 14mm (22 ligne) silver tone anodised aluminium fixed shank button to the RNZAEC. No Maker marked to back. |
New Zealand Army Legal Service
The New Zealand Army Legal Department formed in 1927, and in November 1950, it changed its title to the New Zealand Army Legal Service.
Motto: JUSTITIA IN ARMIS (Justice in arms).
Motto: JUSTITIA IN ARMIS (Justice in arms).
|
- Above: A silver or silver plate Cap badge to the New Zealand Army Legal Service. This is the British version, with long looped lugs to back, but no maker mark. Size 39mm by 31mm.
|
- Above: A silver or silver plate Cap badge to the New Zealand Army Legal Service. This is again the British version, with long looped lugs to back, but no maker mark. Size 39mm by 31mm.
|
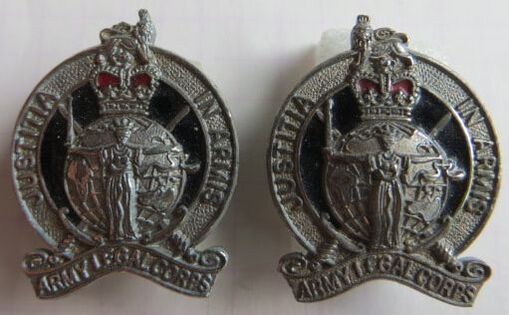
- Above: A silver or silver plate pair of Collar badges to the New Zealand Army Legal Service. These are the British version, with two looped lugs to back to each, but no maker mark. Note Lions to top of collars oppose each other. Size 30mm by 23mm.
|
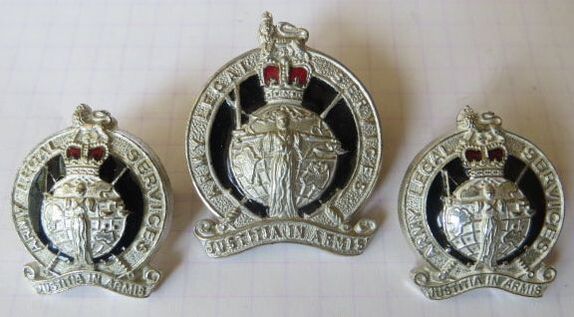
- Above: A die stamped, silver plated, Cap badge and pair of semi-solid Collar badges to the New Zealand Army Legal Service. Very similar to the British version, but note the words in the outer wreath "Army Legal Services", and "Justtia In Armis" to lower banner. Note the collars don't appear to come with opposing lions to top.
- Opposite Top and Sides: A multi-piece Cap and Collar set to the New Zealand Army Legal Service. Possible Silver (though not marked) or Silver |
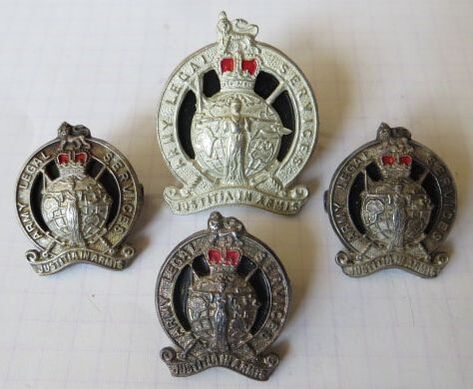
(Continued)
plate, with separate enamel disc to back. All have lugs, with the Cap Badge being extra long. No maker mark. - Above Bottom: A multi piece, silver plated Collar Badge to the New Zealand Army Legal Service. Pin type lugs to back, no maker mark. |
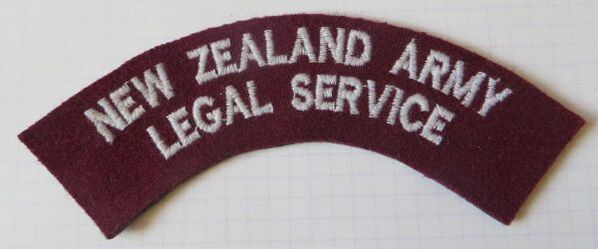
- Above: A unauthorised (and NOT worn) White letter on maroon coloured background shoulder title to the New Zealand Army Legal Service.
|
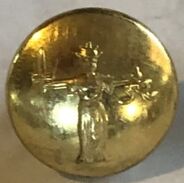
- Above: A 14mm, gilt brass button to the New Zealand Army Legal Service. Maker marked to "GAUNT LONDON" (B Jones collection).
|
New Zealand Forces Motor Corps
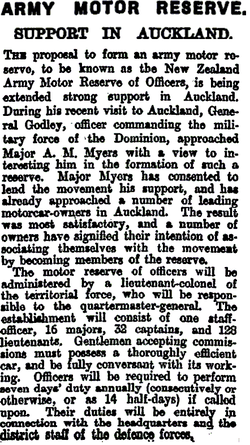
The New Zealand Army Reserve of Officers was formed in April 1913.
- Opposite: A newspaper article from the New Zealand Herald, dated 17th of Jan 1913, page 5. It states "Officers will be required to perform seven days' duty annually (consecutively or otherwise, or as 14 half-days) if called upon. Their duties will be entirely in connection with the headquarters and the district staff of the defence forces".
It was re-designated the New Zealand Forces Motor Services Corps in May 1915.
During WW1 it seems to have taken on a NZ Defense roll, and had two sections
- A Motor Boat Section - a number of references were made in News Papers of the time, including 23rd of July 1915 which stated in the Auckland Star, that the Auckland Motor-boat Section of the New Zealand Forces Motor Service Corps had twenty motor-boats in the motor-boat section of the Motor Service Corps at the time.
References are also made on the Torpedo Bay Naval Museum website, which features a picture of Charles Henry Tarr Palmer, who was a member of the Auckland Motor Boat Section of the NZ Forces Motor Service Corps. Early on in WW1 he organised patrols of the Hauraki Gulf by the force. He is pictured on the site wearing the below insignia. He went on to serve with the British Royal Navy Volunteer Reserve and saw action in the North Sea.
- A Motor-Car Section - again Newspapers of the time indicate that:
"Gentlemen accenting commissions in the New Zealand Forces Motor Reserve must possesses a thoroughly efficient motor-car and a good practical knowledge of it. They will be required to perform seven days' duty annually (consecutively or otherwise as required, or as fourteen half-days) if called upon. Their duties will be entirely in connection with the headquarters and district staffs of the defence forces. Officers will be asked to perform duty as far as possible in the neighborhood in which they reside.
Allowances will be granted to officers as follows in connection with their employment on duty in peace time :
- Class "A," cars of net less than 20 horse-power and 26 cwt in weight, having seating capacity for four persons (including driver), 40s per diem;
- Class "B 3 " cars of under 20 horsepower or under 26 cwt in weight, having seating capacity for four persons (including driver), 37s 6d per diem;
- Class "C," cars of not less than 10 horse-power, having seating capacity for one or two persons in addition to driver, 30s per diem.
An officer may also be called out for a half-day's tour of duty, when half the above rates only will be paid. A half-hour's tour of duty will not exceed five horn's.
This allowance must cover all expenses, including wear-and-tear, cost of petrol and lubricating oil, cost of repairs, ferry tolls, etc. Days on which out and home journeys only are performed do not count for the daily allowance unless the total mileage for these journeys exceeds twenty-five miles, when an extra day's pay will be paid. Officers of the New Zealand Forces Motor Reserve will be subject to the regulations relating to discipline which are in force for the Territorial Force.
There will be no examination for promotion in connection with the Motor Reserve, and first appointments will be recommended by the General Officer Commanding, New Zealand Military Forces, in ranks suitable to the ages of applicants. Promotions will be subsequently made in the Motor Reserve as vacancies in the establishment of the various ranks occur (Hawera & Normanby Star, 7 August 1914, Page 7)".
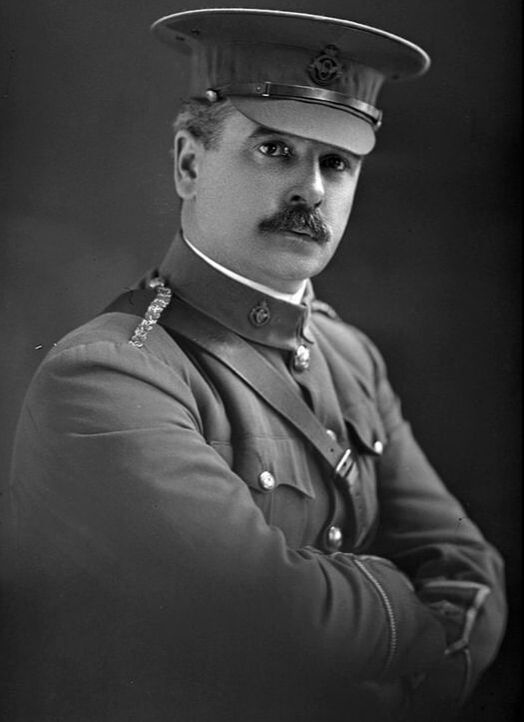
|
- Opposite: A image of Sydney Millichamp Moore-Jones, who was a member of New Zealand Force Motor Service Corps and therefore also a gazetted Officer in the Territorial Force. He held the rank of Lieutenant, and had a Belsize Touring Car, of 20 hp. Sadly Sydney had a disability (laim in one leg) and was not classed fit for the 1st NZEF. He also served in WW2 and had a service number of 27/11/1877 (image take from the Auckland Cenotaph website).
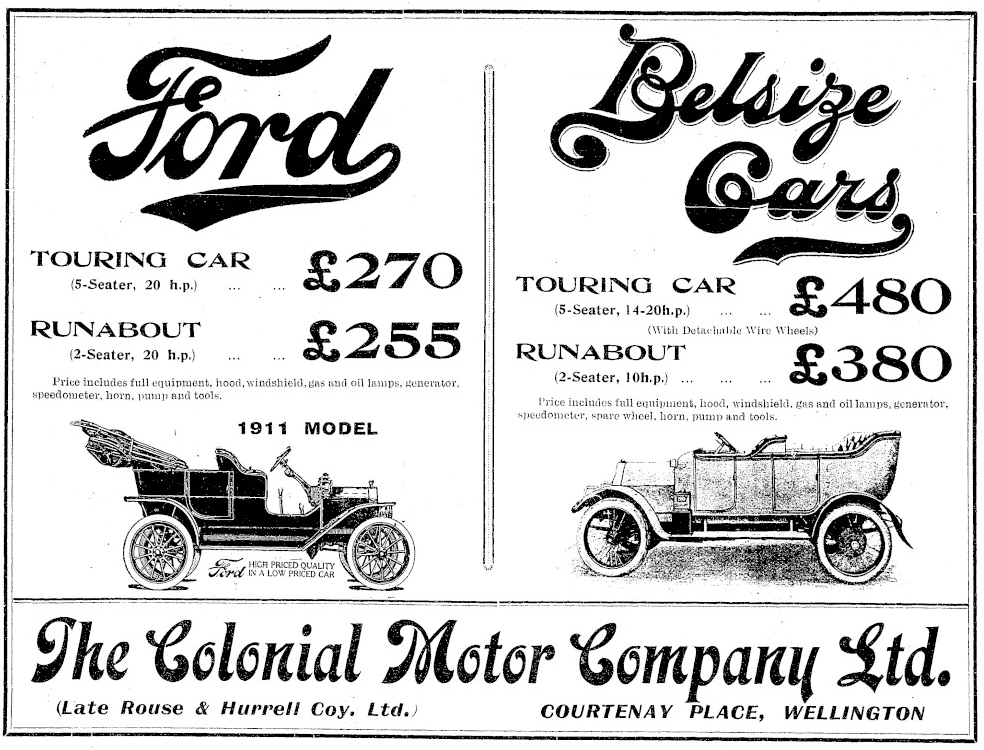
- Above: A newspaper advert taken from the "Progress" on the 1 December 1911, Page 890 which shows a example of Sydney's car, and a rough price in 1911.
|
|
|

- Opposite & Above: A Cap and Collar badge set in die-stamped brass to the New Zealand Forces Motor Service Corps. New Zealand made, they have two copper wire looped lugs to back. No maker mark and size of Cap 38mm by 33mm, while Collars 25mm by 20mm.
|
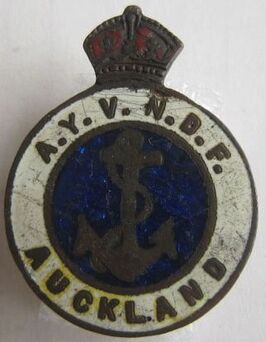
- Above: A gilt brass and enamel Cap badge to the Auckland Yachtsman's Volunteer Naval Defense Force (A.Y.V.N.D.F). Set up during WW1, the unit taught skills aligned with the Royal Navy and Royal Naval Reserve. They acted as recruiters for the Service. Two lugs to back (I am minus one), with the maker mark of "Young & Co", which were based in Auckland. Size 33mm by 24mm.
|

- Above: Another example of a New Zealand Forces Motor Service Corps Cap and Collar badge. Note the non-voiding to crown on the Cap, and the collar is in darkened bronze (Ian Hamilton Collection).
|
At some stage during WW1 Gaunt made the below version of the badge. Much like the NZAPC, NZDC and NZAOC, it seems a separate designed badge was made for the NZEF in the UK, to be worn by overseas personnel, and which is different in design to the above New Zealand made version.
No photo evidence (yet) has been found of it being worn.
Up until the early 2000, this badge was considered quiet rare, but the market became flooded with examples, likely from old stocks from J R Gaunt's factory premises, which were on-sold on a global auction platform. It caused the badges value to plummet and examples now turn up on a regular basis.
|
- Above: A two piece, die stamped bronze Cap badge to the New Zealand Military Forces Motor Reserve. Semi-solid to back, and maker mark impressed to back to "J R GAUNT LONDON". Two D shaped copper lugs to back and size 31mm in diameter.
|
- Above: A similar two piece, die stamped Cap badge to the New Zealand Military Forces Motor Reserve. This time chromed, with maker mark impressed to back to "J R GAUNT LONDON". Two round lugs to back and size 31mm in diameter.
|
Royal New Zealand Armoured Corps
The New Zealand Armoured Corps was formed on the 29th of March 1944 from the nine existing Mounted Rifle Regiments and the 18th, 19th and 20th Battalions of the 2nd NZEF serving in Italy.
As they were already serving outside New Zealand, the Corps badge would have been the "standard" New Zealand "Onwards" Cap Badge and Collars.
Some men sort to distinguish themselves from other units, and locally "unofficial" badges to the New Zealand Armoured Corps exist.
As they were already serving outside New Zealand, the Corps badge would have been the "standard" New Zealand "Onwards" Cap Badge and Collars.
Some men sort to distinguish themselves from other units, and locally "unofficial" badges to the New Zealand Armoured Corps exist.
|
|
|
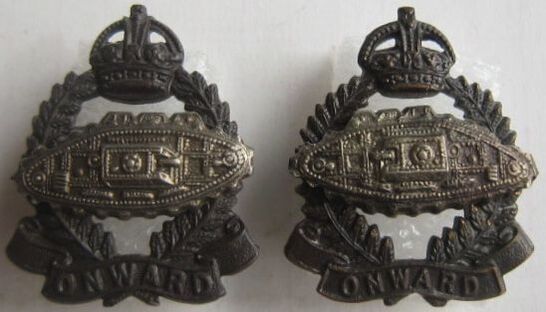
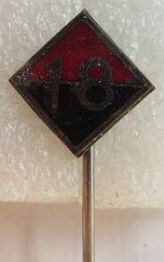
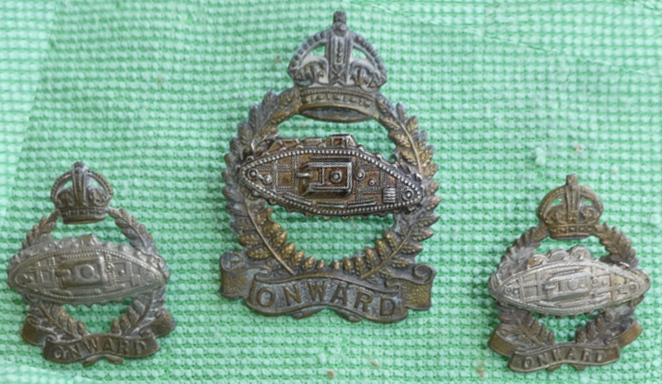
- Above: A set of Cap and Collar badges in gilt brass with white metal centers to the New Zealand Armoured Corps . Again Onwards Cap and Collars have had their "NZ" removed and a center probably from a British badge has been sweated onto front (Ian Hamiliton Collection).
|
- Above: A three piece brass Cap badge with separately attached "NZ" and Tank attached to center. Note the sand cast WW1 NZ Expedtionary Force frame used (Ian Hamilton Collection).
|
|
On the 12th of July 1947, the Corps was awarded the prefix "Royal" and changed its title to the Royal New Zealand Armoured Corps.
There badge was described as "depicted the Crown, fearnleaves and "ONWARDS" scroll.... The central portion consisted of a band inscribed with the words "Royal New Zealand Armoured Corps" surrounding, a basic tank as in the R.T.R Badge. To perpetuate the Mounted Rifle association with the Armoured Corps, designs included crossed lances with pennants" (Archive NZ "Badges & Buttons - New Zealand Regiment - FL48958601)
There badge was described as "depicted the Crown, fearnleaves and "ONWARDS" scroll.... The central portion consisted of a band inscribed with the words "Royal New Zealand Armoured Corps" surrounding, a basic tank as in the R.T.R Badge. To perpetuate the Mounted Rifle association with the Armoured Corps, designs included crossed lances with pennants" (Archive NZ "Badges & Buttons - New Zealand Regiment - FL48958601)
|
|
- Opposite: A 2 piece, gilt fired brass and Silver or Silver plate (not marked) Cap badge to the Royal New Zealand Armoured Corps. Kings crown, with long looped lugs to back. Maker marked in raised letters to "J R Gaunt London". Size 49mm by 44mm.
- Above: A gilt fired brass and Silver Collar badge opposing pair (note the turret of the guns points in different directions on each to center) to the Royal New Zealand Armoured Corps. Both have two D shaped looped lugs to back, and have a "S" for Silver to back of crown. Maker impressed to back to "J R Gaunt London". Size 32mm by 28mm. |
|
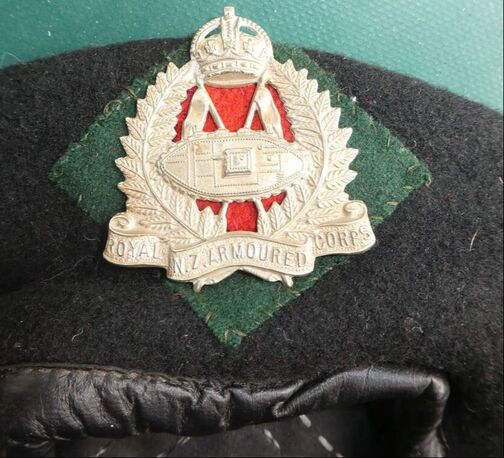
- Above: A other ranks Black beret with white metal Cap badge to the Royal New Zealand Armoured Corps. Note the Corps' colours behind the badge. Beret dates from the 1950's (Ian Hamilton Collection).
|
|
- Above: A other ranks, white metal Cap badge to the Royal New Zealand Armoured Corps. No maker mark, with two long copper looped lugs. Size 49mm by 45mm.
|
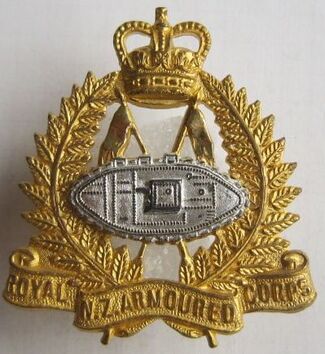
With a change in Monarch in 1952, the Royal New Zealand Armoured Corps Cap and Collar badge was updated to reflect with the new crown.
- Above: A gilt fired brass and Silver or Silver plate (not marked) Cap badge to the Royal |
(continued) New Zealand Armoured Corps. Queens crown, with long looped lugs to back. Maker marked in raised letters to "J R GAUNT LONDON". Size 49mm by 45mm.
- Above: A pair of gilt fired brass and Silver or Silver plate (not marked) opposing Collar badges (note the turret gun to center on each) to the Royal New Zealand Armoured Corps. Both have two D shaped looped lugs to back. Maker marked with raised letters to back to "J R GAUNT LONDON". Size 32mm by 27mm. |
|
|
- Opposite: A single piece, two tone, anodised aluminium Cap badge to the Royal New Zealand Armoured Corps. Queens crown, with long looped lugs to back. No maker mark. Size 49mm by 45mm.
- Above Center: A opposing pair of single piece, two tone, anodised aluminium Collar badges (note the turret gun to center on each) to the Royal New Zealand Armoured Corps. Both have two pins to back to be used with clutches. No maker mark, and size 32mm by 28mm. - Above Right: A faded, 2 tone, single piece, anodised aluminium Collar badge to the Royal New Zealand Armoured Corps. Two pins to back to be used with clutches. No maker mark, other than a circular impression to center, and size 32mm by 28mm. |
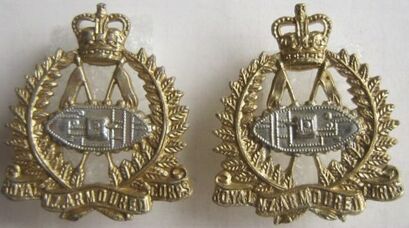
|
|
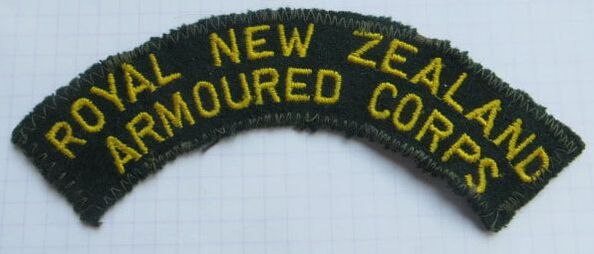
- Above: A later/modern cloth shoulder title in Indian Yellow thread on a Rifle green background to the Royal New Zealand Armoured Corps.
- Opposite: A modern, single piece, gilt finished, white metal Cap badge to the Royal New Zealand Armoured Corps. Solid to back, with two pins to back with clutches. No maker mark. Note the changes to crown and wreath. Size 51mm by 46mm. |
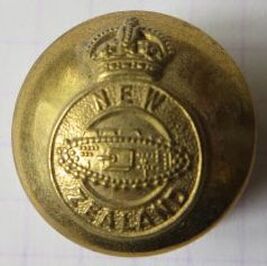
|
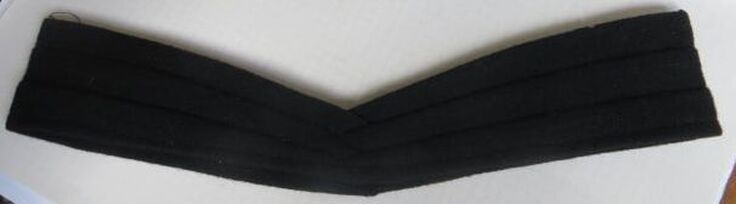
- Above: A puggaree to fit the Lemon Squeezer hat to the New Zealand Armoured Corps, Black/Black/Black. Adopted in 1941, but also worn unposted New Zealand Regular Force recruits. Marked to inside with size only, in purple ink to "7 ".
|
- Above: A pre 1952, 19mm, Kings Crown, gilt brass button to the New Zealand Armoured Corps. Maker marked to "GAUNT, LONDON".
1st Armoured Car Regiment (New Zealand Scottish) Royal NZ Armoured Corps.
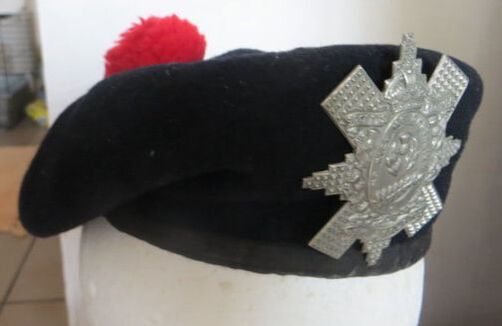
The New Zealand Scottish Regiment formed as a Territorial unit on the 17th of January 1939. It reformed as 1st Divisional Regiment, R.N.Z.A.C (New Zealand Scottish) in 1949. Later this title was changed to 1st Armoured Car Regiment (New Zealand Scottish).
The Regiment was formally disbanded on 16 April 2016.
Motto: Mo Rich Mo Dhuthaich (My King and country)
- Opposite: A white metal, early type cap badge to the 1st Armoured Car Regiment (New Zealand Scottish). Its on a black and red Tam-o-Shanter. The hat is marked inside to "Macpack" and has a black ribbon bow to back. The Cap badge is not maker marked.
|
- Above: A large, convex, single piece white metal Cap badge to the 1st Armoured Car Regiment (New Zealand Scottish). No maker mark to back, with two copper wire loops to back. Size 75mm by 59mm.
|
- Above: A large, slightly flattened, single piece plated copper (just see the wear to the plating on the thistle to center) Cap badge to the 1st Armoured Car Regiment (New Zealand Scottish). No maker mark to back, with two copper wire loops to back. Size 75mm by 60mm.
|
- Above: A more modern issue of the Cap badge in chromed metal to the 1st Armoured Car Regiment (New Zealand Scottish). No maker mark to back, with two pressed type chromed lugs to back. Size 76mm by 60mm.
|
The regiment continued to wear the Kings crowned until their disbandment.
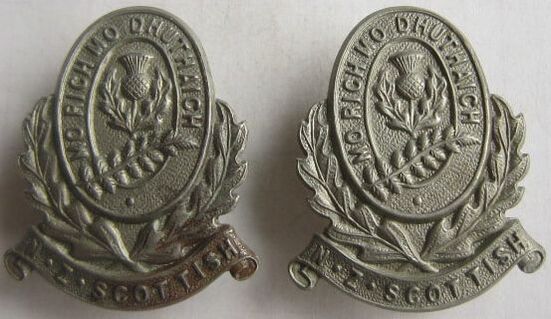
- Above: A pair of white metal collar badges to the 1st Armoured Car Regiment (New Zealand Scottish). No maker mark to back, with two copper wire lugs. Size 37mm by 30mm.
|
- Above: A darkened, bronzed, white metal collar badges to the 1st Armoured Car Regiment (New Zealand Scottish). No maker mark to back, with two copper wire lugs. Size 37mm by 30mm.
|
|
|
- Opposite & Above: At some stage in the 1980's or 1990's the 1st Armoured Car Regiment (New Zealand Scottish) reissued their badges in chromed metal and aluminium. The Cap badge is in a heavy chrome like metal, solid to back, with two long lugs. No maker mark and size 76mm by 61mm..
|
- Above Left & Above: The Collars to the 1st Armoured Car Regiment (New Zealand Scottish) are solid aluminium, with a thumb-tack stuck to back, to be used with clutches. No maker mark and size 37mm by 30mm.
|
|
- Above: A small cast silver Collar badge to the 1st Armoured Car Regiment (New Zealand Scottish). No maker mark to back, with two D shaped lugs to back. Size 31mm by 21mm.
|
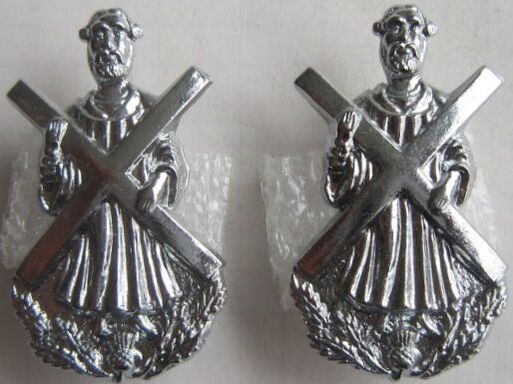
- Above: A pair of chromed metal collars to the 1st Armoured Car Regiment (New Zealand Scottish). No maker mark to back, with two looped lugs in a North/South configuration. Size 42mm by 24mm.
|
- Above: A white metal Sporran badge to the 1st Armoured Car Regiment (New Zealand Scottish). Large single flat brass flang to back, but no maker mark. Size 42mm by 27mm.
|
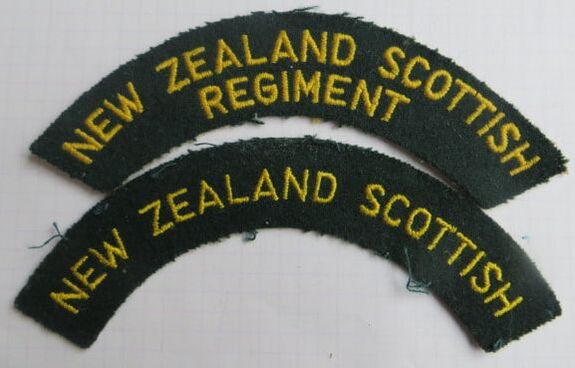
- Above: A pair of post 1961 shoulder title to the 1st Armoured Car Regiment (New Zealand Scottish). Bunting Yellow embroidered letters on a Rifle Green background.
|
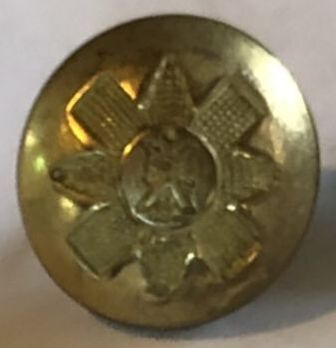
- Above: A rare 19mm white metal button to the New Zealand Scottish Regiment. Maker mark unreadable (B Jones collection).
|
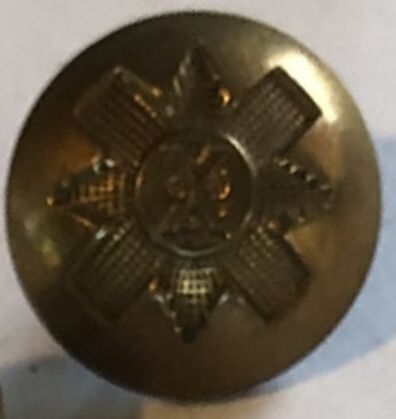
- Above: A rare 19.5mm Gilt brass button to the New Zealand Scottish Regiment Maker marked to "ANDERSON & SON EDINBURGH" (B Jones collection).
|
|
- Opposite: A hand made sleeve badge or piece of "trench art" from WW2. Two piece brass, with safety pin backing. No maker mark and 18mm by 58mm.
|
|
Like the British Royal Armoured Corps, the tank badge is worn on the right upper sleeve by the R.N.Z.A.C and at the time by the 1st Armoured Car Regiment (New Zealand Scottish).
|
- Above: A Silver bullion thread on black material backing. No maker mark and size 35mm by 75mm.
|
|
Royal New Zealand Dental Corps
The New Zealand Dental Service Corps formed on the 7th of November 1915 from Officers and Men who were part of the New Zealand Medical Corps.
It was designated the New Zealand Dental Corps on the 24th of Feb 1916.
The NZDC was in all major WW1 theaters as part of the New Zealand Field Ambulance, and also had large set-ups in the Reinforcement training camps in New Zealand. It has been mentioned that up to 30% of recruits would not have made "fit" and been sent overseas, if it hadn't been for the work of the NZDC.
Motto: EX MALO BONUM (From evil comes good).
WW1 New Zealand & Overseas Worn 1st Type
|
|
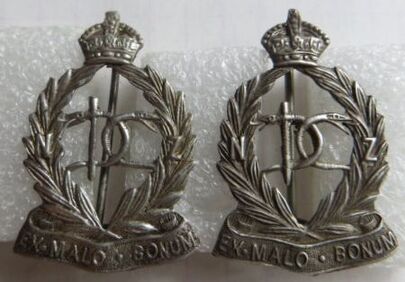
- Opposite & Above: A Stirling Silver Cap & Collar badge set to an Officer in the New Zealand Dental Corps. Owned by 3/648 Capt. Ernest P Pridham. All have a brooch fitting to back and all are stamped "Stg Silver". Size of Cap 39mm by 27mm, while size of Collars 30mm by 20mm.
|
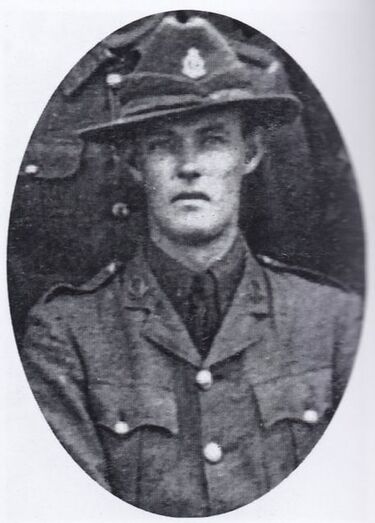
|
- Above: A gilt brass Cap badge to the New Zealand Dental Corps. Die stamped brass, with two hex type brass lugs to back. No maker mark. Size is 39mm by 26mm.
- Opposite: A image of 3/648 Capt. Ernest P Pridham, taken from "Onward : Portraits of the New Zealand Expeditionary Force (Vols 5), by Beattie, P.J. & Pomeroy, M. (2013-2020). Ernest is possibly wearing the Cap, but the Collar badges appear subdued. |
|
- Above: A darkened brass Cap badge to the New Zealand Dental Corps. Die stamped brass, with two hex type brass lugs to back. No maker mark. Note the crown is a rounded type. Size is 39mm by 27mm.
|
|
|
- Above: A pair of Collar badges or maybe two Cap's to the New Zealand Dental Corps. Darkened brass, with two looped lugs to each, which are replacements. Note the void to above the banner to center. No maker mark with size 36mm by 25mm.
|
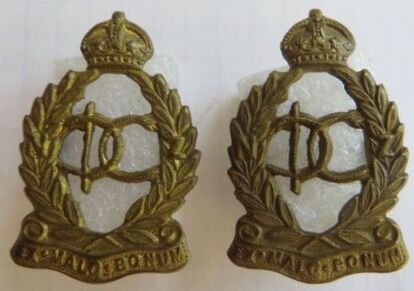
- Above: A gilt pair of brass Collar badges to the New Zealand Dental Corps. Copper looped lugs, and no maker mark. Size is 30mm by 20mm.
|
WW1 Overseas & Going Forward 2nd Type
|
- Above: The 2nd Type of New Zealand Dental Corps Cap badge. This design seems to have originated overseas during WW1 by Gaunt, it then became the adopted badge of the Corps in France, the UK, and later in years, during WW2 and beyond.
- Above Left: A gilt brass Cap badge to the New Zealand Dental Corps. Two copper looped lugs to back. which have been pinched to points. Maker plaqued to back of top banner to "J R GAUNT LONDON". Size 36mm by 37mm. - Above Right: A darkened brass Cap badge to the New Zealand Dental Corps. Two copper looped lugs to back. Maker plaqued to back of top banner to "J R GAUNT LONDON". Note the non-voiding around the Kiwi to base. Size 37mm by 38mm. |
- Above: A gilt brass Cap badge to the New Zealand Dental Corps. Two thick wire copper looped lugs to back. No maker mark. Size 37mm by 37mm.
|
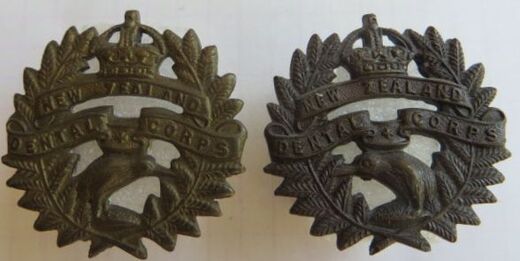
- Above: A non-matching pair of collar badges to the New Zealand Dental Corps. One has a dulled gilt finish, while the other is darkened. Note the Kiwi's are opposing to bottom center. Both have two short copper looped lugs to back, but with no maker mark. Size 31mm by 30mm.
- Opposite Top & Middle: A pair of gilt brass shoulder titles to the New Zealand Dental Corps (N.Z.D.C.). Both titles have hex type brass lugs to back and a maker mark impressed to "J R GAUNT, LONDON". Size is 15mm by 52mm. - Opposite Bottom: A single gilt brass shoulder title to the New Zealand Dental Corps (N.Z.D.C). Half size compare to the two above, so I presume Officers. Maker marked to "J R GAUNT LONDON" to back, and has two D shaped copper looped lugs. Size 11mm by 45mm. |
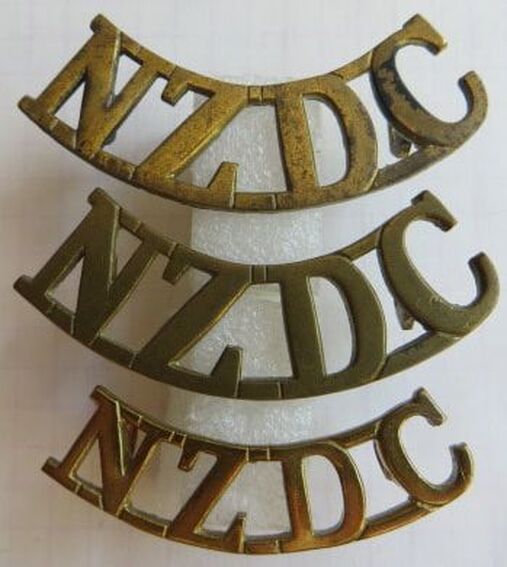
|
In July 1947, the corps was awarded the prefix "Royal". It does not seemed to have updated its kings crown badges to reflect this. It wasn't until post 1952, that a new badge was adopted with the "Royal" prefix.
|
|
- Opposite & Above: A post 1952, gilt brass and Silver or Silver plate (not marked) Cap and Collar badge set to the Royal New Zealand Dental Corps. Maker marked to Cap to "M & K Ltd, Well NZ" or Mayer and Kean Wellington New Zealand. The Collars have "M & K W NZ". The center on each is held on by two wires bent through holes in the surround to back. Thick wire looped lugs to each.
|
|
- Above: A gilt brass and white metal Cap badge to the Royal New Zealand Dental Corps. The white metal shield has been sweated onto the front. Two thick copper wire looped to back with the maker "M & K Ltd, Well NZ" for Mayer & Kean Limited, Wellington, New Zealand.
|
- Above: A more modern strike of the Royal New Zealand Dental Corps Cap badge. In gilt metal with a frosted silver shield to front. Solid to back, with small gilt covered looped lugs. No maker mark.
|
- Above: A single piece, two tone anodised aluminium Cap badge to the Royal New Zealand Dental Corps. No maker to back, with two long aluminium looped lugs to back.
|
|
|
|
|
- Above: A pair of two tone, anodised aluminium staybrite Collar badges to the Royal New Zealand Dental Corps. No maker mark with the above left collar having aluminium looped lugs, while the right has pins, to be used with clutches.
|
- Above: A pair of single piece, dull aluminium Collar badges to the Royal New Zealand Dental Corps. No maker mark and with pin to back to be used with clutches.
|

- Above: Cloth shoulder titles to the Royal New Zealand Dental Corps. Gold on Cossack Green. Note the lower title is the more modern, with embroidered border.
|
- Above Left: A 19mm, gilt brass shoulder strap button, with sew-in shank to the Royal New Zealand Dental Corps. Bolt thread to back and the maker details of "GAUNT, LONDON". Also found as a standard button with fixed shank (B Jones collection).
- Above 2nd Left: A 26mm gilt tone anodised aluminium fixed shank button to the Royal New Zealand Dental Corps. No maker marked to back, with 2 vent holes. - Above 2nd Right: A 19mm gilt tone anodised aluminium fixed shank button to the Royal New Zealand Dental Corps. Maker marked to "LONDON BADGE & BUTTON". - Above Left: A 14mm gilt tone anodised aluminium fixed shank button to the Royal New Zealand Dental Corps. No maker marked to back, with 2 vent holes. |


The Royal New Zealand Dental Corps wore two coloured puggarees to their Lemon Squeezer hats.
- 1st Type - Green/Khaki/Green
- 2nd Type - Dark Blue/Peacock Green/Dark Blue.
- Opposite: A Lemon Squeezer hat with the 2nd type puggaree of Dark Blue/Peacock Green/Dark Blue to center. Note there is also a Kings crown, Kiwi to center, Cap badge to the hat (Image from the internet).
- 1st Type - Green/Khaki/Green
- 2nd Type - Dark Blue/Peacock Green/Dark Blue.
- Opposite: A Lemon Squeezer hat with the 2nd type puggaree of Dark Blue/Peacock Green/Dark Blue to center. Note there is also a Kings crown, Kiwi to center, Cap badge to the hat (Image from the internet).
Fakes and Forgeries
The following is a fake, cast New Zealand Dental Corps Cap badge - the WW1 type, which was made at the type in New Zealand and worn overseas.
- Detail is OK to front, but colour again is wrong, and a organgey-yellow.
- To back is solid (which some originals are - Officers for example), stippled and pitted.
- Two short copper brass lugs are solidered to back.
- Size 40mm by 27mm.
- Detail is OK to front, but colour again is wrong, and a organgey-yellow.
- To back is solid (which some originals are - Officers for example), stippled and pitted.
- Two short copper brass lugs are solidered to back.
- Size 40mm by 27mm.
|
|
|
|
Royal New Zealand Chaplains' Department
As mentioned in the section covering the New Zealand Volunteer Badges, the New Zealand Chaplains' Department existed as far back as the Maori Wars. The unit was small, and it appears that there was no regular supplier of badges up to and during WW1. Pictures of the time indicate a variety of types were worn, but that there was no connection between a type of badge and the Chaplains denomination (i.e. Catholic, Methodist, Prespitarian Anglican etc).
Some badges appear to be hand-made, and have a motif of a crown on top of a malteese cross.
The NZ Army Chaplains Department, like those of the UK, Australia and Canada, had their own ranking, which sat alongside that of the Army.
Chaplain-General (CG) = Major-General
Deputy Chaplain-General (DCG) = Brigadier
Chaplain to the Forces I Class (CF1) = Colonel
Chaplain to the Forces II Class (CF2) = Lieutenant-Colonel
Chaplain to the Forces III Class (CF3) = Major
Chaplain to the Forces IV Class (CF4) = Captain
All Chaplains started at the rank of Captain or IV Class.
Motto: In This Sign Conquer.
Motto: (none in the 1st NZEF - as noted in R17187868 AALI W3508 7291 Archives NZ)
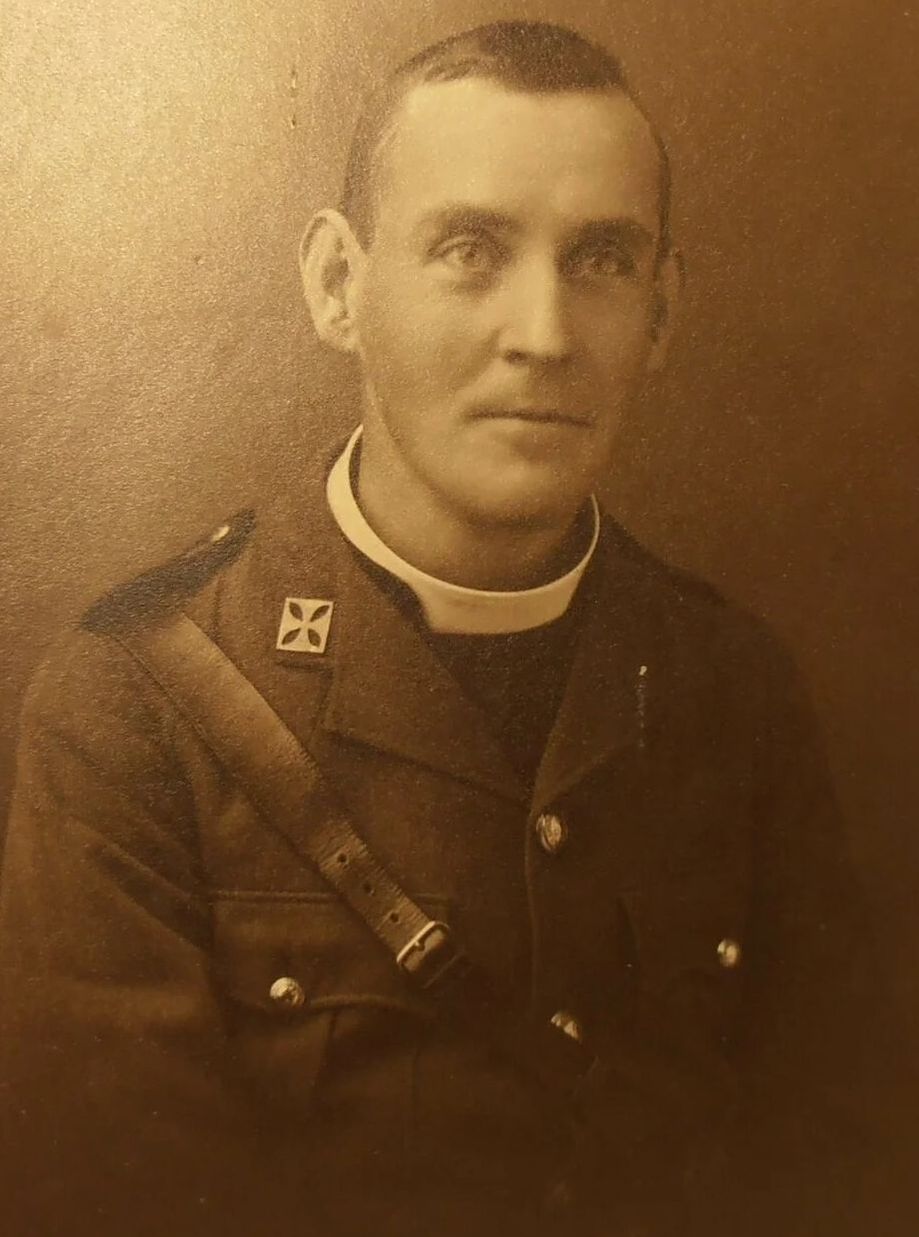
|
- Above: A single piece, painted brass Cap badge worn from the Volunteer period into maybe WW1 by New Zealand Army Chaplains. Two D shaped copper looped lugs to back, with no maker mark. Size 27mm by 27mm.
- Opposite: A early, prbably pre-war image of 6/1149 Rev Thomas Feilden Taylor CF3 (Major). He is wearing the above Cap badge size badge (27mm by 27mm) on his Collar. He left with the main body in Oct 1914 and served with the Canterbury Infantry Battalion in Egypt and at Gallipoli. Note he is wearing the 4 star "New Zealand Forces" buttons on his tunic. Denomination - Church of England. The photograph is undated (New Zealand Society of Genealogists. Nelson Branch and Tasman Heritage). |
|
- Above: A example of a brass, voided, non-crowned Cap badge worn by the New Zealand Chaplains Department. Note it has been taken just slightly on a angle, and the light has changed the color. Size 27mm by 27mm (T Heighway collection)
|
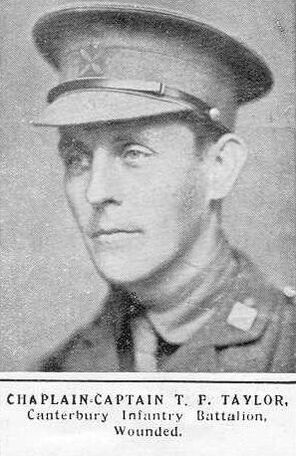
- Above: Another image of 6/1149 Rev Thomas Feilden Taylor printed in 1915 as part of Auckland Weekly News, Roll of Honor 1915. Sadly Rev Taylor was shot in the back at Gallipoli on the 15th of May 1915. He was evacuated out to Malta, where he happily recoved from his wounds to return back to Gallipoli on the 25th of Aug 1915. He would go on to serve there, and the UK until Sept 1916, when, due to ill health, he returned to New Zealand. Note his Cap and Collar badges are the non-void Cowned type, which are discussed further below (image from Auckland Cenotaph).

- Above: A image of 36276 Rev Ronald Sinclair Watson CF4 (Captain). He is wearing a darkened voided Kings crown Cap badge, with void, non-crowned Collars. Denomination - Presbyterian. See below also (Presbyterian Research Centre (Archives)).
|
|
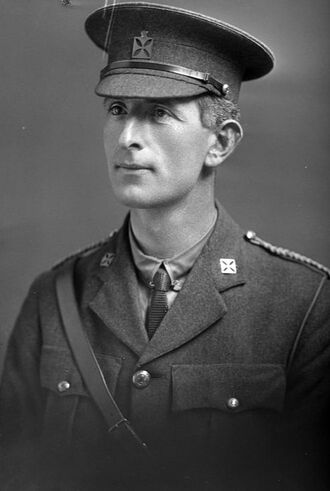

|
- Above: A example of a 2 piece, brass, voided, crowned Cap badge worn by the New Zealand Chaplains Department. The crown is separatly sweated to top of badge, and note that it is non-void (C Sayer collection)
|
- Above: A example of a 2 piece, brass, voided, crowned Cap badge worn by the New Zealand Chaplains Department. Note it has been taken just slightly on a angle, and the light has changed the color. Size 39mm by 29mm, and note the crown is voided (T Heighway collection)
|
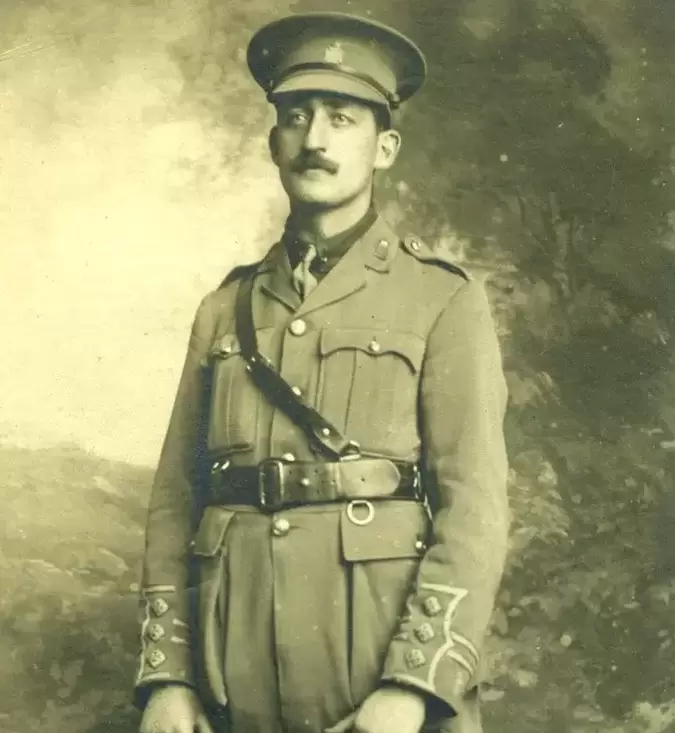
|
- Opposite: A image of 18/17 Rev Walter McLean, CF4 (Captain), who is wearing a silmilar badge to the above on his Cap and might have the same on his Collar (hard to make out).
Rev McLean begain his military service on the 8th of Oct 1915, and spent 4 years and 15 days overseas, in Egypt and the Middle East (1915/1916) and France and the Western Front (1916/1917/1918). He was awarded the Military Cross, gazetted on the 1st of Jan 1918. Denomination - Presbyterian (Presbyterian Research Centre (Archives)). |
|
- Above: A locally made pattern of badges to the New Zealand Chaplins' Department. These seem to have been worn during WW1. Two piece construction, with separate crown attached to a hand-cut circular wreath containing a cross. They have a darkened finish applied and appear to be brass underneath. Two hex type brass lugs to the back of both Cap and Collar, but no maker mark. Size of Cap 40mm by 28mm, Collar 31mm by 22mm.
- Opposite: A image of 37060 Rev David Craig Herron, CF4 (Captain) of the New Zealand Chaplains Department who won the Military Cross in 1918. He was ordained a Presbyterian minister, and looks to be wearing the smaller, Collar size badge of the above to his Peaked Cap. Three Officers pips, for the rank of Captain, can just be seen on his left shoulder strap (image from the Auckland Cenotaph). |
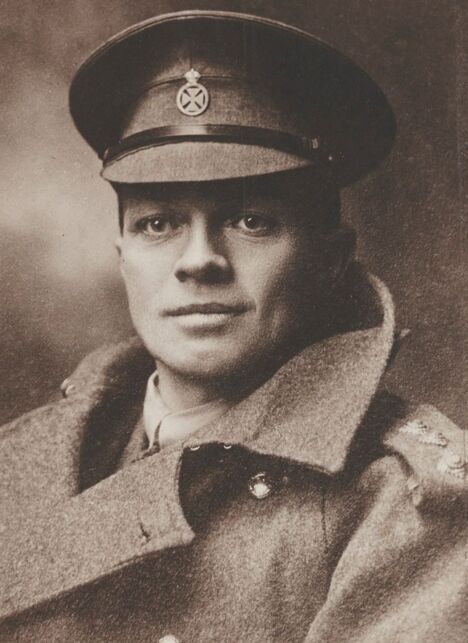
|
|
- Above: A darkened bronze Cap badge to the British or Commonwealth (including New Zealand) Chaplains' Department with two blades to back. No maker mark. Size 40mm by 39mm.
- Opposite: A later, post WW1 image of 36276 Rev Ronald Sinclair Watson CF4 (Captain). Here, he is wearing the above Cap badge ad below collars, with their Kings Crown and non-voiding. Rev Watson is also wearing the following medals (Left to Right) Military Cross (gazetted 1st of Feb 1919), British War Medal, Victory Medal and his Territorial Decoration (George V - for Long Service). Denomination - Presbyterian (Presbyterian Research Centre (Archives)). |
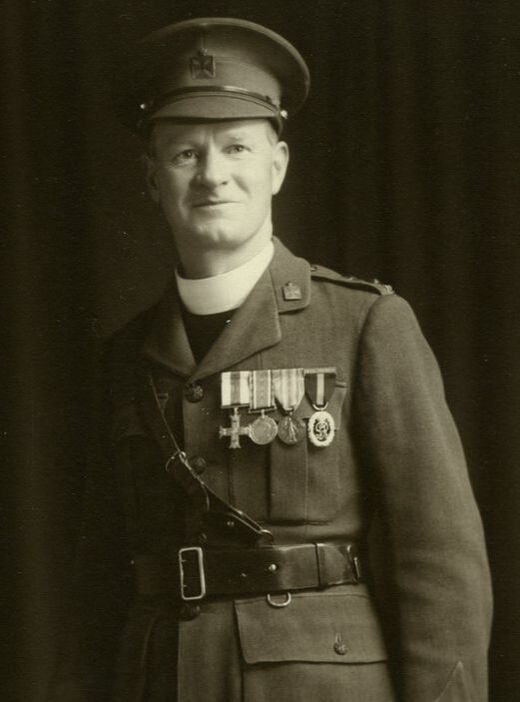
|
|
- Above: A darkened copper Cap badge to the British or Commonwealth (including New Zealand) Chaplains' Department. Two pressed type lugs to back with a marker mark in raised letters to "K. G. Luke, Melb". Size 41mm by 39mm.
|
- Above: A pair of darkened Collar badges to the British or Commonwealth (including New Zealand) Chaplains' Department. Two short type lugs to back on each with a marker mark in raised letters to "K. G. Luke, Melb". Size 32mm by 28mm. Note the right Collar has been mis-struck, and right edge is at a angle.
|
From 1937 the New Zealand Chaplains' Department was given approval to wear all British Chaplains badges.
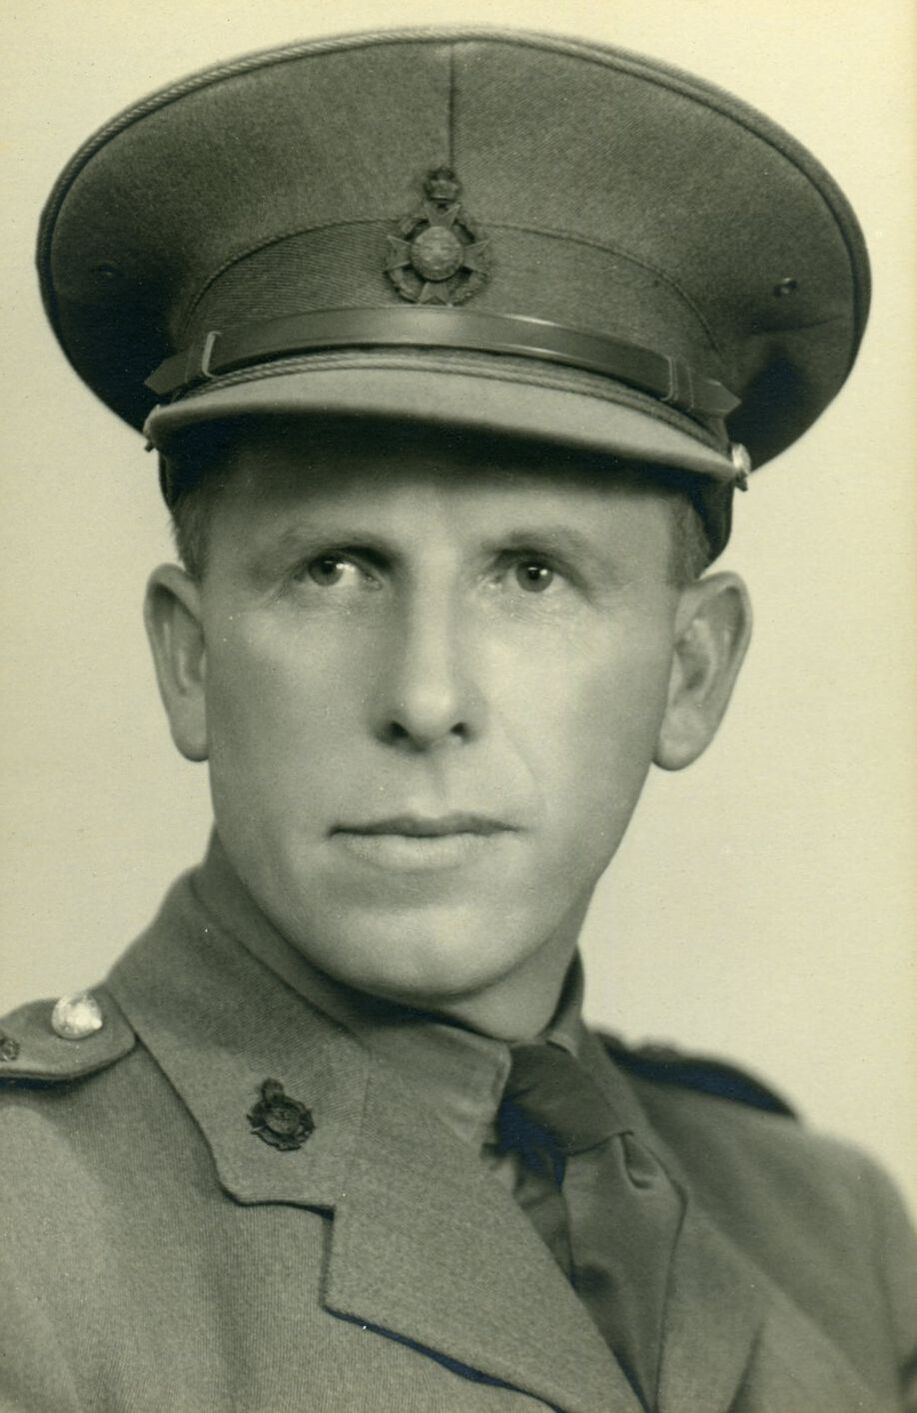
|
- Above: A Cap badge to both the British and New Zealand Chaplains' Department. No maker mark to back, with two thick wire looped lugs to back. Size 45mm by 34mm.
- Opposite: A image of 35174 Rev Andrew MacFarlane, CF4 (Captain) who left New Zealand as part of the 3rd Echelon between July 1940 and March 1941, and served with No. 3 General Hospital, New Zealand Medical Corps. He is wearing a darkened version of the above badge, with matching Collar badges. Denomination - Presbyterian (Presbyterian Research Centre (Archives)). |
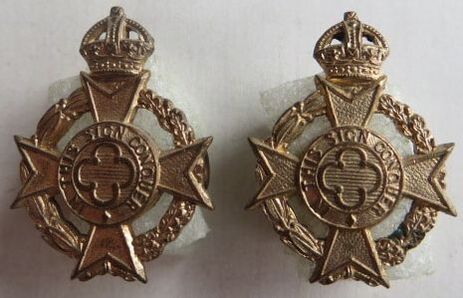
- Above: A Collar badge pair to both the British and New Zealand Chaplains' Department. No maker mark to back, with two thick wire looped lugs to back to each. Size 30mm by 22mm.
|
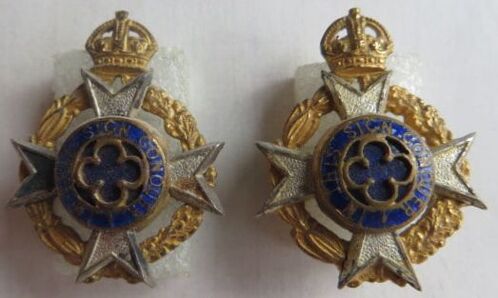
- Above Right: A pair of Kings crown, gilt brass, enamel and Silver plated Collar badges used by both the British and New Zealand Chaplains' Department. Marked "P" for plate to back with D shaped copper looped lugs. One is faintly marked "J R Gaunt London". Size 30mm by 22mm.
|

- Above: A image taken in 1941, in New Zealand by the New Zealand Artillery Officer on the far right, and who is standing with at least two other members of the New Zealand Artillery. In the center is a Chaplain, with the rank of Captain. He is wearing a Kings Crown, British Chaplains Cap Badge on his Lemon Squeezer, with a puggaree of Black/Khaki/Khaki/Black. You can just see the bottom band of black, partly obscured by the brim of his hat. I sadly do not know who they are.
|
- Above: A Kings crown, gilt fired brass, enamel and Silver Sash badge used by both the British and New Zealand Chaplains' Department. No maker mark to back, and not marked Silver, it has a broach fitting to back. Size 66mm by 44mm.
- Opposite: A image of Rev Charles M. Sullivan, CF4 (Captain) dated 1945. Interestingly he is wearing a 5th (Otago Hussars) Mounted Rifles Cap badge, and King crowned Chaplain Collar badges. Denomination - Presbyterian (Presbyterian Research Centre (Archives)). |
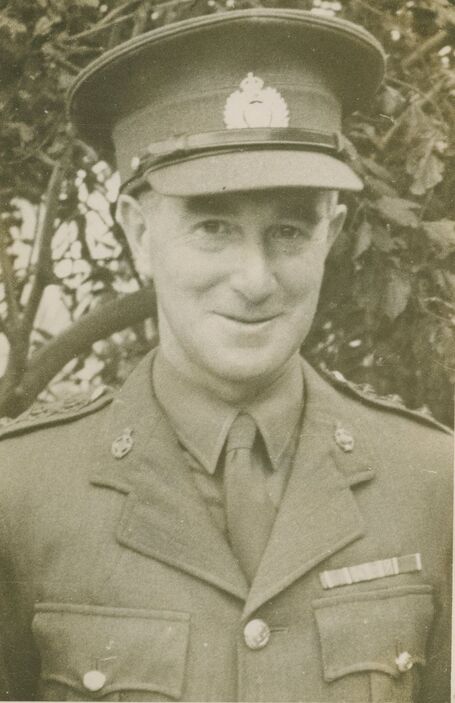
|
In July 1947, the New Zealand Chaplans' Department was awarded the prefix "Royal" and became the Royal New Zealand Chaplains' Department. They continued to wear the British versions of the badges.
|
- Above: A single piece, gilt brass, Cap badge to the British or Royal New Zealand Chaplains' Department. Not maker marked, and with two looped lugs to back. Size 45mm by 32mm.
|
- Above: A single piece, darkened bronze, Cap badge to the British or Royal New Zealand Chaplains' Department. Not maker marked, and with two tangs to back. Size 45mm by 34mm.
|
- Above: A single piece, gilt brass, Cap badge to the British or Royal New Zealand Chaplains' Department. Note the "large" Queens crown. Not maker marked, and with two thick wire looped lugs to back. Size 45mm by 34mm.
|
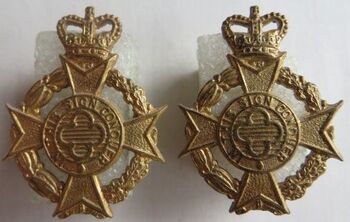
- Opposite: A pair of single piece, gilt brass, Collar badges to the British or Royal New Zealand Chaplains' Department. Note the "large" Queens crown matching the above, right Cap badge. Not maker marked, and with two thick wire looped lugs to back on each. Size 30mm by 23mm.
|
|
- Opposite: A multi-piece, gilt, Silver and enamel Cap badge to the British or Royal New Zealand Chaplains' Department. Not maker marked and with two long looped lugs. Size 45mm by 34mm.
- Above: A Pair of gilt brass, enamel and silver or silver plated Collar badges to either the British or Royal New Zealand Chaplains' Department. Note someone has removed the overlay on one, and snapped off the arms on the other. Two D shaped looped lugs to both, but no maker mark. Size 29mm by 22mm. |
In 1980, the Royal New Zealand Chaplains' Department were given permission to wear their own distinctive badge.
|
- Above: A single piece, silver plate, gilt metal and resin Cap badge to the Royal New Zealand Chaplains' Department. To back is a prong bar. Maker marked to "Mayer & Toye Ltd, Wgtn, NZ". Size 52mm by 39mm.
|
- Above: A single piece, silver plate, gilt metal and resin Cap badge to the Royal New Zealand Chaplains' Department. To back is a prong bar. No Maker mark. Size 52mm by 39mm.
|
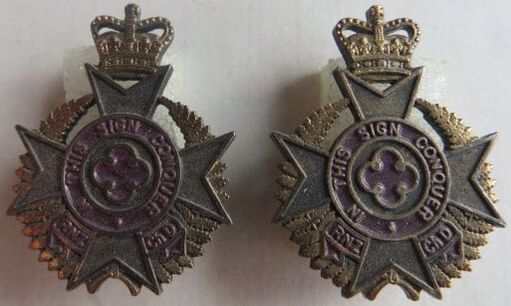
- Above: A pair of single piece, silver plate, gilt metal and resin Collar badges to the Royal New Zealand Chaplains' Department. To back are a pair of looped lugs, with no maker mark. Size 32mm by 24mm.
|
Officers of the Royal New Zealand Chaplains' Department were authorised to wear silver or anodised aluminium crosses on their green Summer and Combat Dress uniforms as Collar badges. Below is a selection which much variation.

Top Row (from Left to Right):
- A gilt pair of crosses with two pins to back, and held onto the uniform by clutches.
- A pair of dull silvered metal crosses, again, two clutch pins to back to each.
- A wide pair of crosses in Silver (not marked). Single pin lug to back.
Bottom Row:
- A pair of crosses in Silver (not marked). Two pin lug to back.
- A pair of crosses in Silver (not marked). Two D shaped looped lugs to back.
- A pair of gilt metal crosses. Two screw posts to back of each.
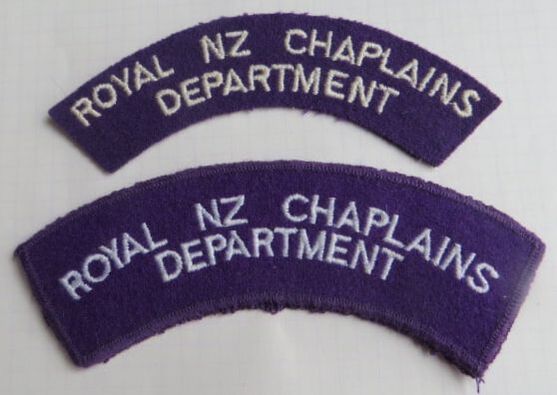
|
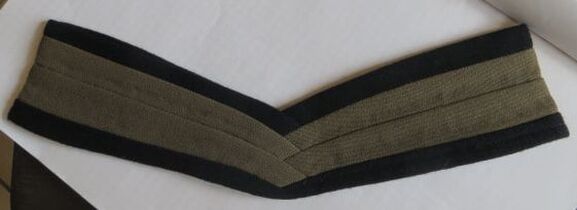
- Opposite: A pair of cloth shoulder title to the Royal New Zealand Chaplains' Department. White letters on a Royal Purple background. The older version, without embroidered edge is at top, while the more modern version is below.
- Above: A puggaree to fit the Lemon Squeezer hat to the Royal New Zealand Chaplains' Department . Black/Khaki/Khaki/Black. Marked to inside with size only, in purple ink to "6 3/4". |
|
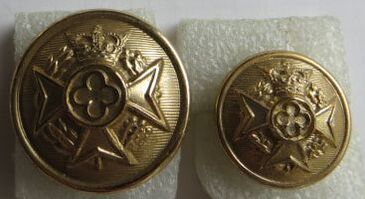
- Above Left: A 26mm gilt tone anodised aluminium fixed shank button to the Royal New Zealand Chaplains' Department. Maker marked to "GAUNT LONDON" to back.
- Above Right: A 20mm gilt tone anodised aluminium fixed shank button to the Royal New Zealand Chaplains' Department. Maker marked to "GAUNT LONDON" to back. |

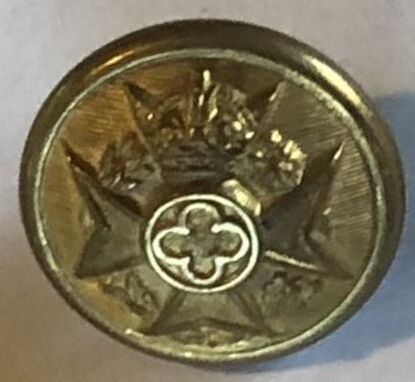
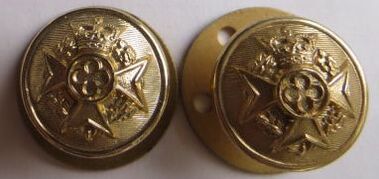
- Above: A pair of 19mm gilt tone anodised aluminium fixed shank shoulder strap buttons to the Royal New Zealand Chaplains' Department. Brass sew-in flang to back, with a thread shank. Maker marked to "GAUNT LONDON" to back.
|
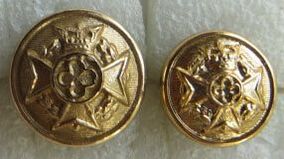
- Above Left: A 17mm gilt tone anodised aluminium fixed shank button to the Royal New Zealand Chaplains' Department. Maker marked to "GAUNT LONDON" to back.
- Above Right: A 14mm gilt tone anodised aluminium fixed shank button to the Royal New Zealand Chaplains' Department. Maker marked to "GAUNT LONDON" to back. |
New Zealand Intelligence Corps
The New Zealand Intelligence Corps formed briefly during WW2.
|
- Above: A bronze Cap badge to the New Zealand Intelligence Corps. Two long copper wire looped lugs to back, with the maker mark of "M & K Ld, W" for Mayer & Kean Limited, Wellington. Size 44mm by 47mm.
|
- Above: A similar Cap badge again to the New Zealand Intelligence Corps. Gilt brass in finish (Ian Hamilton Collection).
|
In 1987 the corps re-formed, but no New Zealand badge was issued, so the Corps worn the British version of the Intelligence Corps Cap and Collar badges in white metal.
In 1994 the corps was given permission to wear a New Zealand version, and the WW2 pattern was updated with a Queens crown.
In 1994 the corps was given permission to wear a New Zealand version, and the WW2 pattern was updated with a Queens crown.
|
- Above: A frosted white metal British Intelligence Corps Cap badge, worn by the New Zealanders from 1987 to 1994. No maker mark and two thread posts with nuts to back.
|
|
- Opposite & Above: A darkened bronze coloured Cap and Collar badge set to the New Zealand Intelligence Corps. No maker mark to back of Collars, but the Cap has "Mayer & Toye, Wgtn, N.Z. (04) 3849 884", and all have two pins to use with clutches
Cap size is 42mm by 46mm. Collar size are 30mm by 32mm |
|
- Above: A darkened near black coloured Cap badge to the New Zealand Intelligence Corps. No maker mark to back, with two pins to use with clutches.
Size is 42mm by 46mm. |
- Above: A brown coloured Cap badge to the New Zealand Intelligence Corps. Maker mark to back to "Mayer & Toye, Wgtn, N.Z. (04) 3849 884", with two looped lugs.
Size is 42mm by 46mm. |
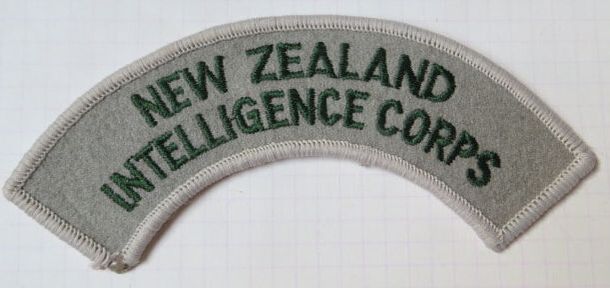
- Opposite: A modern cloth shoulder title to the New Zealand Intelligence Corps. Green embroidered letters on a grey background.
New Zealand Army Air Corps
The New Zealand Army Air Corps was established on the 9th of August 1963. Their badge is based on the British version.
|
- Above: A silver plated Cap badge to the New Zealand Army Air Corps. Two looped lugs to back, but no maker mark. Size 46mm by 40mm.
|
- Above: A silver plated Cap badge to the New Zealand Army Air Corps. Two screw posts to back, but no maker mark. Size 47mm by 41mm.
|
- Above: A anodised aluminium Cap badge to the New Zealand Army Air Corps. British made, with slider to back and maker marked to "London Badge & Button Co Ltd". Size 47mm by 40mm.
|
|
- Above: A pair of opposing collars, 1st type, to the New Zealand Army Air Corps in silver coloured anodised aluminium. No maker mark and with two pins to back to each to use with clutches. Size 35mm by 29mm.
|
- Above: A pair of opposing collars, 2nd type, to the New Zealand Army Air Corps in silver coloured anodised aluminium. No maker mark and single slot like lug to back. Size 25mm by 23mm.
|
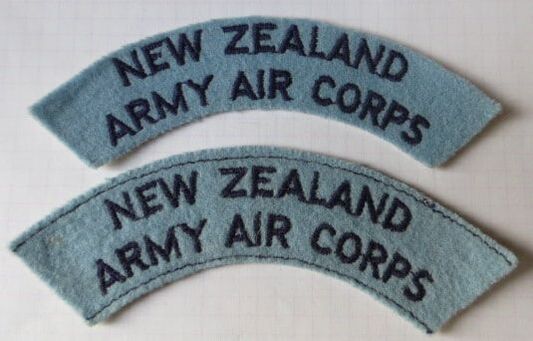
- Opposite: A pair of Indigo embroidered lettered on Adonis Blue backing, shoulder titles to the New Zealand Army Air Corps. The bottom title is possibly unissued, and shows the stitching to top and bottom, which indicates were to cut and sew to the soldier.
New Zealand Everyman's Hut.
The Everyman's Hut operated during WW2 in New Zealand, in the training camps like Papapkura and Burnham.
They were a Christian organisation, much like the Y.M.C.A. but were founded in Australia in 1936, initially by Christian Businessmen, but likeminded New Zealanders adopted the concept, to allow New Zealand Defense personel somewhere to have light refreshments, literature, Christian entertainment and witness.
- Opposite: A darkened copper Cap badge worn by civilian personel while in Camp on their uniform. It has two copper looped lugs to back, in a East/West configuration and is maker marked/impressed to "THEO MEYER, AUCK".

- Opposite: A letter head given to New Zealand troops training at Papakura Military Camp to write home. Other items seen include an Army Bible, with the Everyman's Hutt logo and "Burnham Military Camp" stamped inside it.
When the above Cap badge came up for sale, two shoulder titles were also listed at the same time. The vendor confirmed that they came with the Badge. They were curved brass with "N.Z.E.H" for New Zealand Everyman's Hut. Prior to this, New Zealand badge references had inferred that they stood for "New Zealand Expeditionary Hospital", which turned out to be wrong!
When the above Cap badge came up for sale, two shoulder titles were also listed at the same time. The vendor confirmed that they came with the Badge. They were curved brass with "N.Z.E.H" for New Zealand Everyman's Hut. Prior to this, New Zealand badge references had inferred that they stood for "New Zealand Expeditionary Hospital", which turned out to be wrong!
Legion of Frontiersmen.
|
The Legion Of Frontiersman was formed in 1904, in Britain.
Motto: God Guard Thee It was a civilian organisation which was founded on fears that Britain and its Empire were to be invaded. Its members saw themselves as a field intelligence corps that would watch over and protect the boundaries of the Empire. Headquarters were based in London. The New Zealand branch formed in 1911, and spread around the country appealing to men of "active military service, liked hunting, "roughing it" and "exploring in wild places", of which New Zealand must have been able to offer plenty. There were some notable members, including seven New Zealand VC winners from WW1 and one from WW2. New Zealand members of the Legion wore a distinct uniform of black tunic, fawn pants and a lemon squeezer hat. - Opposite: A sadly unnamed image of a New Zealand Frontiersman wearing the rank of Sergeant to his black tunic. Note his Lemon Squeezer, which is worn with peaks "side on" to front, and with a Leather band. Cap badge, Collars of the Legion of Frontiersmen. Note also the chain-mail shoulder boards which have the metal "Frontiersmen" titles attached. To back of photo is "Devon Studios, P O Box 248, New Plymouth" |
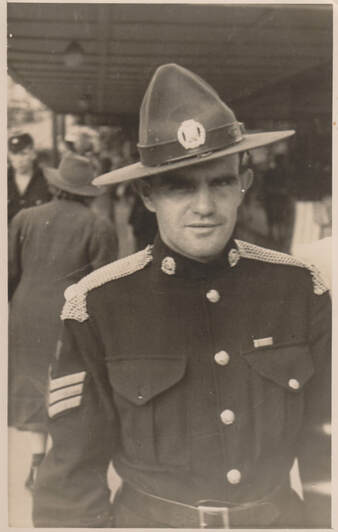
|
|
|
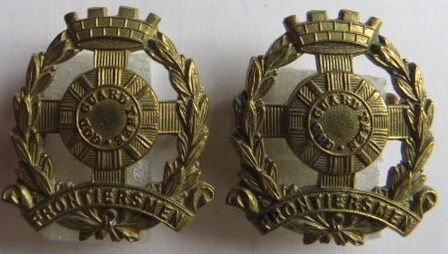
- Opposite & Above: A gilt brass Cap and Collar badge set to the Legion of Frontiersmen. All have two copper looped lugs to back. No maker mark. Size of Cap is 42mm by 40mm, while Collars are 30mm by 27mm.
|

- Above: A pair of gilt bass Collar badges to the Legion of Frontiersmen. Extra gilt seems to have been applied, and they are still die stamped, with two copper D shaped looped lugs to back. No maker mark and size 30mm by 27mm.
- Opposite: A gilt brass Cap badge to the Legion of Frontiersmen. Long brass slider to back, with the maker mark on the back of the shield to "M & K Ltd, Wgton", for Mayer and Kean Ltd, Wellington". Size 43mm by 40mm. |
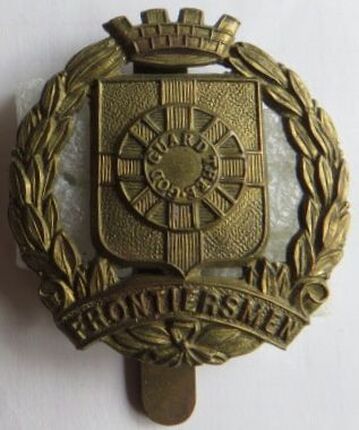
|
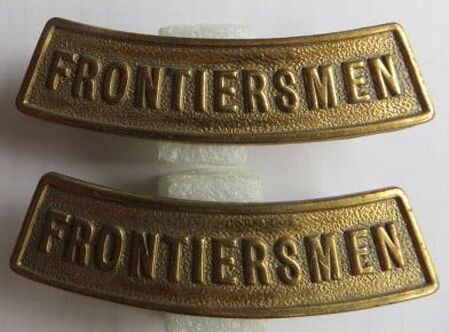
- Above: A matching pair of solid backed, gilt brass shoulder titles to the Legion of Frontiersmen. Two looped lugs to the back of each. No maker mark. Size 16mm by 63mm.
|
- Above: A pair of metal chain-mail shoulder boards to the Legion of Frontiersmen, but also worn by some British Yeomanry regiments today. Roughly 180mm long by 150mm wide.
|
|
- Above: A New Zealand made, Legion of Frontiersmen buttonhole badge in gilt brass and enamal. To back is a bottonhole fitting with the membership number "628" stamped to back and the logo for "MK" in a circle for Mayer and Kean of Wellington. Likely made around the 1930's (image from the internet).
|
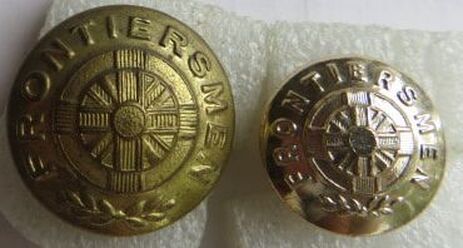
- Above Left: A 23mm gilt brass, fixed shank button to the Legion of Frontiersmen. Maker marked to (sadly not readable) "###### & Son Ltd ####DON ENG" to back. Likely Gaunt.
- Above Right: A 18mm silver tone anodised aluminium fixed shank button to the Legion of Frontiersmen. No maker marked to back. |
Other sizes & maker marks found on the Buttons (B Jones collection):
Fronteirsman buttons: 13mm "JR Gaunt MTL", 16mm "Firmins London", 16.7mm "Firmins London", 16.7mm "Made in England" (gilt), 17.3mm (no maker), 23mm (no maker), 23mm "JR Gaunt & son Ltd London", 23mm "Gaunt London", 23mm "JR Gaunt & son London England", 23mm (no maker & unsure of metal), 23mm "JR Gaunt Montreal"(chrome)
"LF" buttons: 17mm (no maker), 16.8mm "Firmins London", 21mm "Firmins & sons Ltd London"