New Zealand Infantry Badges
Just prior to the beginning of WW1, New Zealand had an established, regular Army and Territorial organisation, which had come into force in 1911 as part of the 1909 Defence Act.
For administration purposes, New Zealand had been divided into four Army Districts.
Prior to 1911, under the Volunteer system, there were five Military Districts, but in 1911, the Nelson District was amalgamated with Canterbury.
Each district was to initially have 4 Territorial Infantry Regiments, and was given a "letter". These letters become important when discussing Reinforcement badges worn during WW1 while training.
The districts were as follows:
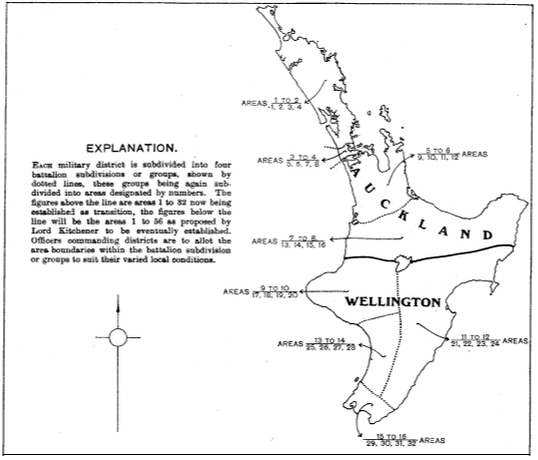
A - Auckland District - covering from the middle to the top of the North Island of NZ.
Infantry Regiments consisted of:
- 3rd (Auckland) Infantry Regiment
- 6th (Hauraki) Infantry Regiment
- 15th (North Auckland) Infantry Regiment
- 16th (Waikato) Infantry Regiment
B - Wellington District - covering from the middle to lower half of the North Island of NZ.
Infantry Regiments consisted of:
- 5th (Wellington Rifles) Infantry Regiment
- 7th (Wellington West Coast) Infantry Regiment
- 9th (Hawke’s Bay) Infantry Regiment
- 11th (Taranaki) Infantry Regiment
- 17th (Ruahine) Infantry Regiment - Formed April 1914
- Opposite: A map showing the two Military Districts for the North Island (Map taken fron the 1910 AJHR H19a - page 7).
Infantry Regiments consisted of:
- 3rd (Auckland) Infantry Regiment
- 6th (Hauraki) Infantry Regiment
- 15th (North Auckland) Infantry Regiment
- 16th (Waikato) Infantry Regiment
B - Wellington District - covering from the middle to lower half of the North Island of NZ.
Infantry Regiments consisted of:
- 5th (Wellington Rifles) Infantry Regiment
- 7th (Wellington West Coast) Infantry Regiment
- 9th (Hawke’s Bay) Infantry Regiment
- 11th (Taranaki) Infantry Regiment
- 17th (Ruahine) Infantry Regiment - Formed April 1914
- Opposite: A map showing the two Military Districts for the North Island (Map taken fron the 1910 AJHR H19a - page 7).
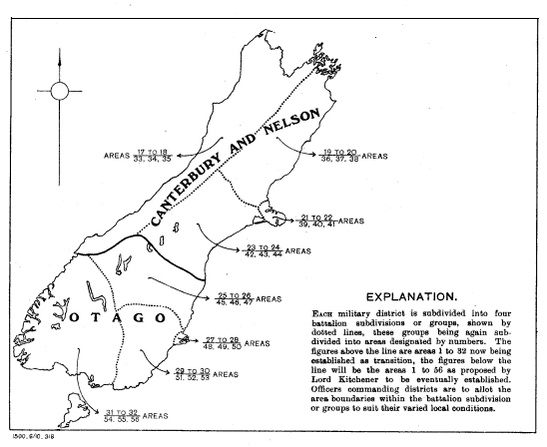
C - Canterbury District - covering from the middle to the top half of the South Island of NZ.
Infantry Regiments consisted of:
- 1st (Canterbury) Infantry Regiment
- 2nd (South Canterbury) Infantry Regiment
- 12th (Nelson) Regiment - became the 12th (Nelson & Marlborough) from 1917
- 13th (North Canterbury & Westland) Regiment
D - Otago Distict - covering from the middle to the lower half of the South Island and including Stewart Island.
Infantry Regiments consisted of:
- 4th (Otago) Infantry Regiment
- 8th (Southland) Infantry Regiment
- 10th (North Otago) Infantry Regiment
- 14th (South) Otago Infantry Regiment
- Opposite: A map showing the two Military Districts for the South Island (Map taken fron the 1910 AJHR H19a - page 7).
Infantry Regiments consisted of:
- 1st (Canterbury) Infantry Regiment
- 2nd (South Canterbury) Infantry Regiment
- 12th (Nelson) Regiment - became the 12th (Nelson & Marlborough) from 1917
- 13th (North Canterbury & Westland) Regiment
D - Otago Distict - covering from the middle to the lower half of the South Island and including Stewart Island.
Infantry Regiments consisted of:
- 4th (Otago) Infantry Regiment
- 8th (Southland) Infantry Regiment
- 10th (North Otago) Infantry Regiment
- 14th (South) Otago Infantry Regiment
- Opposite: A map showing the two Military Districts for the South Island (Map taken fron the 1910 AJHR H19a - page 7).
Prior to WW2, the Canterbury/Nelson and Otago Army Districts were amalgamated into the Southern Army District, to cover the whole of the South Island. The Auckland and Wellington Army Districts remained as is.
This section of the website will look at the huge variation of Cap and Collar badges worn by the 17 New Zealand Infantry Regiments from 1911 until now.
This section of the website will look at the huge variation of Cap and Collar badges worn by the 17 New Zealand Infantry Regiments from 1911 until now.
New Zealand Infantry Regiments
1st (Canterbury) Infantry Regiment.
Formed in 1911 (from the 1st North Canterbury Battalion).
Headquarters at Christchurch.
On the 30th of May 1911, the following designs were submitted for approval for the Regiment's badges:
Headquarters at Christchurch.
On the 30th of May 1911, the following designs were submitted for approval for the Regiment's badges:
|
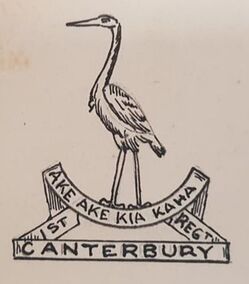
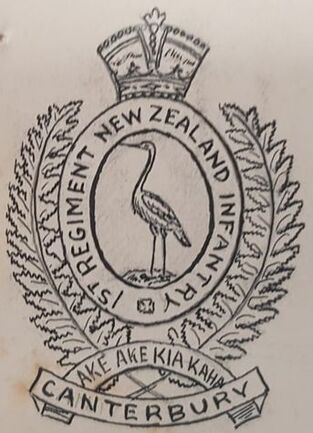
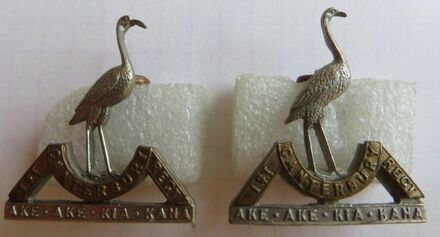
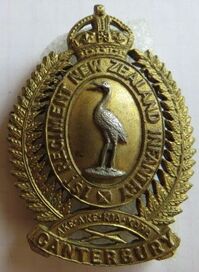
Opposite and Above: The Cap badge was described as a "Bird (white crane) surrounded by oval bearing the words "1st Regiment New Zealand Infantry" flanked by fern fronds and surmounted by a crown. Motto "Ake Ake Kia Kaha" and words "Canterbury" on scroll at base".
Collar Badge - "Bird surmounting scrolls bearing the motto & words "1st Regiment Canterbury". (Badges - Regimental - Territorial Force, R23534556 AD1 AAYS 13-13 Archives NZ). |
Motto: AKE AKE KIA KAHA (Forever and ever be strong).
|
- Above: A bi-metal Officers Bronze and Silver (not marked as such to back) Cap badge to the 1st (Canterbury) Infantry Regiment. Two tangs or blades to back, which is semi-solid. Maker plaque to back to "J R GAUNT LONDON". Size 46mm by 34mm.
|
- Above: A bi-metal other ranks, gilt brass and white metal Cap badge to the 1st (Canterbury) Infantry Regiment. Two copper looped lugs to back, with a maker plaque to back of crown to "J R GAUNT LONDON". Size 46mm by 34mm.
|
|
- Above Right: A Gaunt made and plaqued gilt brass and white metal Cap badge to the 1st (Canterbury) Infantry Regiment, with hook. In 1911 there was some indecision or direction on what Hat or Cap the newly formed New Zealand Army should wear. It was often left to the Regiment and its Officers to decide. Some, such as 1st (Canterbury) Infantry Regiment, adopted the slouch hat for a period before WW1. It was worn with one flap held up/back, as had been the style during the Boer War. Some badges were therefore produced with a hook at the base. This is a rare survivor, as many of these badges had their hook snapped/clipped off, and issued as a normal Cap badge. Size overall with hook is 56.5mm by 34mm.
|
- Above: A bi-metal other ranks, gilt brass and white metal Cap badge to the 1st (Canterbury) Infantry Regiment. Two copper looped lugs to back, with no maker mark. Size 47mm by 33mm.
|
- Above: Referred to as the "Spiky Leaf" version, with angular crown and fern wreath, this appears to be a locally made NZ version of the cap badge, and is rare. Bi-metal, it has two copper looped lugs to back. No maker mark. Size 47mm by 32mm.
|
- Above: A sand cast Brass Cap badge, complete with Gaunt plaque cast into its back. Made in the Middle East during WW1 as Kiwi Regiments were briefly stationed there or passed through to other theaters of War. Size 45mm by 33.5mm.
|
- Above: A all brass other ranks, Cap badge to the 1st (Canterbury) Infantry Regiment. Two long copper wire lugs to back, with no maker mark. Size 48mm by 34mm.
|
|
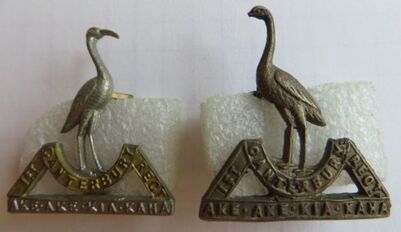
- Above: A pair of bi-metal Collar badges to the 1st (Canterbury) Infantry Regiment. Right when worn, both are impressed to back, with the left in small letters to "J R GAUNT LONDON" and the right to "J R GAUNT L'DON". Both have copper looped lugs. Size 29mm by 25mm.
|
In August 1947 the 1st (Canterbury) Infantry Regiment was designated a Territorial Force (TF)
|
- Above: A solid backed, gilt fired Officers Cap badge to the 1st (Canterbury) Infantry Regiment. Impressed to back to "J R GAUNT LONDON", this is the Queens Crowned version, and used from 1952 to 1964. Extra long looped lugs to back. Size 47mm by 33.5mm.
|
- Above: A matching opposing pair of Gilt Fired and Silver collars (not marked) to the 1st (Canterbury) Infantry Regiment. Both have D shaped copper loops to back. Size 29mm by 25mm.
|
- Above Left: A bi-metal Collar badge to the 1st (Canterbury) Infantry Regiment. Wide flat, pressed type brass lugs to back, with sweat-holes to back of white metal frame. No maker mark and size 28mm by 25mm.
- Top Right: A all white metal version of the Collar. It could be its just lost the upper banner over-lay. No maker mark. Size 30mm by 26mm. |
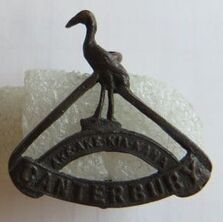
- Above: A unusual collar size badge, which looks to have been cut from a Cap badge (but is missing the wreath). Purpose unknown. Two copper looped lugs to back. Size 26mm by 26mm.
|
- Above: A pair of shiny brass coloured, modern opposing collars to the 2nd Battalion (Canterbury, Nelson and Marlborough West Coast) Royal New Zealand Infantry Regiment. Both have a pair of pins to back, to be used with clutches. No maker mark. Size 28mm by 24.5mm.
|
On the 1st of April 1964 it amalgamated with the Nelson, Marlborough and West Coast Regiment and became:
2 RNZIR – 2nd Battalion, (Canterbury, and Nelson-Marlborough and West Coast), Royal New Zealand Infantry Regiment.
Again it was designated a Territorial Force.
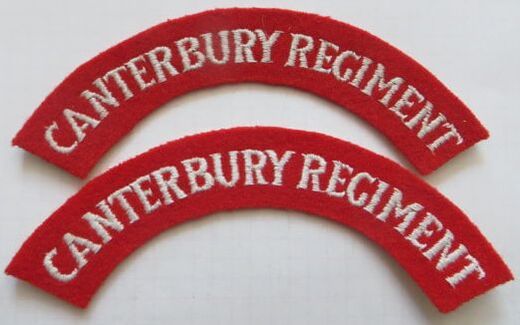
- Opposite: A pair of embroidered and felt cloth shoulder titles worn post 1961 to 1994 to elements of the Canterbury Regiment of the 2 RNZIR. Size 20mm by 125mm.
In March 2013, the Regiment was further merged with the 4th Battalion (Otago and Southland), Royal New Zealand Infantry Regiment to form:
2nd/4th Battalion, Royal New Zealand Infantry Regiment (2/4 RNZIR)
It is a Reserve battalion of the Royal New Zealand Infantry Regiment (see above for Collar badge).
2 RNZIR – 2nd Battalion, (Canterbury, and Nelson-Marlborough and West Coast), Royal New Zealand Infantry Regiment.
Again it was designated a Territorial Force.
- Opposite: A pair of embroidered and felt cloth shoulder titles worn post 1961 to 1994 to elements of the Canterbury Regiment of the 2 RNZIR. Size 20mm by 125mm.
In March 2013, the Regiment was further merged with the 4th Battalion (Otago and Southland), Royal New Zealand Infantry Regiment to form:
2nd/4th Battalion, Royal New Zealand Infantry Regiment (2/4 RNZIR)
It is a Reserve battalion of the Royal New Zealand Infantry Regiment (see above for Collar badge).
2nd (South Canterbury) Infantry Regiment.
Formed in 1911, from the South Canterbury Battalion of Infantry, it became the 2nd (South Canterbury) Infantry Regiment.
Headquarters at Timaru.
Headquarters at Timaru.
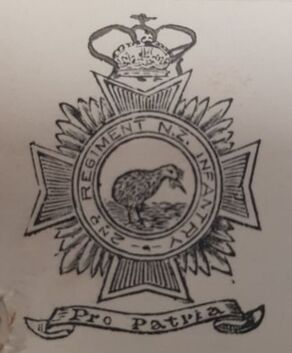
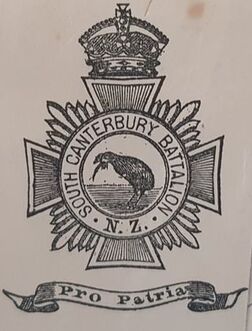
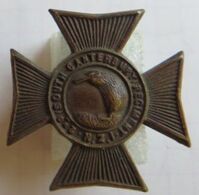
Cap Badge - In 1911, their badge was described as a "Maltese cross with the words "South Canterbury Battalion NZ" in a circle surrounding a Kiwi".
Collar Badge - "Similar".
On the 20th of Dec 1911, the opposite drawing was submitted for approval to the General Officer Commanding (G.O.C), with the following:
"The Officer Commanding 2nd (South Canterbury) Regt. N.Z.I applies for permission to make the following alterations in the regimental badge approved on 8.7.11.
On a Maltese Cross a Kiwi within a garter inscribed 2nd (South Canterbury) Regt. N.Z.I. the cross surmounted by a crown and based on a scroll bearing the inscription Pro Patria.
It is proposed to use the complete design on the cap and the cross without the crown and scroll on the collar.
Samples of previous and proposed badges enclosed.
I have the honour to be, Sir, your obedient servant.
W. Stuart, Lieut-Col, Canterbury Military District"
The reply was as follows on the 6th of Jan 1912:
"The G.O.C approves of the words 2nd (S. Canterbury) Regiment being substituted for S. Canterbury Battalion N.Z.I. and thinks it an improvement as it is the proper name of the Regiment. He thinks the letters N.Z.I. superfluous. As regards the addition of the crown and scroll he thinks they (especially the crown) spoil the badge, which is now a particularly neat and soldierlike looking one. But if the Regiment is particularly keen to have it he has no objection to the scroll.
H. O. Knox, Lt-Col, Quartermaster General".
- Opposite: Another sketch of the 2nd (South Canterbury) Infantry Regiment's badge held by Archive NZ in the 1911 files. It shows the badge adopted by the regiment in 1898.
(Badges - Regimental - Territorial Force, R23534556 AD1 AAYS 13-13 Archives NZ).
Motto: PRO PATRIA (For our country).
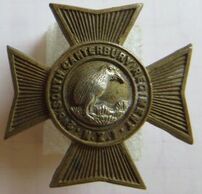
There are many variations to the center of this badge both with the size of the Kiwi featured, and the ground upon which it stands.
Here are a few examples.
"The G.O.C approves of the words 2nd (S. Canterbury) Regiment being substituted for S. Canterbury Battalion N.Z.I. and thinks it an improvement as it is the proper name of the Regiment. He thinks the letters N.Z.I. superfluous. As regards the addition of the crown and scroll he thinks they (especially the crown) spoil the badge, which is now a particularly neat and soldierlike looking one. But if the Regiment is particularly keen to have it he has no objection to the scroll.
H. O. Knox, Lt-Col, Quartermaster General".
- Opposite: Another sketch of the 2nd (South Canterbury) Infantry Regiment's badge held by Archive NZ in the 1911 files. It shows the badge adopted by the regiment in 1898.
(Badges - Regimental - Territorial Force, R23534556 AD1 AAYS 13-13 Archives NZ).
Motto: PRO PATRIA (For our country).
There are many variations to the center of this badge both with the size of the Kiwi featured, and the ground upon which it stands.
Here are a few examples.
|
- Above: A bronze and silver (not marked), solid back Officers Cap badge to the 2nd (South Canterbury) Infantry Regiment. Two tangs or blades to back and a impressed maker mark of "J R GAUNT LONDON". Size 36mm by 33mm.
|
- Above: A bronze and silver (not marked) , solid back Officers Collar badge to the 2nd (South Canterbury) Infantry Regiment. Two D-shaped pressed lugs to back and impressed with the maker details of "J R GAUNT LONDON". Size 30mm by 30mm.
|
- Above: A silver and gold, solid back sweethearts badge in the size of a Cap badge to the 2nd (South Canterbury) Infantry Regiment. Brooch fitting to back with "STERLING" stamped to back base. Size 36mm by 32mm.
|
|
- Above: A gilt brass and white metal Cap badge to the 2nd (South Canterbury) Infantry Regiment. Large Kiwi to center, with copper looped lugs and a maker plaque to back (top) to "J R GAUNT LONDON". Size 36.5mm by 32mm.
|
- Above: A gilt brass and white metal Cap badge to the 2nd (South Canterbury) Infantry Regiment. Earlier type Kiwi to center (found on the South Canterbury Rifle Volunteer badges), with copper looped lugs and a maker plaque to back (bottom arm) to "J R GAUNT LONDON". Size 36mm by 32mm.
|
- Above: A gilt brass and white metal Cap badge to the 2nd (South Canterbury) Infantry Regiment. Thinner Kiwi to center, with copper D shaped lugs, but no maker mark. Size 37mm by 31mm.
|
- Above: A darkened brass and white metal Cap badge to the 2nd (South Canterbury) Infantry Regiment. Thinner Kiwi to center, with copper looped lugs but no maker mark. Size 36.5mm by 31mm.
|
|
- Above: A pair of gilt brass and white metal Collar badges to the 2nd (South Canterbury) Infantry Regiment. Larger Kiwi to center, with copper D shaped looped lugs and maker mark of "J R GAUNT LONDON". Size 30mm by 30mm.
|
- Above: A pair of darkened brass and white metal Collar badges to the 2nd (South Canterbury) Infantry Regiment. Larger Kiwi to center, with copper D shaped looped lugs and maker mark of "J R GAUNT LONDON". Size 30mm by 30mm.
|
|
- Above: A pair of gilt brass and white metal Collar badges to the 2nd (South Canterbury) Infantry Regiment. Thinner Kiwi to center, with copper D shaped looped lugs but no maker mark. Size 30mm by 30mm.
|
- Above: A gilt brass and white metal Collar badge (right when worn) to the 2nd (South Canterbury) Infantry Regiment. Earlier type Kiwi to center (found on the South Canterbury Rifle Volunteer badges), with copper D shaped lugs and a maker plaque to back (bottom arm) to "J R GAUNT LONDON". Size 30mm by 30mm.
|
- Above: A darkened all brass Collar badge to the 2nd (South Canterbury) Infantry Regiment. Thinner Kiwi to center, with copper looped lugs (with feet) but no maker mark. Size 30mm by 30mm.
|
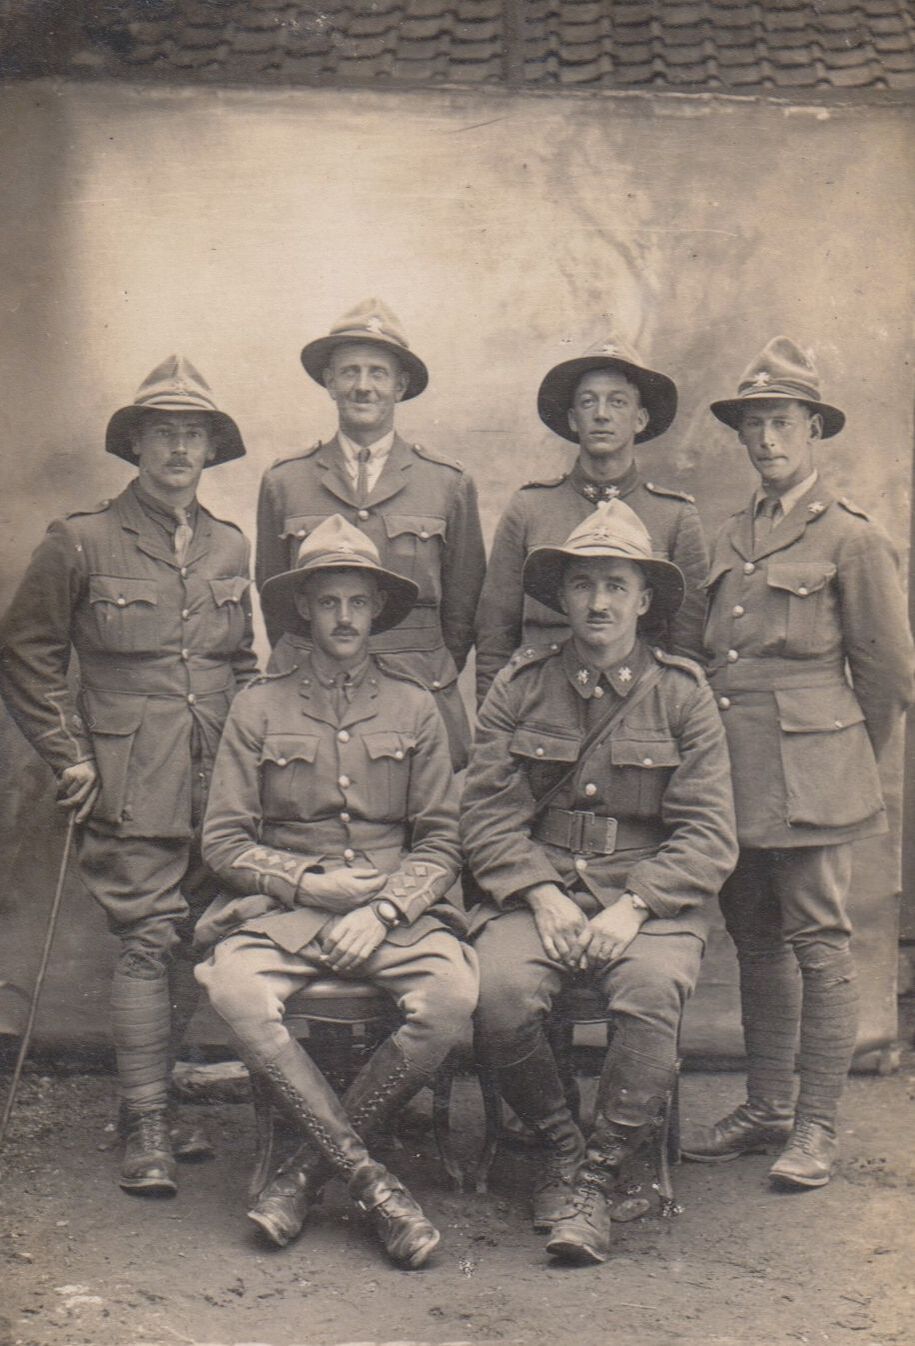
- Above: A group photo, taken in France (it says 1916 to back) of Officers to the 2nd (South Canterbury) Infantry Regiment. Sadly not all are yet identified at this stage.
Front Row Left: 6/408 Captain Douglas Playfair Fraser, MID, sadly KIA on the 20th Sept 1916 on the Somme, France.
Back Row, 2nd from the Right: A possible ID of 6/478 William Moyse Hocking.
The 2nd (South Canterbury) Infantry Regiment was absorbed into the 1st (Canterbury) Infantry Regiment in 1921.
In late 1938, the National Military Reserve (NMR) was formed.
It was a reserve force for the Territorial Army, which was to be called up in times of emergency.
They were issued and wore obsolete uniforms and webbing, but were also issued with badges which originated from 1911, yet, had been made obsolete due to amalgamations of Regiments after the Great War, in the 1920's.
In the Southern Military District (covering the whole of the South Island of New Zealand), the following NMR units wore the 2nd (South Canterbury) Infantry Regiment Cap badge from 1938 and into WW2:
- 3rd Battalion, Christchurch NMR
- 15th Coy, Nelson NMR
- 16th Coy, Blenheim & Picton NMR
- 18th Coy, Timaru NMR
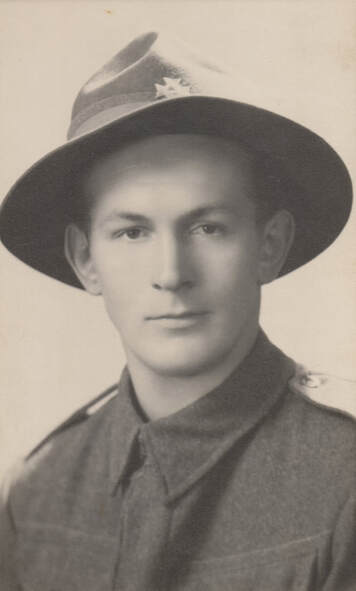
- Opposite: A superb photo of 8909 Pte. Claude D'Arcy Hatsell who enlisted in 1940 and who served with the Supply Column of the New Zealand Army Service Corps in the First Echelon of the 2nd NZEF. He is wearing a 2nd (South Canterbury) Infantry Regiment Cap badge to his Lemon Squeezer. This is likely due to him being part of the NMR prior to enlisting in the Regular Army.
Sadly I am unable to confirm as Claude's WW2 service file are not yet available on-line.
It was a reserve force for the Territorial Army, which was to be called up in times of emergency.
They were issued and wore obsolete uniforms and webbing, but were also issued with badges which originated from 1911, yet, had been made obsolete due to amalgamations of Regiments after the Great War, in the 1920's.
In the Southern Military District (covering the whole of the South Island of New Zealand), the following NMR units wore the 2nd (South Canterbury) Infantry Regiment Cap badge from 1938 and into WW2:
- 3rd Battalion, Christchurch NMR
- 15th Coy, Nelson NMR
- 16th Coy, Blenheim & Picton NMR
- 18th Coy, Timaru NMR
- Opposite: A superb photo of 8909 Pte. Claude D'Arcy Hatsell who enlisted in 1940 and who served with the Supply Column of the New Zealand Army Service Corps in the First Echelon of the 2nd NZEF. He is wearing a 2nd (South Canterbury) Infantry Regiment Cap badge to his Lemon Squeezer. This is likely due to him being part of the NMR prior to enlisting in the Regular Army.
Sadly I am unable to confirm as Claude's WW2 service file are not yet available on-line.
3rd (Auckland) Infantry Regiment.
The 3rd (Auckland) Infantry Regiment was formed in 1911 (from the 1st Battalion, Auckland Infantry (Countess of Ranfurly's Own).
Headquarters were at Auckland.
On the 10th of July 1911, their badge was described as:
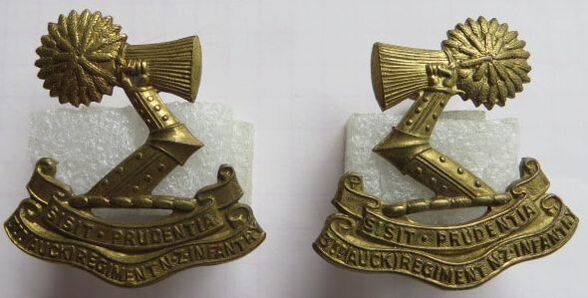
"Badge.- Mailed arm holding sheaf over motto "Sisit Prudentia" surrounded by circle bearing words “1st Battalion Auckland Infantry” and wreath is surmounted by a crown, and having words “New Zealand” on scroll at base.
Collar Badges.- Mailed arm and sheaf over motto and words “1st Battalion Auckland Infantry".
The G.O.C. approves these badges if word "Third" is substituted for "1st Battalion"".
A memo dated the 24th of Nov 1911, notes the "Motto "Sisit Prudentia" will be inserted under the 3rd (Auckland) Regiment ("Countess of Ranfurly's Own") in the next issue of the New Zealand Army List".
(Badges - Regimental - Territorial Force, R23534556 AD1 AAYS 13-13 Archives NZ).
Motto: SISIT PRUDENTIA (Ever prudent).
Headquarters were at Auckland.
On the 10th of July 1911, their badge was described as:
"Badge.- Mailed arm holding sheaf over motto "Sisit Prudentia" surrounded by circle bearing words “1st Battalion Auckland Infantry” and wreath is surmounted by a crown, and having words “New Zealand” on scroll at base.
Collar Badges.- Mailed arm and sheaf over motto and words “1st Battalion Auckland Infantry".
The G.O.C. approves these badges if word "Third" is substituted for "1st Battalion"".
A memo dated the 24th of Nov 1911, notes the "Motto "Sisit Prudentia" will be inserted under the 3rd (Auckland) Regiment ("Countess of Ranfurly's Own") in the next issue of the New Zealand Army List".
(Badges - Regimental - Territorial Force, R23534556 AD1 AAYS 13-13 Archives NZ).
Motto: SISIT PRUDENTIA (Ever prudent).
|
|
- Opposite: A darkened semi-solid, bronze Officers Cap badge to the 3rd (Auckland) Infantry Regiment. Two tangs or blades to back, with maker impressed mark to back to "J R GAUNT LONDON". Size 44.5mm by 38mm.
- Above: A solid, bronze, Officers Collar badge to the 3rd (Auckland) Infantry Regiment. Impressed to back to "J R GAUNT LONDON", and with two D shaped copper looped lugs. Size 32.5mm by 32mm. |
|
|
- Opposite & Above: A gilt brass WW1 era Cap badge and matching opposing Collars to the 3rd (Auckland) Infantry Regiment. Maker plaqued to "J R GAUNT LONDON" to back. All have copper looped lugs. Size of Cap is 45mm by 38mm, while Collars are 33mm by 32mm.
|
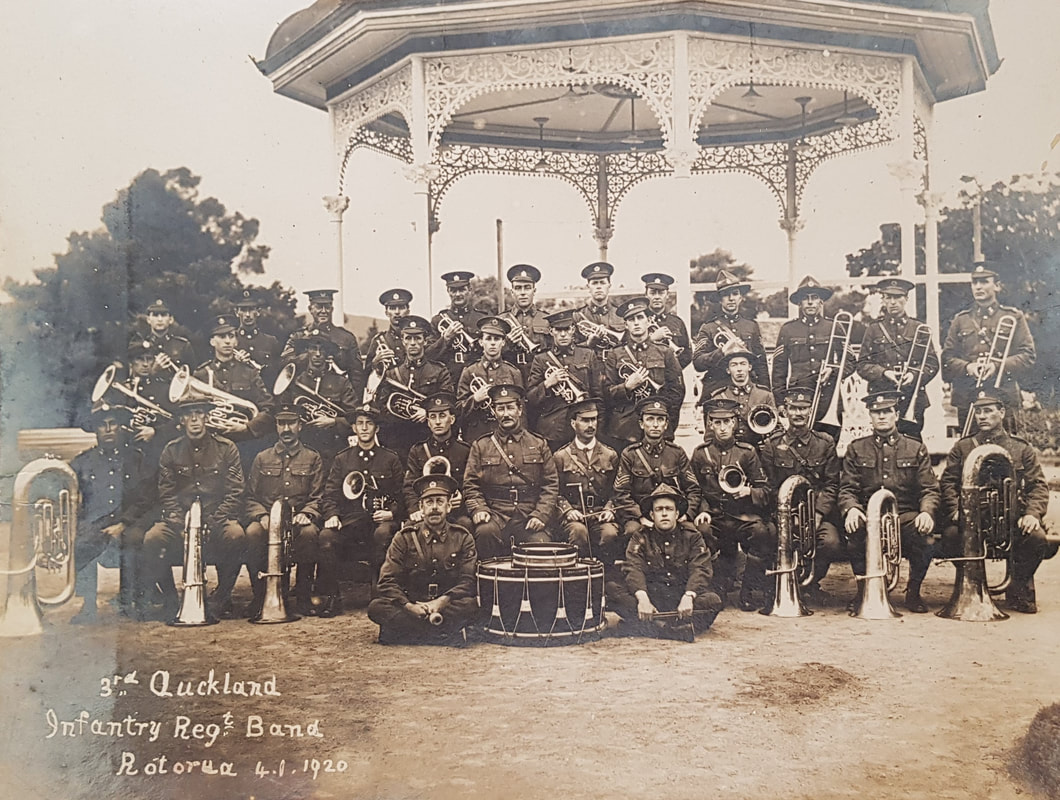
- Above: A superb image of the 3rd (Auckland) Infantry Regiment Band in Rotorua on the 4th of Jan 1920. A mixture of peaked Caps and Lemon Squeezers worn by its members (Nigel Robson Collection).
|
- Above: A single piece, gilt brass Cap badge to the 3rd (Auckland) Infantry Regiment. No maker mark to back, and thick copper wire loops. Size 44mm by 39mm.
|
- Above: A semi-solid gilt brass Cap badge to the 3rd (Auckland) Infantry Regiment. Thin wire looped lugs to back, but no maker mark. Size 46mm by 38mm.
|
- Above: A variation to the 3rd (Auckland) Infantry Regiment Cap badge. Non-voided to center, with thin wire looped lugs to back. No maker mark. Size 46mm by 39mm.
|
|
|
|
|
|
- Above: A gilt brass Cap badge to the 3rd (Auckland) Infantry Regiment. Non-void crown, and with brass Slider to back. No maker mark. Size 45mm by 43mm.
|
- Above: A gilt fired Officers Cap badge to the 3rd (Auckland) Infantry Regiment. Solid to back, with looped lugs. Maker impressed to "J R GAUNT LONDON". Note the extra voiding to bottom center. Size 44.5mm by 43mm.
|
- Above: A gilt fired Officers Cap badge to the 3rd (Auckland) Infantry Regiment. Semi-solid to back, with extra long lugs to back. No maker mark. Size 45mm by 43mm.
|
- Above: A gilt brass, opposing pair of Collar badges to the 3rd (Auckland) Infantry Regiment. Both are maker marked to back of top banner ends to "M & K" and "W" for Mayer and Kean, Wellington. Two copper wire looped lugs to back of each. Size 33mm by 33mm.
|
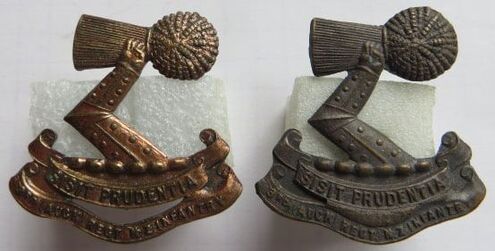
- Above: A pair of Collar badges to the 3rd (Auckland) Infantry Regiment. This is the type with "3rd (Auck) Regt NZ Infantry" in the base banner. Usually they have the full word Regiment. No maker mark to either, and wire looped lugs to the back of the above right collar. Size 31mm by 30.5mm.
|
In 1921 the Regiments title changed to the Auckland Regiment (Countess of Ranfurly's Own).
|
|
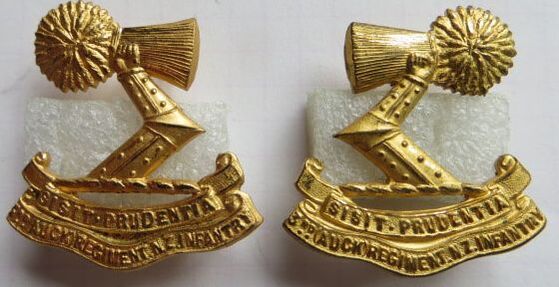
- Opposite & Above: A Queens crown gilt fired Officers Cap and Collar badge set to the 3rd (Auckland) Infantry Regiment. The Cap is solid to back, with extra long lugs, and maker impress to "J R GAUNT LONDON". Both Collars are also solid to back, and have two D shaped copper lugs each. No maker mark. Size of Cap is 45mm by 37.5mm, while Collars are 33mm by 31.5mm.
|
In August 1947 the Auckland Regiment (Countess of Ranfurly's Own) was designated a Territorial Force (TF)
On the 1st of April 1964 it amalgamated with the North Auckland Regiment and became:
3 RNZIR – 3rd Battalion, (Auckland (Countess of Ranfurly's Own) and Northland), Royal New Zealand Infantry Regiment
Again it was designated a Territorial Force.
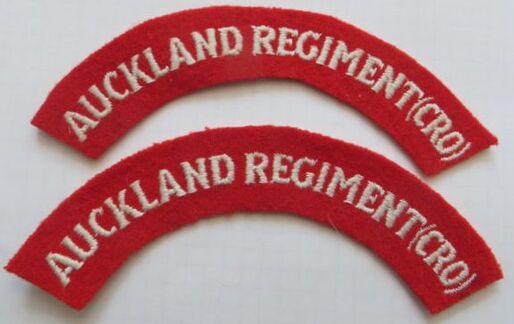
- Opposite: A pair of embroidered and felt cloth shoulder titles worn post 1961 to 1994 to elements of the Auckland Regiment of the 3 RNZIR. Size 20mm by 128mm.
In March 2013, the Regiment was further merged with the 6th Battalion (Hauraki), Royal New Zealand Infantry Regiment to form:
3rd/6th Battalion, Royal New Zealand Infantry Regiment (3/6 RNZIR)
It is a Reserve battalion of the Royal New Zealand Infantry Regiment.
On the 1st of April 1964 it amalgamated with the North Auckland Regiment and became:
3 RNZIR – 3rd Battalion, (Auckland (Countess of Ranfurly's Own) and Northland), Royal New Zealand Infantry Regiment
Again it was designated a Territorial Force.
- Opposite: A pair of embroidered and felt cloth shoulder titles worn post 1961 to 1994 to elements of the Auckland Regiment of the 3 RNZIR. Size 20mm by 128mm.
In March 2013, the Regiment was further merged with the 6th Battalion (Hauraki), Royal New Zealand Infantry Regiment to form:
3rd/6th Battalion, Royal New Zealand Infantry Regiment (3/6 RNZIR)
It is a Reserve battalion of the Royal New Zealand Infantry Regiment.
4th (Otago) Infantry Regiment.
Formed in 1911 from the 1st Battalion, Otago Rifles, it became the 4th Regiment (Otago Rifles).
Headquarters at Dunedin.
Headquarters at Dunedin.
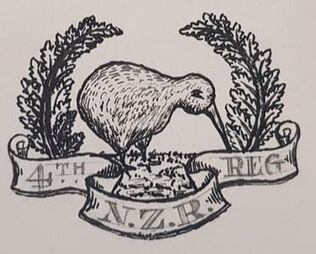
- Opposite: A sketch of the proposed badge to the 4th (Otago) Infantry Regiment held by Archive NZ.
Cap Badge - In 1911, their badge was described as a "A Kiwi flanked by fern fronds. Scroll at base bearing the words "4th Regiment N.Z.R"".
Collar Badge - "Smaller"
(Badges - Regimental - Territorial Force, R23534556 AD1 AAYS 13-13 Archives NZ).
In 1911, the Regiments Band full dress uniformed was described as:
"Headress - Dark blue helmet with brass mountings.
Blue forage cap with red band.
Tunic - Pleated cloth dark blue collar & cuffs.
Austrian knot on sleeves, shoulder straps piped white, seams of tunic piped white, shoulder epaulets trimmed white, side edges of back of tunic 6 buttons, 6 buttons down front.
Trousers - Blue cloth with 1/4 scarlet-welt side pockets"
(Cadets, Regimental Badges and Uniforms R21078962 Box 19 AD37 24 c1912 Archives N.Z.).
Motto: (none in the 1st NZEF - as noted in R17187868 AALI W3508 7291 Archives NZ)
|
- Above: A possible proto-type badge to the 4th (Otago) Infantry Regiment. Gilt brass, with two short copper looped lugs to back, there is no maker mark (image from the internet).
|
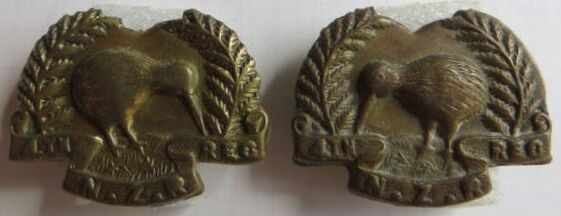
|
- Opposite & Above: This is the first pattern of badges worn by the 4th (Otago) Infantry Regiment, from 1911 and during WW1. All brass, with short copper looped lugs to back. Note, not much difference in size between Collars and Cap. No maker mark. Size of Cap is 27mm by 34mm, while the Collars are 23mm by 30.5mm.
|
|
- Above: A Collar badge to the 6th Regt, N.Z.R - it has been mentioned that this could be a Reinforcement Badge. Not often seen. Two copper looped lugs to back, with no maker mark. Size 23mm by 30.5mm.
|
- Above: Non-voided, opposing collar badges to the 4th (Otago) Infantry Regiment in brass. Again, no maker mark, and short copper looped lugs to back. Size 23mm by 30.5mm.
|
|
- Above: A darkened Copper Cap badge to the 4th (Otago) Infantry Regiment. No maker mark to back, with two small copper looped lugs to back. Size 27mm by 35mm.
|
- Above: A darkened Copper Cap badge to the 4th (Otago) Infantry Regiment. No maker mark to back, and with a long brass slider. Size 26mm by 35mm.
|
- Above: A large Horse breast badge to the 4th (Otago) Infantry Regiment. It is usually mounted on a piece of leather. Cast brass, with three large D-shaped lugs to back. Size 58mm by 69mm.
|
During WW1 (possibly 1915), the Regiment changed its Cap and Collar design to the below:
|
|
- Opposite and Above: A Cap and opposing Collar badges to the 4th (Otago) Infantry Regiment. Gilt brass, with each having two D shaped, copper looped lugs to back. Each also has a maker plaque to back with "J R GAUNT LONDON". Size of Cap is 34mm by 41mm, while Collar badge size is 25mm by 31mm.
|
|
|
- Opposite and Above: A Cap and opposing Collar badges to the 4th (Otago) Infantry Regiment. Gilt brass, with round, copper looped lugs to back. No maker mark. Size of Cap is 34mm by 41mm, while Collar badge size is 25mm by 31mm.
|
- Opposite: A darkened collar badge to the 4th (Otago) Infantry Regiment. Two D shaped looped lugs to back, but no maker mark. Size is 25mm by 31mm.
The 4th (Otago) Infantry Regiment amalgamated with the 10th (North Otago) Infantry Regiment in 1921 to form the Otago Regiment.
In 1948 it merged again to form the Otago and Southland Regiment (their badges are shown further below).
By this stage it was designated a Territorial Force (TF)
On the 1st of April 1964 it became:
4 RNZIR – 4th Battalion, (Otago and Southland), Royal New Zealand Infantry Regiment
Again it was designated a Territorial Force.
In March 2013, the Regiment was further merged with the 2nd Battalion (Canterbury and Nelson-Marlborough and West Coast), Royal New Zealand Infantry Regiment to form:
2nd/4th Battalion, Royal New Zealand Infantry Regiment (2/4 RNZIR)
It is a Reserve battalion of the Royal New Zealand Infantry Regiment.
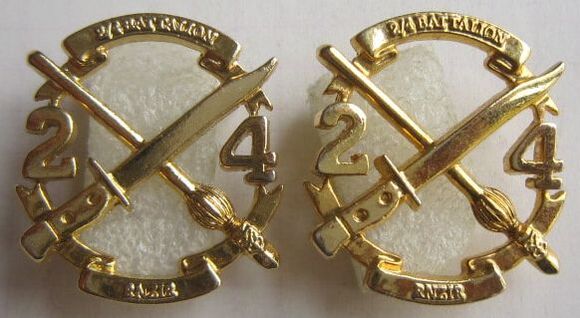
- Opposite: A pair of gilt metal Collar badge to the 2nd/4th Battalion, Royal New Zealand Infantry Regiment. These are NOT opposing, so two of the same are worn together. Two pins to back, in a North-east/South-west configuration to be used with clutches. No maker mark and size 30mm by 28mm.
2nd/4th Battalion, Royal New Zealand Infantry Regiment (2/4 RNZIR)
It is a Reserve battalion of the Royal New Zealand Infantry Regiment.
- Opposite: A pair of gilt metal Collar badge to the 2nd/4th Battalion, Royal New Zealand Infantry Regiment. These are NOT opposing, so two of the same are worn together. Two pins to back, in a North-east/South-west configuration to be used with clutches. No maker mark and size 30mm by 28mm.
5th (Wellington Rifles) Infantry Regiment
Formed in 1911 (from the 1st Battalion, Wellington Rifles).
Headquarters at Wellington.
Cap Badge - In 1911, their badge was described as a "Duke of Wellington's crest, i.e. Lion bearing pendant over Coronet. Motto "Virtutis Fortuna Comes" on scroll at base".
Collar Badge - Cap badge larger than Collar badge and omitting motto".
(Badges - Regimental - Territorial Force, R23534556 AD1 AAYS 13-13 Archives NZ).
A 18th of May, 1912 memo states
"Mess Dress:
Mess jacket. Scarlet cloth, edged all round with white piping Roll collar, pointed cuffs 6 inches deep at the point and 2¾ inches behind, cloth shoulder straps, edged like the jacket, except where the facings are white. Small buttons down the jacket with button holes 6 - correspond
Mess Waistcoat. Blue, four buttons.
Collar Badges. The Duke of Wellington's Crest in gold embroidery, the flag in Silver within a gold edging, the cross scarlet.
The Roll collar to be of Blue. The shoulder straps of Blue.
The Cuffs of Blue."
(Cadets, Regimental Badges and Uniforms R21078962 Box 19 AD37 24 c1912 Archives N.Z.).
Motto: VIRTUTIS FORTUNA COMES (Good fortune is the companion of courage).
At the outbreak of WW1, the 5th (Wellington) Infantry regiments members made up part of the Samoan Expeditionary Force, sent in August 1914 to capture German held Samoa. Upon its return in early 1915, the 5th (Wellington) Infantry Regiment, as a unit, remained in New Zealand. Some of its members re-enlisted, and formed parts of the 1st and 2nd Battalions of the New Zealand Rifle Brigade, who saw action in France.
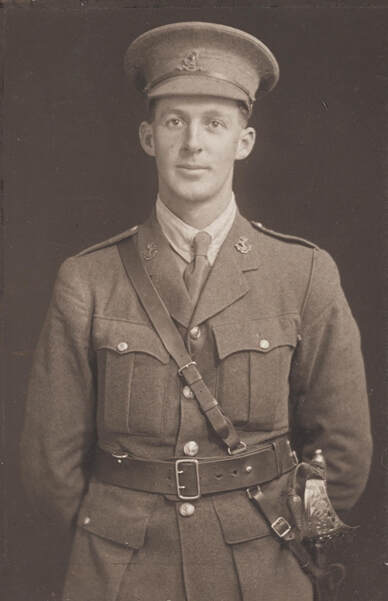
- Opposite: A superb pre-war/early WW1 image of 14025 Capt. Daniel Cornelius Bowler MC. Daniel was involved with the New Zealand Cadet force prior to WW1 (he was a teacher by profession), and then as a 2nd Lieutenant in the Territorial Force of the 5th (Wellington) Infantry Regiment. He seems to have missed the call-up for the Samoan Expeditionary Force, and though pestering the Regimental Headquarters for a position, he eventually joined the 14th Reinforcements as a 2nd Lieutenant on the 10th of Jan 1916. He was a member of G Company (3rd Batt, NZRB), 14th Reinforcements on the 22nd of Feb 1916.
Daniel sailed on the SS Tahiti from New Zealand on the 26th of June 1916, and disembarked at Devonport on the 22 of Aug 1916.
After a small stint at Sling Camp, he proceeded overseas where he was assigned to D Company, 2/3rd New Zealand Rifle Brigade.
On the 11th of Jan 1917 he was promoted Lieutenant.
On the 2nd of March 1917, Daniel was awarded the Military Cross for gallantry and devotion to duty in the field:
"For conspicuous gallantry in action. He led a successful raid against the enemy with great gallantry, captured a large number of prisoners, and effected his withdrawal at a critical time with marked ability"
On the 31st of July 1917, he took over command of his company with the rank of Temporary Captain.
Wounded in the hand on the 14th of Aug 1917 (barbed wire).
Killed in action on the 12th of October 1917.
Remembered on the Tyne Cot Memorial, Tyne Cot Cemetery, Zonnebeke, West-Vlaanderen, Belgium.
His wife would later accept his Military Cross, in a private ceremony, held in New Zealand.
Note his Cap and collar badges, which were worn only by Officers prior to 1920. After 1920, the badge was adopted by all ranks of the regiment.
(Image taken from the Auckland Cenotaph)
|
- Above: A semi-solid gilt brass Officers Cap badge to the 5th (Wellington) Infantry Regiment. To back were three tangs, all of which have been cut off, and two wire loops crudely soldered to back. Maker impressed to back of upper lower center banner to "J R GAUNT LONDON". Size 41mm by 52mm.
|
- Above: A semi-solid darkened brass Cap badge to a Officer in the 5th (Wellington) Infantry Regiment. To back are two out of three tangs, with the top tang behind the flag snapped off. Maker plaqued to back of lower banner to "J R GAUNT LONDON". Size 41mm by 52mm.
|
|
|
- Opposite & Above: A semi-solid darkened bronze Cap and Collar badge set to a Officer in the 5th (Wellington) Infantry Regiment. To back, each badge has two tangs. Maker impressed to back of all to "FIRMIN LONDON". Cap size 41mm by 52mm, Collar size 34mm by 33mm.
Note the Collar badges were also worn by some Officers of the British Duke Of Wellington's Regiment (West Riding). |
|
|
- Opposite & Above: Other Ranks Cap & Collar badges to 5th (Wellington) Infantry Regiment. Often referred to in the books as "1st Battalion badges" and certainly worn from 1911 to 1920. Both Cap and opposing Collars have 2 copper looped lugs to back in a North South configuration. All have a small plaque to back to "J R GAUNT LONDON". Cap size 47.5mm by 37.5mm, Collars 28mm by 23.5mm.
|
The above right collar (as pictured) was worn as a Cap badge by Wellington Volunteer units prior to 1911, and usually had a brass "N" and "Z" either side to front of the peaked Cap.
|
|
- Opposite & Above: A gilt brass other ranks Cap and Collar badge to the 5th (Wellington) Infantry Regiment. All are die stamped, with copper looped lugs to Cap, and D shaped copper looped lugs to Collars. No maker mark, but likely Gaunt.
|
|
- Above: A gilt brass other ranks Cap badge to the 5th (Wellington) Infantry Regiment. Die stamped, with thick copper looped lugs to back. Maker marked to "M & K W" for Mayer & Kean Wellington. Size 42mm by 53mm.
|
- Above: A gilt brass other ranks Cap badge to the 5th (Wellington) Infantry Regiment. Die stamped, with two short bolt threads to back, and large brass flanges. No maker mark.
|
|
|
- Opposite & Above: A gilt fired Officers Cap and Collar badge set to the 5th (Wellington) Infantry Regiment. The Cap badge is semi-solid, with long looped lugs to back. The Collars are die stamped, but have a very heavily gilt finish. All have no maker mark. Cap size 41mm by 53mm, Collar 35mm by 33.5mm.
|
|
|
|
- Above: A pair of similar made Cap badges to the 5th (Wellington) Infantry Regiment. Both are die stamped, with pressed type brass lugs, more commonly seen on NZ badges in the 1940's/50's. One has a darkened finish, while the other is in gilt brass. Both have no maker mark.
|
- Above: A pair of early gilt fired Collar badges to the 5th (Wellington) Infantry Regiment. These are semi-solid to back, with D shaped copper looped in a North South configuration. They are not maker marked. I have yet to see a gilt fired matching Cap badge. Size 29mm by 23mm.
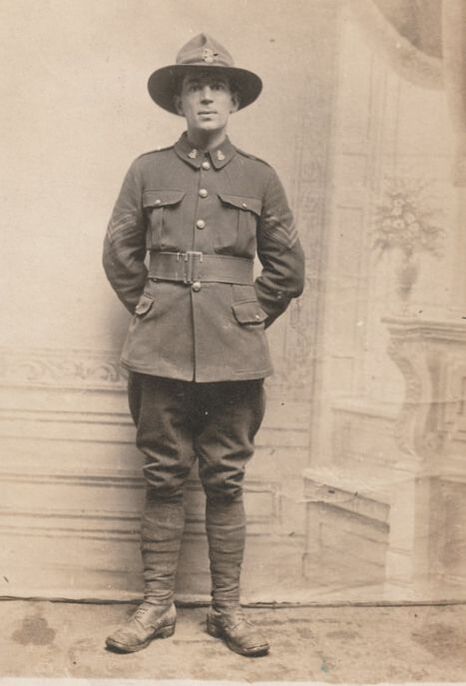
- Opposite: A full length, pre 1920 era image of a Sergeant in the 5th (Wellington) Infantry Regiment. The backdrop of the photo suggests a French mobile photo studio, yet the badge and this regiment weren't in this theater of war. Certainly by the state of his boots, he has been out in the field (Iain Davidson collection). |
|
|
- Above: A variation in the gilt brass Collar badge to the 5th (Wellington) Infantry Regiment. Note the finer detail and strike, which matches the Volunteer HP center, so pre-1911 or just a variation? Two brass looped lugs and no maker mark. Size 29mm by 25mm.
|
- Above: A later chromed collar badge to the 5th (Wellington) Infantry Regiment. Possibly Regimental Band, which would have worn white metal or chromed insignia as a distinction. Two D shaped chromed lugs to back, with no maker mark.
|
- Above: A rare WW1 era Band Cap badge to the 1st Battalion, Wellington Regiment. Made from die stamped, gilt brass, with two hex type brass lugs to back. No maker mark (Ian Hamilton Collection).
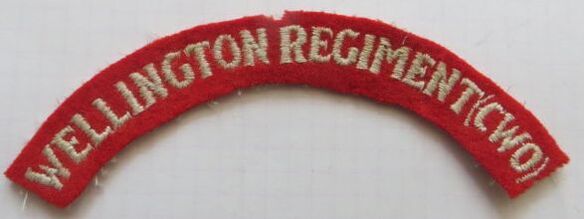
- Opposite: A single embroidered and felt cloth shoulder titles worn post 1961 to 1994 to elements of the Wellington Regiment of the 7 RNZIR. Size 20mm by 122mm.
In 1921 the regiments title changed to the Wellington Regiment (City of Wellington's Own).
In August 1947 the Wellington Regiment (City of Wellington's Own) was designated a Territorial Force (TF)
On the 1st of April 1964 it merged with the Hawkes Bay Regiment and became:
7 RNZIR – 7th Battalion, (Wellington (City of Wellington's Own) and Hawke's Bay), Royal New Zealand Infantry Regiment
Again it was designated a Territorial Force.
In March 2013, the Regiment was further merged with the 5th Battalion (Wellington West Coast and Taranaki), Royal New Zealand Infantry Regiment to form:
5th/7th Battalion, Royal New Zealand Infantry Regiment (5/7 RNZIR)
It is a Reserve battalion of the Royal New Zealand Infantry Regiment.
Fakes & Forgeries
Below is a fake or reproduction cap badge to the 1st type, 5th (Wellington) Infantry Regiment.
- Orangey-Yellow in colour, with some pitting to front, around stomach of Lion and crown and its base.
- To back is a mess, with a very large edge all the way round. Lacking in detail, which a die-stamped version would have.
- Two small copper lugs, soldered on, where as the originals have a different kind of braze, which does not turn black with time.
- Size 47.5mm by 37mm.
|
|
|
|
Below is a fake or reproduction cap badge to the 2nd type, 5th (Wellington) Infantry Regiment.
- Orangey-Yellow in colour, with some pitting and material faults to front. Note the black oxidsed patches.
- To back is stippled, with holes, and a large flat area to base, where the excess brass has been filed down from the casting process. It lacks the detail, which a die-stamped version would have.
- Two small copper lugs, soldered on, where as the originals have a different kind of braze, which does not turn black with time.
- Size 40.5mm by 51.5mm.
|
|
|
|
6th (Hauraki) Infantry Regiment

Formed in 1911 (from the 2nd Battalion, Auckland (Hauraki) Infantry).
Headquarters at Paeroa.
On the 10th of July 1911, their badge was described as "The badges in use are approved i.e. "Eight pointed star bearing lion and motto "Honi soit qui mal y pense" in a circle, also motto "Nulli secundus". Word "Hauraki" on scroll at base". Collar badges - smaller, omitting the word "Hauraki"".
On the 4th of April 1912, the NZ Army Quartermaster General approved a change to the badge motto, from "Nulli secundus" to "Whaka Tangata Kia Kaha"
(Badges - Regimental - Territorial Force, R23534556 AD1 AAYS 13-13 Archives NZ).
Motto: KIA KAHA (Be strong).
Also: HONI SOIT QUI MAL Y PENSE (Shame on him who thinks evil of it).
Also: WHAKA TANGATA KIA KAHA (as noted in R17187868 AALI W3508 7291 Archives NZ).
- Opposite: A superb image of 12/295 Robert Nicoll (Nick) Morpeth, pictured here as a Officer in the 6th (Hauraki) Infantry Regiment. He saw action at Gallipoli and the Western Front, in France, where he won the MM and MC. He finished the war as Captain, but was wounded twice, once through the left arm, and the 2nd through the leg, which had to be amputated. He was one of 6 brothers who served in WW1 from the same family. Allan (18899) killed in 1917; George Douglas (44944); Gerald (12/416); Moore (12/1039) killed in 1915; Robert Nicoll (Nick - 12/295) and Sloan (48797).
Nick is wearing a set of non-void, darkened Cap and Collar badges to the 6th (Hauraki) Infantry Regiment (Archive NZ - Captain Robert Nicoll Morpeth - 6th Hauraki Company Military Cross - R24184808).
|
- Above: A rare bi-metal, multi-piece Officers Cap badge to the 6th (Hauraki) Infantry Regiment. Possible silver, with certainly frosting still to back, but not marked. Two long tangs to back and with a makers plaque to "J R GAUNT LONDON".
|
|
- Above: A pair of incomplete bi-metal collars to the 6th (Hauraki) Infantry Regiment. Note I am missing the gilt brass center piece on both of them. They are opposing, with the two Lion's facing inwards. They do also have part of the lower banner in raised letters to base of banner "Kia Kaha".
|
- Opposite: A semi-solid, Officers Bronze Cap badge to the 6th (Hauraki) Infantry Regiment. Note the voiding to center, which seems to be a feature on Officers Cap badges (and also the Collars, though I have none to show) to this regiment. This example has had its tangs or blades removed, and a long brooch fitting attached. Maker impressed to back to "J R GAUNT LONDON". Size 40.5mm by 52mm.
|
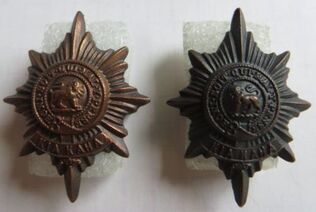
- Above: A pair of darkened copper Collar badges to the 6th (Hauraki) Infantry Regiment. Both have D shaped lugs to back, and one is more polished than the other. No maker mark, and note the Lion's are opposing to center. Size 31mm by 23mm.
|
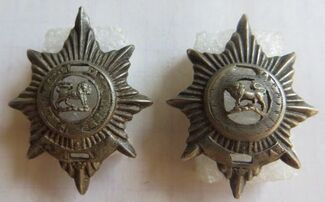
- Above: A gilt fired brass Officers Cap badge to the 6th (Hauraki) Infantry Regiment. Semi-solid to back, with long looped lugs. Maker impressed to back base to "J R GAUNT LONDON". Size 40mm by 52mm.
|
- Above: A pair of gilt fired brass Officers Collars badges (note the lions face in different directions to center) to the 6th (Hauraki) Infantry Regiment.
Semi-solid to back, with D shaped lugs. No maker mark to either. Size 29.5mm by 23mm. |
|
- Above: A gilt brass, other ranks Cap badge to the 6th (Hauraki) Infantry Regiment. Maker plaqued to back base to "J R GAUNT LONDON". Two copper looped lugs, with size 40mm by 52mm.
|
- Above: A gilt brass, other ranks Collar badge (left, when worn) to the 6th (Hauraki) Infantry Regiment. Maker plaqued to back top to "J R GAUNT LONDON". Two copper D shaped lugs, with size 29mm by 23mm.
|
- Above: A gilt brass, other ranks Cap badge to the 6th (Hauraki) Infantry Regiment. Two wire looped lugs to back, and a marker mark, in raised letters to "M & K Ltd, Wgtn, NZ" for Mayer & Kean, Wellington, New Zealand, on the lower left of the banner back. Size 41mm by 51mm.
|
|
- Above: A gilt brass, other ranks Cap badge to the 6th (Hauraki) Infantry Regiment. Two copper looped lugs (with feet) to back, but no maker mark. Size 42mm by 53mm.
|
- Above: A pair of opposing gilt brass Collar badges to the 6th (Hauraki) Infantry Regiment. Die-stamped, with two D shaped copper looped lugs, these are not maker marked, but likely Gaunt. Size 29mm by 22.5mm.
|
- Above: A slight variation in Collar badge to the 6th (Hauraki) Infantry Regiment. Note the elongated center rays of the star to top and bottom. No maker mark to back, with two D shaped copper looped lugs. Size 31mm by 23mm. Left, when worn.
|
|
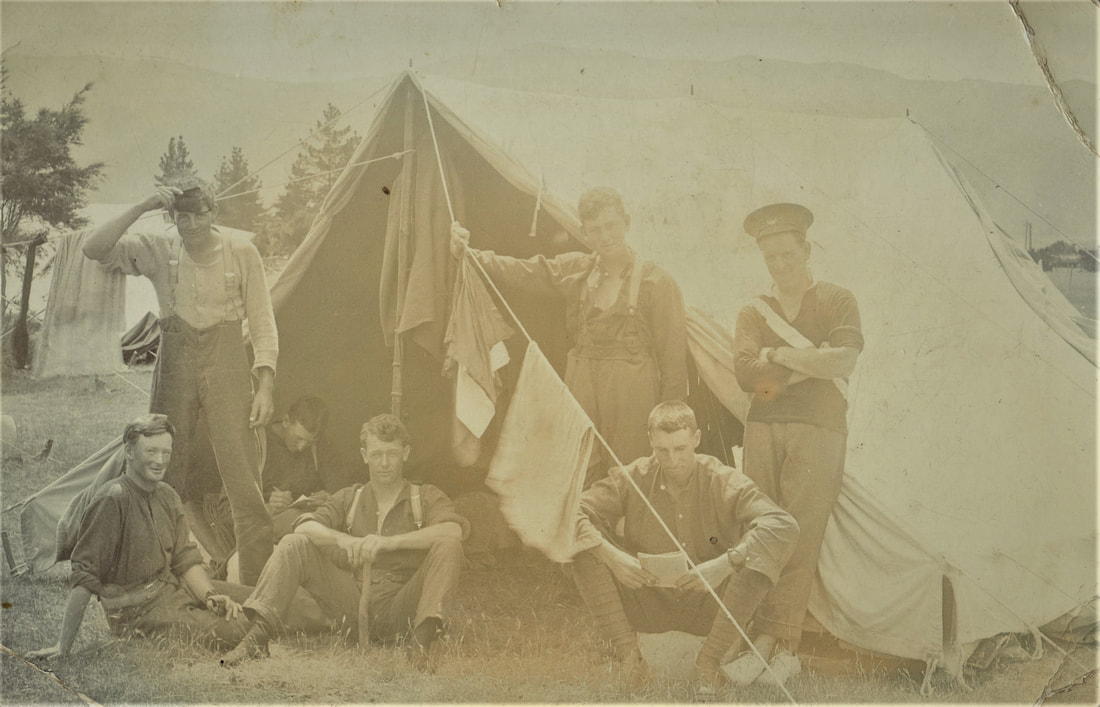
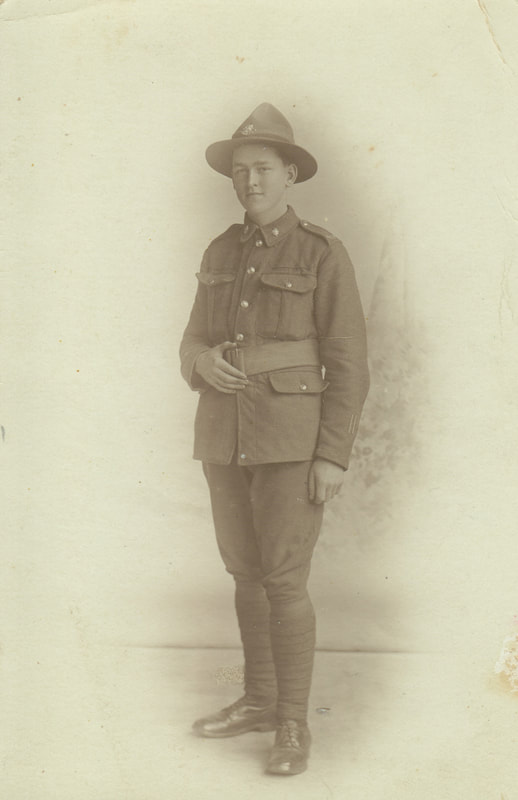
- Opposite: A full length image of 12/3760 Pte. Alexander Neil Mcleod. Alex started his service on the 20th of October 1915, as part of A Coy, 9th Infantry Reinforcements. This was later changed to the 10th Reinforcements.
He saw 3 years and 53 days overseas during WW1, with the Auckland Infantry Regiment. Here he is wearing the 6th (Hauraki) Infantry Regiment Cap badge and Collar badges. - Above: A earlier image of Alex's military life. He is standing, holding the guide rope of the tent at Trentham Camp as part of either A Coy, 9th or 10th Infantry Reinforcements. Happily Alex survived WW1, and went on to serve at home in WW2, with the service number 812218 |
In 1921 the regiments title was changed to 2nd Battalion, Auckland Regiment.
In 1923 the regiments title was again changed to the Hauraki Regiment.
During WW2, the 6th contributed to the following overseas Battalions of the 2NZEF:
- 18th Battalion - Briefly till the 5th October 1942.
- 21st Battalion
- 24th Battalion
- 29th Battalion
In August 1947 the Hauraki Regiment was designated a Territorial Force (TF)
On the 1st of April 1964 the Regiment became:
6 RNZIR – 6th Battalion, (Hauraki), Royal New Zealand Infantry Regiment.
Again it was designated a Territorial Force.
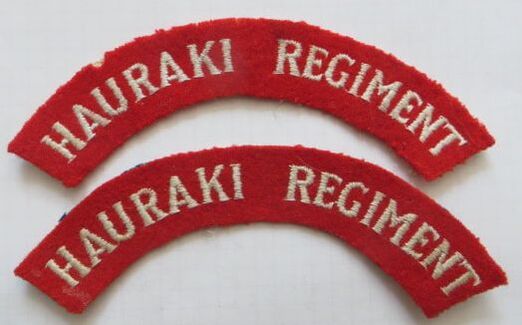
- Opposite: A pair of embroidered and felt cloth shoulder titles worn post 1961 to 1994 to elements of the Hauraki Regiment of the 6 RNZIR. Size 20mm by 125mm.
In 1923 the regiments title was again changed to the Hauraki Regiment.
During WW2, the 6th contributed to the following overseas Battalions of the 2NZEF:
- 18th Battalion - Briefly till the 5th October 1942.
- 21st Battalion
- 24th Battalion
- 29th Battalion
In August 1947 the Hauraki Regiment was designated a Territorial Force (TF)
On the 1st of April 1964 the Regiment became:
6 RNZIR – 6th Battalion, (Hauraki), Royal New Zealand Infantry Regiment.
Again it was designated a Territorial Force.
- Opposite: A pair of embroidered and felt cloth shoulder titles worn post 1961 to 1994 to elements of the Hauraki Regiment of the 6 RNZIR. Size 20mm by 125mm.
|
|
- Opposite & Above: A large painted chrome metal badge to the 6th (Hauraki) Infantry Regimental Band. Semi-solid to back, with two looped lugs. Maker marked to "PAC" to lower banner. Size 60mm by 71mm.
|
In March 2013, the Regiment was further merged with the 3rd Battalion (Auckland [Countess of Ranfurly's Own] and Northland), Royal New Zealand Infantry Regiment to form:
3rd/6th Battalion (Hauraki), Royal New Zealand Infantry Regiment (3/6 RNZIR)
It is a Reserve battalion of the Royal New Zealand Infantry Regiment.
A modern version of the Hauraki Cap and Collar badge are still worn today
3rd/6th Battalion (Hauraki), Royal New Zealand Infantry Regiment (3/6 RNZIR)
It is a Reserve battalion of the Royal New Zealand Infantry Regiment.
A modern version of the Hauraki Cap and Collar badge are still worn today
|
|
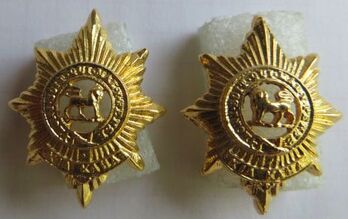
- Opposite & Above: A gilt metal, semi-solid Cap and opposing Collars (note the lions face in different directions to center) to the 3rd/6th Battalion, Royal New Zealand Infantry Regiment. Pins to back of all, to be used with clutches, but no maker mark. Size of Cap is 40.5mm by 50.5mm, size of Collars is 27mm by 21mm.
|
|
|
- Opposite & Above: A blackened metal, semi-solid Cap and opposing Collars to the 3rd/6th Battalion, Royal New Zealand Infantry Regiment. Pins to back of Collars, to be used with clutches, while the Cap has two thread posts to be used with nuts. No maker mark. Size of Cap is 40.5mm by 50.5mm, size of Collars is 28mm by 22mm.
|
- Opposite: A grey coloured, metal, semi-solid Collars to the 3rd/6th Battalion, Royal New Zealand Infantry Regiment. Pins to back, to be used with clutches. No maker mark. Size of Collars is 27mm by 21mm.
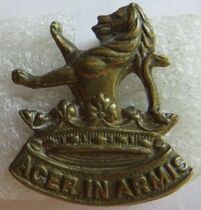
7th (Wellington West Coast Rifles) Infantry Regiment.
Cap and Collar badges to the 7th (Wellington West Coast Rifles) Infantry Regiment. Formed in 1911 (from the 2nd Battalion, Wellington (West Coast) Rifles).
Headquarters were at Wanganui.
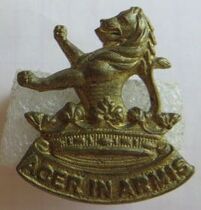
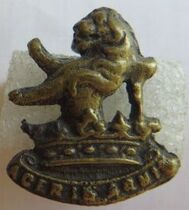
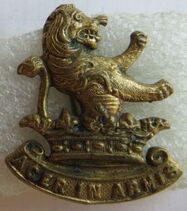
Cap Badge - In 1911, their badge was described as a "Lion over Coronet with motto "Acer in armis" on scroll at base".
Collar Badge - "Similar"
(Badges - Regimental - Territorial Force, R23534556 AD1 AAYS 13-13 Archives NZ).
Motto: ACER IN ARMIS (Strong in Arms).
Headquarters were at Wanganui.
Cap Badge - In 1911, their badge was described as a "Lion over Coronet with motto "Acer in armis" on scroll at base".
Collar Badge - "Similar"
(Badges - Regimental - Territorial Force, R23534556 AD1 AAYS 13-13 Archives NZ).
Motto: ACER IN ARMIS (Strong in Arms).
|
- Above: A other ranks, darkened brass Cap badge to the 7th (Wellington West Coast Rifles) Infantry Regiment. Two D shaped copper looped lugs in a North/South configuration. Maker plaqued to center back to "J R GAUNT LONDON". Size 39mm by 33mm.
|
- Above: A other ranks, gilt brass Cap badge to the 7th (Wellington West Coast Rifles) Infantry Regiment. Two looped copper lugs in a North/South configuration. No maker mark, and size 39mm by 33mm.
|
- Above: A modified other ranks Cap badge to 5th (Wellington) Infantry Regiment. Banner has been removed, for unknown reason, and therefore resembles a 7th (Wellington West Coast Rifles) Infantry Regiment Cap badge. Two copper looped lugs to back in a North/South configuration. Plaque to back to "J R GAUNT LONDON". Size 45mm by 38mm.
|
|
- Opposite: A single darkened bronze Officers Collar to the 7th (Wellington West Coast Rifles) Infantry Regiment. Left (when worn), it is semi-solid to back and impressed to "J R GAUNT LONDON". Size 29mm by 25mm.
|
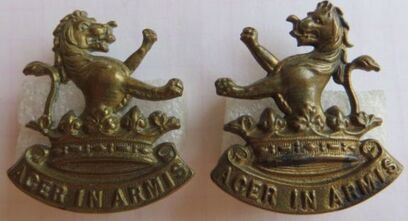
- Above: A pair of gilt brass Collar badges 7th (Wellington West Coast Rifles) Infantry Regiment. Two copper D shaped lugs in a North/South configuration, with makers plaque to "J R GAUNT LONDON". Size 28mm by 25mm.
|
- Above: A pair of gilt brass Collar badges 7th (Wellington West Coast Rifles) Infantry Regiment. Two copper D shaped lugs in a North/South configuration, but no makers mark. Size 28mm by 25mm.
|
- Above: A gilt brass Collar badge to the 7th (Wellington West Coast Rifles) Infantry Regiment (left when worn). Two copper looped lugs, but no maker mark. Size 27.5mm by 25mm.
|
- Above: A sand cast Collar badge to the 7th (Wellington West Coast Rifles) Infantry Regiment (left when worn). Probably middle Eastern manufacture, around WW1. Two copper looped lugs, with size 27mm by 23mm.
|
- Above: A gilt brass Collar badge to the 7th (Wellington West Coast Rifles) Infantry Regiment (right when worn). Brooch fitting to back, but no maker mark. Size 28mm by 24.5mm.
|
- Above: A gilt brass Collar badge to the 7th (Wellington West Coast Rifles) Infantry Regiment (left when worn). Brooch fitting to back, but no maker mark. Size 28mm by 24.5mm.
|
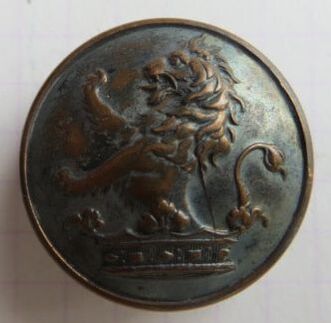
- Opposite: A 24mm unknown blazer or livery button with the Duke of Wellington's coat of arms. Looks to have been silver plated in the past, on copper, which has worn/oxidised with time.
Maker marked to "Firmin & Sons Ltd, 153 Strand, London".
The regiments title changed in 1921 to 2nd Battalion, Wellington Regiment.
In 1923 it was changed again to the Wellington West Coast Regiment.
During WW2, the 7th contributed to the following overseas Battalions of the 2NZEF:
- 19th Battalion - Briefly till the 5th October 1942.
- 22nd Battalion
- 25th Battalion
- 36th Battalion
In 1948, the Wellington West Coast Regiment amalgamated with the Taranaki Regiment form the 7th/11th Wellington West Coast & Taranaki Regiment (its badges are further down).
By this stage it was designated a Territorial Force (TF)
On the 1st of April 1964 the Regiment became:
5 RNZIR – 5th Battalion, (Wellington West Coast and Taranaki), Royal New Zealand Infantry Regiment
Again it was designated a Territorial Force.
In March 2013, the Regiment was further merged with the 7th Battalion (Wellington [City of Wellington's Own], Hawkes Bay) , Royal New Zealand Infantry Regiment to form:
5th/7th Battalion, Royal New Zealand Infantry Regiment (5/7 RNZIR)
It is a Reserve battalion of the Royal New Zealand Infantry Regiment.
Fakes & Forgeries
Below is a fake or reproduction cap badge to the 7th (Wellington West Coast Rifles) Infantry Regiment.
- Orangey-Yellow in colour, with some pitting to front, and lacking the sharpness in detail.
- To back is a mess, with pitting and stippling. Again, lacking the smooth reverse detail, which a die-stamped version would have.
- Two small copper lugs, soldered on, where as the originals have a different kind of braze, which does not turn black with time.
- Size 38mm by 33mm.
|
|
|
|
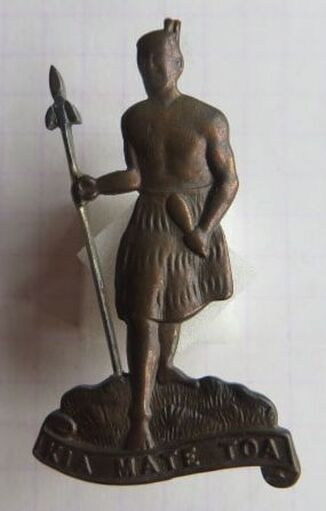
8th (Southland Rifles) Infantry Regiment.
Formed in 1911 (from the 2nd Battalion, Otago Rifles).
Headquarters were at Invercargill.
Their badge was submitted for approval with designs on the 28th of July 1911.
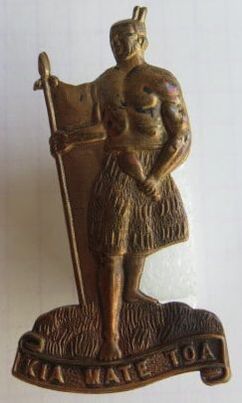
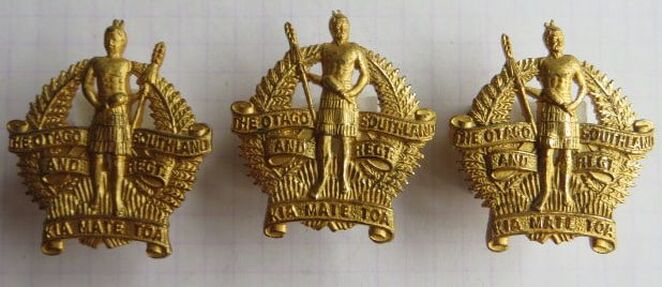
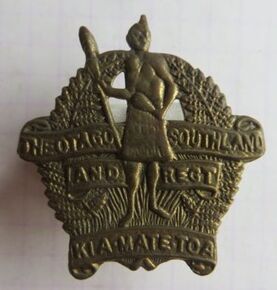
Cap Badge - was described as a "Effigy of a Maori grasping a spear (Taiaha) and club (Mere). Motto "Kia Mate Toa" (Die Game) on a scroll below".
Collar Badge - "Cap and Collar badges similar".
(Badges - Regimental - Territorial Force, R23534556 AD1 AAYS 13-13 Archives NZ).
Motto: KIA MATE TOA (Die bravely).
Headquarters were at Invercargill.
Their badge was submitted for approval with designs on the 28th of July 1911.
Cap Badge - was described as a "Effigy of a Maori grasping a spear (Taiaha) and club (Mere). Motto "Kia Mate Toa" (Die Game) on a scroll below".
Collar Badge - "Cap and Collar badges similar".
(Badges - Regimental - Territorial Force, R23534556 AD1 AAYS 13-13 Archives NZ).
Motto: KIA MATE TOA (Die bravely).
|
- Opposite: A semi-solid bronze Cap badge with Silver Spear to the 8th (Southland) Infantry Regiment. A little toned and polished, its difficult to distinguish the separately applied Taiaha (Spear in Maori) in Silver. The badge is impressed to back to "J R GAUNT LONDON". Note 2 feathers to head.
- Above: A opposing pair of bronze or bronzed Collar badges to the 8th (Southland) Infantry Regiment. Two D shaped copper lugs to the back of each. No maker mark, and again note 2 feathers to head. |
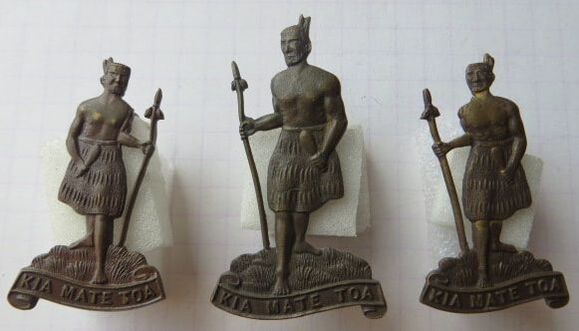
- Opposite: A Cap and opposing Collar badges set in gilt brass to the 8th (Southland) Infantry Regiment. All have a marker plaque to "J R GAUNT LONDON" to back and 2 feathers to head. D shaped looped lugs are in a North/South configuration.
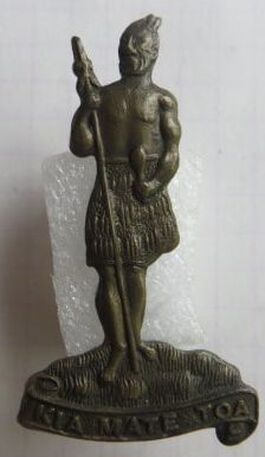
- Above: A darkened copper Cap badge to the 8th (Southland) Infantry Regiment. Most of the darkened finish has been polished off. Note the non-void area, maybe to prevent the spear from breaking. Two copper wire looped lugs to back, but no maker mark.
|
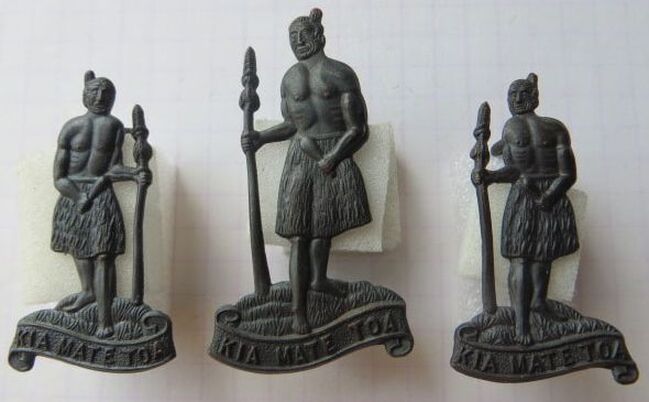
- Above: A Cap and opposing Collar badge set in darkened copper to the 8th (Southland) Infantry Regiment. All three have copper looped wire lugs to back. No marker mark with just 1 feather to head. Lugs are again in a North/South configuration to back.
|
|
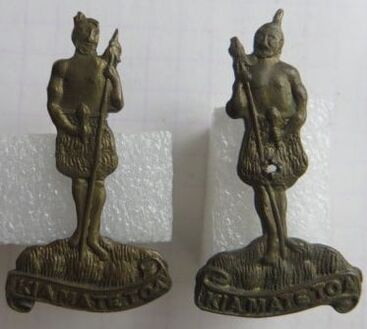
- Opposite and Above: The scarce "Spear Across the Body" type, possible to counter the issue of the spear tip catching and breaking off. If you have ever tried to collect a set of badges to the 8th, you will come across many examples where the spear tip has snapped off. This type appear to be locally made in New Zealand.
|
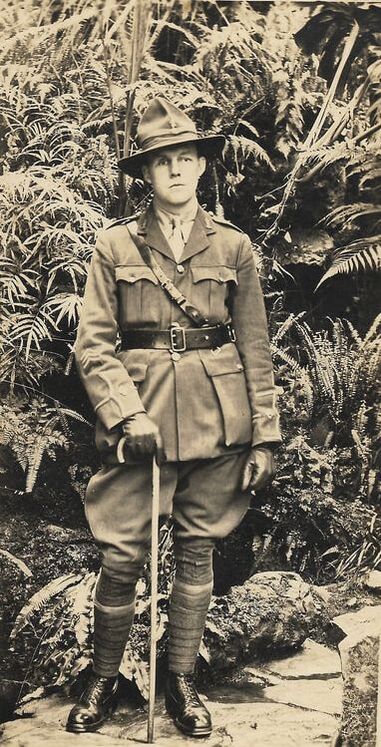
- Opposite: A superb, full length picture of 8/448 2nd Lieut Henry Nicolson around late 1918/1919.
Henry was from Invercargill, in the south of the South Island. He started his military service on the 14th of August 1914 and was to spend 3 years and 206 days overseas.
He rose from the rank of Private to 2nd Lieutenant.
Henry left with the main body of the New Zealand Expeditionary Force, traveling to Egypt, and then onto Gallipoli with the Otago Infantry Battalion.
In September 1915, he was evacuated out from the peninsula, sick.
Recovered, he went on to join the 3rd Battalion of the Otago Infantry Regiment, in France, where he was wounded (Gunshot wound to face and chest) on the 4th of October 1917.
He was to lose his right eye in December that year.
Henry remained in the UK until July 1918, as part of New Zealand Headquarters, based in London. He was then stuck off strength and sent home due to his wounds.
The opposite photo show Henry presumable at home, in New Zealand, wearing a earlier style of Officers tunic, with rank cuffs to a 2nd Lieutenant. His Lemon Squeezer has the Cap badge to the 8th (Southland) Infantry Regiment, with matching collars to his tunic.
On his right sleeve are 3 Overseas service Chevrons to represent the 3+ years of his service.
Henry's record shows that he was at least still alive in June 1967, as he was awarded both his Gallipoli medallion and lapel badge.
In 1921 the 8th merged with the 14th (South Otago) Infantry Regiment to form the 2nd Ballation, Otago Regiment.
In 1923 the regiments title changed again to the Southland Regiment.
During WW2, the 8th contributed to the following overseas Battalions of the 2NZEF:
- 20th Battalion - Briefly till the 5th October 1942.
- 23rd Battalion
- 26th Battalion
- 30th Battalion
- 37th Battalion
In 1948 the Otago Regiment and Southland Regiments merged, and formed the Otago and Southland Regiment.
By this stage it was designated a Territorial Force (TF)
- Above: A Cap and Collar badge set in gilt fired brass to the Otago and Southland Regiment. The Cap badge to center is different to the right collar (when pictured) in that the size of the lugs on the Cap badge are a lot longer. All have a raised maker mark of "J R GAUNT LONDON" to back.
|
- Above: A gilt brass, die stamped Cap badge to the Otago and Southland Regiment. It does not appear to have had collars issued with it.
|
On the 1st of April 1964 the Regiment became:
4 RNZIR – 4th Battalion, (Otago and Southland), Royal New Zealand Infantry Regiment
Again it was designated a Territorial Force.
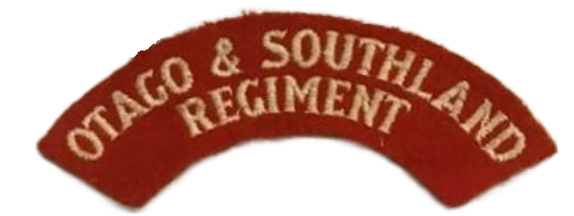
- Opposite: A single embroidered and felt cloth shoulder titles worn post 1961 to 1994 to elements of the Otago & Southland Regiment of the 4 RNZIR (Image from the Internet).
In March 2013, the Regiment was further merged with the 2nd Battalion (Canterbury and Nelson-Marlborough and West Coast) , Royal New Zealand Infantry Regiment to form:
2nd/4th Battalion, Royal New Zealand Infantry Regiment (2/4 RNZIR)
It is a Reserve battalion of the Royal New Zealand Infantry Regiment.
4 RNZIR – 4th Battalion, (Otago and Southland), Royal New Zealand Infantry Regiment
Again it was designated a Territorial Force.
- Opposite: A single embroidered and felt cloth shoulder titles worn post 1961 to 1994 to elements of the Otago & Southland Regiment of the 4 RNZIR (Image from the Internet).
In March 2013, the Regiment was further merged with the 2nd Battalion (Canterbury and Nelson-Marlborough and West Coast) , Royal New Zealand Infantry Regiment to form:
2nd/4th Battalion, Royal New Zealand Infantry Regiment (2/4 RNZIR)
It is a Reserve battalion of the Royal New Zealand Infantry Regiment.
Fakes & Forgeries
The below is a fake or reproduction badge to the 8th (Southland) Infantry Regiment. Its a bit of a worry.
- Made from a "one feather to head" type, which is usually copper in composition, this is cast brass.
- Finish to front is OK, some strikes of the original badge aren't great anyway, and this at a passing glance would fool most collectors. But just lacking the fine detail in depth. I just wonder if the blackened finish, hides much of the faulting from the casting too.
- The back just lets it down, with again, just lack of detail from what a back die would do on a original die-stamped badge... but again its OK/nearly there.
- Small ribbon copper lugs to back, which is not on the originals, but the fixing material is hidden by the darkened finish.
- Size 46mm by 25.5mm.
|
|
|
|
9th (East Coast Rifles) Infantry Regiment.
A selection of Cap and Collar badges to the 9th (Wellington East Coast) Infantry Regiment which formed in 1911 (from the 5th Battalion Wellington (Center or Ruahine) Rifles which also amalgamated at the time 3rd Battalion Wellington (East Coast) Rifles.
Re-designated 9th (Hawke's Bay) Regiment on the 27th March 1914.
Headquarters was at Napier.
Re-designated 9th (Hawke's Bay) Regiment on the 27th March 1914.
Headquarters was at Napier.
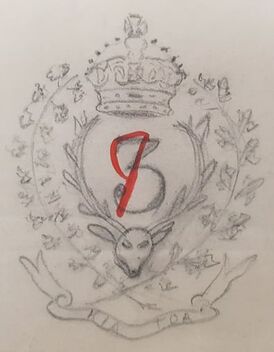
- Opposite: A sketch of the proposed badge for the 9th (East Coast Rifles) Infantry Regiment held by Archive NZ. Note the sketch shows a "3" to center, which would have referred to the 3rd Battalion Wellington (East Coast) Rifles, but has been "corrected" to the 9th.
Cap Badge - In 1911, their badge was described as "Fern fronds surmounted by a crown surrounding a red deer's head with No. of Regt's IX between. Motto "Kia Toa" on scroll at base".
Collar Badge - "Omit fern fronds, crown & motto".
Collar badge was approved on the 24th of July 1911 by the G.O.C.
(Badges - Regimental - Territorial Force, R23534556 AD1 AAYS 13-13 Archives NZ).
Another file mentions the Mess Dress of the Regiment as:
"1st Battalion - Mess Dress - Universal for Infantry of the Line with blue facings".
(Cadets, Regimental Badges and Uniforms R21078962 Box 19 AD37 24 c1912 Archives N.Z.).
Motto: KIA TOA (Be brave).
|
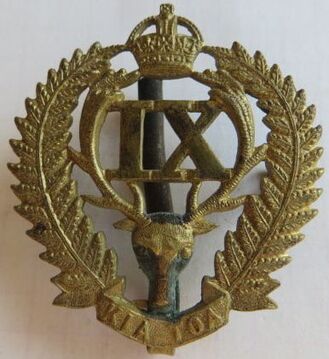
- Above: A Officers darkened bronze Cap badge to the 9th (Hawkes Bay) Infantry Regiment. Semi-solid to back, with the maker details impressed to "J R GAUNT LONDON". Two D shaped looped lugs to back.
|
- Above: A rare variation of the 9th (Hawkes Bay) Infantry Regiment Cap badge. This badge has been issued with a hook to hold back the flap of a slouched hat, these are rare especially to this regiment. Like the 1st (Canterbury) Infantry Regiment hooked Cap badge, they came about prior to WW1 due to the different Regiments adopting a wide range of Hats.
|
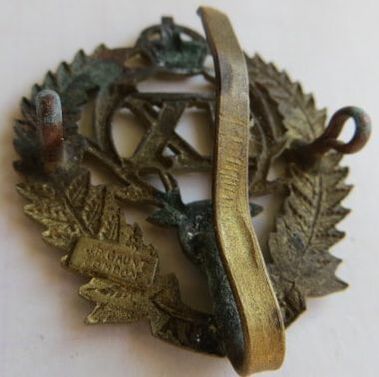
(continued): At some stage the 9th (Wellington East Coast) Infantry Regiment adopted the slouch Hat, with the Cap Badge worn to the side, and the brim of the Hat worn up. The hook would have been used to hold the brim back.
Sadly this has been bent 360 degrees, behind the badge, but the hook is still firmly attached. Maker plaqued to "J R GAUNT LONDON" to back, with copper looped lugs. |
|
|
- Opposite: A "Other Ranks" gilt brass Cap badge to the 9th (Hawkes Bay) Infantry Regiment. Copper looped lugs to back and a maker plaque to "J R GAUNT LONDON".
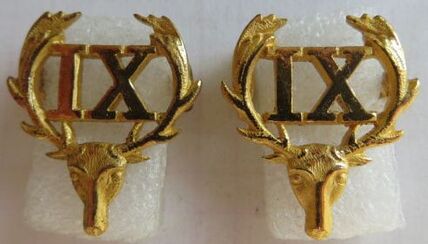
- Above: A matching pair of darkened Collar badges to the 9th (Hawkes Bay) Infantry Regiment. D shaped copper looped lugs to back, but no maker mark. Likely Gaunt. |
|
|
- Opposite: A gilt fired brass Officers Cap badge to the 9th (Hawkes Bay) Infantry Regiment. Long looped lugs to back, which is semi-solid. No maker mark.
- Above: A matching pair of gilt fired Collar badges to the 9th (Hawkes Bay) Infantry Regiment. D shaped copper looped lugs to back, but no maker mark. Likely Gaunt. |
At the end of WW1 the 9th (Hawke's Bay) Infantry Regiment absorbed the 17th (Ruahine) Infantry Regiment.
In 1921 its title changed to the 3rd Battalion, Wellington Regiment.
In 1923 its title changed again to the Hawke's Bay Regiment.
But in 1941, the 2nd Battalion of the Hawke's Bay Regiment was mobilised and designated the 1st Battalion Ruahine Regiment.
During WW2, the 9th contributed to the following overseas Battalions of the 2NZEF:
- 19th Battalion - Briefly till the 5th October 1942.
- 22nd Battalion
- 25th Battalion
- 36th Battalion
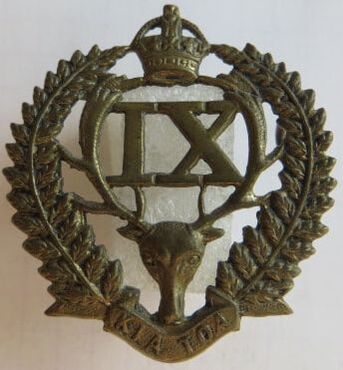
- Above: A gilt brass Cap badge to the 9th (Hawkes Bay) Infantry Regiment. Copper wire looped lugs to back, but no maker mark. Note the wider frame and smaller crown.
|

- Above: A gilt brass Cap badge to the 9th (Hawkes Bay) Infantry Regiment. Two pressed type lugs to back. No maker mark.
|
- Above: A semi-solid, Queens Crown, gilt fired brass Cap badge to the 9th (Hawkes Bay) Infantry Regiment. Two long looped lugs to back, but no maker mark.
|
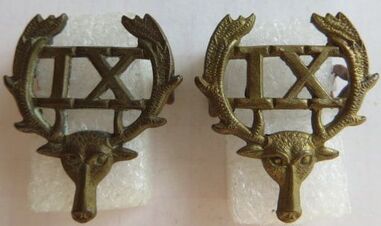
- Above: A matching pair of gilt brass Collar badges to the 9th (Hawkes Bay) Infantry Regiment. Two thick copper wire lugs to back, but no maker mark.
|
- Above: A gilt brass Collar badge to the 9th (Hawkes Bay) Infantry Regiment. Two round copper wire lugs to back, but no maker mark.
|
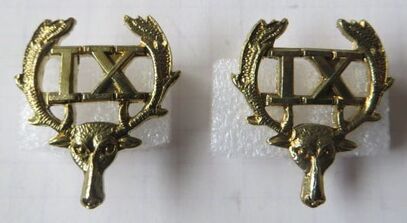
- Above: A pair of shiny brass coloured, modern collars to the 7th Battalion (Wellington (City of Wellington's Own) and Hawkes Bay) Royal New Zealand Infantry Regiment.
Both have a pair of pins to back with no maker mark. |
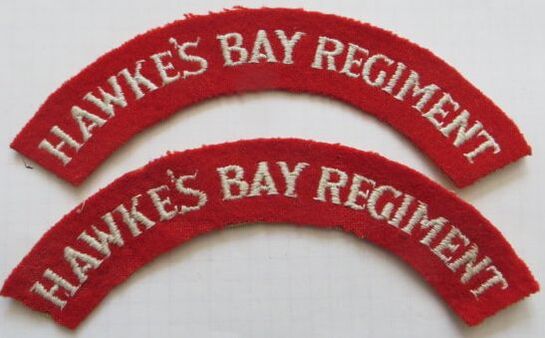
In August 1947 the Hawke's Bay Regiment was designated a Territorial Force (TF)
On the 1st of April 1964 it merged with the Wellington (City of Wellington's Own) Regiment and became:
7 RNZIR – 7th Battalion, (Wellington (City of Wellington's Own) and Hawke's Bay), Royal New Zealand Infantry Regiment
Again it was designated a Territorial Force.
- Opposite: A pair of embroidered and felt cloth shoulder titles worn post 1961 to 1994 to elements of the Hawke's Bay Regiment of the 7 RNZIR. Size 20mm by 130mm.
In March 2013, the Regiment was further merged with the 5th Battalion (Wellington West Coast and Taranaki), Royal New Zealand Infantry Regiment to form:
5th/7th Battalion, Royal New Zealand Infantry Regiment (5/7 RNZIR)
It is a Reserve battalion of the Royal New Zealand Infantry Regiment.
10th (North Otago) Infantry Regiment.
Formed in 1911 (from the 3rd Battalion, Otago Rifles).
Headquarters were at Oamaru.
A memo dated the 4th of April 1911 states:
"Sir,
I have the honour to forward a sample and description of Regimental badge for approval and registration.
I would suggest that "10th Regiment (North Otago Rifles)" be substituted for the present lettering "3rd Battn Otago Rifle Volunteers", also that the New Zealand (conventional) cross --- enclosure (a) --- be substituted for the Australian cross which is now on the face of the shield in the centre of the badge.
The description of the proposed badge is. therefore --- two fern leaves surmounted by a crown, enclosing circular lettering "10th Regiment (North Otago Rifles)", within which is a shield embossed with the New Zealand Cross, the whole footed by a scroll bearing the legend "Pro Patria"".
This was confirmed later with
Cap Badge - "Circle bearing words "10th Regiment North Otago Rifles", surrounding N.Z. cross (4 stars) flanked by fern fronds & surmounted by Crown. Motto "Pro Patria" on scroll at base".
Collar Badge - "Similar".
(Badges - Regimental - Territorial Force, R23534556 AD1 AAYS 13-13 Archives NZ).
Motto: PRO PATRIA (For our Country).
|
- Above: Another darkened bronze Officers, semi-solid Cap or Collar badge to the 10th (North Otago) Infantry Regiment. Two D shaped copper looped lugs to back, but no maker mark. Note there is a large amount of damage to front, right side and center. Size 39mm by 41.5mm.
|
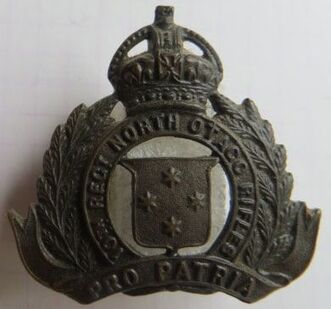
|
- Above & Right: A Cap and Collar badge set in gilt brass to the 10th (North Otago) Infantry Regiment. All are voided, around the center shield and have a maker plaque to "J R GAUNT LONDON" to behind the crown. Size 39mm by 40mm.
|
A cautionary tale with these.
A story circulated a few years back with regards to a NZ collector and his Jeweler mate, who mentioned that they were doing a rip-roaring trade in selling voided 10th badges by converting non-void versions, by just cutting out the background. The difference in price when sold was apparently well worth their while. ;-( |
|
- Above & Right: the more commonly encountered Cap and Collar badge set in gilt brass to the 10th (North Otago) Infantry Regiment.
|
(continued) All are non-voided, around the center shield and have a brass makers plaque to "J R GAUNT LONDON" to behind the crown. Two D shaped copper looped lugs to each. Size 38.5mm by 41mm.
|
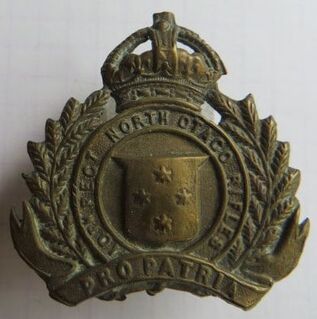
- Above: A thin, gilt brass Cap or Collar badge to the 10th (North Otago) Infantry Regiment. Two copper looped lugs to back, with no maker mark. Size 39.5mm by 39.5mm.
|
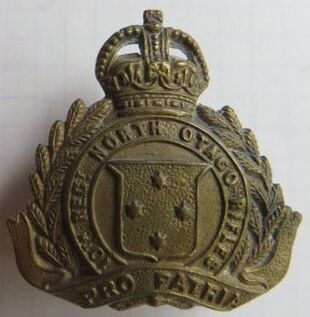
- Above: A gilt brass Cap or Collar badge to the 10th (North Otago) Infantry Regiment. Two copper looped lugs to back, with no maker mark. Size 41mm by 40mm.
|
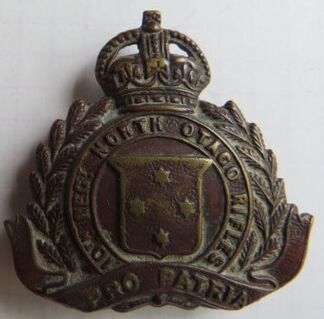
- Above: A darkened brass Cap or Collar badge to the 10th (North Otago) Infantry Regiment. Two copper looped lugs have been clipped off, with no maker mark. Size 40mm by 40.5mm.
|
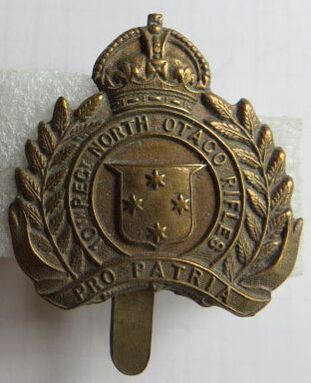
- Above: A gilt brass Cap badge to the 10th (North Otago) Infantry Regiment. Large brass slider to back, with no maker mark. Size 39.5mm by 38mm.
|
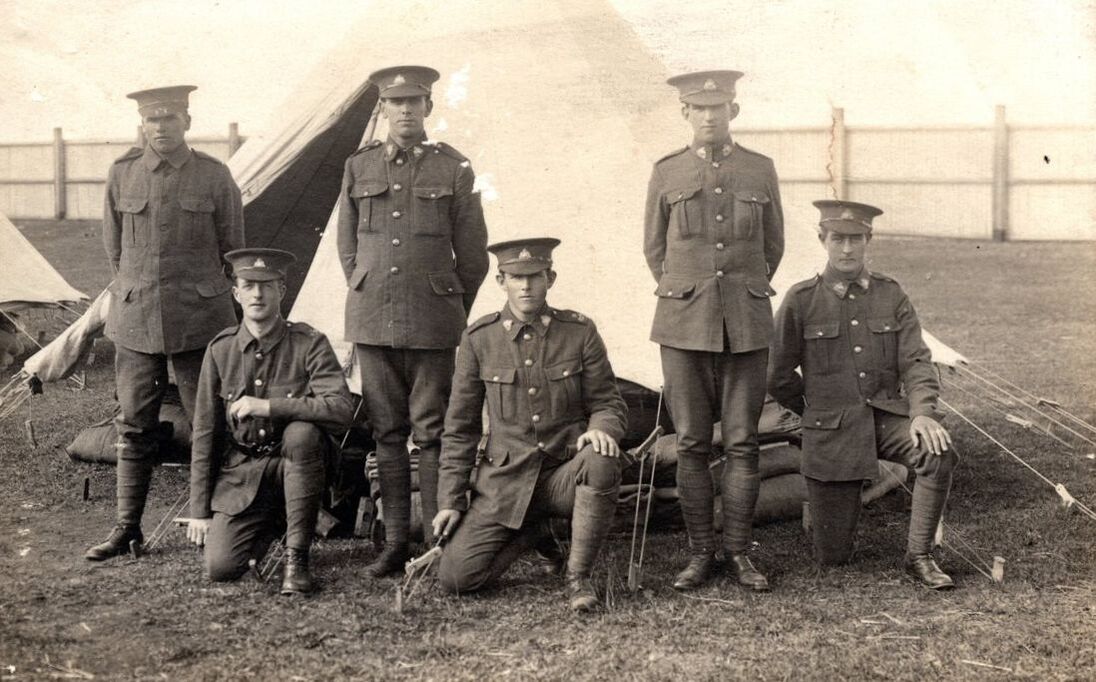
- Above: A pre-WW1/WW1 of the 10th (North Otago) Infantry Regiment in Camp, in New Zealand. A mix of missing insignia, with one having nothing, while another with just a Cap badge. The center kneeling soldier is showing his shoulder strap which clearly has a "10" over "NZR". Sadly no names or date.
|
In 1921, they were merged with the 4th (Otago) Infantry Regiment, and became the Otago Regiment.
In late 1938, the National Military Reserve (NMR) was formed.
It was a reserve force for the Territorial Army, which was to be called up in times of emergency.
They were issued and wore obsolete uniforms and webbing, but were also issued with badges which originated from 1911, yet had been made obsolete due to amalgamations of Regiments after the Great War, in the 1920's.
In the Southern Military District (covering the whole of the South Island of New Zealand), the following NMR units wore the 10th (North Otago) Infantry Regiment Cap badge from 1938 and into WW2:
- 4th Battalion, Dunedin NMR
- 19th Coy, Oamaru NMR
- 20th Coy, Invercargill NMR
Fakes & Forgeries
Below is a fake or reproduction cap badge to the 10th (North Otago) Infantry Regiment.
- Orangey-Yellow in colour, but OK to front in terms of detail.
- To back is stippled, with holes, and a large flat area to side, where the excess brass has been filed down from the casting proccess. It lacks the detail, which a die-stamped version would have.
- Two small copper lugs, soldered on, where as the originals have a different kind of braze, which does not turn black with time.
- Size 38.5mm by 41.5mm.
|
|
|
|
11th (Taranaki Rifles) Infantry Regiment.
The 11th (Taranaki Rifles), was formed in 1911 (from the 4th Battalion, Wellington (Taranaki) Rifles).
Headquarters were at Stratford.
Headquarters were at Stratford.
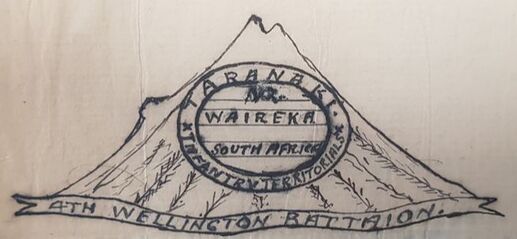
- Opposite: A sketch of the proposed badge of the 11th (Taranaki) Infantry Regiment held at Archive NZ. The G.O.C in a memo dated the 10th of July stated:
"The General Commanding Officer considers there is too much verbiage in this- honours should not appear on badges- and suggests the omission of the circle etc. in the middle of mountain and insertion of "11th Taranaki Rifles" on scroll at foot.
There is now no such Regiment as the "4th Wellington Battalion."
The following badge was approved on the 24th of July 1911.
Cap Badge - "Facsimile of Mt Egmont with words "11th Taranaki Rifles on scroll at base".
Collar Badge - "Similar".
Written in pencil "Regimental Motto (not fond of badge) "Primus in Bello"".
A memo dated 22nd of Aug 1911 notes that the regimental motto is "Primus in Bello".
(Badges - Regimental - Territorial Force, R23534556 AD1 AAYS 13-13 Archives NZ).
Motto: PRIMUS IN ARMIS (First in arms).
They wore a number of variations to their badge.
|
- Above: A bronze, semi-solid, Officers Cap badge to the 11th (Taranaki Rifles) Regiment. Note the Battle Honors to either side to front, with "WAIREKA", "NEW ZEALAND" and "SOUTH AFRICA". Two tangs or blades to back, with a maker impressed marked to "J R GAUNT LONDON". Size 25.5mm by 49mm.
|
- Above: A Other Ranks, gilt brass version of the 11th (Taranaki Rifles) Regiment Cap or Collar badge with Battle Honors.It has been noted from the memoirs of a Commanding Officer of the 11th, that these badges were worn by the Men in France in December 1916. Two D shaped copper looped lugs to back, with maker plaque to "J R GAUNT LONDON". Size 25.5mm by 50mm.
|
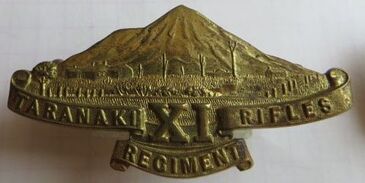
- Above: A Cap and/or Collar badge in gilt brass to the 11th (Taranaki Rifles) Regiment. Rectangular plaque marked to "J R GAUNT LONDON" to back. Size 25.5mm by 49.5mm.
|
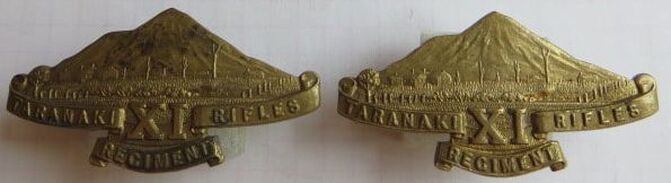
- Above: A pair of Cap or Collar badges in gilt brass to the 11th (Taranaki Rifles) Regiment. Oval maker plaques to "J R GAUNT LONDON" to back. Two D shaped copper looped lugs. This is the most commonly found type of badge found to the regiment. Size 25.5mm by 49.5mm.
|
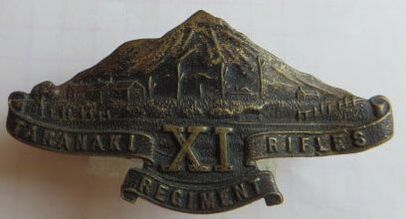
- Above: A darkened brass Cap or Collar badge to the 11th (Taranaki Rifles) Regiment. Two D shaped lugs to back, with no maker mark. Size 26mm by 49.5mm.
|
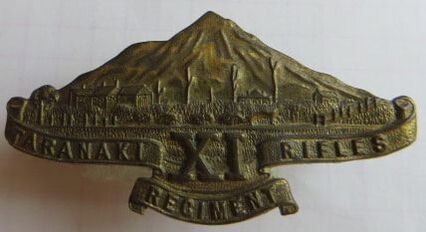
- Above: A gilt brass Cap or Collar badge to the 11th (Taranaki Rifles) Regiment. Two D shaped lugs to back, with no maker mark. Size 25.5mm by 49.5mm.
|
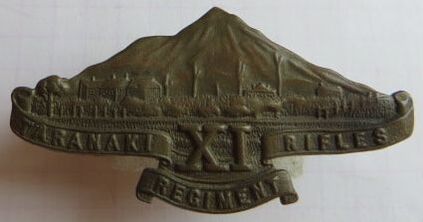
- Above: A gilt brass Cap or Collar badge to the 11th (Taranaki Rifles) Regiment. Two D shaped lugs to back, with no maker mark. Size 25.5mm by 49.5mm.
|
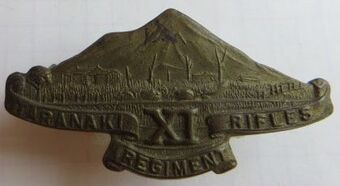
- Above: A gilt brass Cap or Collar badge to the 11th (Taranaki Rifles) Regiment. Two hex type brass lugs to back, much like you would find on a WW1 Reinforcements badge. No maker mark. Size 26mm by 49.5mm.
- Opposite: A very detailed image of 10/2499 Temporary Captain Robert Kenneth Nicol who enlisted as a Sergeant with the 6th Reinforcements, B Company. He served with both the 1st and 2nd Wellington Battalions, at Gallipoli (Murdros), Egypt and the Western Front, where he won the Military Cross in Dec 1917 as a 2nd Lieutenant attached to the NZ 1st Light Trench Mortar Battalion. He was sadly killed in action on the 5th of August 1918 as a part of Dunsterforce, which was a Allied Expeditionary Force set up to fight the Ottoman forces in Armenia, after the Russian Tsarist army collapsed in 1917. Robert is wearing a set of 2nd type 11th (Taranaki) Infantry Regiment Cap/Collar badges. He has his "MC" ribbon bar just above his tunic pocket. His puggaree to his hat is infantry, with colours khaki/scarlet/khaki. I believe his hat may be American, as it has a vent or badge hole to the front, with metal grommet. He looks to just have a metal shoulder title to his shoulder boards (R24183992 AALZ 25044 F1032 Archives NZ). |

|
In 1921 the 11th Taranaki Regiment was re-designated the 4th Battalion Wellington Regiment, and then its title changed again to just the Taranaki Regiment in 1923.
It is thought that the badges opposite were made in 1921, with pictorial evidence of them still being worn in 1930 alongside the earlier version.
- Opposite: A darkened bronze, semi-solid Officers Cap badge, to the IVth Battalion, Wellington Regiment, Taranaki Rifles. Two tangs or blades to back and impressed to "J R GAUNT LONDON". Size 25mm by 49mm.
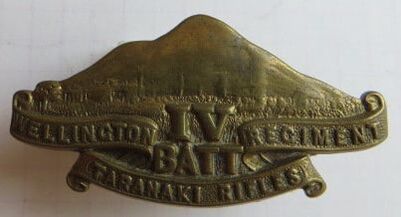
- Above: Gilt brass Other Ranks Cap and/or Collar Badge with the title, IVth Battalion, Wellington Regiment, Taranaki Rifles. To back are D shaped copper looped lugs, with maker plaque to "J R GAUNT LONDON". Size 25mm by 49mm.
|
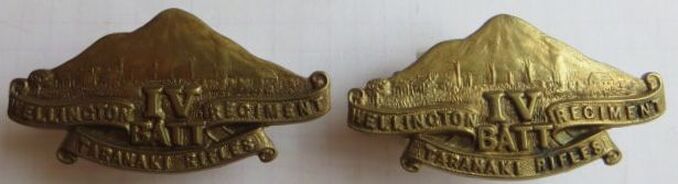
- Above: A Gilt brass Other Ranks pair of Cap or Collar Badge with the title, IVth Battalion, Wellington Regiment, Taranaki Rifles. To back are D shaped copper looped lugs, with maker plaque to "J R GAUNT LONDON". Size 25mm by 49mm.
|
During WW2, the 11th contributed to the following overseas Battalions of the 2NZEF:
- 19th Battalion - Briefly till the 5th October 1942.
- 22nd Battalion
- 25th Battalion
- 36th Battalion
In 1948, the Taranaki Regiment amalgamated with the Wellington West Coast Regiment form the 7th/11th Wellington West Coast & Taranaki Regiment).
By this stage it was designated a Territorial Force (TF)
|
- Above: A post 1948 to 1964 style Cap badge in gilt brass and white metal to the 7th/11th (Wellington West Coast & Taranaki) Regiment. Two thick, wire looped lugs to back. No maker mark, but possibly Mayer & Kean or Wellington.
|
- Above: A post 1948 to 1964 style Cap badge in gilt brass and white metal to the 7th/11th (Wellington West Coast & Taranaki) Regiment. Two pressed type copper lugs to back. No maker mark.
|
- Opposite: A matching, opposing Collar badge pair in gilt brass and white metal to the 7th/11th (Wellington West Coast & Taranaki) Regiment. Two thick, wire looped lugs to the back of each. No maker mark, but possibly Mayer & Kean or Wellington and match the above Cap badge.
On the 1st of April 1964 the Regiment became:
5 RNZIR – 5th Battalion, (Wellington West Coast and Taranaki), Royal New Zealand Infantry Regiment
Again it was designated a Territorial Force.
On the 1st of April 1964 the Regiment became:
5 RNZIR – 5th Battalion, (Wellington West Coast and Taranaki), Royal New Zealand Infantry Regiment
Again it was designated a Territorial Force.
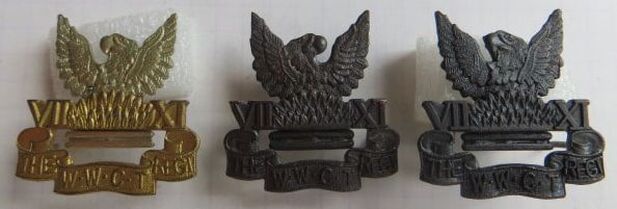
As part of the Royal New Zealand Infantry Regiment, the 5th/7th Battalion wear the RNZIR Cap badge. Opposite are pre-2012 Collar badges to the unit.
- Far left: A gilt brass and white metal Collar with two pins to back to be used with clutches. No maker mark.
- Center and Right: A opposing pair of darkened copper 2 piece Collars badges. The center badges has three pins, while the right has two. No maker mark.
- Far left: A gilt brass and white metal Collar with two pins to back to be used with clutches. No maker mark.
- Center and Right: A opposing pair of darkened copper 2 piece Collars badges. The center badges has three pins, while the right has two. No maker mark.
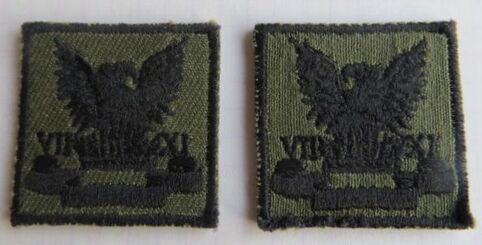
- Above: A pair of pre-2012 cloth badges to the 5th/7th Battalion, Royal New Zealand Infantry Regiment. Note the Phoenix heads are opposing.
|
- Above: A post 2013 set of opposing Collar badges to the 5th/7th Battalion of the Royal New Zealand Infantry Regiment. Single piece, they are Gilt and Silver tone metal, with two pins to the back of each, to be used with clutches. No maker mark. Size 24.5mm by 30mm.
|
In March 2013, the Regiment was further merged with the 7th Battalion (Wellington [City of Wellington's Own], Hawkes Bay) , Royal New Zealand Infantry Regiment to form:
5th/7th Battalion, Royal New Zealand Infantry Regiment (5/7 RNZIR)
It is a Reserve battalion of the Royal New Zealand Infantry Regiment.
5th/7th Battalion, Royal New Zealand Infantry Regiment (5/7 RNZIR)
It is a Reserve battalion of the Royal New Zealand Infantry Regiment.
In 2008, elements of the Taranaki Regiment celebrated its 150 years. Three types of badges were struck for the occasion.
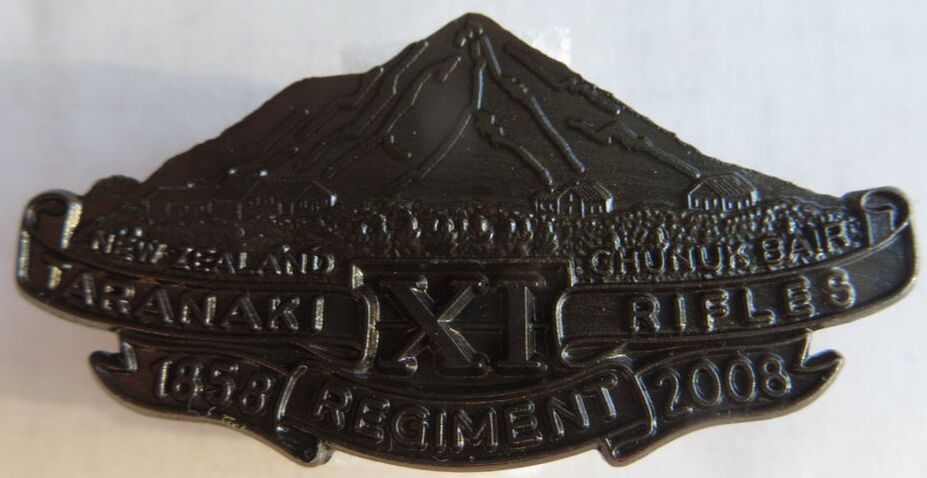
- Above: A darkened bronze coloured metal version of the Cap badge to the 11th (Taranaki) Rifles Regiment, with battle honors and the dates "1858 - 2008". It has two pins to back to be used with clutches. No maker mark and size 25mm by 50mm.
|
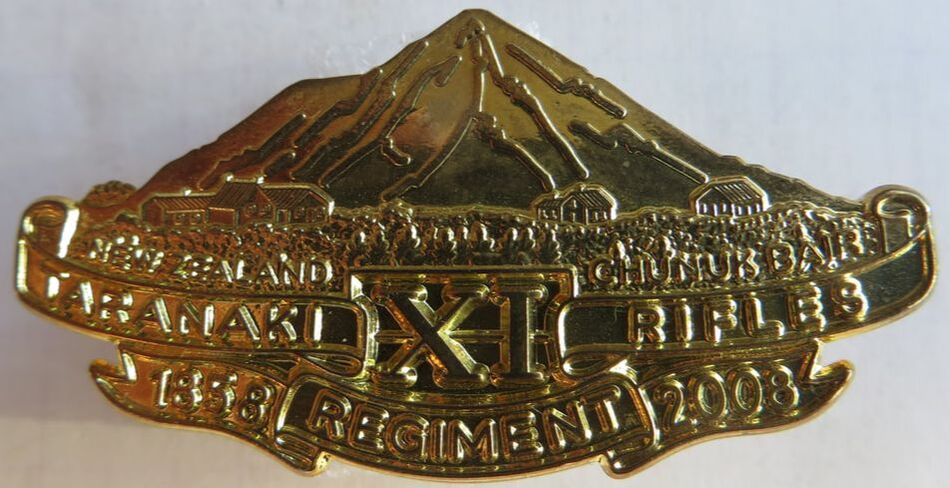
- Above: A gilt metal version of the Cap badge to the 11th (Taranaki) Rifles Regiment, with battle honors and the dates "1858 - 2008". It has two looped lugs to back. No maker mark and size 25mm by 50mm.
|
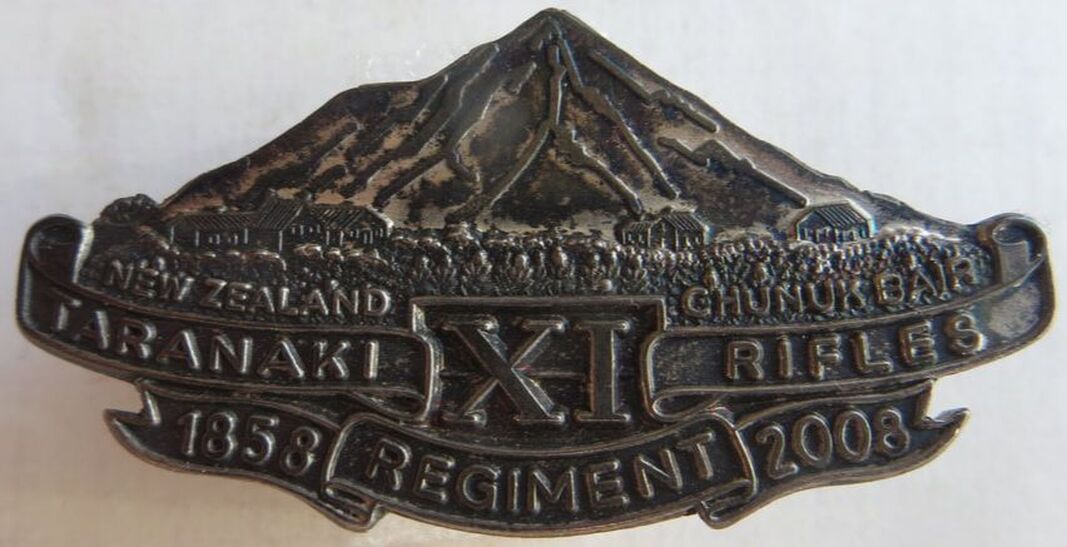
- Bottom: A Stirling Silver version of the Cap badge to the 11th (Taranaki) Rifles Regiment, with battle honors and the dates "1858 - 2008". It has two lugs to back, along with the mark of "St.Silv" and is numbered "18". No maker mark and size 25mm by 50mm.
|
Fakes & Forgeries
Below is a fake or reproduction cap badge to the 11th (Taranaki) Infantry Regiment.
- Orangey-Yellow in colour, but lacking detail to front.
- To back is stippled, with holes, and a large flat area to base, where the excess brass has been filed down from the casting proccess. It lacks the detail, which a die-stamped version would have.
- Two small copper lugs which are not used on originals.
- Size 25mm by 48mm.
|
|
|
|
|
|
|
|
Above and opposite is a reproduction cap badge to the 11th (Taranaki) Infantry Regiment done in the UK in the 00's.
- Detail is good to front, and for most, at a glance this badge would pass, except for the fact that it has a silver colour.
- To back also is good, with a readable Gaunt maker plaque. Its up-side-down, but that is sometimes encountered on originals too.
- Stamped to back to "SILVER" just at the summit of Mt Egmont.
- Two silver coloured lugs to back. Shape is OK and similar to originals, but you can see the base of the lug.
- Size 23.5mm by 47mm.
Basically a fantasy badge, maybe not sold to fool the collector as such, but then there is no reason for it to exist either. No badges were issued in solid silver to the New Zealand Army. Some gilt fired brass examples, have silver components, but the 11th (Taranaki) Infantry Regiment never had this distinction.
12th (Nelson) Infantry Regiment.
The 12th (Nelson) Infantry Regiment was formed in 1911 from the amalgamation of 1st and 2nd Battalions of Nelson Infantry.
Headquarters was at Nelson.
Headquarters was at Nelson.
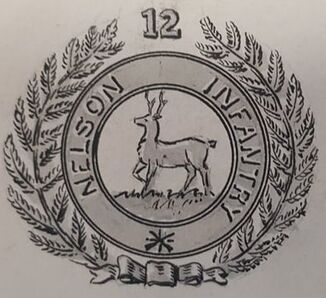
- Opposite: A sketch of the proposed badge for the 12th (Nelson) Infantry held by the NZ Archive.
Cap Badge - In 1911, their badge was described as a "Stag surrounding by circle bearing the words "Nelson Infantry" flanked by fern fronds & surmounted by the number of Regt. 12".
Collar Badge - "Similar".
(Badges - Regimental - Territorial Force, R23534556 AD1 AAYS 13-13 Archives NZ).
Motto: (none in the 1st NZEF - as noted in R17187868 AALI W3508 7291 Archives NZ)
|
- Above: A darkened Bronze Officer Cap badge to the 12th (Nelson) Infantry Regiment. Semi-solid to back, with two blades or tangs to back. Sadly one has bust off. At back base, is the impressed maker mark of "J R GAUNT LONDON".
|
- Above: A darkened brass Cap badge to the 12th (Nelson) Infantry Regiment. Die-stamped, with two D shaped looped lugs to back, and small maker plaque to "J R GAUNT LONDON".
|
- Above: A pair of matching, opposing gilt brass Collar badges to the 12th (Nelson) Infantry Regiment. Two D shaped looped lugs to back on each, along with a small maker plaque of "J R GAUNT LONDON".
|
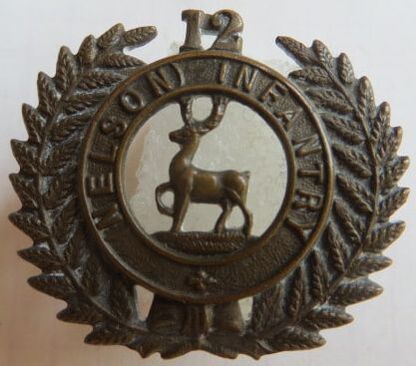
- Above: A darkened brass Cap badge to the 12th (Nelson) Infantry Regiment. Die-stamped, with two D shaped looped lugs to back, but no maker mark. Note the "12" to top is joined.
|
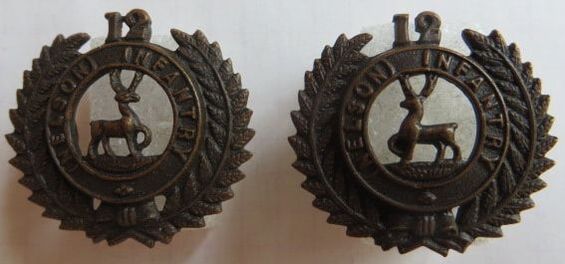
- Above: A matching darkened pair of brass Collar badges to the 12th (Nelson) Infantry Regiment. Copper D shaped lugs to back, but no maker mark.
|
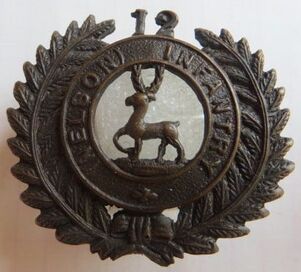
- Above: A darkened brass Cap badge to the 12th (Nelson) Infantry Regiment. Die-stamped, with two looped lugs to back and no maker mark. Variations in the bow to base and the antlers to the Stag.
|
In 1917, due to losses on the Western Front, part of the 13th (North Canterbury and Westland) Infantry Regiment merged with the 12th (Nelson) Infantry Regiment. On the 13th of April 1917, the title of the 12th (Nelson) Infantry Regiment was changed to the 12th (Nelson & Marlborough) Infantry Regiment.
In March 1919, the regiment requested to change its badge to include the "Marlborough" part in the title on its badge.
In March 1919, the regiment requested to change its badge to include the "Marlborough" part in the title on its badge.
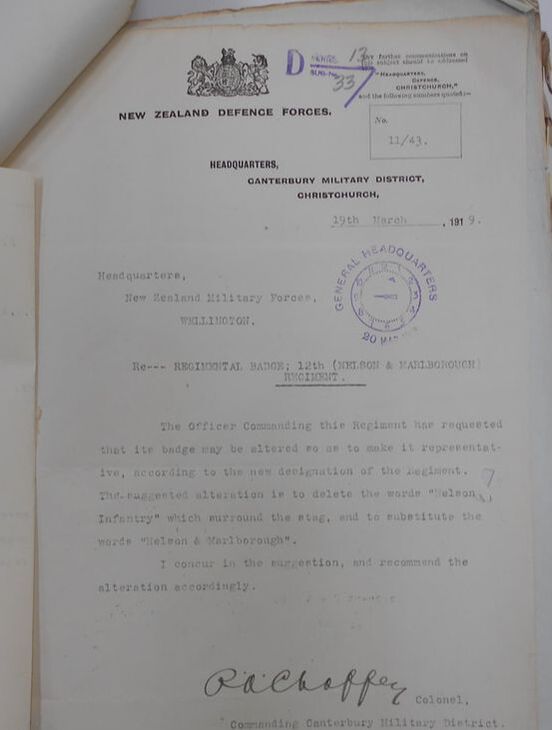
- Above: A letter dated the 19th of March 1919 from the Commanding Officer of the Canterbury District requesting the title change be made on the Cap and Collar badges of the 12th (Nelson) Infantry Regiment to be 12th (Nelson & Marlborough) (Badges - Regimental - Territorial Force, R23534556 AD1 AAYS 13-13 Archives NZ).
|
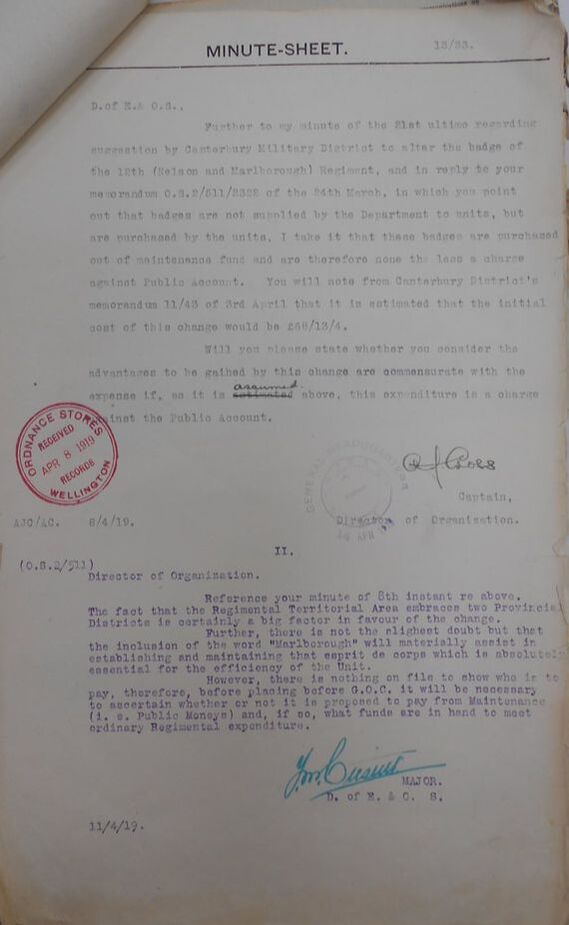
|
- Opposite Above Right: There was some push-back, as the funds would come out of the Regiments "Maintenance Grant", which was a public purse. The initial cost would be to the sum of 68 Pounds, 13 Shillings and 4 pense, including postage (Badges - Regimental - Territorial Force, R23534556 AD1 AAYS 13-13 Archives NZ).
On the 6th of May 1919 approve was given to order the below modified badges, with a initial order for 1000 sets.
Today, it is a very hard badge to find and collect, so one wonders where they have all gone over the years!
On the 6th of May 1919 approve was given to order the below modified badges, with a initial order for 1000 sets.
Today, it is a very hard badge to find and collect, so one wonders where they have all gone over the years!
|
|
- Above & Opposite: A Cap and Collar badge set to the 12th (Nelson & Marlborough) Infantry Regiment. All have a darkened finish applied, though both collars are polish to front, with just the finish to back. All have two D shaped copper looped lugs and a makers plaque to back to "J R GAUNT LONDON"
|
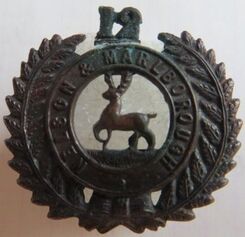
- Above: A single darkened Collar badge to the 12th (Nelson & Marlborough) Infantry Regiment. This has its full darkened finish to front with two D shaped copper looped lugs and a makers plaque to back to "J R GAUNT LONDON"
|
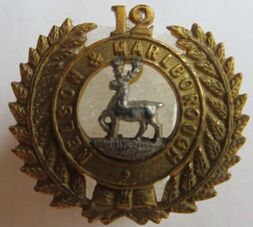
- Above: A post WW1 bi-metal Collar badge to the 12th (Nelson & Marlborough) Infantry Regiment. Semi-solid to back, with 2 D shaped copper looped lugs to back and the impressed maker mark of "J R GAUNT LONDON".
|
In 1921, the 12th merged with the 13th (North Canterbury and Westland) to form the 2nd Battalion, The Canterbury Regiment.
This changed again in June 1923 to The Nelson, Marlborough and West Coast Regiment.
The 12th & 13th badges are discussed further below in the next section.
During WW2, the 12th contributed to the following overseas Battalions of the 2NZEF:
- 20th Battalion - Briefly till the 5th October 1942.
- 23rd Battalion
- 26th Battalion
- 30th Battalion
- 37th Battalion
In August 1947 the Nelson, Marlborough and West Coast Regiment was designated a Territorial Force (TF)
On the 1st of April 1964 it amalgamated with the Canterbury Regiment and became:
2 RNZIR – 2nd Battalion, (Canterbury, and Nelson-Marlborough and West Coast), Royal New Zealand Infantry Regiment.
Again it was designated a Territorial Force.
In March 2013, the Regiment was further merged with the 4th Battalion (Otago and Southland), Royal New Zealand Infantry Regiment to form:
2nd/4th Battalion, Royal New Zealand Infantry Regiment (2/4 RNZIR)
It is a Reserve battalion of the Royal New Zealand Infantry Regiment.
13th (North Canterbury and Westland) Infantry Regiment
Formed in 1911, from the 2nd (North Canterbury Battalion of Infantry, it became the 13th (North Canterbury) Infantry Regiment.
Headquarters at Rangiora.
Headquarters at Rangiora.
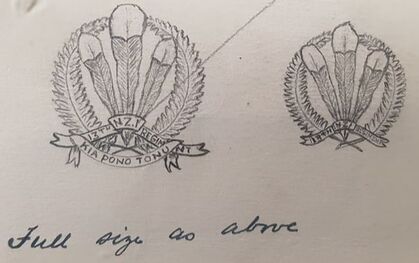
Designs for the badge were submitted for approval on the 30th of May 1911.
In a memo it was described as
"Badges 13th Regt. N.Z.I
Helmet Badge is not suggested as there is no full dress at present.
Cap and Collar Badges as enclosed pattern and same size.
Motto "Kia Pono Tonu" - "Be Faithful Always"
Motto to be on Cap badge only.
Design: Shaded parts of feather to be bronze black.
Tips of feathers white metal.
Fernleaves and ribbon to be brass.
For Officers fernleaves & ribbon will be gold or gilt"
- Opposite: The sketches submitted for the proposed badge of the 13th (North Canterbury & Westland) Infantry Regiment, held by Archive NZ.
(Badges - Regimental - Territorial Force, R23534556 AD1 AAYS 13-13 Archives NZ).
Motto: KIA PONO TONU (Ever faithful).
Below are the rarest of the New Zealand Infantry Badges.
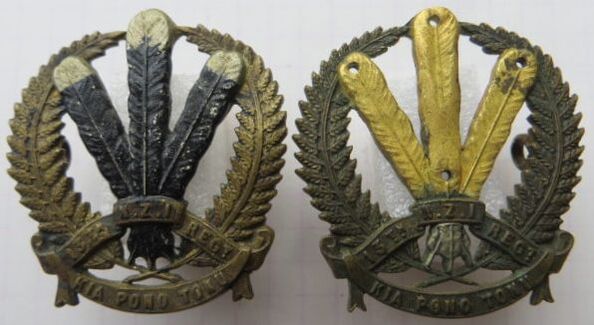
- Above Right: A bi-metal, 3 piece, die stamped, gilt brass and white metal Cap badge to the 13th (North Canterbury) Infantry Regiment. It has a maker plaque to back to "J R GAUNT LONDON". Two copper looped lugs.
- Above Left: A semi-solid gilt and Silver (not marked) Cap badge to the 13th (North Canterbury) Infantry Regiment. Impressed to back to "J R GAUNT LONDON". Sadly its missing the top Silver feather over-lay to upper center. Two copper looped lugs to back. |

- Above: A pair of scarce white metal and brass Collar badges to the 13th (North Canterbury) Infantry Regiment.
Note the right Collar has been re-painted with black paint to the feathers. This is how they would have looked, when first issued, but is not original. The left is as you find them now (if you can!). |
In January 1912, the regiment change its title to the 13th (North Canterbury and Westland) Infantry Regiment.
The regiment looked to change their badge, with a memo dated the 17th of June 1914 stated a reason for the change as follows:
"Enclosed is a complete set of cap and collars badges, for the adoption of which the Officer Commanding the 13th. (N. C. & W) Regiment desires approval.
It was found that the previous badge was unsatisfactory as the colour rubs off.
It is intended to give the old badge to the Cadet Companies affiliated to the Regiment.
Approval is recommended".
The below design was approved for the 13th Regt. on the 30th of June 1914.
In a memo dated the 7th of July 1914 it's noted:
"The description of the badge of the 13th (North Canterbury and Westland) Regiment on page 86 of the Army List will be altered to read "The Number of the Regiment encircled by fern fronds and surmounted by a Crown". Motto "Kia Ponu Tonu"".
(Badges - Regimental - Territorial Force, R23534556 AD1 AAYS 13-13 Archives NZ).
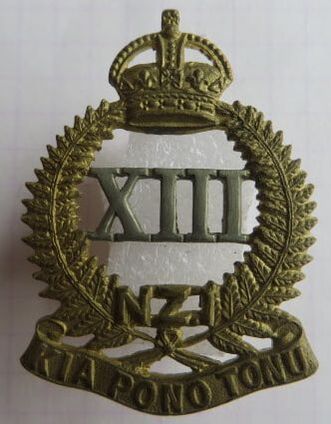
|
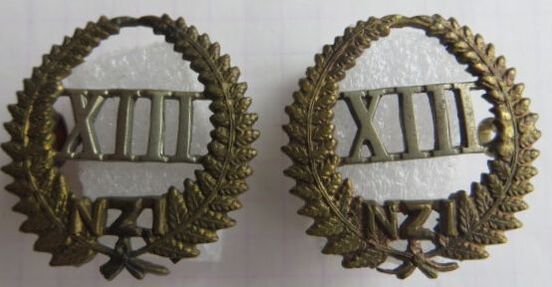
- Opposite: A gilt brass and white metal Cap badge to the 13th (North Canterbury and Westland) Infantry Regiment. Maker plaque to "J R GAUNT LONDON" to behind crown and with two copper looped lugs to back.
- Above: A matching pair of gilt brass and white metal Collar badges to the 13th (North Canterbury and Westland) Infantry Regiment. Both have two D shaped copper looped lugs and a maker plaque to "J R GAUNT LONDON". |
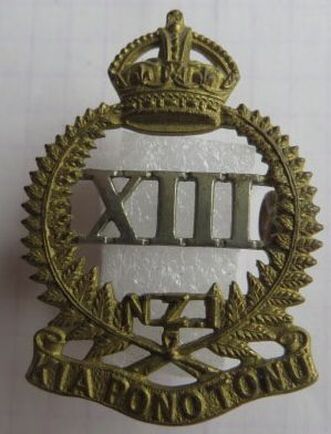
|
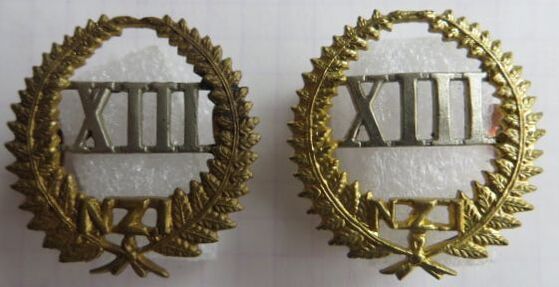
- Opposite: A slight difference in crown to this unmarked Cap badge to the 13th (North Canterbury and Westland) Infantry Regiment. Two D shaped copper looped lugs to back.
- Above: Like the Cap, these Collar badges are also unmarked to the 13th (North Canterbury and Westland) Infantry Regiment. D shaped copper looped lugs to back. |
- Opposite: Sadly not a great image, but its of a gilt fired and Silver Cap badge to a Officer of the 13th (North Canterbury and Westland) Infantry Regiment.
Two piece, with separate silver center. Two looped lugs to back, with a mark mark, impressed to back base to "J R GAUNT LONDON" (image from the internet).
Note, in late 1938, the National Military Reserve (NMR) was formed.
It was a reserve force for the Territorial Army, which was to be called up in times of emergency.
They were issued and wore obsolete uniforms and webbing, but were also issued with badges which originated from 1911, yet had been made obsolete due to amalgamations of Regiments after the Great War, in the 1920's.
In the Southern Military District (covering the whole of the South Island of New Zealand), the following NMR units wore the 13th (North Canterbury and Westland) Infantry Cap badge from 1938 and into WW2:
- 17th Coy, Greymouth & Westport NMR
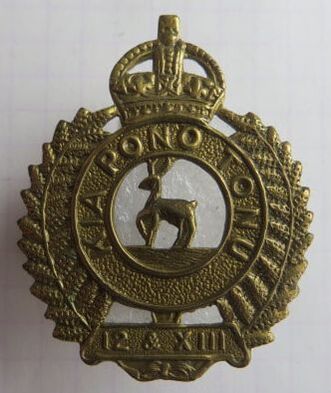
In 1921, the 12th (Nelson & Marlborough) Infantry Regiment merged with the 13th to form the 2nd Battalion, The Canterbury Regiment.
This changed again in June 1923 to The Nelson, Marlborough and West Coast Regiment.
At time the combined badge opposite, was deeply unpopular with both Regiments, and they continued to wear the 12th (Nelson and Marlborough) and 13th (North Canterbury & Westland) badges.
After WW2, it was mandated that the Regiment (the 12th & 13th (Nelson, Marlborough and West Coast) Infantry Regiment) were to wear the new badge.
- Left: A die stamped gilt brass Cap badge to the 12th & 13th (Nelson, Marlborough and West Coast) Infantry Regiment. This is termed the "rough strike", but does not appear to have ever been issued with similar type collars. Two brass looped wire lugs to back. No maker mark.
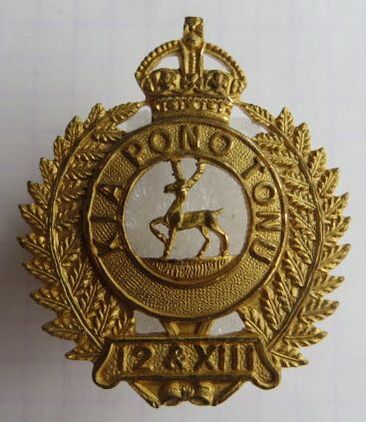
|
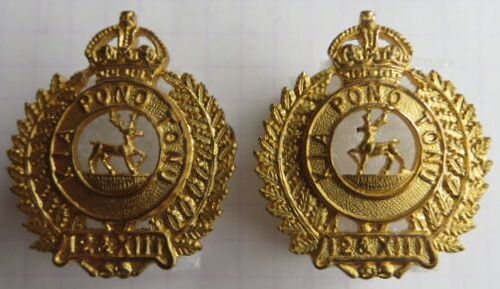
- Opposite and Above: A gilt fired Kings Crowned Cap and Collar badge to 12th & 13th (Nelson, Marlborough and West Coast) Infantry Regiment.
Note the Collars are opposing, with the one worn on the left (depicting the Stag facing the same way as the Cap badge) being the hardest to get. All have looped lugs to back, with no maker mark. |
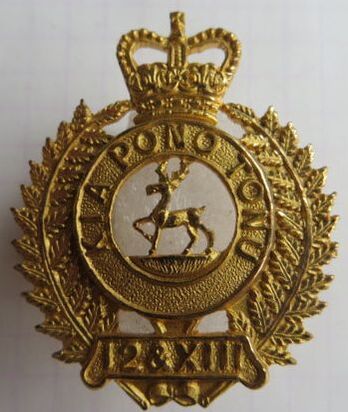
|
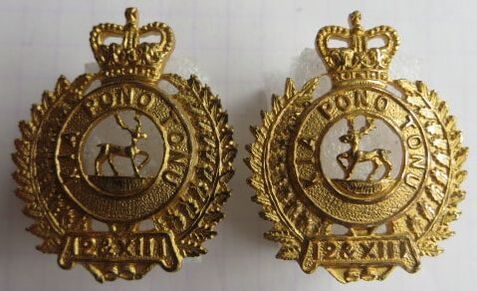
- Opposite and Above: A gilt fired Queens Crowned (post 1952) Cap and Collar badge to 12th & 13th (Nelson, Marlborough and West Coast) Infantry Regiment.
All have looped lugs to back, with the maker impressed mark of "J R Gaunt London. |
Interesting to note that there are no standard, die stamped, gilt brass Queens crown badges to this regiment. Possibly the rough strike Kings Crown brass badge was worn post 1952 for some length of period.
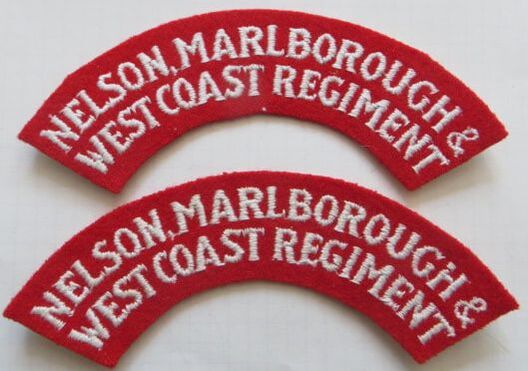
In August 1947 the Nelson, Marlborough and West Coast Regiment was designated a Territorial Force (TF)
On the 1st of April 1964 it amalgamated with the Canterbury Regiment and became:
2 RNZIR – 2nd Battalion, (Canterbury, and Nelson-Marlborough and West Coast), Royal New Zealand Infantry Regiment.
Again it was designated a Territorial Force.
- Opposite: A pair of embroidered and felt cloth shoulder titles worn post 1961 to 1994 to elements of the Nelson, Marlborough and West Coast Regiment of the 2 RNZIR. Size 28mm by 125mm.
In March 2013, the Regiment was further merged with the 4th Battalion (Otago and Southland), Royal New Zealand Infantry Regiment to form:
2nd/4th Battalion, Royal New Zealand Infantry Regiment (2/4 RNZIR)
It is a Reserve battalion of the Royal New Zealand Infantry Regiment.
Fakes & Forgeries
Below is a fake or reproduction cap badge to the 12th & 13th (Nelson, Marlborough and West Coast) Infantry Regiment.
- Detail to front, though orangey-Yellow in colour, is not far off the originals.
- To back is stippled, with large flat areas around edges. To the botton right, is a raised section, where the excess brass has been filed down from the casting proccess. It lacks the detail, which a die-stamped version would have.
- Two small copper lugs, one soldered on, while the other is brazed.
- Size 41mm by 32.5mm.
|
|
|
|
14th (South Otago) Infantry Regiment.
The 14th Regiment (South Otago Rifles) was formed in 1911 from the 4th Battalion, Otago Rifles.
Headquarters were at Milton.
Headquarters were at Milton.
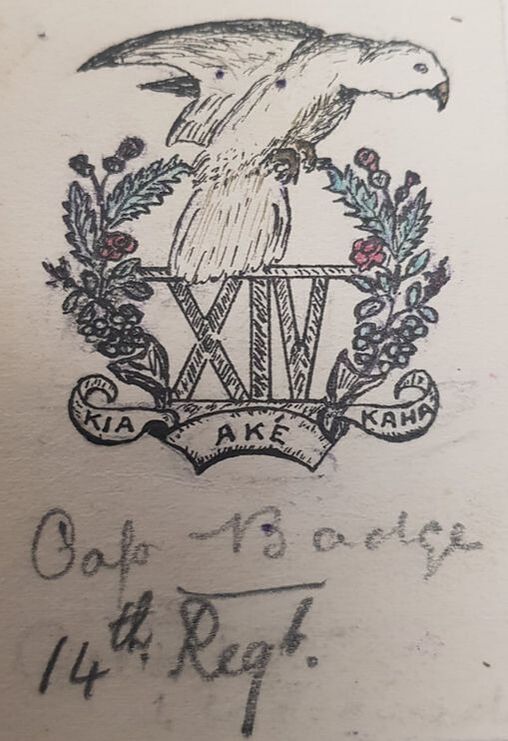
|
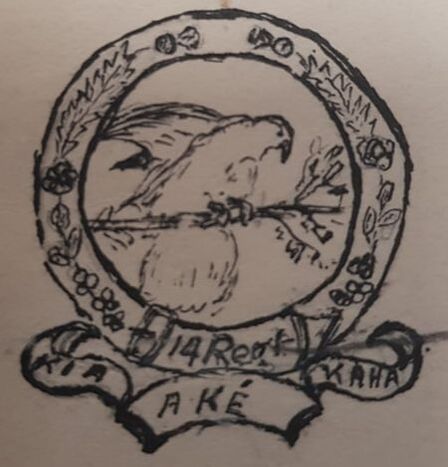
- Opposite and Above: The original sketches of the design for the Cap (Left) and Collar (Above) which were approved by the G.O.C. on the 15th of Aug 1911.
They were describe as the following: "Cap Badge - A Kea (Nestor Notabilis) preparing to fly - symbolic of being prepared - over the number of the Regiment "XIV", with a wreath of the Red Rose, Shamrock and Thistle - symbolic of unity. Motto "Kia Kaha Ake (Be strong for ever) on a scroll below. |
Collar Badge - "Within a circle embossed with a wreath of Red Roses, Shamrock and Thistle - a Kea preparing to fly. Motto "Kia Kaha Ake" on a scroll below".
(Badges - Regimental - Territorial Force, R23534556 AD1 AAYS 13-13 Archives NZ).
Motto: AKE KIA KAHA (Forever be strong).
(Badges - Regimental - Territorial Force, R23534556 AD1 AAYS 13-13 Archives NZ).
Motto: AKE KIA KAHA (Forever be strong).
|
- Above: A darkened bronze Officers Cap badge to the 14th (South Otago) Infantry Regiment. This is die stamped, with a hollow back. Two tangs or blades were to back, but have snapped off. No maker mark.
|
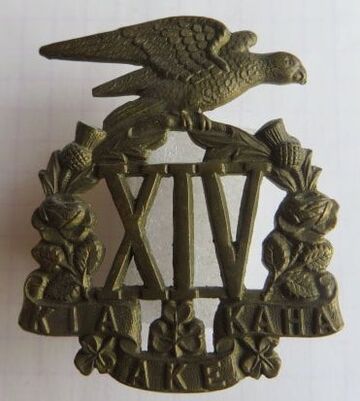
- Above: A gilt brass Cap badge to the 14th (South Otago) Infantry Regiment. This is die stamped, with two copper looped lugs to back. Maker plaque to base to "J R GAUNT LONDON"
|
|
- Above: A gilt brass Collar badge pair to the 14th (South Otago) Infantry Regiment. Both are die stamped, with two Copper D shaped lugs to back and a maker plaque of "J R GAUNT LONDON". Size 28mm by 28mm.
|
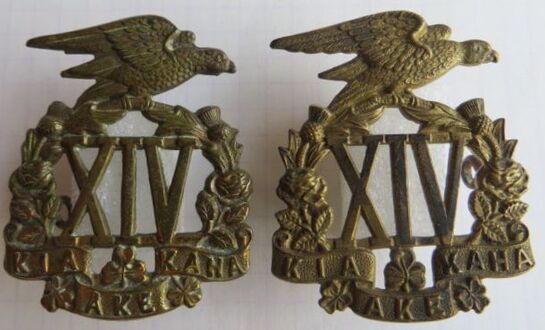
- Above: A pair of unmarked gilt brass Cap badges to the 14th (South Otago) Infantry Regiment. Slight differences in the bird (Kia), and floral wreath. To back bot have different copper looped lugs. No maker mark.
|
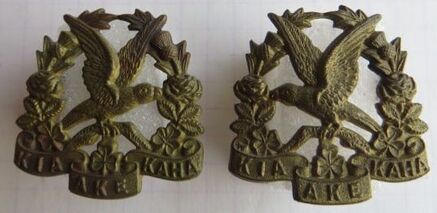
- Above: A opposing pair of gilt Collar badges to the 14th (South Otago) Infantry Regiment. Both are unmarked and have two copper looped lugs to back.
|
- Above: A unmarked Silver Collar badge to the 14th (South Otago) Infantry Regiment. Two Silver loops to back, but no maker or hallmark.
|
|
|
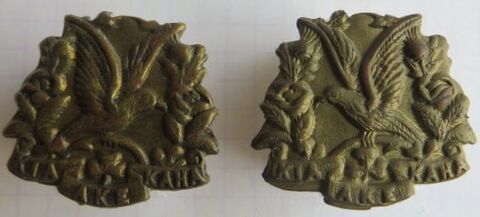
- Opposite & Above: A matching set of non-void gilt brass Cap and Collar badges to the 14th (South Otago) Infantry Regiment. Short copper looped lugs to back, with no maker mark.
The 14th (South Otago) Infantry Regiment merged with the 8th (Southland) Infantry Regiment in 1921 to become The 2nd Battalion, Otago Regiment. |
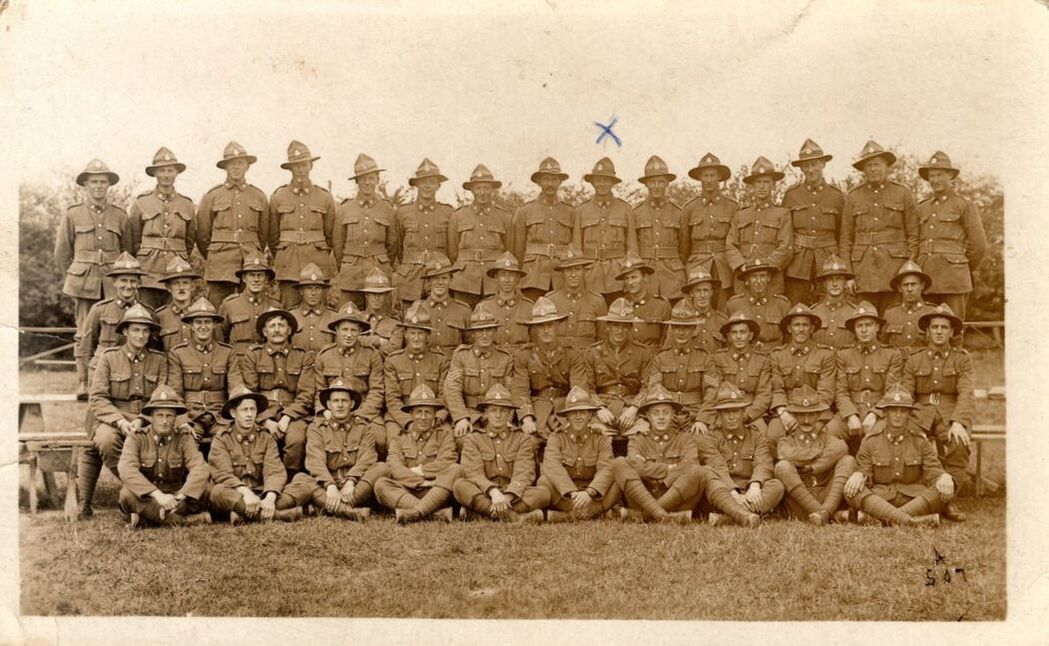
- Above: A WW1 image of a group of Officers and men of the 14th (South Otago) Infantry Regiment. All are wearing their Caps and Collars with their Lemon Squeezer. Sadly no names or date.
In 1921 the 14th (South Otago) amalgamated with the 8th (Southland) Infantry Regiment and became The Southland Regiment.
In 1921 the 14th (South Otago) amalgamated with the 8th (Southland) Infantry Regiment and became The Southland Regiment.
15th (North Auckland) Infantry Regiment.
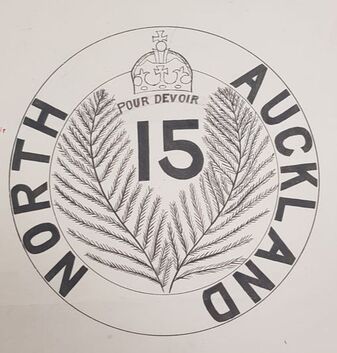
The 15th (North Auckland) Infantry Regiment formed in 1911 as a new unit.
Headquarters were in Whangarei.
On 10th of July 1911, their badge was described as
"No. of Regiment - 15 - flanked by fern fronds and sun surmounted by a crown whole surrounded by a circle bearing the words "North Auckland". Cap badge smaller than Collar. Motto to be selected later.
The G.O.C. approves this badge subject to the following.- "There is no particular necessity to have a motto, but if one is wanted it must be decided now and worked into the badge, which should then be submitted again. The crown is wrong - it must be a Tudor Crown (Sketch attached).
Accordingly please report the wishes of O.C. Regiment with regard to motto".
A memo dated the 4th of Oct 1911, gives permission for the Regiments motto "Pour Devoir" to be inserted into the already approved design of the badge.
- Opposite: A undated hand drawn design for the proposed 15th (North Auckland) Infantry Regiment badge found in the New Zealand Archives.
(Badges - Regimental - Territorial Force, R23534556 AD1 AAYS 13-13 Archives NZ).
Motto: POUR DEVOIR (For right).
|
- Above: A darkened brass, Officers Cap badge to the 15th (North Auckland) Infantry Regiment, solid, with two tangs to back. Sadly one has broken off. Impressed to "J R GAUNT LONDON" to back.
|
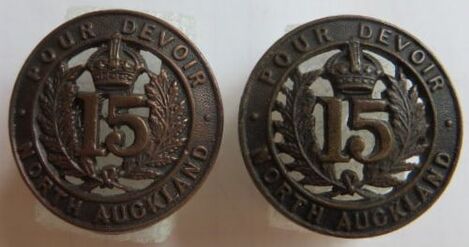
- Above: A pair of non-matching darkened Collar badges to the 15th (North Auckland) Infantry Regiment.
The left is a die stamped darkened copper/bronze collar which has a Gaunt plaque to back. To right is a solid to back Collar and impressed to "J R GAUNT LONDON" to back. |
|
|
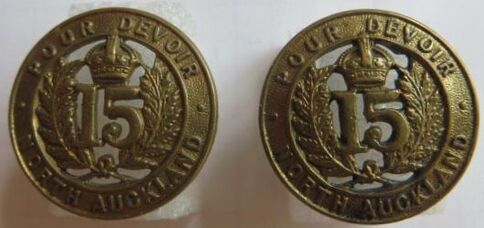
- Opposite and Above: A die stamped, other ranks, gilt brass Cap and Collar set to the 15th (North Auckland) Infantry Regiment, with J R Gaunt plaques to back. All have a pair of D shaped copper looped lugs.
|
|
|
- Opposite: A die stamped, gilt brass Cap badge to the
- Above: A single gilt fired, semi-solid brass Collar badge to the 15th (North Auckland) Infantry Regiment. Impressed to back to "J R GAUNT LONDON". Two D shaped looped lugs. |
In 1921 the title of the regiment changed to 3rd Battalion, Auckland Regiment.
In 1923, it changed again to the North Auckland Regiment.
During WW2, the 15th contributed to the following overseas Battalions of the 2NZEF:
- 18th Battalion - Briefly, until the 5 Oct 1942
- 21st Battalion
- 24th Battalion
- 29th Battalion
In August 1947 the North Auckland Regiment was designated a Territorial Force (TF)
In 1951, the Regiment was renamed to the 15th (Northland) Infantry Regiment, and a Queens crown Cap and Collar badge were issued.
|
|
|
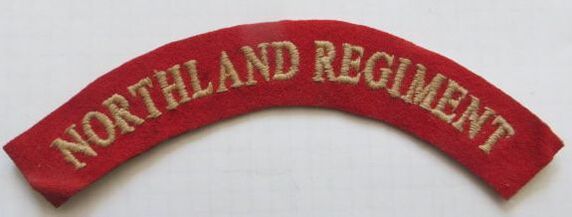
On the 1st of April 1964 it amalgamated with the Auckland Regiment (Countess of Ranfurly's Own and became:
3 RNZIR – 3rd Battalion, (Auckland (Countess of Ranfurly's Own) and Northland), Royal New Zealand Infantry Regiment
Again it was designated a Territorial Force.
- Opposite: A single embroidered and felt cloth shoulder titles worn post 1961 to 1994 to elements of the Northland Regiment of the 3 RNZIR. Size 28mm by 125mm.
In March 2013, the Regiment was further merged with the 6th Battalion (Hauraki), Royal New Zealand Infantry Regiment to form:
3rd/6th Battalion, Royal New Zealand Infantry Regiment (3/6 RNZIR)
It is a Reserve battalion of the Royal New Zealand Infantry Regiment.
Fakes & Forgeries
A interesting fake or reproduction of the cap badge to the 15th (North Auckland) Infantry Regiment.
- Usually the cast mark is to the back, but on this fake, its to the top, front, with a large section of the border missing.
- Colour again is a orangey-yellow, with stippling and bumps.
- To back is the same again, stippled.
- Two small copper lugs, brazed on.
- Size 31.5mm diameter.
- Usually the cast mark is to the back, but on this fake, its to the top, front, with a large section of the border missing.
- Colour again is a orangey-yellow, with stippling and bumps.
- To back is the same again, stippled.
- Two small copper lugs, brazed on.
- Size 31.5mm diameter.
|
|
|
|
16th (Waikato) Infantry Regiment.
The 16th (Waikato) Infantry Regiment formed in 1911 as a new unit.
Headquarters were in Hamilton.
Headquarters were in Hamilton.
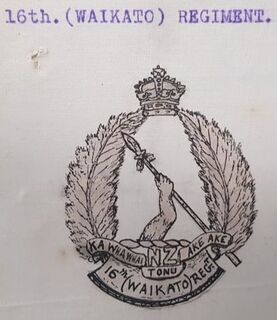
On the 10th of July 1911, their badge was described as
"Arm grasping Maori spear over letters N.Z. flanked by fern fronds and surmounted by crown. Motto "Ka Whawhai Tonu Ake Ake" & "16th (Waikato) Regiment" on scrolls at base.
Collar Badges.- similar removing omitting fern fronds and name of Regiment and substituting Roman numerals XVI for letters N.Z.
The G.O.C considers the proposed badge rather large and a bit complicated but approves same subject to the omission of the 1st N.Z. and being made a little smaller".
- Opposite: A sketch of the proposed 16th (Waikato) Infantry Regiment badge held by Archive NZ.
(Badges - Regimental - Territorial Force, R23534556 AD1 AAYS 13-13 Archives NZ).
Motto: KA WHAWHAI TONU AKE AKE (We shall fight for ever and ever).
|
- Above: A darkened bronze Officers Cap badge to the 16th (Waikato) Infantry Regiment. Solid to back, and impressed to "J R GAUNT LONDON". Two tangs or blades to back. Size 41mm by 37mm.
|
- Above: A polished, darkened brass Officers Cap badge to the 16th (Waikato) Infantry Regiment. Solid to back, and impressed to "J R GAUNT LONDON". Two tangs or blades to back. Size 41mm by 37mm.
|
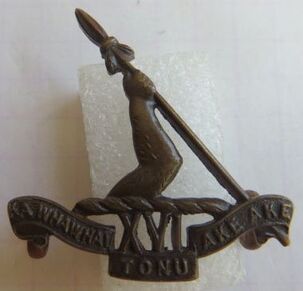
- Above: A solid bronze Collar badge to the 16th (Waikato) Infantry Regiment. Two D shaped copper lugs in a East/West configuration to back, along with the impressed maker details for "J R GAUNT LONDON". Size 28mm by 28mm.
- Right: Rare bi-metal Officers Gilt fired brass and silver Cap badge to the 16th (Waikato) Infantry Regiment. Solid to back, with two long looped lugs. No maker mark. Size 41mm by 36mm. |
|

|
Opposite & Above: A gilt brass Cap and opposing Collar badge pair to the 16th (Waikato) Infantry Regiment. All have a maker plaqued to back to "J R GAUNT LONDON". All have Copper looped lugs to back. Size of Cap 41mm by 36mm, Collars 30mm by 28mm.
|
|
|
Opposite & Above: A darkened brass Cap and opposing gilt Collar badge pair to the 16th (Waikato) Infantry Regiment. All have copper looped lugs to back, but no maker mark. Size of Cap 41.5mm by 36mm, Collars 29mm by 29mm.
|
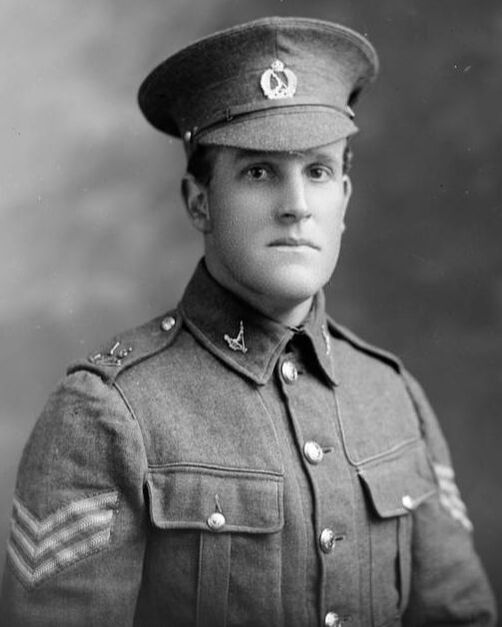
- Opposite: A image of 12/704 Sgt Frederick George Bennett, wearing his 16th (Wakatio) Cap badge and opposing collars. Note he also has a separate "16" to his shoulder boards and a curved brass "NZR" shoulder title.
Fred left commenced his service on the 14th of August 1914, as a private, and was rapidly promoted to Corporal (17th of Aug 1914) and Sergeant (1st Sept 1914), and then left with the main body on 16th of October for Egypt, where he arrived on the 4th of Dec 1914.
Fred landed at Gallipoli on the 25th of April as part of the Auckland Infantry Brigade. He was sadly shot on the day in the shoulder.
He was evacuated out to No. 1 Australian General Hospital by the 30th of April 1915.
Deemed medically unfit for active service, but mediaclly fit for Civilain service, he was sent home to New Zealand on the 7th of Aug 1915, and discharged from the New Zealand Army in NZ on the 23rd of Dec 1915 (Auckland Libraries Heritage Collections 7003-320).
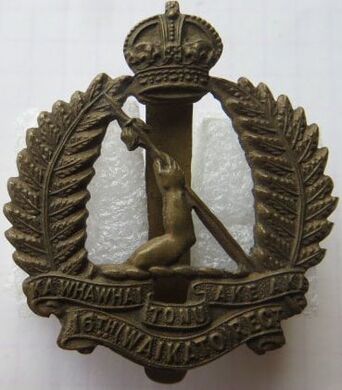
- Above: A gilt brass Cap badge to the 16th (Waikato) Infantry Regiment.
Note the non-voided crown and lack of fretting to lower banner. To back is a brass slider, with a maker mark which has been scored out to back. Size 41mm by 37mm. |
- Above: A Queens crown version of the to the 16th (Waikato) Infantry Regiment Cap badge. Solid to back, with two looped lugs. Maker impressed to back to "R F Senior Auckland" or Richard Fitzgerald Senior of Senior Badges Ltd (Alan Leitch Collection).
|
In 1921 the title of the regiment changed to The Waikato Regiment.
During WW2, the 16th contributed to the following overseas Battalions of the 2NZEF:
- 18th Battalion - Breifly, until the 5 Oct 1942
- 21st Battalion
- 24th Battalion
- 29th Battalion
The 16th (Waikato) Infantry Regiment was absorbed into the 1st Armoured Regiment in 1950, and became the 2nd Armoured Squadron (Waikato) Royal New Zealand Armoured Corps.
Fakes & Forgeries
Below is a fake or reproduction cap badge to the 16th (Waikato) Infantry Regiment.
- Detail to front is OK, though there is some distortion to crown shape to top.
- Colour is a orangey-yellow.
- To back is stippled, and lacks detail. There is a flat area to base where the excess brass has been filed down from the casting proccess.
- Two small copper lugs, soldered on.
- Size 42mm by 36mm.
|
|
|
|
17th (Ruahine) Infantry Regiment.
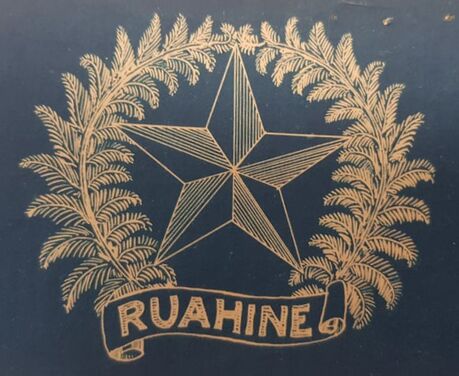
"The Ruahine had existed as a Volunteer unit based around Wellington prior to 1911.
Its members were absorbed into the four Wellington Area Regiments when the New Zealand Army was established in 1911.
In early 1914 approval was given to establish the 17th (Ruahine) Infantry Regiment.
On the 17th of July 1914 approval was granted for the badge and motto.
The following letter was written in support of the approval on the 8th of July 1914.
"To the Officer Commanding Wellington Infantry Brigade.
Sir, I have the honour to enclose a more finished design for our Regt. badge, and trust that it will be accepted.
The motto chosen is "Ad Unum Omnes", meaning "All to a man", or "Presenting a solid front". As a matter of fact the motto is capable of a variety of meanings synonomous with those given above.
I shall be glad if I may have a reply re Badge, Motto and Honarary Colonel, in the case of the first, I am desirous of placing the order with a home firm for delievery as early as possible.
I have the honour to be
Sir
Your obediant servant
A B Charters
Lieut-Col
Comdg. 17th (Ruahine) Regt"
- Opposite, Above Right: The original drawing attched to the letter by Lieut-Col Charters on the 8th of July, showing the badge which would become the 17th's.
(Badges - Regimental - Territorial Force, R23534556 AD1 AAYS 13-13 Archives NZ).
Headquarters were based in Masterton.
Motto: AD UNUM OMNES (Together as one).
Recruiting began, and its members boarded with the main body of the New Zealand Expeditionary Force, when it left NZ's shores in October 1914. There is some doubts on whether the unit actually had a badge issued to them by this time.
In Egypt, the Sultan gifted the Regiment its first sets of badges as a thank you from the Egyptian nation. Issued to the men at the time, were the British Sun hat, and the gift included a large badge to fit the hat. This is unique, as no other NZ Regiment was issued with a Sun hat badge.
In Egypt, the Sultan gifted the Regiment its first sets of badges as a thank you from the Egyptian nation. Issued to the men at the time, were the British Sun hat, and the gift included a large badge to fit the hat. This is unique, as no other NZ Regiment was issued with a Sun hat badge.
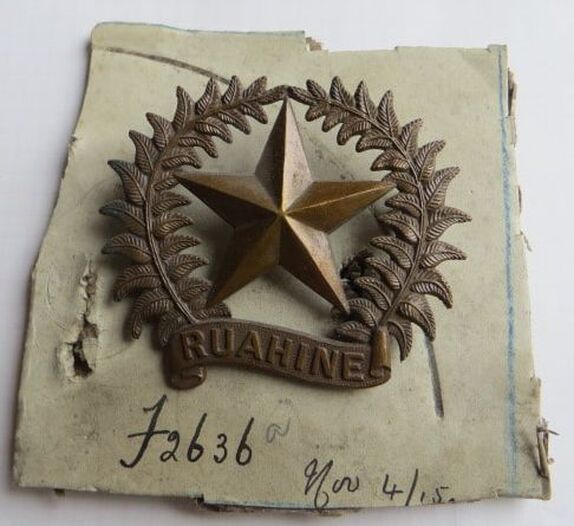
|
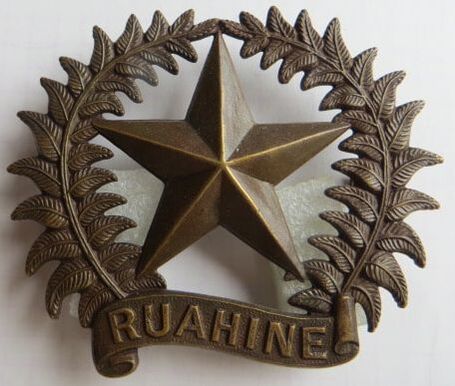
- Opposite & Above: Two darkened bronze, semi-solid Officers Sun Hat Helmet Badges. Both have a small brass plaque to back of wreath to "J R GAUNT LONDON". Two copper looped lugs to back. Note the left is on part of a sample card, with Gaunt stock number of "J2636a" and the date "Nov 4/15" for 4th of November 1915. Size 60mm by 73mm.
|
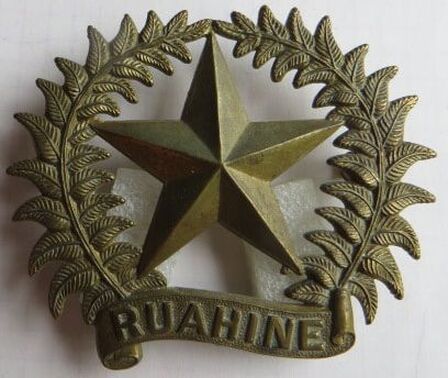
- Above: A other ranks, gilt brass 17th (Ruahine) Infantry Regiment Helmet badge. Two large copper loops to back, with a small makers plaque to back center of the star to "J R GAUNT LONDON". Size 60mm by 73mm.
|

- Above: A other ranks, sand cast 17th (Ruahine) Infantry Regiment Helmet badge. Manufactured in the middle east (most likely Egypt) while the regiment was stationed there. Correctly cast in copper looped lugs, with a Gaunt plaque also cast into the back. The original cast would have been taken from a other ranks, die stamped gilt brass badge. Size 58mm by 70mm.
|
|
- Above: A Officers, darkened bronze, semi-solid Cap or Collar badge (worn as either) to the 17th (Ruahine) Infantry Regiment. Two D shaped lugs to back and impressed to "J R GAUNT LONDON". Size 30mm by 37mm.
|
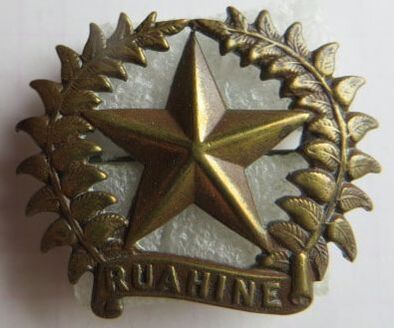
- Above & Right: A Cap and Collar badge set in brass to the 17th (Ruahine) Infantry Regiment. What is unique about them is they have been brooched.
|

(continued) There is much debate on whether Officers and some Men preferred to have this for easy of removal from their uniforms. These are all maker plaqued to "J R GAUNT LONDON" to back, on the upper left of the wreath. Size 30mm by 37mm.
|
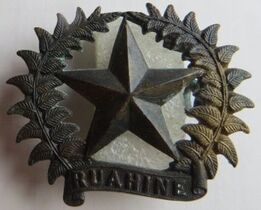
- Above & Right: A Cap and /or Collar badge set to the 17th (Ruahine) Infantry Regiment.
|
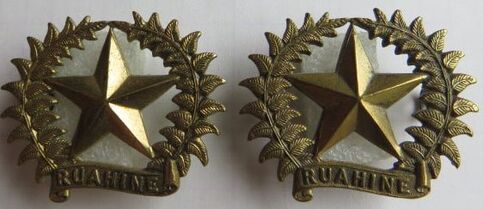
(continued) All are gilt brass, with two D shaped copper looped lugs to back. Marker plaqued to "J R GAUNT LONDON". Size 30mm by 37mm.
|
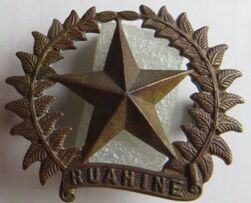
- Above: A unmarked, gilt brass Cap or Collar badge to the 7th (Ruahine) Infantry Regiment. Two D shaped copper lugs, so likely Gaunt. Size 30mm by 37mm.
|
|
- Above: A variation. A gilt brass Cap or Collar badge to the 17th (Ruahine) Infantry Regiment. Two copper looped lugs to back. Note the fern wreath, and the rounding of the fonds. Size 31mm by 37mm.
- Opposite: A WW1 era image of a unnamed Sergeant with his loved-one. Sadly no message to back other than the UK studio name of "Samuels Ltd, Photographers, 27 Piccadilly, 84 & 150 Strand, London". |
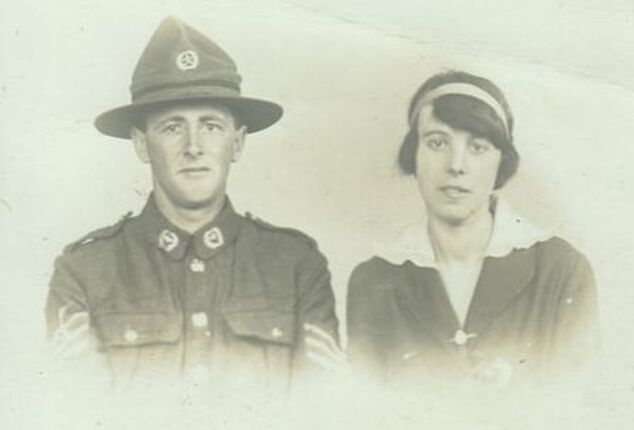
|
The 17th (Ruahine) Infantry Regiment was absorbed into the 9th (Wellington East Coast) Infantry Regiment in 1921 and became the 9th (Hawkes Bay) Infantry Regiment in 1923. In 1941 the 2nd Battalion of the 9th (Hawkes Bay) Infantry Regiment reformed and named the 17th (Ruahine) Regiment and served with the 3rd New Zealand Division in the Pacific. It was stripped of men by 1943 (due to shortages), and existed on paper until 1948, when it was formally disbanded.
Fakes & Forgeries
Below is a fake or reproduction cap badge to the 17th (Ruahine) Infantry Regiment.
- Detail to front is OK though not crisp to edges
- Colour is a orangey-yellow.
- To back is stippled, and pitted, and just lacks detail. There is a flat area to base where the excess brass has been filed down from the casting proccess. The cast mark of a outline of a Gaunt plaque also looks to have been there.
- Two small copper lugs, soldered on.
- Size 30mm by 36mm.
|
|
|
|
The Infantry Puggaree.
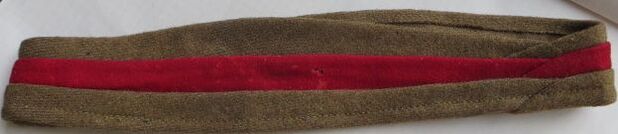
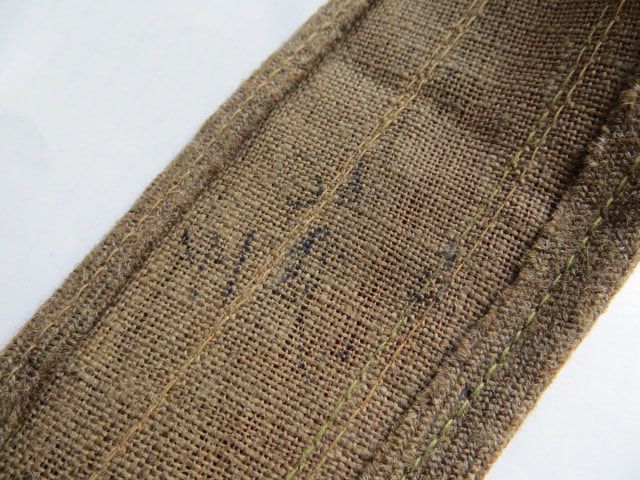
|
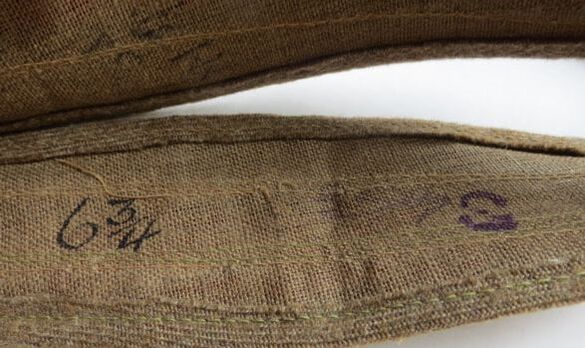
Top, Above & Opposite: A early puggaree to fit the Lemon Squeezer hat in the colours of the New Zealand Infantry. Khaki/Scarlet/Khaki. The scarlet appears to be a velvet like material, while the two strips of Khaki are Wool. It is folded side-on.
Opposite shows the faint "W (broadarrow) D" for the War Department in Black ink. Sadly the rest of the detail is too faint. Above shows the other side with a "6 3/4" in black ink and a "3" in purple. Someone has written "453" just after the purple 3 in pencil. British made/take on the NZ Pug? |
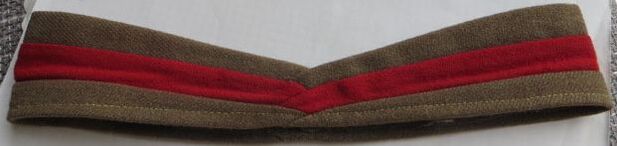
Above & Opposite: A puggaree to fit the Lemon Squeezer hat in the colours of the New Zealand Infantry. Khaki/Scarlet/Khaki. This scarlet is like Khaki material, in wool. It is folded front-on.
Opposite shows the faint size of "6 7/8" in purple ink. Note the lining is a much paler colour than the one above. No other marks, but it looks to have come in contact with rain and water, and the scarlet has leaked through from the other side. |
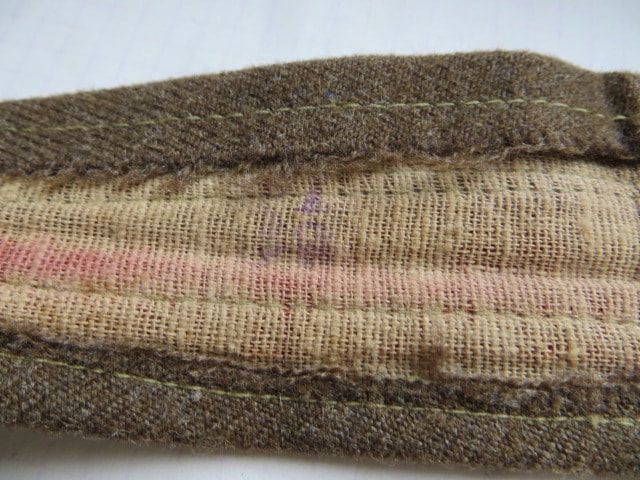
|
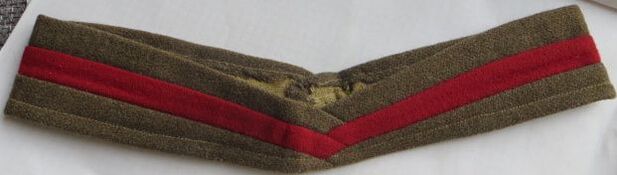
|

|
Above & Opposite: A puggaree to fit the Lemon Squeezer hat in the colours of the New Zealand Infantry. Khaki/Scarlet/Khaki.
Marked to inside to 332213 Ramsey H.G. , with size in purple ink to "7 7/8".
The Infantry Puggaree was worn prior to WW1 and up to 1966 by the New Zealand Infantry, New Zealand Rifle Brigade, New Zealand Machine Gun Corps and New Zealand Pioneer Battalion.
Marked to inside to 332213 Ramsey H.G. , with size in purple ink to "7 7/8".
The Infantry Puggaree was worn prior to WW1 and up to 1966 by the New Zealand Infantry, New Zealand Rifle Brigade, New Zealand Machine Gun Corps and New Zealand Pioneer Battalion.
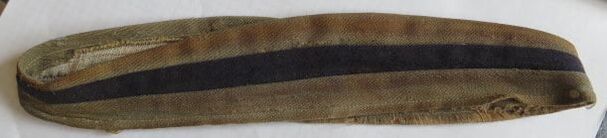
- Opposite: A puggaree to fit the Lemon Squeezer hat in the colours of the Home Service branch of the New Zealand Expeditionary Force, worn from 1917. Khaki/Black/Khaki. Not marked and well worn/dirty.
It is folded side-on.
It is folded side-on.
The New Zealand Rifle Brigade
The New Zealand Rifle Brigade was formed in early 1915 as a desire to further contribute to New Zealand's current (at the time) War effort. It would be a whole new Regiment, with 4 battalions and associated reinforcements.
Nicknamed "The Dinks", they were disbanded on the 4th of Feb 1919 in the UK.
Motto: SOYES FERME (Stand Fast).
Nicknamed "The Dinks", they were disbanded on the 4th of Feb 1919 in the UK.
Motto: SOYES FERME (Stand Fast).
|
- Above: A single, darkened bronze Officers Collar badge to the New Zealand Rifle Brigade. Maker plaqued to back to "J R GAUNT LONDON". Size 38mm by 26mm.
|

- Above: A single, darkened brass Other ranks Cap badge to the New Zealand Rifle Brigade. Maker plaqued to back to "J R GAUNT LONDON". Size 38mm by 26mm.
|
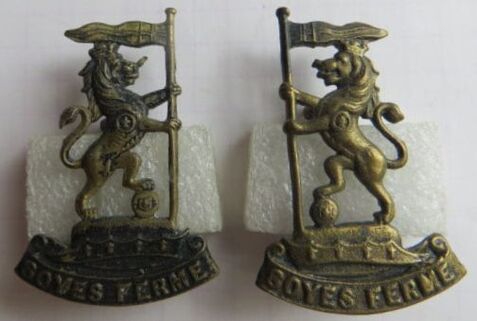
- Above: A opposing pair of darkened brass Collar badges (note the right can be worn as a Cap badge) to the New Zealand Rifle Brigade. Maker plaqued to back to "J R GAUNT LONDON". Note the pennant to top, which is wavy. The New Zealand made, reinforcement issued badges are in the same design, but tend to have a straight pennant to top. Size 38mm by 26mm.
|
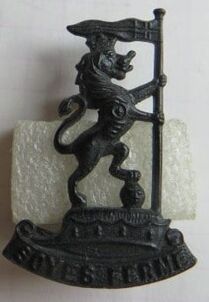
- Above: A single, darkened brass Other ranks Collar badge to the New Zealand Rifle Brigade. No maker, but with D shaped copper lugs to back, its likely Gaunt. Size 38mm by 26mm.
|
- Above: A single, darkened brass Other ranks Cap badge to the New Zealand Rifle Brigade. No maker mark, but round copper lugs with feet to base. Size 40mm by 25mm.
|
- Above: A opposing pair of darkened brass Collar badges (note the right can be worn as a Cap badge) to the New Zealand Rifle Brigade. No maker mark, with rounded copper lugs which have feet. Size 40mm by 25mm.
|
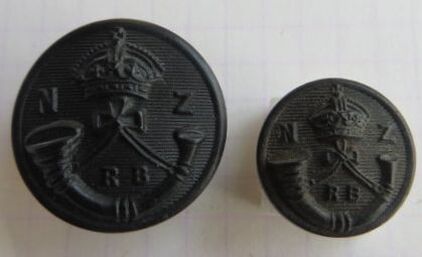
- Above Left: A fixed shank 23mm NZRB Button - maker marked to "FIRMIN & SONS LD, HALESOWEN".
- Above Right: A fixed shank 17mm NZRB Button - maker marked to "FIRMIN & SONS LD, HALESOWEN". |
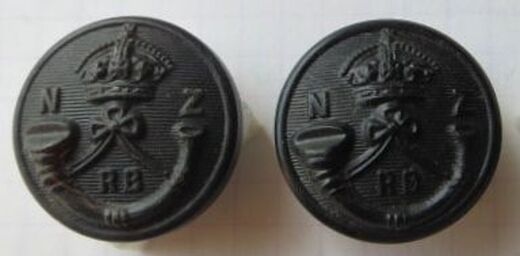
- Above: Black bone buttons to the New Zealand Rifle Brigade.
- Left: A fixed shank 23mm NZRB Button - maker marked to "JAS GROVE & SONS, HALESOWEN". - Right: A fixed shank 23mm NZRB Button - maker marked to "GROVE & SONS, HALESOWEN". |
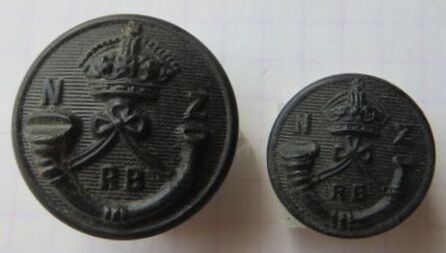
- Opposite Left: A fixed shank 23mm NZRB Button. No maker mark, but to back is a circular ridge.
- Opposite Right: A fixed shank 17mm NZRB Button. No maker mark, but to back is a circular ridge.
Other NZRB sizes & maker marks (B Jones collection):
11.5mm (no maker),12mm "Firmins & sons", 12.4mm (no maker)
- Opposite Right: A fixed shank 17mm NZRB Button. No maker mark, but to back is a circular ridge.
Other NZRB sizes & maker marks (B Jones collection):
11.5mm (no maker),12mm "Firmins & sons", 12.4mm (no maker)
When stocks were not available of the New Zealand Rifle Brigade Button, British Rifle Brigade buttons were worn.
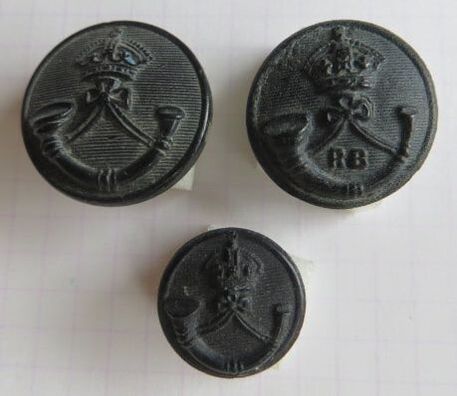
- Above Left: A fixed shank 23mm British Rifle Brigade Button - maker marked to "FIRMIN & SONS LD, HALESOWEN".
- Above Right: A fixed shank 23mm British Rifle Brigade Button (note the "RB" to front)- No maker mark. - Center: A fixed shank 16mm British Rifle Brigade Button - No maker mark. |
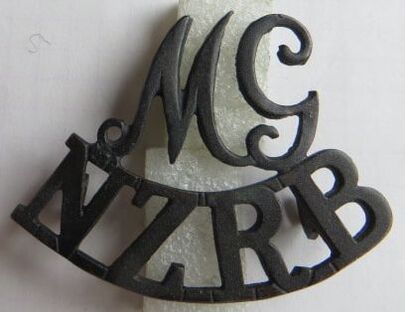
- Above: A piece of trench art? MG/NZRB so Machine Gun, New Zealand Rifle Brigade. Maker marked to "J R GAUNT LONDON" to back of title. Size 41mm by 53mm.
Other RB British made horn buttons (B Jones collection) 6.7mm (no maker), 23.3mm (no maker), 24mm (no maker) |
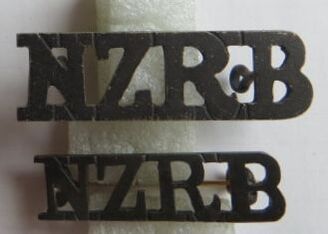
- Opposite: A pair of straight Officer titles to the New Zealand Rifle Brigade. Top is a full size, hand cut darkened shoulder title, with two looped lugs to back. Size 15mm by 53mm. Bottom is a smaller hand cut version, with brooch fitting to back. Size 11mm by 40mm.
Both are not maker marked.
Both are not maker marked.
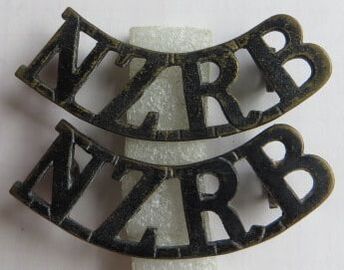
- Above: A darkened pair of brass Shoulder titles to the New Zealand Rifle Brigade. Both have two hex, brass lugs to back and the maker mark of "J R GAUNT LONDON". Size 15mm by 53mm.
|
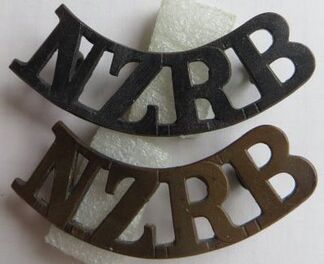
- Above: A darkened pair of brass Shoulder titles to the New Zealand Rifle Brigade. Both have two rounded copper lugs to back and the maker mark of "STOKES & SONS". Size 15mm by 55mm.
|
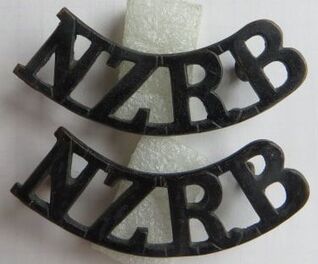
- Above: A darkened pair of brass Shoulder titles to the New Zealand Rifle Brigade. Both have two hthin ribbon type lugs to back and the maker mark of "TIPTAFT B'HAM". Size 15mm by 53mm.
|
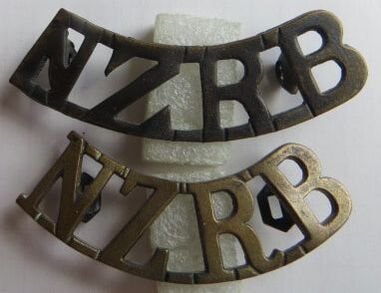
- Above Top: A large NZRB darkened brass shoulder title. Note the angular ends to the "Z". Two hex type brass lugs to back, no maker mark. Size 16mm by 58mm.
Above Bottom: A NZRB darkened brass shoulder title. Two hex type brass lugs to back, no maker mark. Size 15mm by 53mm. |

- Above Top: A NZRB darkened brass shoulder title. Two hex type brass lugs to back, no maker mark. Size 15mm by 55mm.
- Above Bottom: A NZRB darkened cast brass shoulder title. No lugs to back, which have snapped off, no maker mark. Size 14mm by 50mm. |
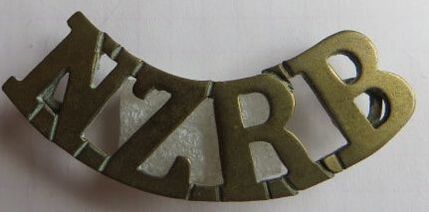
- Above: A NZRB darkened brass shoulder title. Two hex type brass lugs to back, no maker mark. Size 16mm by 55mm.
|
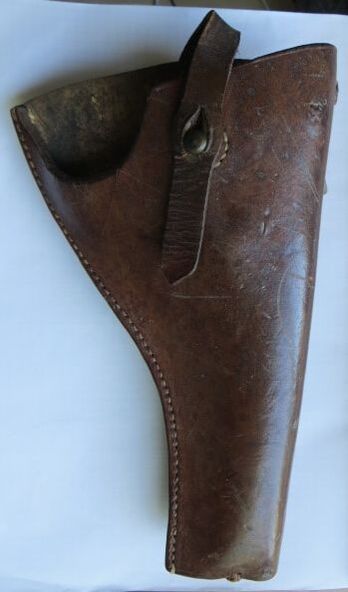
- Above: A WW1 issued leather Holster to 44565 2nd Lieutenant Arnold Thomson. Arnold was served with the 2nd Battalion of the New Zealand Rifle Brigade.
|
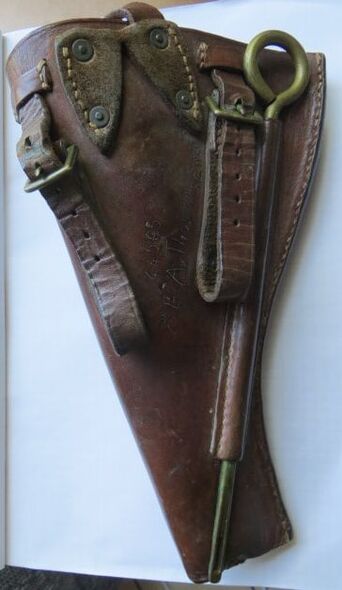
- Above: Same Holster, but with a picture of the back, complete with cleaning rod for the Pistol. Note the leather flap has been modified and cut down to a single, narrow strap.
|
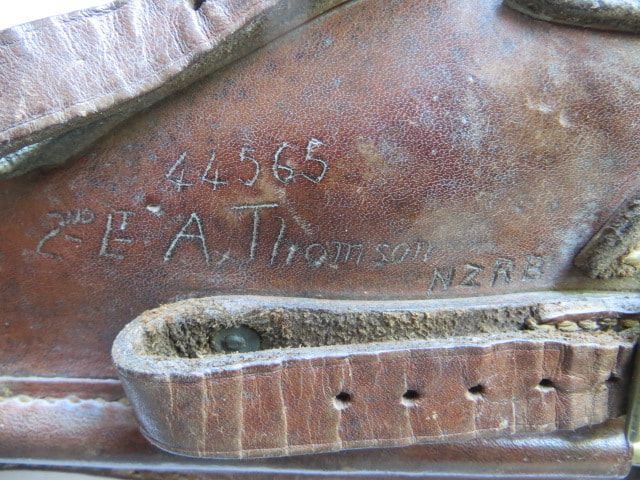
- Above: Arnold marked his holster with his details to back.
- Opposite: Arnold was originally from Dunedin, but moved to Hawera, in the North Island of New Zealand, and was a qualified Solicitor. He sadly died of wounds on the 27th of August 1918, aged 32. He is buried at Bagneux British Cemetery, Gezaincourt, Somme in France. The photo shows him wearing a 28th Reinforcement Cap badge to his Lemon Squeezer. |
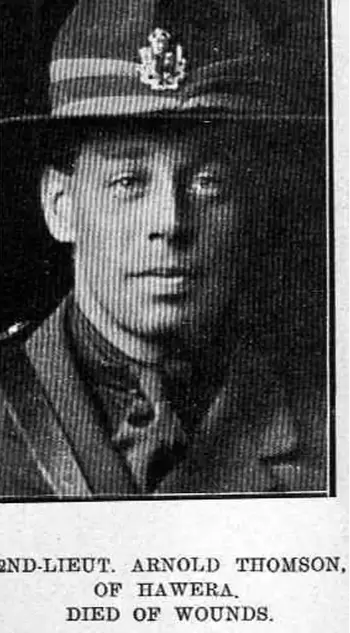
|
As mentioned above, in 1938, the National Military Reserve (NMR) was formed.
It was a reserve force for the Territorial Army, which was to be called up in times of emergency.
They were issued and wore obsolete uniforms and webbing, but were also issued with badges which originated from 1911, yet had been made obsolete due to amalgamations of Regiments after the Great War, in the 1920's.
Recorded "re-issue" of badges are as follows:
- Northern Military District (covering top half of the North Island of New Zealand) - wore the badge of the New Zealand Rifle Brigade (the NZRB disbanded in 1919).
- Central Military District (covering the bottom half of the North Island of New Zealand) - wore the badge of the New Zealand Rifle Brigade (the NZRB disbanded in 1919).
(noted in New Zealand Army Distinguished Patches 1911-1991 - Page 61 by M Thomas & C Lord, "It was also mentioned that due to stocks of the right-hand collar badges of the NZ Rifle Brigade being limited, when exhausted, it would be necessary for the left-hand collar badge to be worn on both sides of the collar and also the cap badge").
Fakes & Forgeries
|
|
|
|
- Above: A reproduction Cap and/or Collar badge to the New Zealand Rifle Brigade.
Detail is blury or rounded to front, but much is also hidden by the blackened finish which has been applied.
To back the looped lugs, are ribbon like.
This is a worrying badge, as there is little detail to back to the originals.
Detail is blury or rounded to front, but much is also hidden by the blackened finish which has been applied.
To back the looped lugs, are ribbon like.
This is a worrying badge, as there is little detail to back to the originals.
WW1 Service Chevrons.
Permission was given in September 1918 for all overseas serving troops to wear a chevron on their right arm.
A red coloured chevron for service before or on the 31st of December 1914, and a blue chevron for every 12 months of service on or after the 1st of January 1915.
The red chevron was to be worn below any blue.
Size: 1/4 inch (6.35mm) by 1 1/4 inch (31.75mm)
The chevron was to be worn on the uniform, but NOT on the greatcoat. It could also be worn by retired or ex-officers and ex-soldiers on civilian clothes.
- Opposite: A WW1 4 year service chevron in dark blue on khaki wool backing.
WW2 Service Chevrons.
During ww2, permission was given in 1944 for all 2NZEF overseas serving troops to wear a chevron on their right arm.
It was to be worn 4 inches or 100mm above the bottom of the cuff.
The colour this time would be red chevron for every 12 months of service from the 3rd of September 1939.
Like the WW1 version, they were not to be worn on the Greatcoat, and also not on the tropical uniform, i.e. Pacific theater of War.
- Opposite: A selection of WW2 4 year service chevron in red on a khaki backing. Note the left set, which are printed on canvas material as a economy measure.
New Zealand Onwards Badge
The New Zealand Onwards badge could probably have its own book written on it!
Its history is very complicated and dates pre-WW1 with its connection to the Royal Naval Ship HMS New Zealand.
During the outbreak of WW1, the British Section of the New Zealand Expeditionary Force formed in England. For many years, people attributed a Oak leafed version of the Onwards badge to this very small force of about 200 men in 1914. Reality is, it probably is just a manufacturers variation, whereby the fern's fronds look more "oak leaf" like than fern. What does appear is grainy pictures of the time is that they wore a small badge on their hats. More collar size in proportion.
A friend recently showed me a 1916 dated photo of a group of three soldiers at a Convalescence Home in England, with one appearing to wear a NZ "Onwards" badge. Maybe the badge design started out as a private purchase item?
During WW2, the "Onwards" badge was adopted by all overseas service personnel serving outside New Zealand. Initially, the early echelons went with their Infantry and Corps badges, but by 1941, this had been "phased out".
All home serving, New Zealand troops were permitted to still wear their units badge.

- Above: A darkened bronze, semi-solid Officers New Zealand Onwards Cap badge. Note the wide, voided Kings crown to top. Two copper looped lugs to back. No maker mark.
|
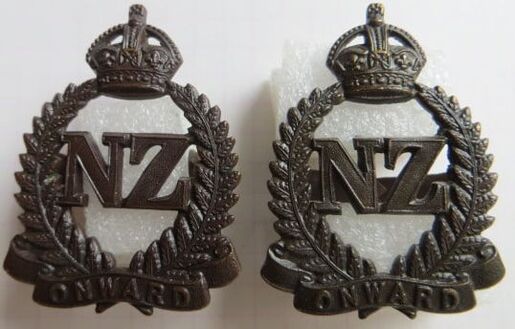
- Above Left: A darkened bronze, semi-sold Officers New Zealand Onwards Cap badge. Two tangs to back, which have been folded over to create prongs. No maker mark.
- Above Right: A darkened bronze, die stamped Officers New Zealand Onwards Cap badge. Two tangs to back. No maker mark. |
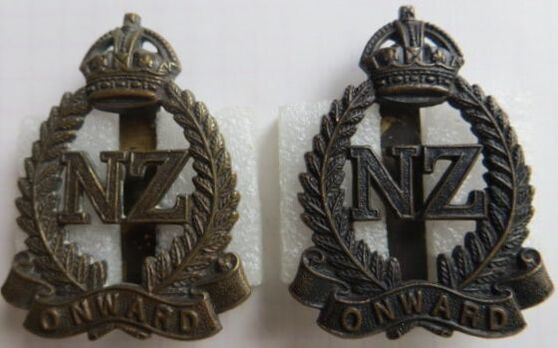
- Above Left: A darkened brass, semi-sold Officers New Zealand Onwards Cap badge. Slider to back. No maker mark.
- Above Right: A darkened bronze, semi-sold Officers New Zealand Onwards Cap badge. Slider to back. No maker mark. |
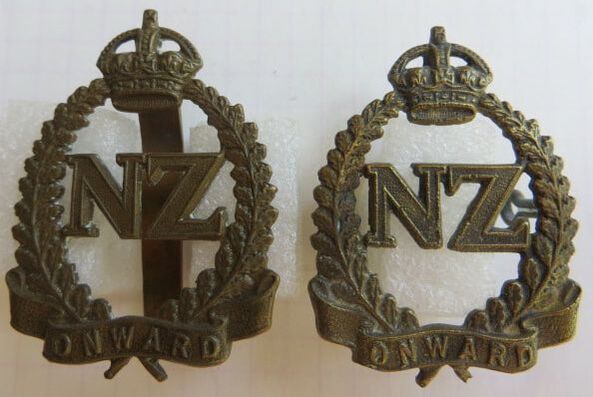
- Above Left: A die stamp, New Zealand Onwards Cap badge. Gilt brass, with slider to back. Note the "oak leaf" border. No maker mark.
- Above Right: What appears to be a cast New Zealand Onwards Cap badge. Gilt brass, with two long looped lugs to back. Again with the "oak leaf" border. No maker mark. |
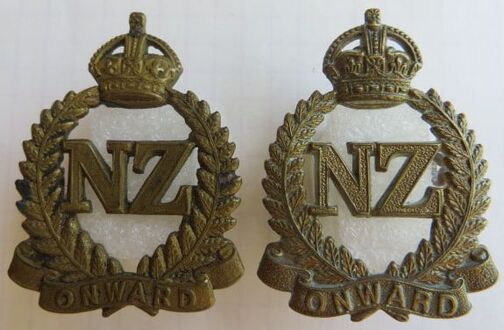
- Above Left: A die stamped, gilt brass New Zealand Onwards Cap badge. This has the maker plaque to behind crown of "J R Gaunt London" and two copper D shaped looped lugs to back.
- Above Right: A die stamped, gilt brass New Zealand Onwards Cap badge. Two copper looped lugs to back. No maker mark. |
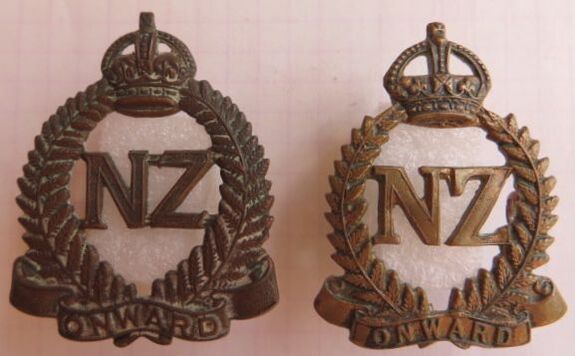
- Above Left: A variation. This Cap badge has a wide frame, similar to the New Zealand 34th Reinforcement Draft Cap badge. But instead of "Expeditionary Force" in the lower banner, its has "Onwards". Gilt brass, die stamped, it has two D shaped copper looped to back. No maker mark.
- Above Right: A wide voided crown, gilt brass New Zealand Onwards Cap Badge. Two D shaped copper looped lugs to back, but no maker mark. |

- Above Left: A darkened brass, die stamped New Zealand Onwards Cap badge. Two copper wire looped to back. No maker mark.
- Above Right:A darkened copper, die stamped New Zealand Onwards Cap badge. Two copper wire looped to back. No maker mark. |
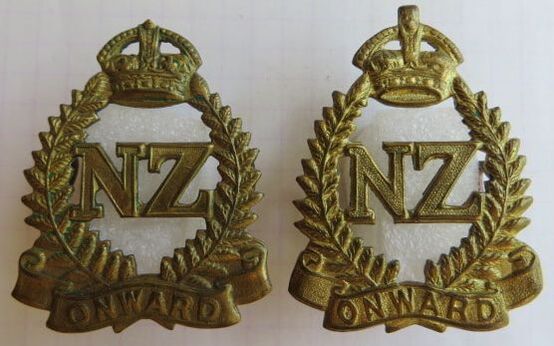
- Above Left: A gilt brass, die stamped New Zealand Onwards Cap badge. Two thick copper looped lugs to back, but no maker mark. Missing tip of crown.
- Above Right: A gilt brass, die stamped New Zealand Onwards Cap badge. Two thick copper looped lugs to back, but again no maker mark. |
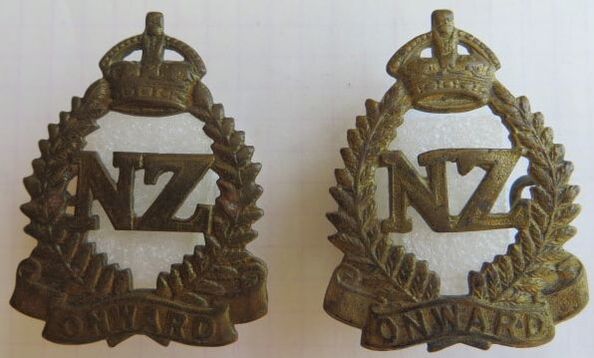
Above Left: A gilt brass, die stamped New Zealand Onwards Cap badge. Two thick copper looped lugs to back, but no maker mark. The "NZ" may have been polished as there is little detail.
Above Right: A gilt brass, die stamped New Zealand Onwards Cap badge. Two thin copper looped lugs to back, but no maker mark. |
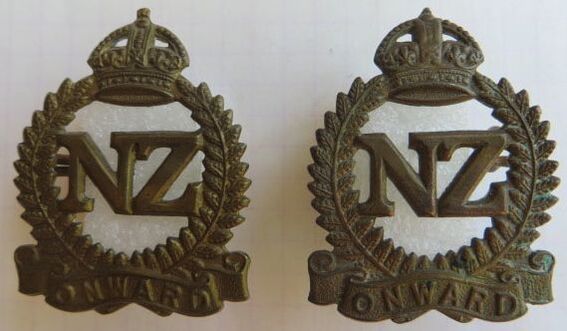
- Above Left: A die stamped, gilt brass New Zealand Onwards Cap badge. Maker marked to lower back on either side to "M & K W" for Mayer & Kean, Wellington and "NZ 45" for New Zealand and 1945. Note the rounded "NZ" to front, which is a feature of Mayer and Kean made Onwards Badges. Two copper wire looped lugs to back.
- Above Right: Another Mayer and Kean made New Zealand Onwards Cap badge. This just has "M & K W" to the bottom left (when viewed from the back. There is no date to this badge. |
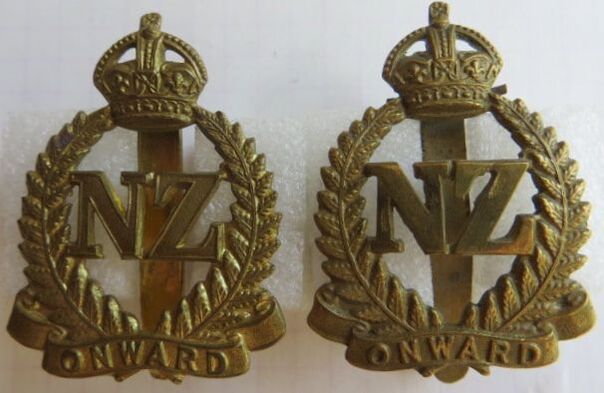
- Above Left: A gilt brass, die stamped New Zealand Onwards Cap badge. This has a long slider to back which has been stamped to "J R Gaunt London". It has a extra piece of wire soldered to back, between the crown and wreath for strengthening.
- Above Right: a similar, gilt brass, die stamped New Zealand Onwards Cap badge. Again a long slider to back with the strengthening wire end just seent to the right of the base of the crown. No maker mark. |
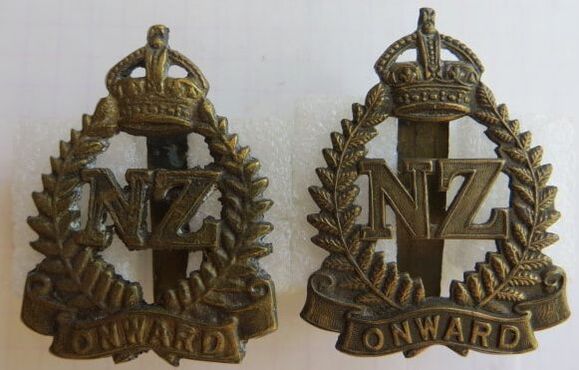
- Above Left: A cast brass New Zealand Onwards Cap badge. This has a short, brass slider to back and is somewhat smaller than the die stamped badge beside it. No maker mark.
- Above Right: A die stamped, gilt brass New Zealand Onwards Cap badge. A wide, short brass slider to back . No maker mark. |
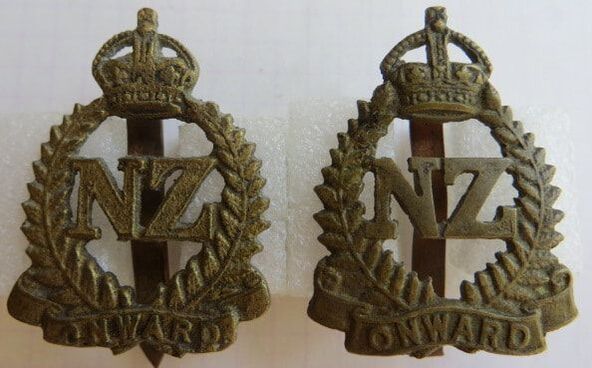
- Opposite Left: A cast brass New Zealand Onwards Cap badge. This has a rounded copper slider to back, which has been sharpened to a point. A wire has been soldered to base of slider and behind the crown to reinforce the badge. No maker mark.
Above Right: A cast brass New Zealand Onwards Cap badge. Again, a rounded copper slider to back. No maker mark.
Above Right: A cast brass New Zealand Onwards Cap badge. Again, a rounded copper slider to back. No maker mark.
|
- Above: A gilt brass New Zealand Onwards Cap badge with its Black backing. Worn on the General Service Cap, from July 1944 with the above colour for all units of the 2NZEF other than Armoured Corps & 22nd Motor Battalion (Red) & Divisional Cavalry (Green). The Cap has two wire looped lugs to back and its split pin. No maker marks.
|
- Above: A darkened brass New Zealand Onwards Cap badge with a original cardboard stiffener. This backing, would go inside a hat like a General Service Cap, and allow the front peak of the hat to "stand", instead of flop forward. Two copper looped lugs to back, with its split-pin, but no maker mark.
|
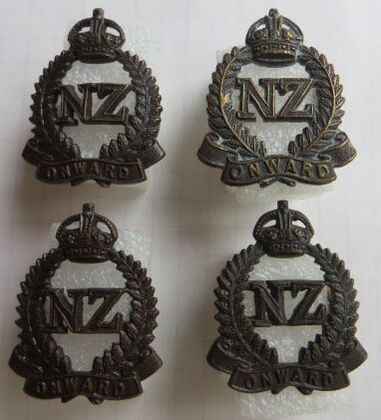
The following are just some of the variations of the New Zealand Onwards Collar badge. This issue is not of scarcity, but rather trying to find a matching pair in terms of detail and finish to front and the different types of lugs to back.
- Opposite Left: A matching pair (vertical) of darkened bronze Officer New Zealand Onwards Collar badges. Both are solid to back, curved and have the maker mark impressed to "J R Gaunt London". Both have D shaped copper lugs.
- Opposite Top Right: A darkened bronze Officer New Zealand Onwards Collar badge. Solid to back, with a curved void to back of crown. Two D shaped copper looped lugs to back. No maker mark.
- Opposite Bottom Right: A darkened bronze Officer New Zealand Onwards Collar badge. Solid to back, with two D shaped copper looped lugs to back. No maker mark.
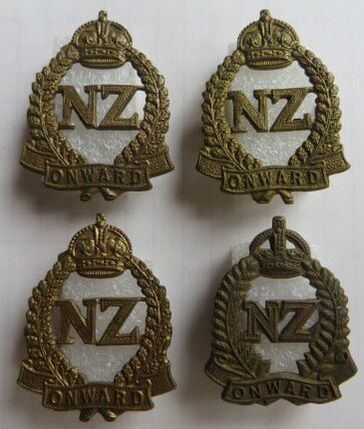
- Above Left: A matching pair (vertical) of gilt brass New Zealand Onwards Collar badges. Oak like fonds to wreath, these both have two D shaped copper lugs to back, with a impressed maker mark of "Tiptaft Bham".
- Above Top Right: A gilt brass New Zealand Onwards Collar badge. Again Oak like fonds to wreath, with D shaped copper lugs to back. No maker mark. - Above Bottom Right: A gilt brass New Zealand Onwards Collar badge. Two hex type flat brass lugs to back. No maker mark. |
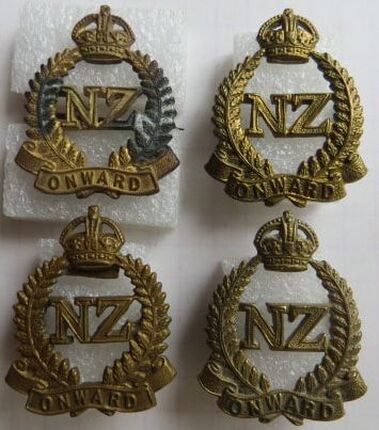
- Above Left: A near matching pair (vertical) of gilt brass New Zealand Onwards Collar badges. Both have maker the maker plaque of "J R Gaunt London". The top is brooched, while the bottom has two D shaped copper looped lugs.
- Above Right: A matching pair (vertical) of gilt brass New Zealand Onwards Collar badges. Two D shape copper looped lugs to back of each, but no maker mark. |
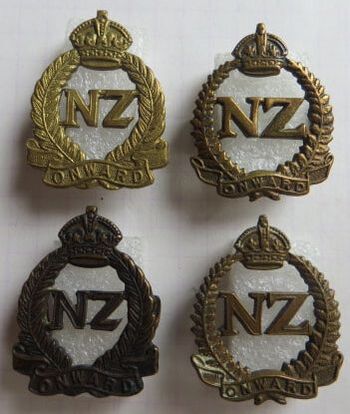
- Above Left: A near matching pair (vertical) of gilt and darkened brass New Zealand Onwards Collar badges. Solid to back, with two D shaped copper loops to back. No maker mark.
- Above Right: A matching pair (vertical) of gilt brass New Zealand Onwards Collar badges. Solid to back, with two D shaped copper loops to back. No maker mark. Note the rounded wreath. |

- Above Left: A matching pair (vertical) of gilt brass New Zealand Onwards Collar badges. Die stamped, these have copper wire loops to back. Both are marker marked to "M & K W, 43" for Mayer and Kean Wellington, 1943.
- Above Right: A matching pair (vertical) of gilt brass New Zealand Onwards Collar badges. These have been coated with black paint to subdue their finish. Two thick copper wire looped lugs to back. No maker mark. |
- Opposite: A matching pair of darkened brass New Zealand Onwards Collar badges. Die stamped, these have copper wire loops to back. Both are marker marked to "M & K W, 43" for Mayer and Kean Wellington, 1943.
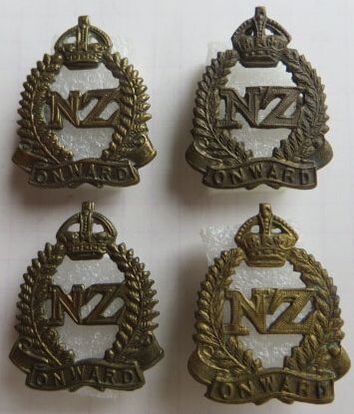
- Above Left: A matching pair (vertical) of gilt brass New Zealand Onwards Collar badges. Die stamped, with two hex type brass lugs to back. No maker mark.
- Above Right: A near matching pair (vertical) of gilt brass New Zealand Onwards Collar badges. Die stamped, with two thick copper wire loops to back. One collar is a tad darker than the other. |
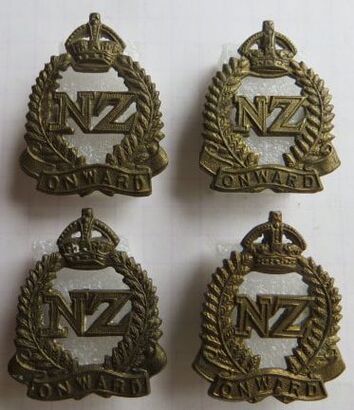
- Above Left: A matching pair (vertical) of gilt brass New Zealand Onwards Collar badges. Die stamped, with copper wire lugs to back. No maker mark.
- Above Right: A matching pair (vertical) of gilt brass New Zealand Onwards Collar badges. Die stamped, with two hex type, brass lugs to back. No maker mark. |
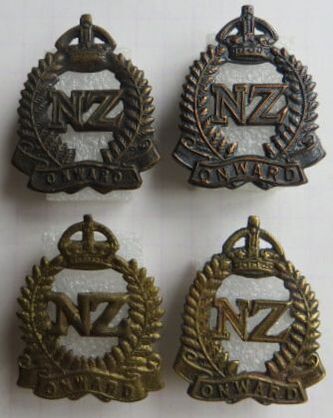
- Opposite: Odds, with no matching mate.
- Top Left: A darkened brass New Zealand Onwards Collar badge. It has two small brass lugs to back. No maker mark.
- Top Right: A darkened copper New Zealand Onwards Collar badge. It has two copper hex flat lugs to back. No maker mark.
- Bottom Left: A gilt brass New Zealand Onwards Collar badge. It has two pressed type brass lugs to back. No maker mark but looks Mayer and Kean of Wellington with the rounded "NZ".
- Bottom Right: A cast brass New Zealand Onwards Collar badge. It has two copper lugs to back. No maker mark.
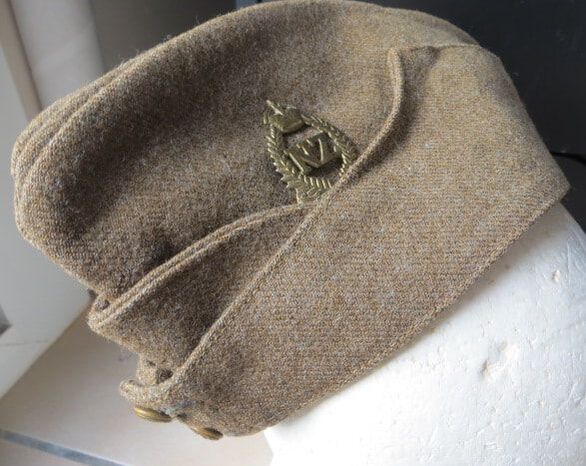
- Above: A WW2 era New Zealand Army Side Hat, with Brass Onwards badge to side. This was worn by all overseas serving troops. Within New Zealand they were permitted to wear their unit or corps badge to side.
|
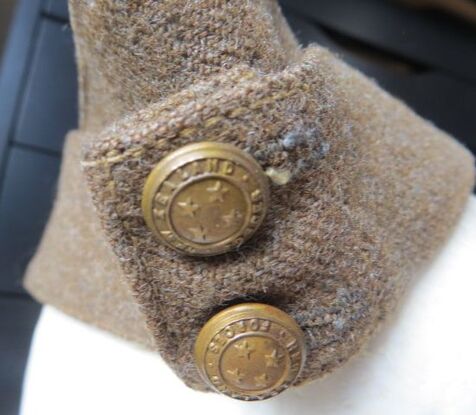
- Above: Front of the same Side Hat, showing the Brass 12mm buttons to front. Both are flexible shanked, J R Gaunt of London marked to back.
|
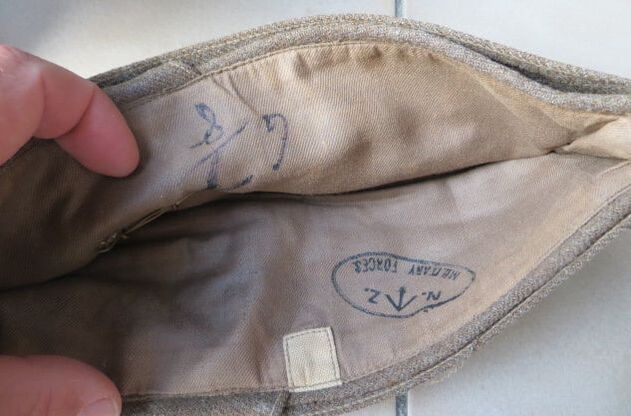
- Above: On the indie of the hat is a separately sewn in label for size. This has not been used, and a large "6 7/8" has been written on the side.
|
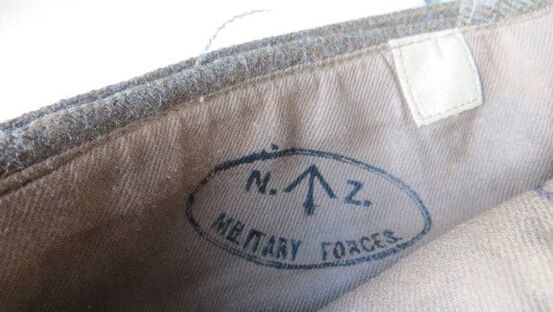
- Above: A oval "N" Broadarrow "Z", "Military Forces" stamp is the only other markings inside the liner of the hat.
|
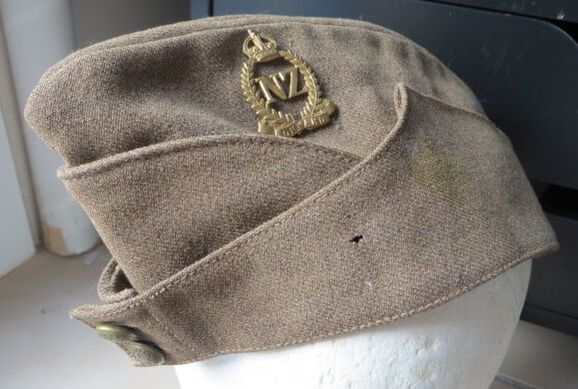
- Above: Another WW2 example of the New Zealand Army Side Hat. Again with a NZ Onwards Cap badge to side, and "New Zealand Forces" Buttons to front. The 12mm Buttons are not maker marked and are fixed shank.
|
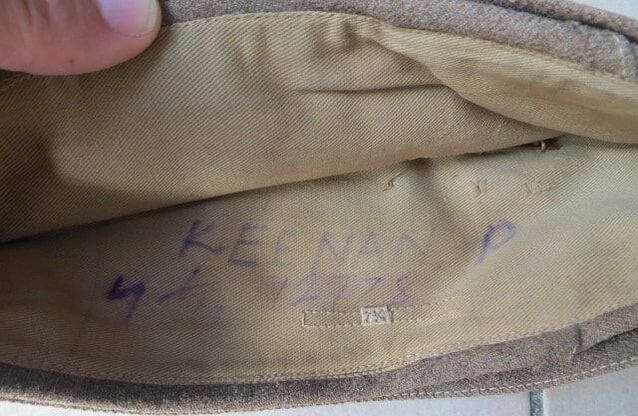
- Above: Inside the same Side Hat is a pre-printed size label of "7 1/4". This seem to have been un-readable as it has been dune in pen in larger numbers. Named to 12778 P Keenan. Sadly Patrick Henry Keenan was killed on the 28th of Nov 1941 in North Africa. He was part of the 26th (Canterbury and Otago) Battalion.
|
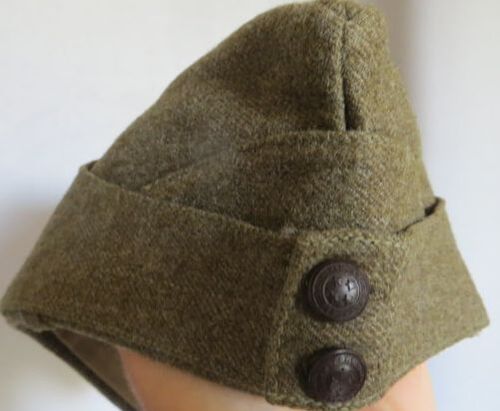
|
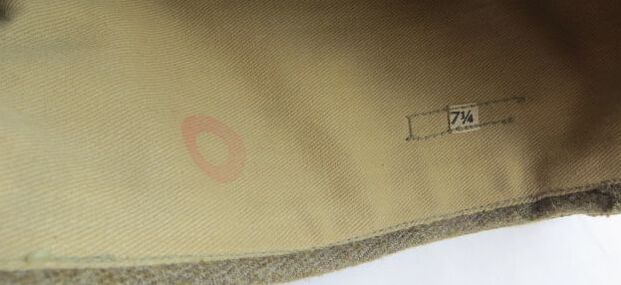
- Opposite and Above: A WW2 era New Zealand Army Side Hat. This has two 13mm bakelite New Zealand Forces buttons to front. No maker marks to inside of hat other than a red inked "O". A size lable of "7 1/4" is sewn in on white tape. Number of holes to side, where a badge had been, but no indications of what it might have been.
|
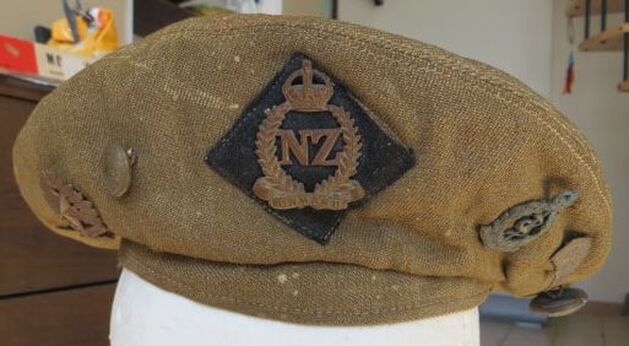
- Above: The General Service Cap or "GS" was introduced to the 2NZEF from July 1944, to be worn in the Italian campaign. Above is a superb, well worn example of a GS Cap, with correct black backing behind a slightly oxidised Onwards Cap badge.
|
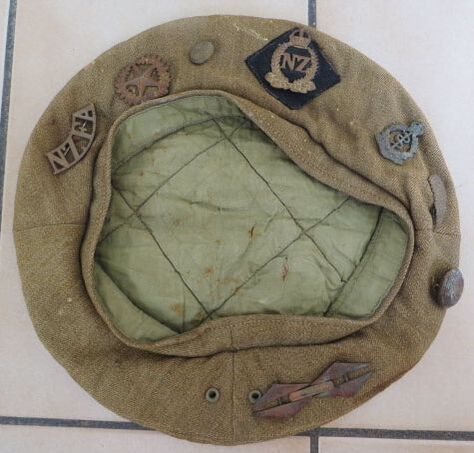
- Above: The same hat, showing the padded inside and the badges added proudly by the previous owner. Behind the Onwards badge, inside is just the word "Dad".
|
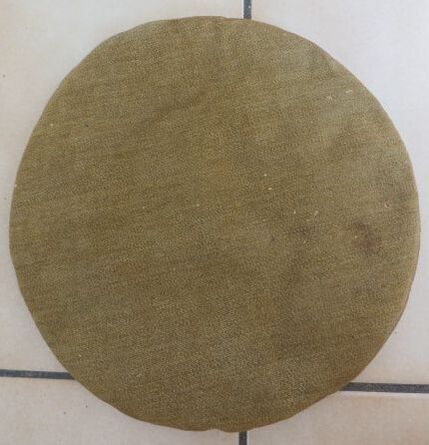
- Above: Top shot of the GS Cap. This example has a cellophane layer, sewn between the khaki wool exterior and padded interior. It makes a crinkly noise when handled. Presumably added to waterproof the hat when worn.
|
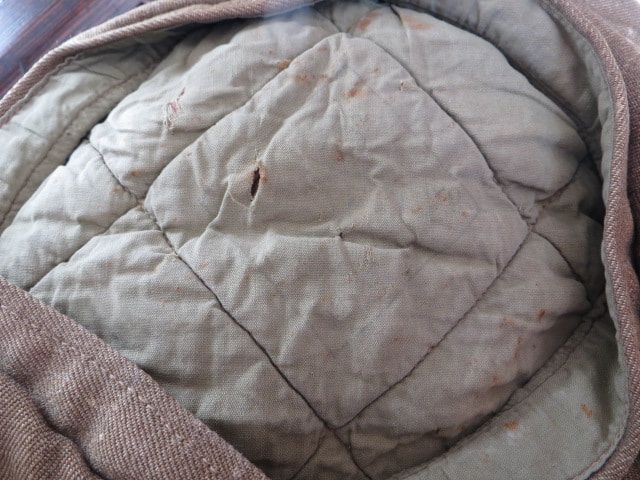
- Above: Inside sadly is a very faint maker black ink stamp, with a top size of "7 #/8", a "Ltd" and a date at the base of "1943".
|
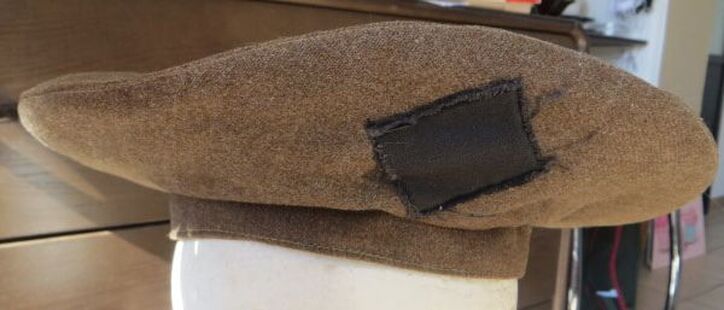
- Above: Another New Zealand General Service Cap or "GS". Different colour khaki to the other above, this has a Black material diamond sewn to front. There is no holes in it or the Cap inside, so it looks like a badge has never been worn to front.
|
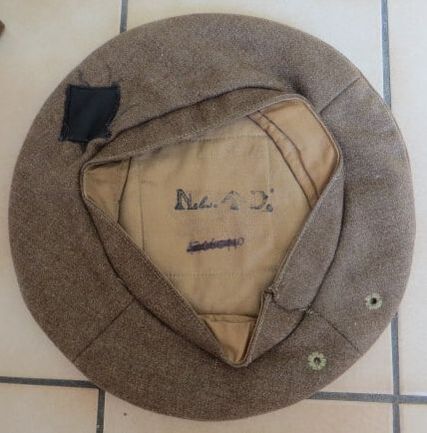
- Above: a base view of the GS. Note the two vent holes, which are further apart on this example.
|
- Above: A top view of the GS. This hat has no cellophane liner.
|
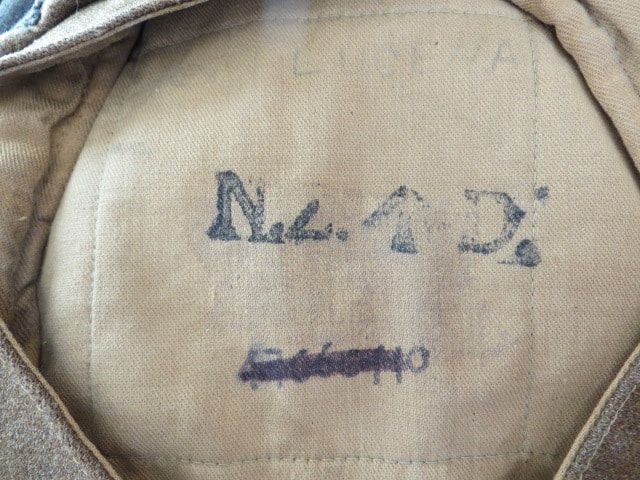
- Above: The inside of the hat is marked in black ink to "N.Z. (broadarrow) D.)" There is also a faint name and service number in ink.
|
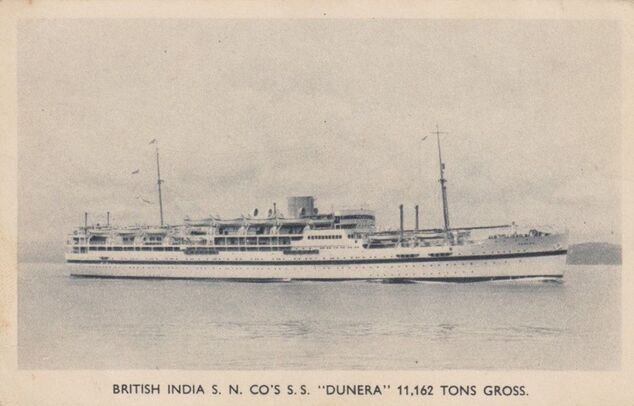
At the outbreak of WW2, the New Zealand Government authorised the formation of the 2nd New Zealand Expeditionary Force for both home and abroad. It was decided, with consoltation with the British, that a Infantry Division be formed, the 2nd New Zealand Division under the commanded of Brigadier General Bernard Freyburg. It would be made up of nine Infantry Battalions, serveral of which formed in 1939/1940.
Initially the first three were named 18th Battalion (from Auckland and the top of the North Island) 19th Battalion (Wellington and lower half of the North Island) and 20th (covering the whole of the South Island).
The 20th Battalion, was divided into four Companies, with the letters A to D used corresponding to the Canterbury, Southland, Nelson-Marlborough-West Coast and Otago districts. A headquarters company included the specialist support troops; signallers, anti-aircraft and mortar platoons, and transport personnel.
The battalion was called to Burnham Camp, outside Christchurch on the 6th of October 1939, with Lieutenant Colonel Howard Kippenberger as their commanding Officer. They were to train until they departed for the Middle East on the 5th of Jan 1940, on-board the SS Dunera, as part of the 4th Infantry Brigade.
The arrived at their base, in Egypt at Maadi on the 14th of Feb, 1940 and continued training.
- Above: A postcard image of the SS Dunera within the items of 9391 Pte. David Russell Campbell.

The following are items to 9391 Pte. David Russell Campbell. His family were originally from Invercargill, but lists a Christchurch address on his enlistment. David was part of the 1st Echelon of the 2nd New Zealand Expeditionary Force, where he joined D Company of the 20th Battalion. Sent to the middle East, he would spend 3 years and 189 days overseas.
Sadly, he was wounded in action and sent home to New Zealand, to be discharged on the 20th of Nov 1943. - Above: A superb image of David and two mates in front of the Sphinx in Egypt, wearing Lemon Squeezers and shorts. |
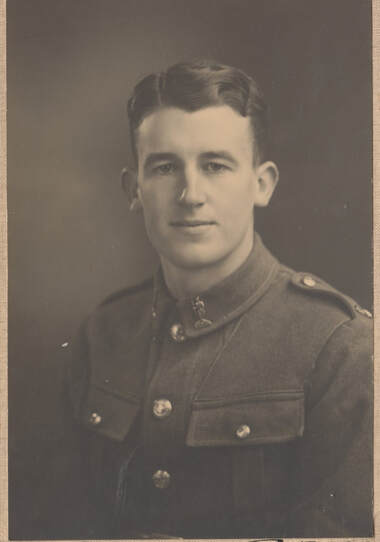
- Above: A nice image of 9391 David Russell Campell. He would reach the rank of Corporal by the end of 1943. David is wearing a 8th (Southland) Infantry Regiment Collar badge, with 4 star New Zealand Force buttons, and a metal shoulder title, likely to be "NZR" for New Zealand Rifles.
|
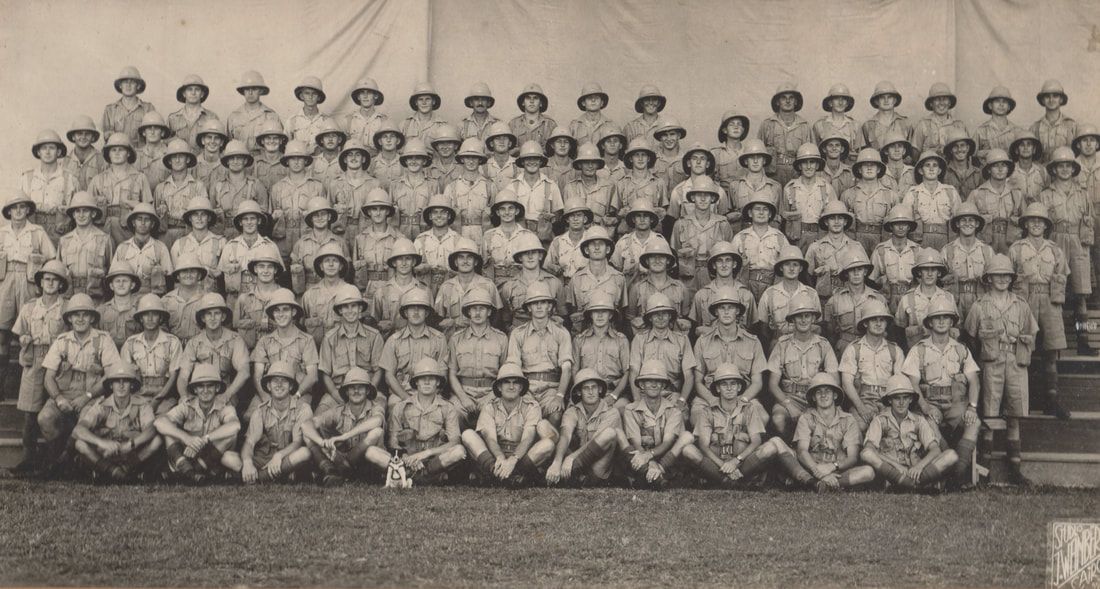
- Above: A superb image of D Company, 20th Battalion, taken on the 28th of August, 1940. All are wearing their British issued Sun hats, with Onwards badge to front, with many also wearing webbed ammunition pouches. David is sitting far left, on the grass, with his legs crossed in the front row. Photographer was "Jean Weinberg, Cairo, Officer D'Academie et de l'Instruction Public, Telephone 53851, Davies Bryan Bldg, 165 Rue Ernad el Din".
I only have a partial list (back 4 rows) of the name if the men above as follows:
Back Row (left to right): 9362 Pte. William John Perry (POW - Greece), Pte. R. Hewitt, 8111 Pte. James Andrew Jordon (KIA - 22/05/1941 - Crete), 8799 Pte. Wilson Martin (KIA - 21/05/1941 - Crete), 9273 Pte. Ian Allister Mclay (POW - Greece), 8482 Pte. William Douglas Morrison (KIA - 07/12/1941 - North Africa), 9177 Pte. Thomas Edwin Hardwick, 8490 Pte. Lionel Ricardo Landoas, 9162 Pte. Albert Edward Hayes (POW - North Africa), 9274 Pte. Ronald William Withell, 9773 Pte. E. H. Wintrup (POW - Greece), Pte. G. D. Wright, 8232 Pte. David Shaw (KIA - 02/06/41 - Crete), 9792 Pte. Ernest James White (POW - Unspecified, but returned medically unfit to UK on the 1st May 1943) , 9045 Pte. Harold Christian Nils Lyders (POW - Greece), 8353 Pte. Godfrey George Thomson.
Second Row from Back: 8423 Pte. Arthur David Williams (POW - North Africa), 9361 Pte. James Hamilton (POW - Crete), 9190 Pte. Thomas Clarence Miller (KIA - 29/01/1942 - North Africa), 9047 Pte. Vyvian Robert John Gare, 8134 Lance-Corporal Lloyd Lister McInnes (POW - Crete), 8241 Pte. James Hesson (POW - Greece), 9205 Pte. Donald William Henderson, 8493 Pte. Cyril Trevathan (POW - Crete), 8099 Pte. Thomas Ivan Frater (KIA - 22/05/1941 - Crete), 8502 Pte. Gordon William Crawford, 8230 Pte. Neil Dixon Low (KIA - 22/05/1941 - Crete), 8233 Pte. Albert William Marshall (POW - North Africa), 8514 Pte. Robert William Mitchell (DOW - 24/05/1941 - Crete), 8269 Pte. John Earl Aitken (DOW - 02/06/1941 - Crete), 9048 Pte. Andrew Thomas Anderson (POW - Italy), 8494 Pte. James Waller (POW - Greece).
Third Row from Back: 8234 Pte. Stuart Sinclair Featherston Wilson (KIA - 26/11/1941 - North Africa), 8183 Pte. Rex McLean Miller, 8265 Pte. Leslie Michael O'Sullivan (POW - Crete), 8447 Pte. Frederick Turnbull Mason, 9185 Pte Eric Gordon Harvey (KIA - 25/05/1941 - Crete), 8344 Pte. James Francis Dellaca (POW - Crete), 8260 Pte. Rowallan Cadenhead Ellis, 8489 Pte. Roderick Ian Hamish Spiers (POW - Crete), 8236 Pte. William Potia Lee, 9044 Pte. John Thomas Wright (DOW 08/06/1947 - Dunedin), 9158 Pte. David Keane (POW - North Africa), 7338 Pte. Percival Glendinning Scott (DOW recieved in Crete - 27/11/1941 - North Africa), 8253 Pte. Robert Noel Barnett, 8424 Pte. Alfred George McCutcheon, 9363 Pte. William Taylor McLew Chapman (KIA - 15/07/1942 - North Africa), Pte. F T Geary, Pte. G H Dick, Pte. W J Warburton.
Forth Row from Back: Pte. A R Forester, 9180 Pte. Walter Mitchell, 9265 Pte. William Muirhead (KIA - 22/05/1941 - Crete), 8488 Pte. James Hamilton (KIA - 27/11/41 - North Africa), 9165 Pte. James Arthur Erridge (KIA - 26/11/41 - North Africa), 8328 Pte. Stanley James Weir (POW - North Africa), 8439 Pte. Alexander Raymond Coulter, 9270 Pte. Raymond W J Bachop (POW - 13/12/41 - North Africa), 8509 Pte. Ernest John Osborne Brown, 9272 Pte. William Francis Adams (POW - 13/12/41 - North Africa), Pte. L V Simmons, 9204 Pte. Clarence Albert Barnett (POW - Crete), 9269 Pte. William Henry Gillan, 7426 Pte. Cameron James Armishaw (POW - North Africa), 7428 Pte. Neil McPherson Brown (POW - Greece), 8266 Pte Donald Allan Muir (POW - Middle East), 8193 Pte William Edward Sandford (POW - Crete).
Front row: 9391 Pte. David Russell Campell
The British Government anticipated the German plans to invade Greece, and dispatched several formations, including the New Zealand 4th Infantry Brigade (including the 20th Battalion) in March 1941 to support the Greek forces. The 4th Brigade was tasked with the defence of the Aliakmon Line in northern Greece, with the 20th Battalion preparing and manning the defences along the western end of the line.
On the 6th of April 1941, the German's invaded, and rapidly advanced, causing the Greek and Allie forces to abandon their positions. The 20th Battalion were part of a rearguard action, blowing bridges to slow the German amoured advance. It was evacuated to Crete on the 28th of April.
By the end of the campaign in Greece, the battalion had 24 personnel killed in action or died of wounds, while 80 others taken prisoners of war
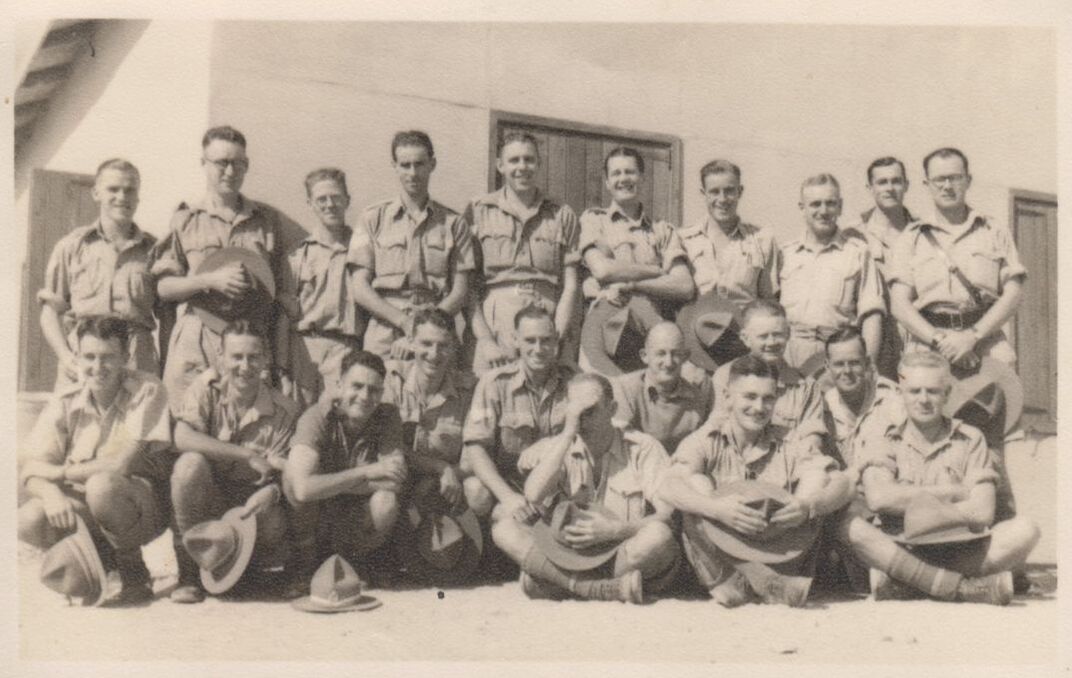
- Above: David and mates, he is kneeling, first on the left, with Lemmon Squeezer in hand. Likely Egypt, but it doesn't mention where.
|
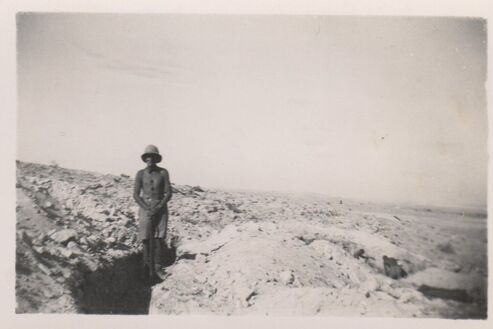
- Above: David somewhere in the desert, entrenching tool in hand and wearing his Sun hat.
|
In Crete, it quickly became apparent that the Island would now be the next German target. The 20th Battalion was detached from the 4th Brigade to form part of a new ad hoc 10th Infantry Brigade. While Kippenberger led this brigade, his nominal second-in-command, Lieutenant Colonel Jim Burrows, was in charge of the 20th Battalion for most of the Battle of Crete.
On 20 May 1941, with the opening day of the invasion of Crete, the battalion was in a positioned to the east of the town of Galatas, where it was watching the coast due to the risk of a seaborne invasion. It dealt with several Fallschirmjäger (German paratroopers) that landed near them. On 22 May, the battalion was used in a counterattack on Maleme airfield, which had been occupied by the Germans the previous day. The Commander in charge (Brigadier Edward Puttick in Freyberg's absence) was reluctant to release the battalion until it had been replaced in the line, as he anticipated the Germans would mount a naval landing later in the evening. The delayed arrival of the relief unit meant that the 20th Battalion was late to its starting position. The counterattack, which also involved the 28th Battalion, commenced at 3:30 am. After a promising start, where the C and D companies of 20th Battalion reached the perimeter of the airfield by 7:30 am, they had to withdraw as their positions were too exposed in daylight hours. The counterattack resulted in heavy casualties. It also resulted in an award of a VC to Lieutenant Charles Upham for his actions during the attack on Maleme airfield.
When Galatas fell to the Germans on 25 May, the 20th Battalion was in danger of being cut off. It successfully regrouped and assisted in the recapture of the town. The battalion withdrew on 26 May, which marked the beginning a retreat to Hora Sfakion, on the southwest coast of Crete.
On arrival at the evacuation beaches, it was found that there was insufficient room on the Australian destroyers that were the designated transport for all of the battalion's personnel. The bulk of the battalion departed on 30 May although Kippenberger was forced to select 40 men to stay behind and form a rearguard under the command of Burrows. After manning defensive positions to prevent Germans infiltrating the cordon around the embarkation beaches, the rearguard was evacuated the following day.
The battalion lost 80 soldiers killed or died of wounds on Crete and nearly 90 were made prisoners of war.
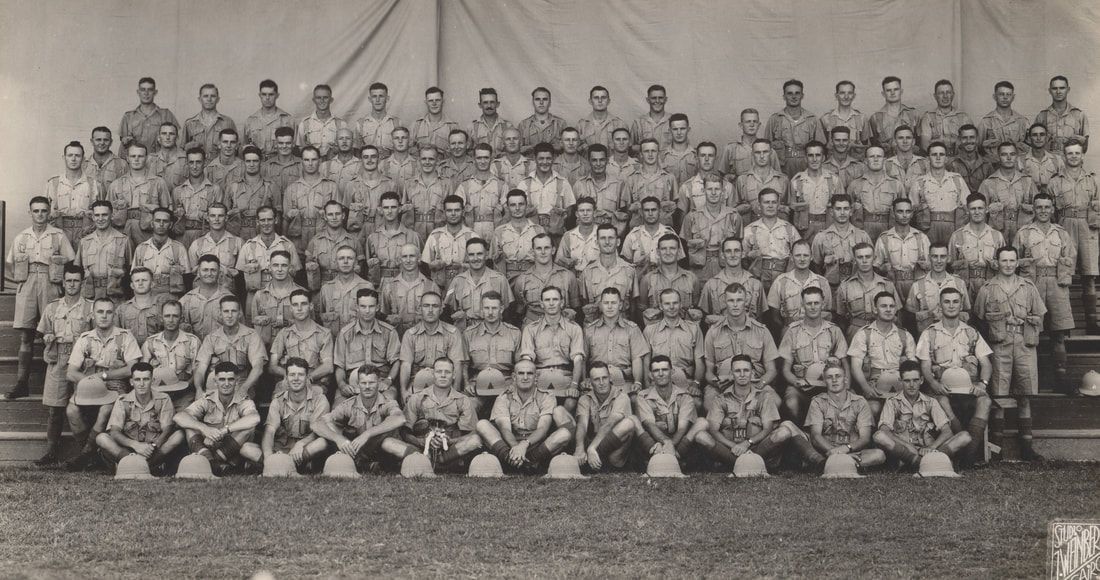
- Above: A similar superb image of D Company, 20th Battalion, again taken on the 28th of August, 1940. This time, hats are off. Note that the Officers to center seem to have a triangle formation sign, sewn onto their puggaree. David again, is sitting far left, on the grass, with his legs crossed in the front row. Picture maker is "Jean Weinberg, Cairo, Officer D'Academie et de l'Instruction Public, Telephone 53851, Davies Bryan Bldg, 165 Rue Ernad el Din".
To back of picture, David has later written "Killed 33, POW (Prisoner of War) 28, Wounded 38, Unharmed 9 - Total Strength 108"
The 20th Battalion were evacuated back to Egypt, and by now had lost more than half its strength. 400 Reinforcements were used to bring back up the strength of the Battalion. By October 1941, the Battalion was ready to be commited to battle in North Africa.
In November 1941, the 2nd New Zealand Division participated in Operation Crusader as part of the British Eighth Army's advance into Libya. The offensive was intended to relieve the siege of Tobruk and force the Axis forces from the Cyrenaica region of Libya. While the 4th Brigade continued to advance, the battalion stayed to cover the road, occasionally intercepting and destroyed lightly armoured vehicles of the 21st Panzer Division, until 23 November at which time it was relieved and placed in reserve.
The next day, the 20th Battalion led the 4th Brigade in linking up with the 6th Infantry Brigade, which was struggling to hold onto gains made at Sidi Rezegh.
In doing so, the battalion, supported by several Valentine tanks, captured 260 German soldiers and three 88 mm guns.
On 25 November, along with the 18th Battalion, it was tasked with the capture of Belhamed, a hill adjacent to Sidi Rezegh. That night, the units advanced to their objective, bayonets fixed, with the 20th Battalion on the left.
Instructed by Kippenberger to take no prisoners, Belhamed was quickly seized with minimal losses.
As he moved forward, Kippenberger made a navigational error which resulted in his headquarters company becoming separated from the other companies of the battalion. It took him until daylight to reestablish contact with the remainder of the battalion. Shortly after his arrival, he was wounded by machine gun fire and evacuated.
The 20th battalion wemt on to consolidated its hold on Belhamed, but was exposed to German mortar and artillery fire from the south.
Unable to excavate much cover, the New Zealanders could only move about freely at night. In the meantime, a corridor had been opened to Tobruk although there were still pockets of German resistance. Despite the protests of the acting commander (in place of Kippenberger) Captain R. Agar, the 20th Battalion was ordered to deal with one such pocket. An attack, made in daylight and without artillery support, which failed with heavy casualties incurred on an already depleted battalion.
A group of about 140 men, along with most of the battalion's transport, was detached and sent into Tobruk while the rest of the battalion, mainly the rifle companies, remained in position on Belhamed for three days. They were effectively destroyed by elements of the 15th Panzer Division attacking from Sidi Rezegh, which had been overrun the previous day. Only one rifleman managed to escape capture.
The battalion's casualties during Operation Crusader were significant, with 60 killed or died of their wounds, and another 126 were wounded. Over 350 soldiers became prisoners of war.
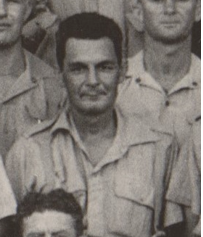
- Above & Opposite: The above image is taken from the above group photo's and is of 9044 Pte. John Thomas Wright, who was also part of the 1st Echelon of the 20th Battalion which departed in 1940. He sadly died on the 8th of June 1947 in his home town of Dunedin, aged 44. It states he died "While on Active Service". Opposite is John's New Zealand Memorial Cross, issued in WW2 by the New Zealand Government to the relatives of those who had fallen.
|
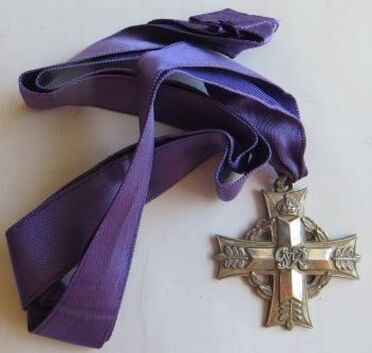
(continued) It is one of the few "named" medals that the New Zealand Government issued at the time. All other NZ WW2 medals are not officially named. It comes in a box of issue and is impressed to back to
|
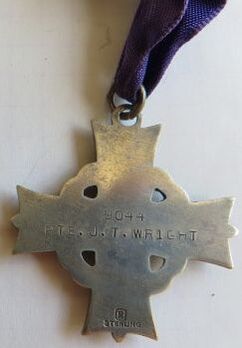
(continued) "9044, Pte. J. T. Wright", with a "R" in a square and "Sterling" for Sterling Silver. John is buried at Anderson's Bay Cemetery, Dunedin.
|
There were a number of men who missed action of Operation Cursader, and they, along with about 140 survivers from the fighting in Libya made up the battaion with 600 reinforcements arriving to make up the numbers. They were now under the command of Jim Burrows, as Kippenberger had been promoted to brigadier and now commanded the 5th Infantry Brigade. They spent two months training while based at Baggush and then later at Maadi.
In Feb 1942, they moved to Syria with the rest of the 2nd New Zealand Division.
Their stay was short, and in June 1942, they were recalled to Libya, and did the 320 km (200 mi) journey in four days.
The 20th, along with the rest of the New Zealand 2nd Division were eventually moved to Minqar Qaim, and while there, it was tasked to hold and delay the advance of German Africa Korps for as long as it could while remaining intact. By the middle of the afternoon of 27 June, the division had been encircled by the 21st Panzer Division. German tanks and infantry approached the 2nd New Zealand Division's positions, including the 20th Battalion's sector on the northern side of the Minqar Qaim escarpment, and were successfully beaten off.
It was decided that the 2nd Division would break out, with the infantry of the 4th Brigade breached the German lines in the very early hours of 28 June, creating a hole through which the transport and the rest of the division could follow through. The 20th Battalion bore the brunt of the fighting on the northern flank of the chosen withdrawal route, part of which included a wadi where numerous German vehicles had been parked. The Germans were caught by surprise, with many in a state of undress. Once the battalion's transport arrived, the infantry quickly boarded and departed for the east.
During the action at Minqar Qaim and the subsequent breakout, the battalion's casualties were light, with seven men killed, eighteen wounded and just over twenty made prisoners of war, and it reached the El Alamein line that evening.
At El Alamein,
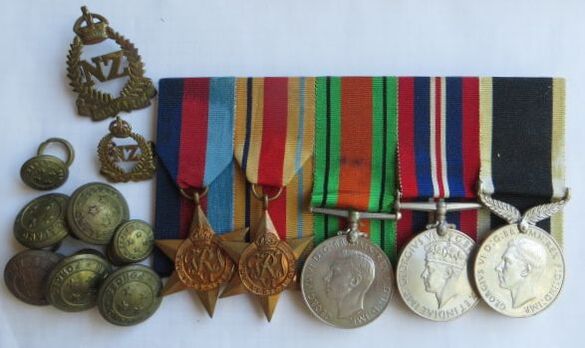
|
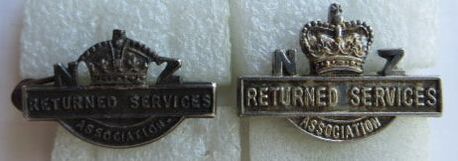
- Opposite: David's medals, fixed mounted for wear. He was awarded from Left to Right - British 1939 to 1945 Star, Africa Star, Defense Medal, 1939-1945 War Medal and the New Zealand War Service Medal, all un-named as issued.
|
The following are sweethearts badges, made out of aluminium and Tortoiseshell . Likely made in the Pacific theater of war for loved ones back home.
|
- Above: A Tortoiseshell and aluminium ONWARDS sweethearts badge with "FIJI" in the base banner, which is where many Kiwi's were stationed during WW2. Steel brooch fitting to back, with no maker mark. Size 35mm by 30mm.
|
- Above: A hand carved bone ONWARDS badge. Associated with NZ Army Nurses, but also likely carved by someone for their sweethearts. No fitting to back and no maker mark. Size 43mm by 33mm.
|
- Above: A Tortoiseshell and aluminium ONWARDS sweethearts badge with "MAVIS" to base scroll. No maker mark and with a brass brooch fitting to base back. Size 47mm by 35mm.
|
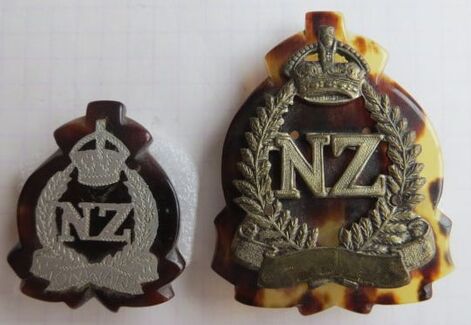
- Left: A aluminium and Tortoiseshell collar size "Onwards" badge, with brass brooch fitting to back. Not maker marked.
- Right: A full sized, gilt brass "Onwards" Cap badge which has had its lugs clipped off, and is mounted on Tortoiseshell. Silver wash has been applied, and lower banner ground down, for I presume a name to be engraved. Brass brooch fitting to back and with no maker mark.
At some stage in the 1950's the New Zealand Army re-introduced the Onwards badge for Ceremonial occasions, to be worn on the Lemon-squeezer on a red puggaree (cloth hat band). This was to be worn by the Honor Guard, which meet visiting dignitaries and heads of state.
Initially Honor Guard badges post 1952 are actually King Crowned badges, which have had the crown removed and a Queens Crown soldered in place.
Initially Honor Guard badges post 1952 are actually King Crowned badges, which have had the crown removed and a Queens Crown soldered in place.
|
- Above: A gilt metal Onwards Cap badge with Queens Crown. Semi-solid to back, with two gilt metal loops to back. No maker mark.
|
|
|
- Opposite: A gilt metal Onwards Cap badge with Queens Crown. Semi-solid to back, with two long screw posts to back. No maker mark.
- Above: A pair of matching gilt metal, solid backed Onwards collars badges. Pin and Clutch fastener fittings to back, with no maker mark. |
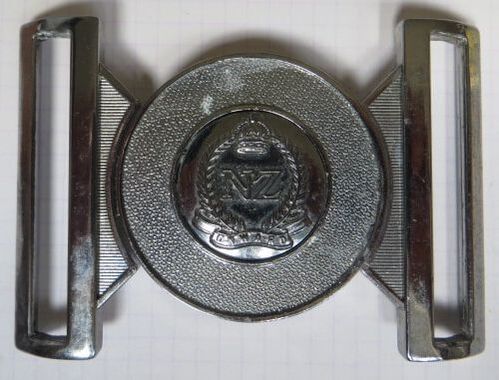
- Above: A New Zealand Officer Cadets Belt Buckle. This pattern was introduced in 1976, and re-introduced the Kings Crown Onwards Badge, which was "on loan" from the 2nd NZEF (1939 to 45) and J Force (1946/47). Maker marked to back to "Hobson & Sons (London) Ltd".
|
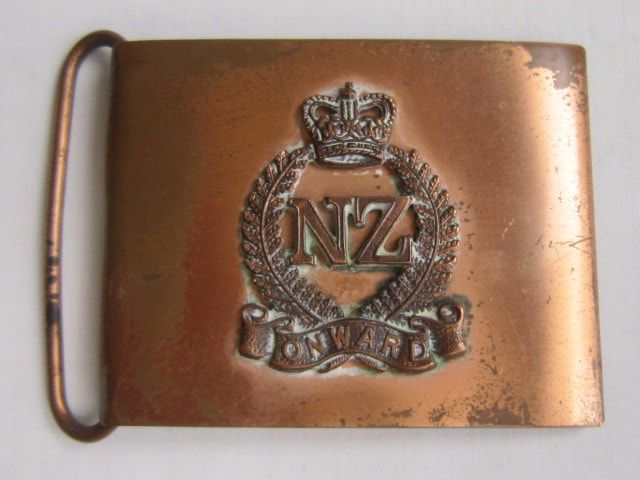
- Above: A current version of the New Zealand Officer Cadets Belt Buckle. To center is a Queens crown Onwards badge. This slightly worn example has no maker mark.
|
Overseas Infantry Battalion Formation Patches of WW1
The following formation patches were worn on the Western Front by the New Zealand Infantry formations:
1st New Zealand Infantry Brigade - all patches were worn on the the Service Dress tunic and greatcoat, on the back, to center, just below the collar.
- Brigade Headquarters - wore a Black square worn as a diamond.
1st New Zealand Infantry Brigade - all patches were worn on the the Service Dress tunic and greatcoat, on the back, to center, just below the collar.
- Brigade Headquarters - wore a Black square worn as a diamond.
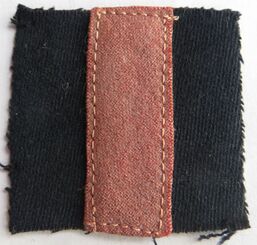
- Above: 1st Battalion Auckland Regiment - wore a Black square with a vertical Red stripe to center. Size roughly 50mm by 50mm.
|
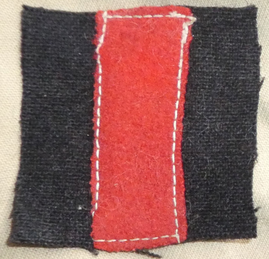
- Above: A similar 1st Battalion Auckland Regiment (Ian Hamilton Collection).
|
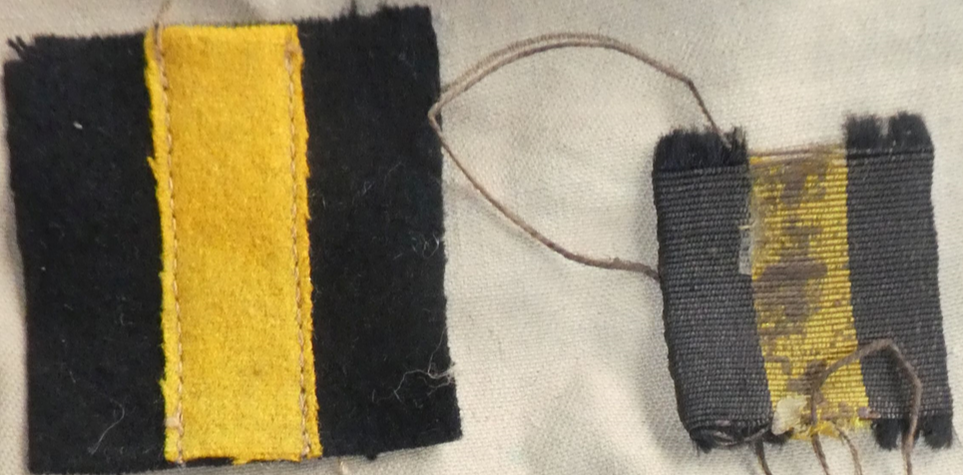
- Above: 1st Battalion Wellington Regiment - wore a Black square with a vertical Yellow stripe to center. Note the ribbon type to the right, which appears a variation (Ian Hamilton Collection).
|
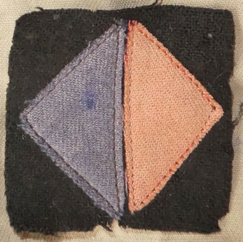
- Above: 1st Battalion Canterbury Regiment - wore a Black square with a diamond, half Blue and Red (Ian Hamilton Collection).
|
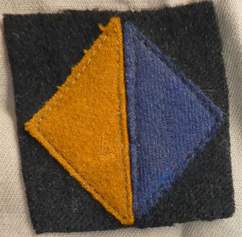
- Above: 1st Battalion Otago Regiment - wore a Black square with a diamond, half Yellow and Blue (Ian Hamilton Collection).
|
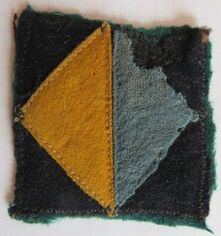
- Above: 1st Battalion Otago Regiment - a variation in colour.
|
2nd New Zealand Infantry Brigade - worn the same.
- Brigade Headquarters - Black square.
- Brigade Headquarters - Black square.
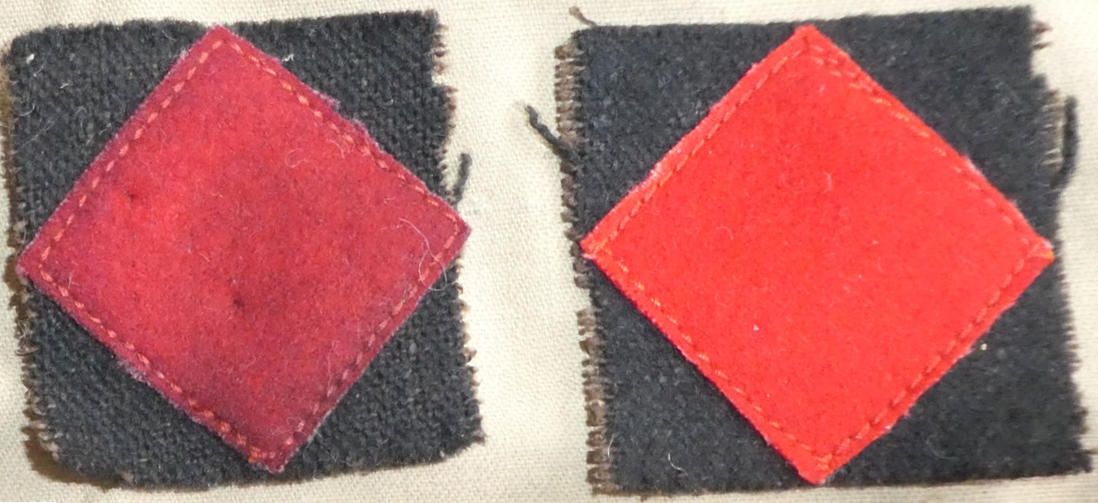
- Above: 2nd Battalion Auckland Regiment - wore a Black square with a Red diamond to center. Two slight variations in colour to center (Ian Hamilton Collection).
|
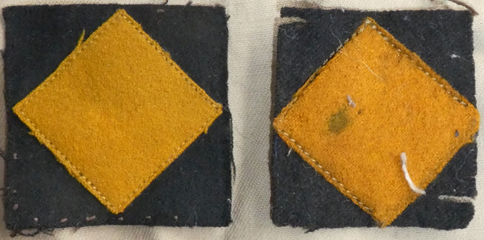
- Above: 2nd Battalion Wellington Regiment - wore a Black square with a Yellow diamond to center (Ian Hamilton Collection).
|
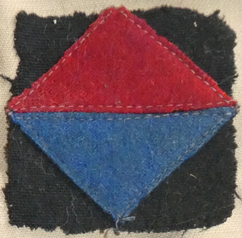
- Above: 2nd Battalion Canterbury Regiment - wore a Black square with a diamond, half Red over Blue (Ian Hamilton Collection).
|
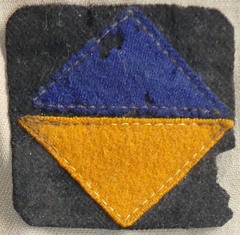
- Above: 2nd Battalion Otago Regiment - wore a Black square with a diamond, half Blue over Yellow (Ian Hamilton Collection).
|
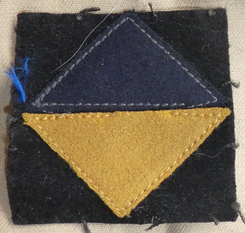
- Above: 2nd Battalion Otago Regiment - a variation in colour (Ian Hamilton Collection).
|

3rd New Zealand Infantry Brigade (New Zealand Rifle Brigade) - Worn on both sleeves, 1 1/2 inches below the shoulder strap.
- Brigade Headquarters - Black 8 pointed star.
- 1st Battalion - NZRB - Black square worn as a diamond.
- 2nd Battalion - NZRB - Black square.
- 3rd Battalion - NZRB - Black triangle, widest part at base.
- 4th Battalion - NZRB - Black triangle, widest part at top, so upside down.
- Opposite: A group of different Black felt patches to the 3rd NZ Infantry Brigade, the New Zealand Rifle Brigade (Ian Hamilton Collection).
4th New Zealand Infantry Brigade - worn on the the Service Dress tunic and greatcoat, on the back, to center, just below the collar.
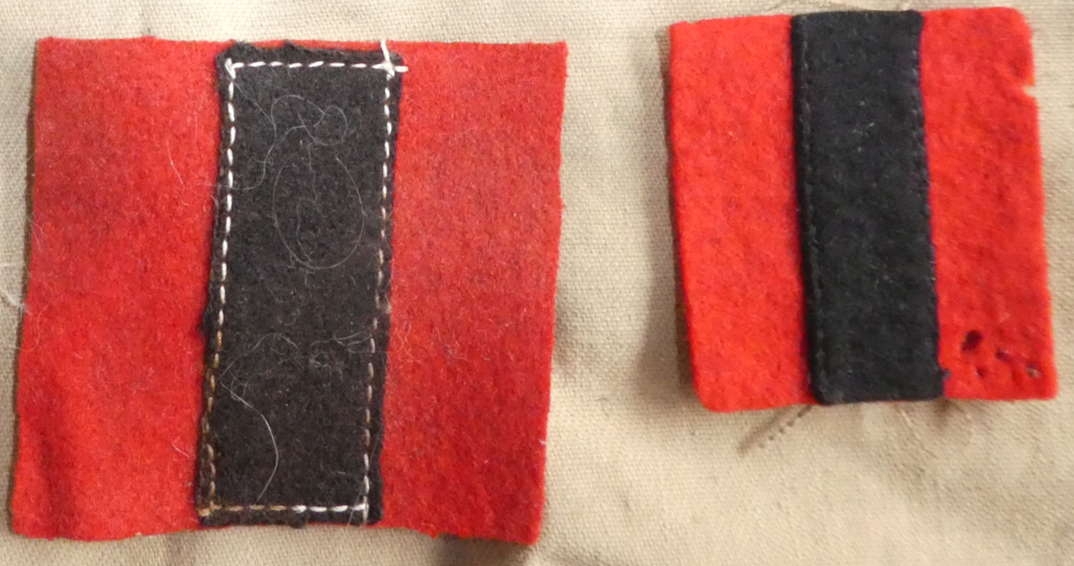
- Above: 3rd Battalion Auckland Regiment - wore a Red square with a vertical Black stripe to center. Above are two variations (Ian Hamilton Collection).
|

- Above: 3rd Battalion Wellington Regiment - wore a Yellow square with a vertical Black stripe to center (Ian Hamilton Collection).
|
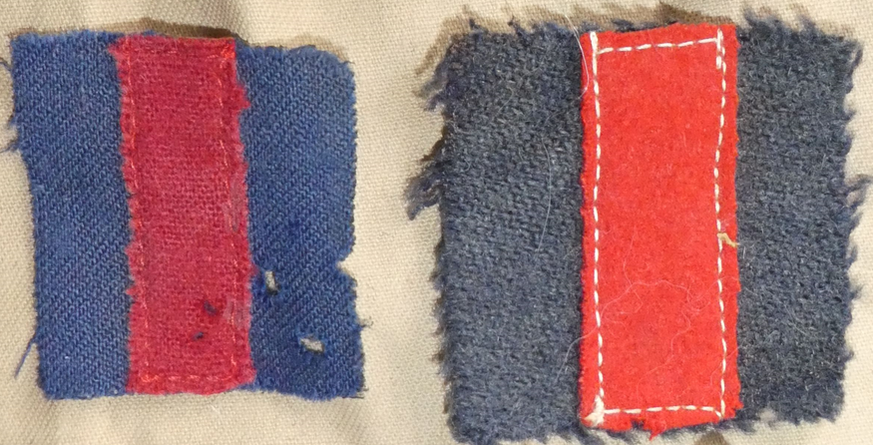
- Above: 3rd Battalion Canterbury Regiment - wore a Blue square with a vertical Red stripe to center. Above are two variations (Ian Hamilton Collection).
|
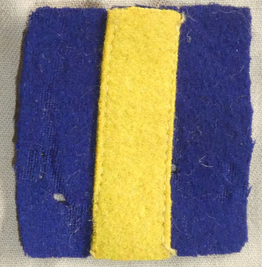
- Above: 3rd Battalion Otago Regiment - wore a Blue square with a vertical Yellow stripe to center (Ian Hamilton Collection).
|
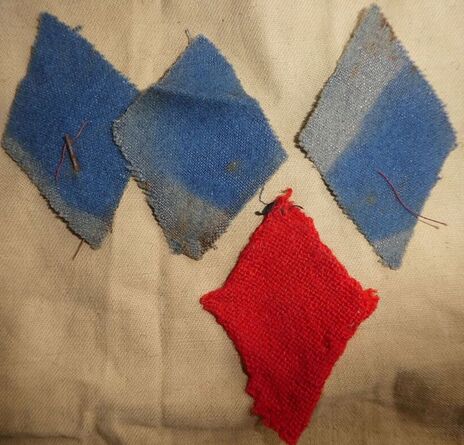
New Zealand Infantry Reserve
In July 1916 all Infantry Reserves were grouped as follows:
- 3rd (Reserve) Battalion - Auckland-Wellington Regiment - Wore a Blue diamond on each sleeve, below the shoulder strap.
- 3rd (Reserve) Battalion - Canterbury-Otago Regiment - Wore a Red diamond on each sleeve, below the shoulder strap.
- 5th (Reserve) Battalion - New Zealand Rifle Brigade - Wore a Black diamond on each sleeve, below the shoulder strap.
These were worn in the UK, were the reserve was stationed.
- Opposite: Coloured diamond patches to the 3rd (Reserve) Battalion - Auckland-Wellington Regiment (blue) and 3rd (Reserve) Battalion - Canterbury-Otago Regiment (Red) (Ian Hamilton Collection).
4th (Reserve) Battalion New Zealand Infantry - in March 1917, the above 3rd (Reserve) was re-titled the 4th (Reserve) Battalion. They wore the following:
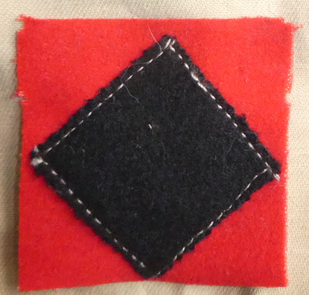
- Above: 4th (Reserve) Battalion Auckland Regiment - wore a Red square with a Black diamond to center (Ian Hamilton Collection).
|
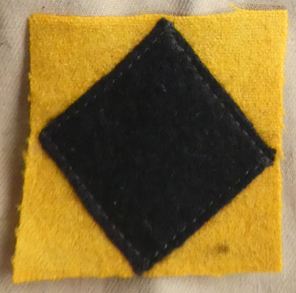
- Above: 4th (Reserve) Battalion Wellington Regiment - wore a Yellow square with a Black diamond to center (Ian Hamilton Collection).
|
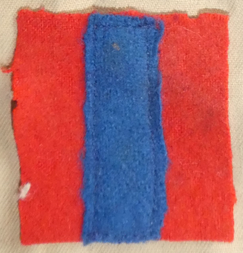
- Above: 4th (Reserve) Battalion Canterbury Regiment - wore a Red square with a vertical Blue stripe to center (Ian Hamilton Collection).
|
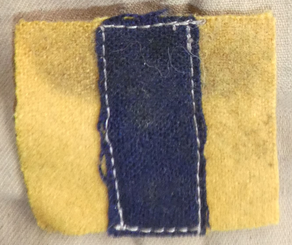
- Above: 4th (Reserve) Battalion Otago Regiment - wore a Yellow square with a vertical Blue stripe to center (Ian Hamilton Collection).
|
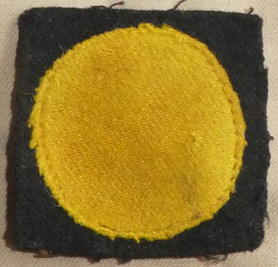
The New Zealand Light Trench Mortar Batteries - From April 1916, the New Zealand Light Trench Mortar Batteries were added to the Infantry Brigades. They were re-organised in September that year. On the 15th of October 1917, as per General Order 416, they were permitted to wear a formation patch. Batteries no. 1, no. 2 and no. 4 were permitted to wear it center back of tunic, just below the collar. Battery no. 3 wore it on the sleeves, 1 1/2 inches below the shoulder strap.
- Opposite: No. 1 New Zealand Light Trench Mortar Battery - Yellow circle on a Black square (Ian Hamilton Collection).
- Opposite: No. 1 New Zealand Light Trench Mortar Battery - Yellow circle on a Black square (Ian Hamilton Collection).
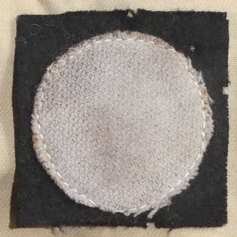
- Above: No. 2 New Zealand Light Trench Mortar Battery - Grey circle on a Black square (Ian Hamilton Collection).
|
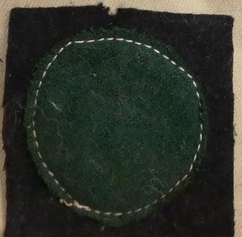
- Above: No. 3 New Zealand Light Trench Mortar Battery - Green circle on a Black square (Ian Hamilton Collection).
|
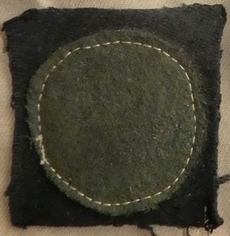
- Above: No. 3 New Zealand Light Trench Mortar Battery - Variation in colour (Ian Hamilton Collection).
|
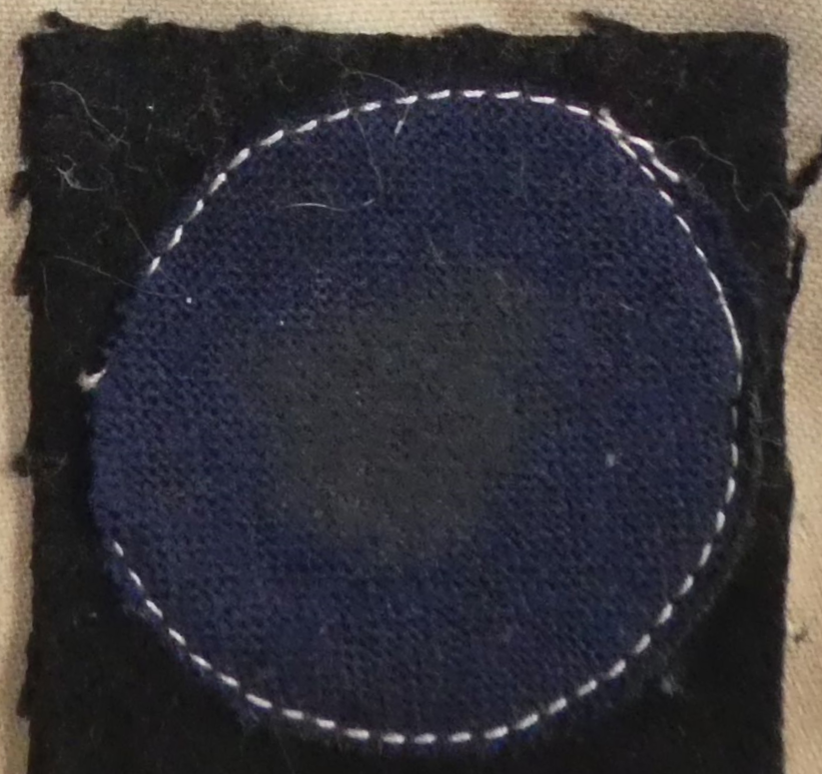
- Above: No. 4 New Zealand Light Trench Mortar Battery - Blue circle on a Black square (Ian Hamilton Collection).
|
Pacific Battalion Formation Patches of WW2
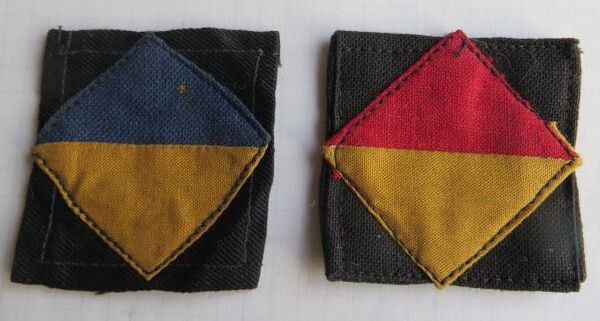
A system of distinguishing colour patches were worn by the 3rd NZ Division of the 2NZEF in the pacific theater of war. They were attached to the puggaree and worn on the right hand side of the Lemon Squeezer.
Initial patches were WW1 like, and made from felt. But due to high humidity, this did not last and cotton material was later used to fabricate them, which lasted longer.
Battalion colours were as follows:
- 29th Battalion - Red Square on Black (see below).
- 30th Battalion - Yellow Square on Black.
- 34th Battalion (opposite - pictured left) - Blue/Yellow Square on Black.
- 35th Battalion (above - pictured right) - Red/Yellow Square on Black.
- 36th Battalion - Yellow and Black Square, halved (see below).
- 37th Battalion Blue/Red Square on Black.
The two patches I have pictured are roughly 45mm by 45mm.
The 3rd Division of the 2NZEF was operational from October 1942 to its disbandment in October 1944. Its members were either sent back to NZ or used to reinforce the 2nd Division fighting in Italy.
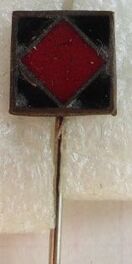
- Above: A association pin to the 29th Battalion, with Red Square on Black. Roughly 10mm by 10mm in size, in enamel and brass, with a long pin to back. No maker mark.
|
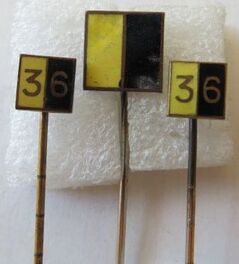
- Above: A set of association pin to the 36th Battalion, with Yellow and Black square. The small are roughly 7mm by 7mm, while the larger is 10mm by 10mm in size. All are enamel and brass, with a long pin to back. No maker mark.
|
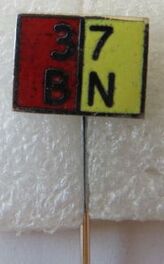
- Above: A unknown association pin. It came will a group of other New Zealand pins, but as you can see, is not the correct shape or colours for the 37th Battalion as mentioned in the books. Chromed brass, with enamel to center. Long pin to back, with no maker mark. 12mm by 9mm.
|
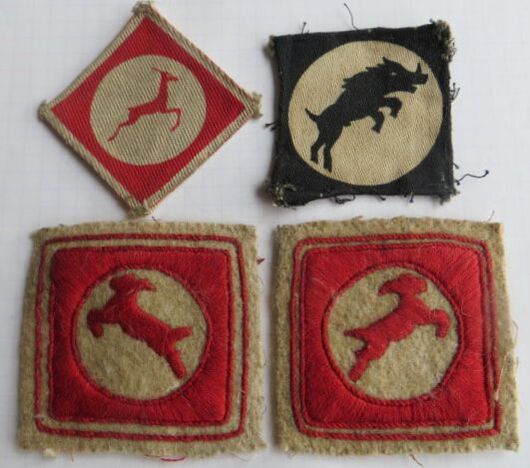
The 2nd Division of the 2NZEF formed to Divisional size with the group forces sent from New Zealand. These groups were called "Echelons", with the 1st Echelon entering camp in October 1939, and left New Zealand on the 5th of Jan, arriving in Egypt on the 12th of Feb 1940. The 2nd Echelon was diverted to the United Kingdom, while at sea, due to Italy's entry into the war. It arrived on the 16th of June 1940.
The 3rd Echelon reached Egypt on the 27th of October 1940.
The 2nd Division saw action in Greece, Crete, the Western Desert and Italy.
It was part of:
- British 8th Army
- British XIII Corps - its formation patch is pictured top left (printed version of a leaping Gazelle) and bottom row (embroidered versions - note the Gazelles were worn opposing on either shoulder).
- British XXX Corps - its formation patch is pictured top right (printed version of a leaping Boar).
British Pattern 1937 Webbed Belt
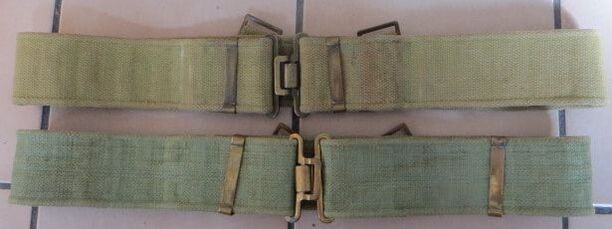
- Opposite: A pair of 1937 Pattern British webbed Army belts. These were adopted by the New Zealand Army during WW2, and were supplied by British and also Canadian firms. You can get a mixture of makers, marks and dates (with some of the brass fittings being dated), with the Canadian marked with a "C" and a arrow or date. They were issued in the top light khaki Green colour, but due to New Zealand later involvement in the Pacific, as the war progressed, most New Zealand belt were coloured with a "Jungle Green" blanco. This means the original coloured belts are quit rare in New Zealand. These belts were still being issued to members of the RNZIR and RNZA as they were being deployed for Vietnam. I have a named belt to 556153 Gnr Vivian Tawhiwhi Brown who was part of 161 Battery, RNZA, and served No. 3 Gun circa 1970.
The New Zealand Regiment
|
The 1st Battalion of the New Zealand Regiment was formed on the 9th of Jan 1947.
It was initially a single Infantry regiment on paper only, and supported by the 11 Territorial Force Regiments which are mentioned above. In the same year, battalions of J Force (New Zealand contribution to the Occupation of Japan) were added as the 2nd and 3rd Battalion of the New Zealand Regiment. When they returned to New Zealand in 1948, the 2nd and 3rd Battalions of the NZR were disbanded. Regular Force unattached Officers and Men were eventual attached to the New Zealand Regiment. Also in 1948 the TF regiments were reduced to 9, with the the Taranaki and Wellington West Coast Regiments merging together, alongside the Otago and Southland Regiments. On the 2nd of August 1957, authorisation was given to raise the 1st Regular Regiment. They would be New Zealand's land force commitment to the British Commonwealth Far East Reserve. They would be deployed in October 1957 to Malaya. Motto: KURA TAKAHI PUNI (We are ready - adopted 1957 R17187868 AALI W3508 7291 Archives NZ) |
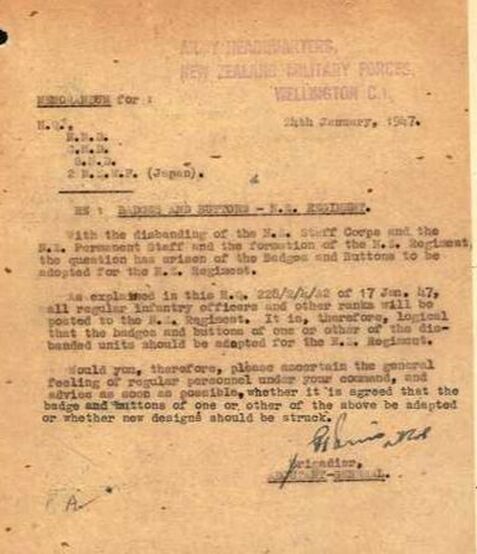
|
- Above Right: A memo dated the 24th of Jan 1947, indicating that all Officers of the NZ Staff and NZ Permanent were to be trasnferred to the New Zealand Regiment, and it was felt that a emblem from one or both of these units be incorporated into the new Regiments insignia (Archive NZ "Badges & Buttons - New Zealand Regiment - FL48958515)
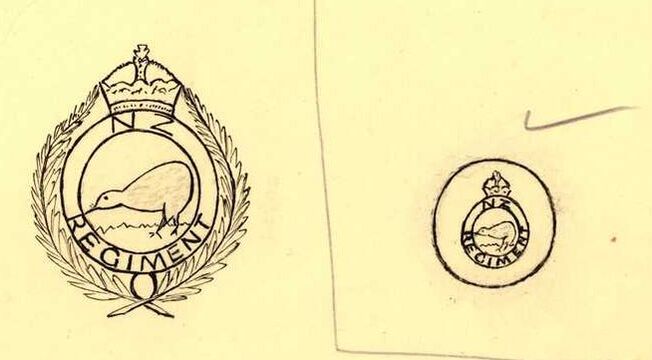
- Opposite & Above: A survey was done of the Military District Commanders in Feb 1947, about what the New Zealand Regiments insignia should be. Some wrote, and discribed, while others drew a picture. The above is from the Southern Military District (S.M.D), while the other is from the Central Militray (C.M.D - Archive NZ "Badges & Buttons - New Zealand Regiment - FL48958600 & FL48958709)
|
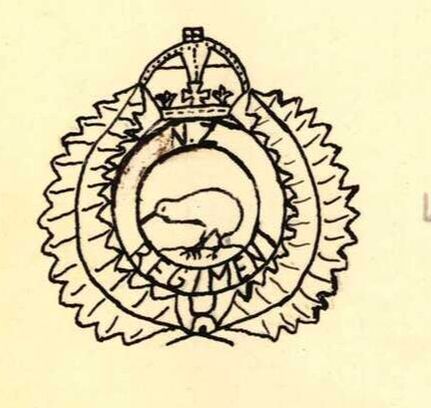
|
New Zealand Regiment Kings Crown - 1st Type Officers
A Mr J. S. Berry who prepared Post Office Stamps for Bradbury, Wilkinson & Royal Mint engravers was asked to produce a proper drawing for the sum of £5.5.0 on the 14th of March 1947 in the UK (Archive NZ "Badges & Buttons - New Zealand Regiment - FL48958693)
The 1st type badge was approved on the 17th of July 1947 by the Army Board, and was "combining features from both the NZ Staff Corps and NZ Permanent Staff badges" (Archive NZ "Badges & Buttons - New Zealand Regiment - FL48958484)
The 1st type badge was approved on the 17th of July 1947 by the Army Board, and was "combining features from both the NZ Staff Corps and NZ Permanent Staff badges" (Archive NZ "Badges & Buttons - New Zealand Regiment - FL48958484)
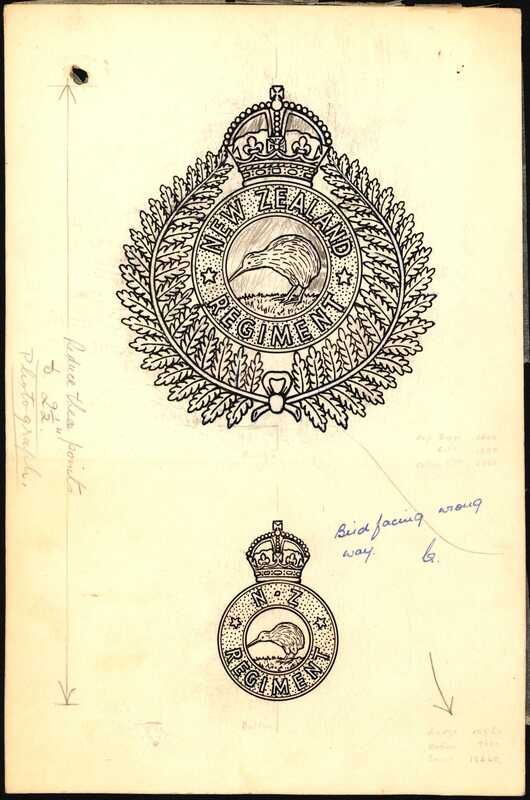
|

- Opposite: A design drawing of the Cap badge and Button center for the New Zealand Regiment. Note the comment in pen "Bird facing wrong way". This controversy would dog the Regiments' badge for many years, and would not be resolved until 1965, with the introduction of the Royal NZ Infantry Regiment AA badge. In 1947, they were given advice that Birds on badges, face to the left (when worn) (Archive NZ - "Badges & Buttons - New Zealand Regiment" - FL48958612).
|
- Above Right: A NZ Army memo regarding the production by J R Gaunt & Son Ltd of the Gilt fired badges for the Regiment. Note the price for Cap at "3/8d" each and "7/-" the Collar badges - a pair. The memo is dated March 1948, and states that there is a 9 month delay before badges arrive, making them as early as late 1948/early 1949.
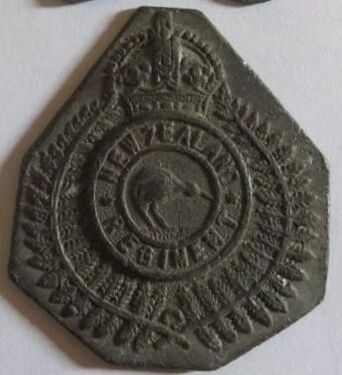
- Opposite: A very rare example of a lead sample, which has been cast from the original dies for the 1st type New Zealand Regiment Badge (confirmed as it has been measured agains the below badges).
The Army had a process with badge manufactuerers, whereby when the dies were "cut" with the impression of the new badge (taken from photo's and drawings like the above by the "die sinkers"), they asked that the manufactuerer cast a lead sample from the die, BEFORE the die was hardened.
These samples were then examined, inspected and approved by the Army, and only then, were the dies then subjected to heat treatment and the metal hardening process, so that it could stamp out brass and aluminium materials to make the finished badge.
This was NOT a quick process, and there are documents in the file (Archive NZ "Badges & Buttons - New Zealand Regiment") which shows that the Army went back and forth with the manufacterer on a number of occations, and that samples were "rejected" if previous alterations had not been made to the die, or faults could still be seen.
I imagine that this took even longer, with the likes of J R Gaunt Ltd, or Firmin & Sons, as samples would have to be sent back and forth from the UK to New Zealand.
|
- Above: A 1st type, gilt fired brass, solid backed Cap badge to the New Zealand Regiment.Based on the New Zealand Staff Cap badge design. It has two long looped to back. No maker mark, but likely J R GAUNT & SONS Ltd. Size 35mm by 31.5mm.
|
- Above: A matching 1st type, opposing gilt fired brass, solid backed Collar badges to the New Zealand Regiment. These collars are worn with the Kiwi facing inwards. They are the same size as the opposite Cap, but have two short D shaped looped lugs to back. They are not maker marked, but are likely J R GAUNT & SONS Ltd. Size 35mm by 31.5mm.
|

- Above: A side-on back shot of the three above badges to show the difference between the Cap and the Collar badges in terms of lug size. Otherwise they are the same size and form to front.
- Opposite: A rare Stirling Silver Sweethearts badge to the New Zealand Regiment. Same size as the above badges, it is not hallmarked, and has a brooch fitting to back with a ball catch. Size 35mm by 31.5mm. |
|
New Zealand Regiment Kings Crown - 1st Type Other Ranks
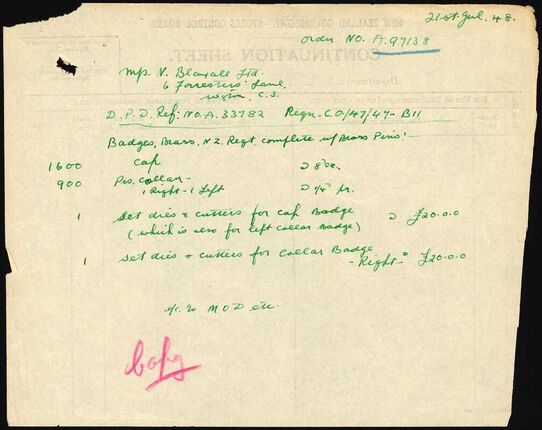
At some stage in late 1948/1949 The New Zealand Army looked to also furnish the Regiment with a Other Ranks badge. There was also some dissatisfaction with the size of the existing Officers badge, which had been described as "too small for a Cap badge" but "too large for a Collar".
The local firm of N Blaxall Ltd of Wellington, were engaged as early as July 1948, to produce a gilt brass "large" Other Ranks badge.
Opposite shows the Order.No. A97138 to supply"
- 1600 Cap at 2/8d each
- 900 pairs of Collar Right & Left - at 2 1/2d a pair
1 set of Dies & Cutters for Cap badge (also cuts Left Collar) £20
1 set of Dies and Cutters for Collar badge (Right) £20."
Badges were duely produced and see below for examples. It was interesting to note that in August 1951, the Army cancelled all further orders from the firm as the dies and cutters (which are usually held by the MOD) had not been forwarded to MOD Stores. This meant no further badges of this type were made.
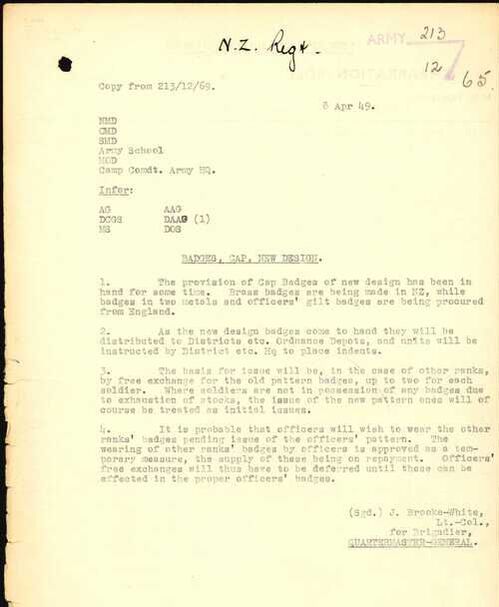
|
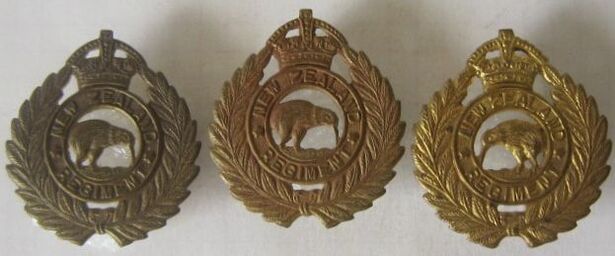
- Above: Referred to as the 'rough strike" these Cap and Collars were made by N Blaxall Ltd, of Wellington for the New Zealand Regiment from 1948. Ranging in tones and colours, all the Cap and Collar badges (when worn) are the same size. There is also no difference in lug length to back either. All have a pair of copper wire looped lugs to back, with no maker mark. Size 43.5mm by 43.5mm.
- Opposite: An Army memo dated the 8th of April 1949, which indicates that supplies of the "new" larger badge are now avaliable to all, and that in the absense of a "Officers" quality badges, that Officers are permitted to wear the new Other Ranks larger badge until a "Officers badge is available (Archive NZ "Badges & Buttons - New Zealand Regiment" - FL48958683).
|
New Zealand Regiment Kings Crown - 2nd Type Other Ranks
From 1950, the New Zealand Regiment sort a continuius souce of badges. They were well aware of the huge lag in time and costs when engaging overseas suppliers, so instead turned to local manufacturers, but with mixed results.
- 20th Dec 1951 - NZ Army engaged Avon Plate Works (APW) - Cylde St, Whangarei - to make the NZ Regiment Other Ranks Brass badge. After cutting the dies, and going back and forth with the Army with lead samples, APW announce that they were withdrawing themselves from the contract on the 9th of April 1952, due to lack of staff and also lost of their crutial die sinker.
- 20th Dec 1951 - NZ Army engaged Avon Plate Works (APW) - Cylde St, Whangarei - to make the NZ Regiment Other Ranks Brass badge. After cutting the dies, and going back and forth with the Army with lead samples, APW announce that they were withdrawing themselves from the contract on the 9th of April 1952, due to lack of staff and also lost of their crutial die sinker.
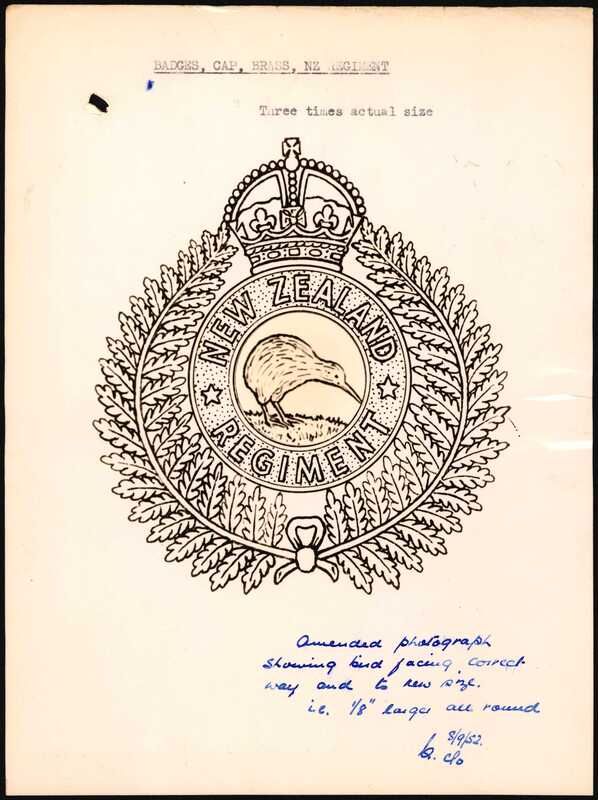
|
- Above: A single piece, gilt brass other ranks Cap badge to the New Zealand Regiment. Two copper wire looped lugs to back with the maker mark of "M & K LTD, WGTN. N.Z." for Mayer and Kean Limited, Wellington New Zealand. Size 43mm by 39.2mm.
- Opposite: A design document of New Zealand Regiment Cap badge, "enlarged" and dated 8th of Sept 1952 (Archive NZ "Badges & Buttons - New Zealand Regiment" - FL48958631). |
- 9th of Sept 1952 - NZ Army engages Mayer & Kean Ltd, 4 Willis St, Wellington, to make a larger Other Ranks Cap badge, by increasing the size of exiting held designs as per above diagram (I presume from the smaller NZ Staff designed NZ Regiment badge size - "Badges & Buttons - New Zealand Regiment" - FL48958548)
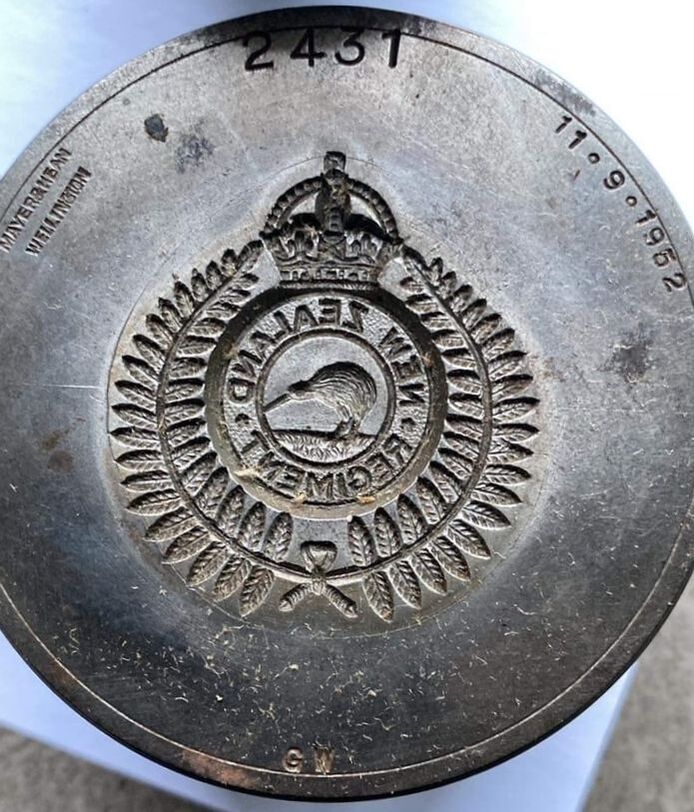
|
- Opposite & Above: A complete set of dies and cutters for the above large Mayer & Kean Ltd made gilt Brass New Zealand Regiment Cap badge, with Kings crown. Note, above left the die is stamped "MAYER&KEAN, WELLINGTON" to front, the number "2431" and the date "11.9.1952", which corrisponds as to when the Army engaged them to make the badges. At the base front is the letters GW, which we believe is the initials for the Die Sinker "George Whitehouse" who passed away at work in 1970 at Mayer & Kean (by then called Mayer & Toye - B Jones Collection).
|
- 19th of March 1953 - 18 firms have been invited to tender by the New Zealand Army for a the making of a Gilt New Zealand Regiment badge.
Prior Importing & Distribution Co. Ltd are singled out (who are the principles in NZ for Australian Stokes & Sons Ltd of Melbourne) responded, along with a F E Gichard & Son of Mt Eden, Auckland (Archive NZ "Badges & Buttons - New Zealand Regiment" - FL48958652)
- 6th of May 1953 - Army raised the issue of whether a Collar badges should be provisioned for. At this stage they decided to still focus on delivering the large Brass Other Ranks badge and also a Gilt and Enamel Officers badge.
- 23rd of May 1953 - A 1" square piece of scarlet cloth is discussed to be worn behind the Other Ranks Cap badge (Archive NZ - Badges & Buttons - New Zealand Regiment FL48958587).
- Opposite: A rare, three piece, gilt brass, silver, enamel with Red felt backing Officers Cap badge to the New Zealand Regiment. Two long looped copper lugs to back, and maker marked in raised letters to back to "J R GAUNT LONDON".
These badges are mentioned throught the file held by Archive NZ, but only indirectly, in that they are available to be worn, but there are no memo's from suppliers stating they made them, when or in what quantities.
- 11th of June 1953, Prior Importing & Distribution Co. Ltd (who are the principles in NZ for Stokes & Sons Ltd) stated that Stokes would be prepared to make 6 gilt sample Cap badge for the New Zealand Regiment in Gilt or "Gold" colour. The dies and cutters are sent from Trenthan in NZ, to Stokes & Sons in Australia, but upon their arrival, are found to be broken, in disrepair and not fitting Stokes' metal press. The NZ Army declined to proceed and asked that the dies and cutters be returned back to NZ (Archive NZ - Badges & Buttons - New Zealand Regiment FL48958461).
Note: The dies were not sent back, and this causes issues for the Army and later badge makers who wanted to base their design on these exisitng dies.
- 8th June 1954, the New Zealand Army accepts the quote from a Mr T. M. Dick, 12 Victoria St, Petone, Wellington on supplying badges for the New Zealand Regiment at "7/8d each, 14/- per pair, and £105 and £140 per set respectively for the badges and dies and cutters" (Archive NZ - Badges & Buttons - New Zealand Regiment FL48958459).
The Army and Mr Dick then over many many months, create and design the dies of thebadge and produce lead samples from them. None of which seem satisfactory to the Army. By the 1st of April 1955, Mr Dick is awaiting for the return of the old dies, which Prior Importing & Distribution Co Ltd had (principles for Stokes & Sons in NZ), and which had been sent to Australia in June 1953.
- 8th April 1957 - A lead sample which Mr Dick has produced from a die is aproved by the NZ Army Board and 2 sample brass badges are asked to be made (Archive NZ - Badges & Buttons - New Zealand Regiment FL48958711)
- 8th July 1957, Mr Dick states that "120 x Cap Gilt, silver, N.Z. Regt" will be ready at a cost of £28 (Archive NZ - Badges & Buttons - New Zealand Regiment FL48958468) - These were to be made for a special "Malaya Force" which was about to depart New Zealand at the time.
- 23rd July 1957, "2000" Other Ranks Cap badges are ordered from Mayer & Kean Ltd, of Wellington (Archive NZ - Badges & Buttons - New Zealand Regiment FL48958467).
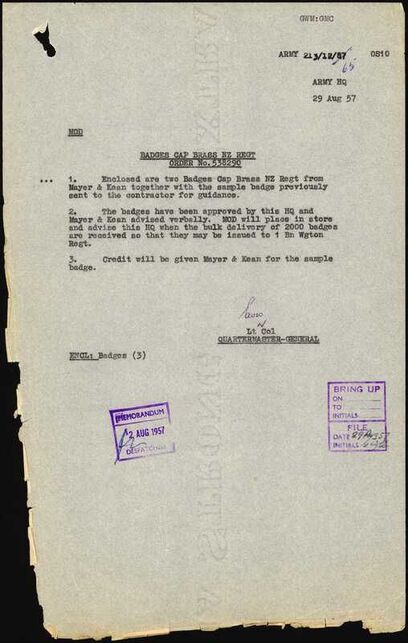
|
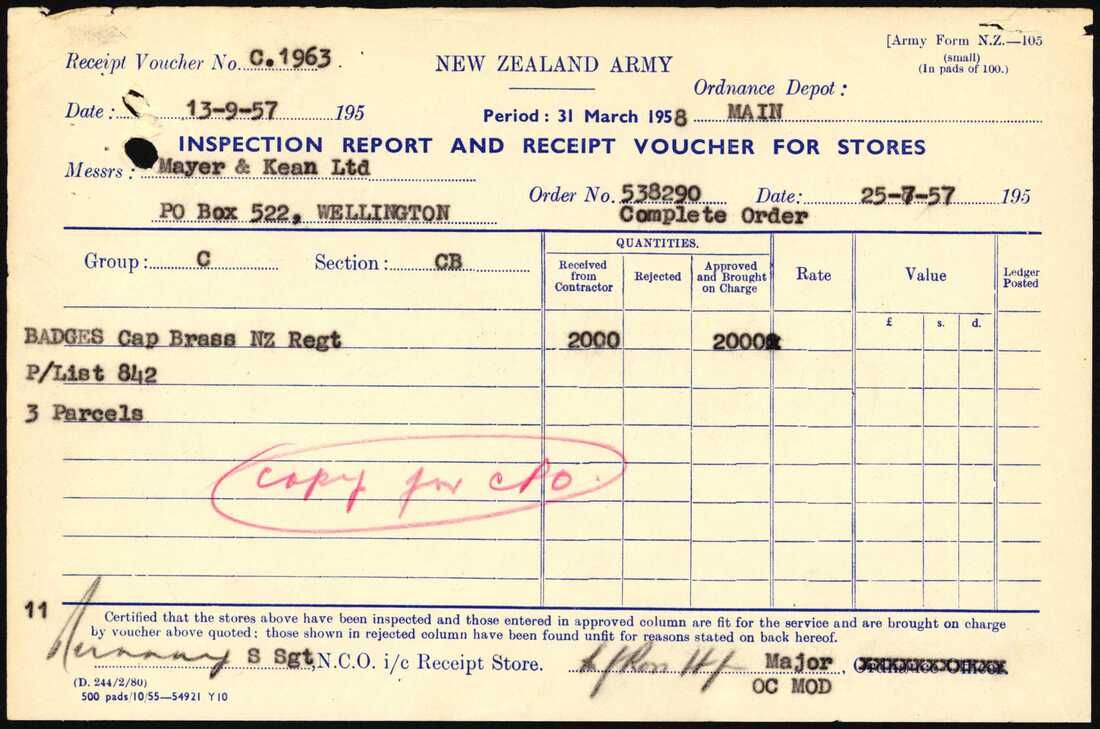
- Opposite & Above: As late as 29th of August 1957, the New Zealand Army was still ordering the Brass (see above), Other Ranks Cap badge from their supplier, Mayer & Kean Ltd, of Wellington (Archive NZ "Badges & Buttons - New Zealand Regiment" - FL48958482 (left) & FL48958498 (above).
|
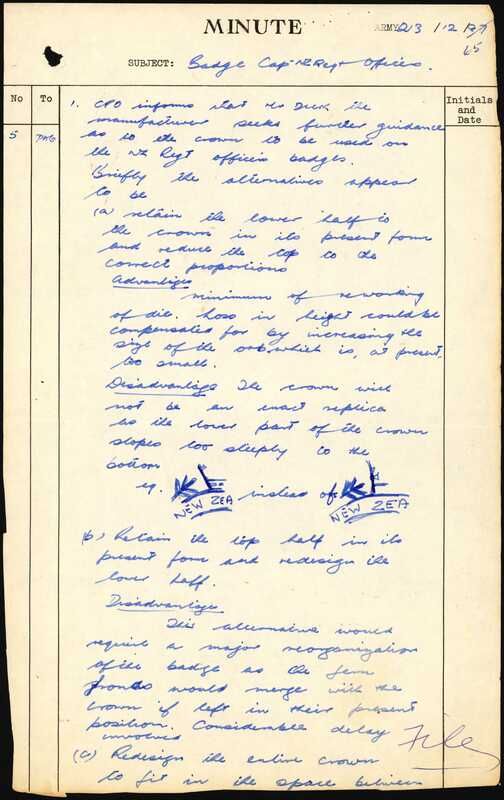
|
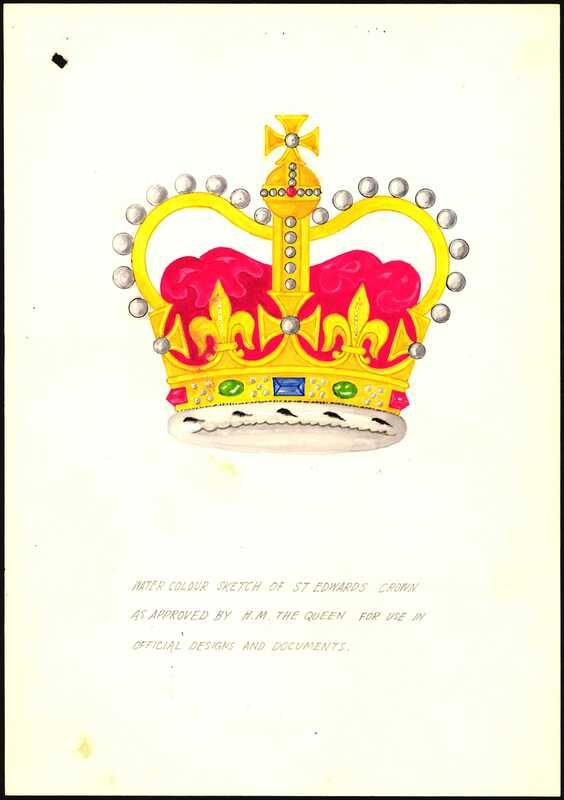
|
- Above Left & Right: Around late 1957 (sadly the date is not recorded), the NZ Army engaged Mr Trevor Malcom Dick, Die Sinker & Medalist, based in Petone, Wellington to update the Officers badge for the New Zealand Regiment, with the Queens crown, as per the above superb drawing. As per the hand-written memo, there were issues around incorporating the crown into the exisiting design, fern wreath and circular banner (Archive NZ "Badges & Buttons - New Zealand Regiment" - FL48958500 (above left) & FL48958483 (above right)
- In a memo dated the 17th Nov 1958 (when filed) it was recommended that:
"8. In view of the incorrect detail and poor quality of the present badge, it is recommended that:
(a). Approval be given for the immediate cancellation of any further production of the badge by the local firm (Mr T M Dick?).
(b). That appropriate steps be taken to place an order with a British firm for a new badge, the drawing of for which the CE has undertaken to prepare" (Archive NZ "Badges & Buttons - New Zealand Regiment" - FL48958418 & FL48958496).
Officers Cap Badge New Zealand Regiment - Queens Crown
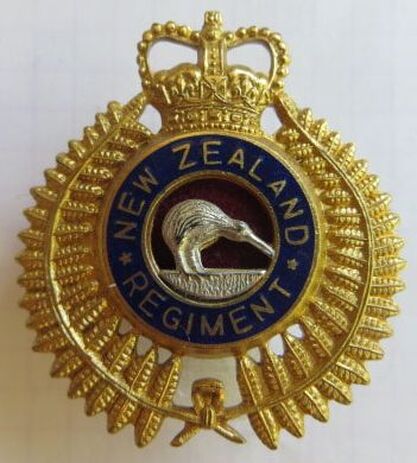
- Above: A gilt fired, Officers Queens Crown, silver and enamel Cap badge to the New Zealand Regiment. Two pressed type looped lugs to back, along with a piece of dark red felt backing. No maker mark and size 43mm by 39mm.
|
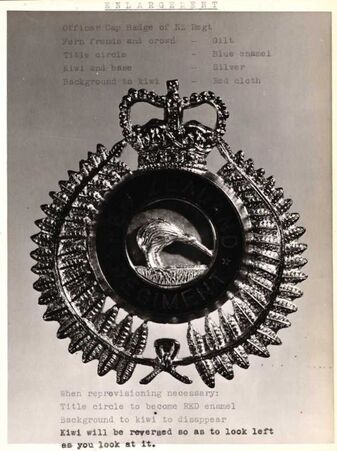
- Above: A early (1958?) photograph of the proposed Officers Badge for the New Zealand Regiment, with Queens crown (Archive NZ "Badges & Buttons - New Zealand Regiment" - FL48958534).
|
Interesting to note.
- The crown was sugested to be based on the the exisiting R.N.Z.D.C Cap badge crown (Archive NZ "Badges & Buttons - New Zealand Regiment" - FL48958576).
- The Officers badge, though made with a Blue enamel circle to center, should have a "Red" enamel circle (Red or Scarlet being the colour of the Infantry). Existing badges were to be "washed" or " wasted" out (i.e. issued/used ) and then any new badges were to have the Red enamel center. This never happened in great quantities, with the blue enamel centered badges only seen now-a-days (Archive NZ "Badges & Buttons - New Zealand Regiment" - FL48958430).
On the 21st of August 1958, a NZ Army memo states that the new Officers pattern of gilt brass and Silver Cap badge to the New Zealand Regiment was available to be issued to Officers. The Officers were able to exchange their exisiting gilt brass Kings crowned badge for the new, on the basis of one for one (Archive NZ entitled "Badges & Buttons - New Zealand Regiment" - FL48958623).
Other Ranks Cap Badge New Zealand Regiment - Queens Crown
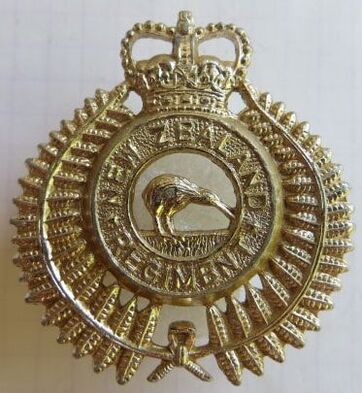
Army memo dated the 11th of Sept 1958 indicates 4000 Other ranks anodised aluminium cap badge are urgently needed by New Zealand Soldiers who have been deployed to Malaya (and their reinforcements). It is sugested that the "dies and cutters for the Officers badge are available in N.Z. and M.O.D Trentham will forward these to you. It is anticipated that these will be suitable for processing the other ranks badge". Also, the other ranks badge will be "same as the officers except for no superimposed silver Kiwi and no enamel" (Archive NZ entitled "Badges & Buttons - New Zealand Regiment" - FL48958702)
- Firmin & Sons Ltd quoted
- 4000 Other Ranks at 9 1/2d each
- Officers 1 s 3 1/2d each
If dies/cutters were not suitable - £45 - for new dies and cutters
- J R Gaunt & Son Ltd quoted
- 4000 Other Ranks at 9d each
- Officers 1 s 3d each
If dies/cutters were not suitable - £50 - for new dies and cutters
(Archive NZ entitled "Badges & Buttons - New Zealand Regiment" - FL48958702)
- Above Opposite: A other ranks, Queens Crown silver tone, anodised aluminium Cap badge to the New Zealand Regiment. Single piece, it has two looped lugs to back. No maker mark and size 43mm by 39mm.
On the 9th of October 1958, a order for the Queens Crown, New Zealand Regiment Other Ranks anodised aluminium Cap badge was placed with Gaunt of London. The initial order was for 4000 badges at 9d each (Archive NZ entitled "Badges & Buttons - New Zealand Regiment" - FL48958550).
A New Zealand Army memo, dated the 10th of Sept 1959, indicates the below anodised aluminium (AA) badge was ready for distribution, and that they are to be exchanged, one for one for the exisiting Brass badges, which I presume refers to the above Kings crowned Cap badge (Archive NZ entitled "Badges & Buttons - New Zealand Regiment" - FL48958458)
Collar Badge New Zealand Regiment
As far back as the 4th of Sept 1956, there was talk of Collar badges being made and issued to the Officers, which was same design as the Kings crown Cap badge but 2/3rds the size, and opposing, so a Left and a Right facing Kiwi (Archive NZ "Badges & Buttons - New Zealand Regiment" - FL48958419). But in a memo dated the 4th of Nov 1958, it was noted that NZ Army Stores held no Collar badges for either Officer or Other Ranks (Archive NZ "Badges & Buttons - New Zealand Regiment" - FL48958453)
With the revision of the Cap badge for both Officers and Other ranks, to include a Queens crown, the Army revisted the need to also have a Collar badge for the New Zealand Regiment.
With the revision of the Cap badge for both Officers and Other ranks, to include a Queens crown, the Army revisted the need to also have a Collar badge for the New Zealand Regiment.
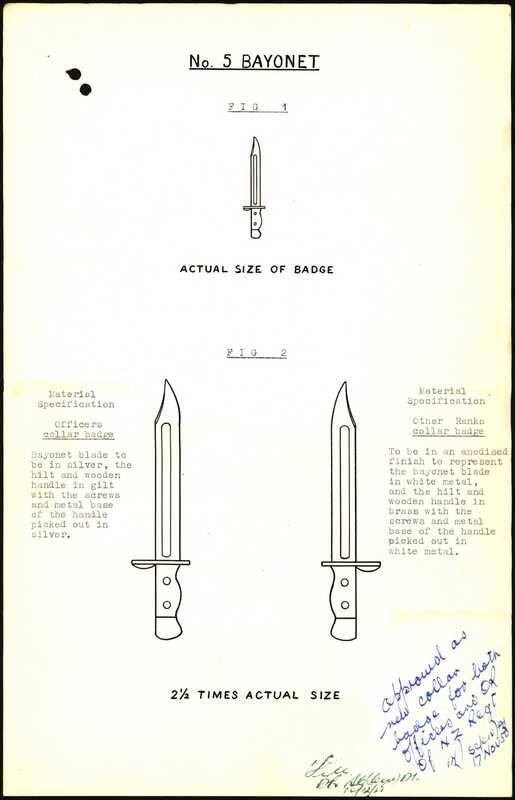
- Above: A design document showing the composition and approval of the Officers and Other Ranks collar badges (Archive NZ entitled "Badges & Buttons - New Zealand Regiment" - FL48958534).
|
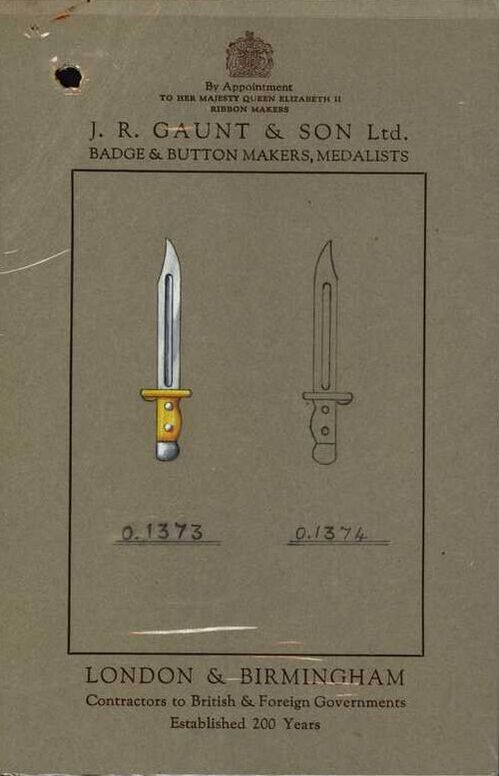
- Above: A J R Gaunt sample card showing the New Zealand regiment collar badges and their Design numbers (Archive NZ entitled "Badges & Buttons - New Zealand Regiment" - FL48958436).
|
The Collar badges were approved on the 29th of January 1959, and worn with the new Queens crown New Zealand Regiment Cap badge. It represents a No. 5 Bayonet. Gaunt designed these (though Fermin also submitted a design and quote - they were apparently cheaper on the Officers collars, but Gaunt was cheaper on the Other Ranks - Gaunt 10/6s Officer - pair, 1/7s Other Ranks - pair), with a Gaunt Design number of "0.1373/4" (per Army memo 213/12/65/086 - (Archive NZ entitled "Badges & Buttons - New Zealand Regiment" - FL48958511).
|
- Above: A opposing pair of Officers gilt fired brass and Silver plate Collar badges to the Royal New Zealand Infantry Regiment. These are two piece, with separate handle to the bayonet. Two pins to back (to be used with clutches), no maker mark. Size 44mm by 10.5mm.
|
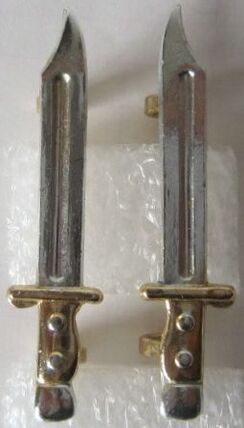
- Above: A opposing pair of anodised aluminium Collar badges to the Royal New Zealand Infantry Regiment. These are two tone, with aluminium looped lugs to back. Maker marked in raised letters to "J R GAUNT LONDON". Size 43.5mm by 10mm.
|
- Above: A opposing pair of two tone metal Collar badges to the Royal New Zealand Infantry Regiment. These have pins to back to be used with clutches. No maker mark, but someone has engraved "L" and "R" to the back of each for Left and Right. Size 42mm by 10mm.
|
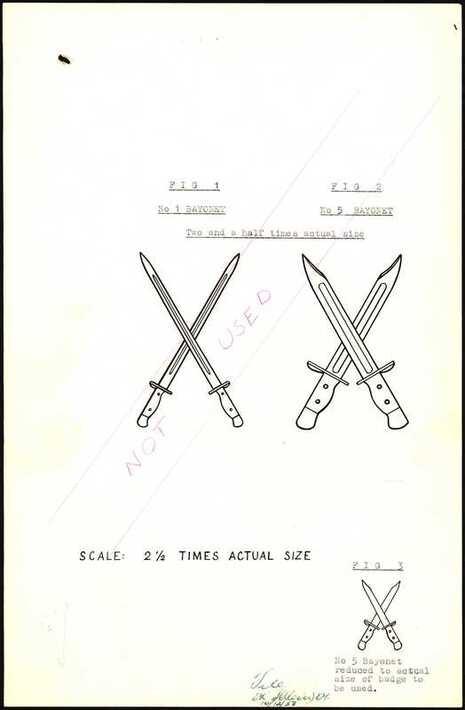
|
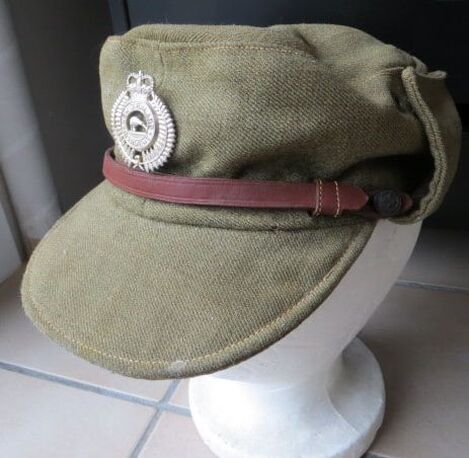
- Above: In 1954 the New Zealand Army adopted the Cap Battledress or Cap BD (also referred to as the Ski Cap) as a headdress. It was not popular, and had a short life. Above is a somewhat sun-bleached exmaple, with a Queens crown anodised aluminium Cap badge to the New Zealand Regiment to front.
- Opposite: A set of rejected design for the New Zealand Regiment Collar badge proposed in late 1958 (Archive NZ "Badges & Buttons - New Zealand Regiment" - FL48958694). |
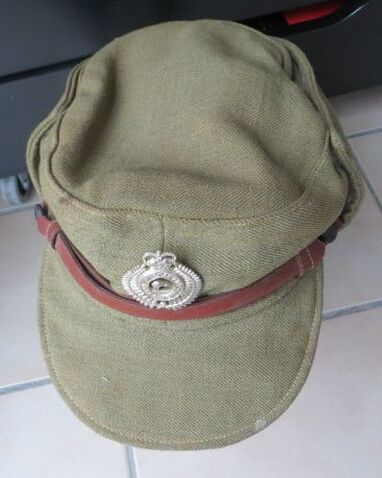
- Above: A top view of the same hat, with leather chin-strap and black plastic "New Zealand Forces" 4 star buttons to either side.
|
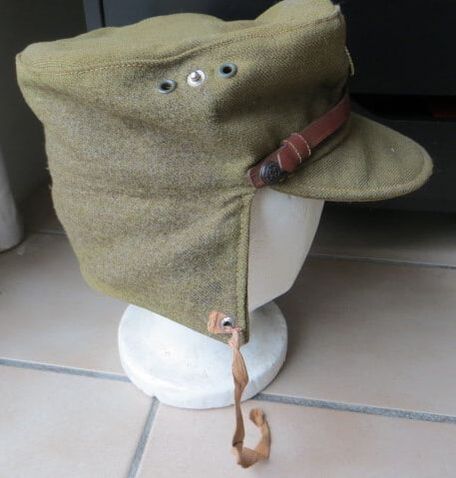
- Opposite: Same hat, with the ear flaps down. They are held in place with two poppers either side. Note the cloth ribbon chin strap which is on either side.
|
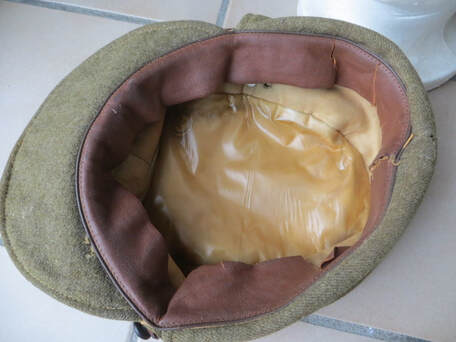
- Oppsoite: The interior of the hat, with a cellulite top liner and thin leather sweatband. No maker mark, but there is a paper size label of 7 1/2.
In January of 1964, a reorganisation of the Infantry was announced, and on the 1st of April that year, all existing Infantry Territorial Formations of the New Zealand Army became Battalions of the Royal New Zealand Infantry Regiment as follows:
1 RNZIR – 1st Battalion, Royal New Zealand Infantry Regiment (Regular)
2 RNZIR – 2nd Battalion, (Canterbury, and Nelson-Marlborough and West Coast), Royal New Zealand Infantry Regiment
3 RNZIR – 3rd Battalion, (Auckland (Countess of Ranfurly's Own) and Northland), Royal New Zealand Infantry Regiment
4 RNZIR – 4th Battalion, (Otago and Southland), Royal New Zealand Infantry Regiment
5 RNZIR – 5th Battalion, (Wellington West Coast and Taranaki), Royal New Zealand Infantry Regiment
6 RNZIR – 6th Battalion, (Hauraki), Royal New Zealand Infantry Regiment
7 RNZIR – 7th Battalion, (Wellington (City of Wellington's Own) and Hawke's Bay), Royal New Zealand Infantry Regiment
This meant the change of badge too.
- Opposite: A faded Newspaper article, sadly I don't know from which paper it was taken, but in the "Press" Newspaper, the same word for word article was published on the 15th of Feb 1964 - Vol CIII, Issue 303366, page 12. The Press article does not have the photo (or this is not captured in Paperpast), nor the same heading, but likely dates the opposite article to about this time.
"Soldiers of the Royal New Zealand Infantry Regiment are to be issued with a distinctive cap badge after the reorganisation of New Zealand infantry regiments in January this year. The badge was recently approved by the ColoneL-in-Chief of the newly formed regiment, Her Majesty the Queen, whose approval appears in the drawing of the badge above, Selected - from several designs offered for consideration to the' colonels of infantry regiments throughout New Zealand, the badge makes use of national emblems, and the traditions established by New Zealand soldiers for more than 50 years.
In the centre of the badge stands a silver kiwi which has been associated with badges of New Zealand infantry regiments for many years. The kiwi was also the divisional sign of the 3rd and 6th New Zealand Divisions during World War 11. Behind the kiwi is the traditional colour of the infantry—scarlet.
At the base of the cap badge the word “Onward” has a significant meaning. It was, until recently, the motto of the crest of the New Zealand Government. This motto was worn on the cap badge by all soldiers of the Second New Zealand Expeditionary Force in the last war. The fern fronds surrounding the oval of the badge are traditionally worn on New Zealand cap badges in place of the laurel wreath usually associated with British Army badges. The words “Royal New Zealand Infantry” (the regimental title), are backed by Garter blue. This colour was incorporated in the design of the badge to record the gracious approval of Her Majesty the Queen in granting the prefix “Royal” to the title of the regiment The badges are expected to be issued to serving soldiers in the Royal New Zealand Infantry Regiment in about 12 months."
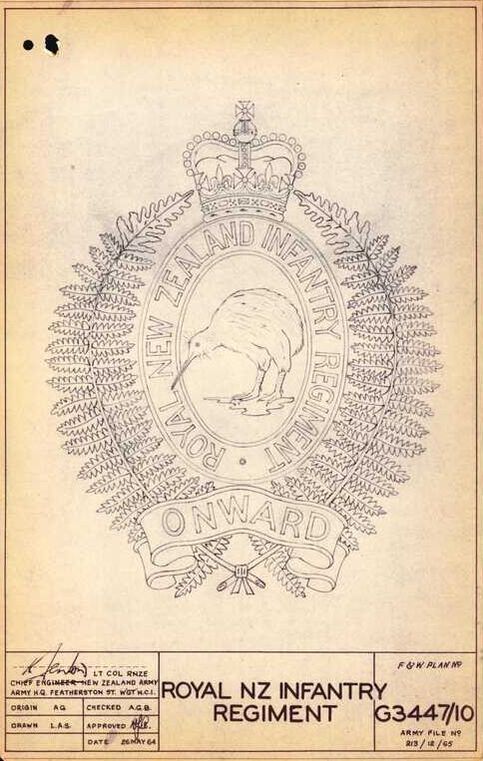
|
- Above: As per Army memo dated the 17th of Dec 1965, the new Royal New Zealand Infantry Regiment insignia was ready for issue. The document indicates that the AA or Anodised Aluminium insignia was to be given in the above quantities to each Regular Force (RF) Officer and Other Ranks, and each Terrritorial Force (TF) Officer and Other Ranks.
Ligne refers to button size (22 ligne =14mm, 27 ligne =16.8mm, 30 ligne =19mm, 40 ligne =25.4mm - Document from Archive NZ entitled "Badges & Buttons - New Zealand Regiment" - FL48958422). - Opposite: A superb "approved" design of the proposed Cap badge of the Royal New Zealand Infantry Regiment, dated 26th of May 1964 (from Archive NZ entitled "Badges & Buttons - New Zealand Regiment" - FL48958474) |
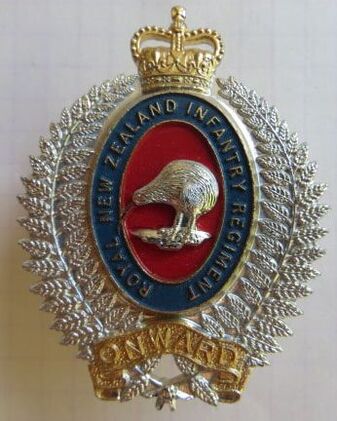
- Above: A 2 piece, 4 tone, anodised aluminium Cap badge to the Royal New Zealand Infantry Regiment (RNZIR). Long pins to back, to be used with clutches. No maker mark and size 49.5mm by 38mm. These early badges were very prone (and still are!) to breaking, with the long aluminium pins snapping off. It was noted at the time that a better means was needed to secure the badge to the hat.
|
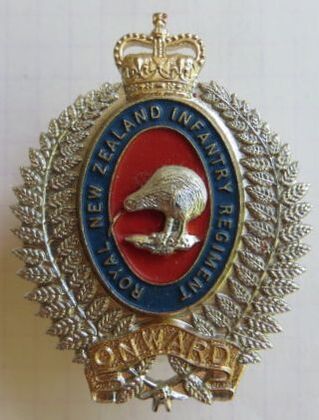
- Above: A 2 piece, 4 tone, anodised aluminium Cap badge to the Royal New Zealand Infantry Regiment (RNZIR). Two Aluminium looped lugs to back. They come either maker marked to "J R GAUNT BHAM" in raised letters to back, or not marked at all. Size 50mm by 47.5mm.
|
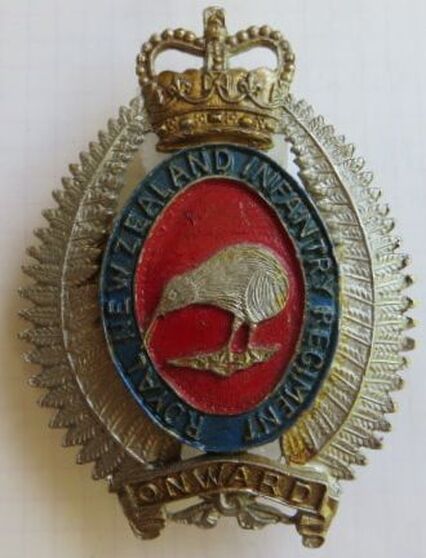
|
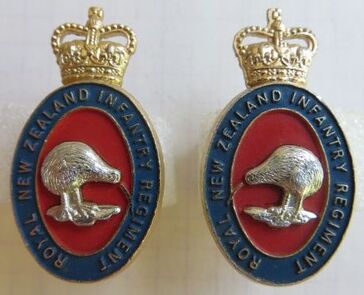
- Opposite: A cast metal and hand painted Helmet Plate Badge to the Royal New Zealand Infantry Regiment's Band. They wore these on the white Home Service Style British helmets. The badge has two looped lugs to back and is numbered "56" in paint to back. Roughly 81mm x 62mm
- Above: A pair of 2 piece anodised aluminium Collars badges to the Royal New Zealand Infantry Regiment. Note opposing Kiwi's to center. These collars are getting harder to find and are associated with the regiments service in Vietnam. They have two pin fittings to back, which are very prone to breaking, so finding a complete opposing set is getting nearly impossible. No maker mark and size 38mm by 20mm. |
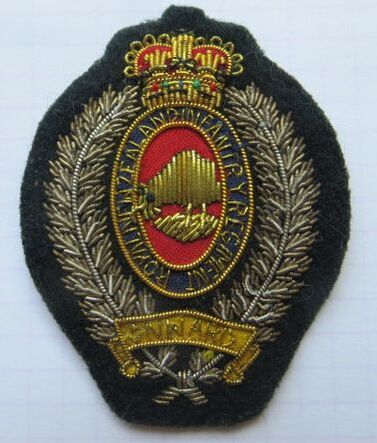
- Above: The current version of the Royal New Zealand Infantry Regiment's Cap badge, but in bullion for Officers, to be worn on a Beret. No maker mark to back.
|
|
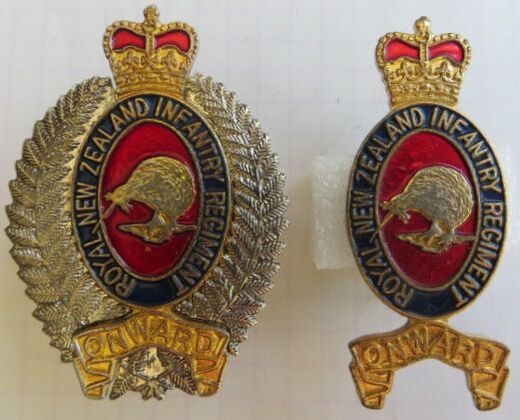
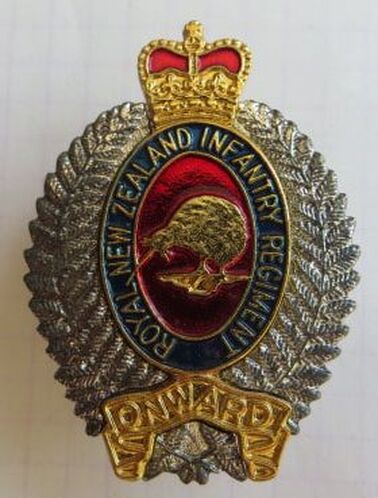
New Zealand Regiment - Buttons
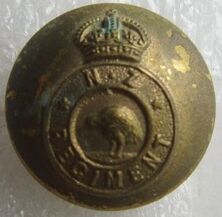
- Above & Opposite: At the same time as designing the Cap badge for the NZ Regiment in 1947, steps were also taken to have a button to match. On the 6th of May, 1948, Gaunt were enganged to make the dies and just one size, a Ligne 30 or 19mm Button. At the time they were experimenting with Anodised Aluminium, a new finish at the time, and the NZ Regiment requested its new buttons be in in this material. It looks like this never happened (till later) and they were instead made in Gilt brass as above. Fixed shank to back and marked "GAUNT LONDON".
|
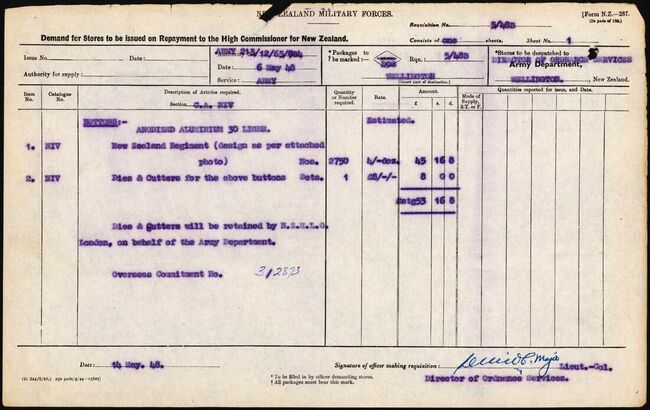
|
|
|
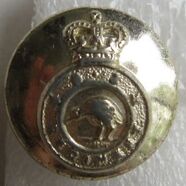
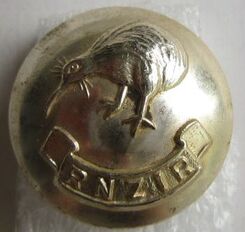
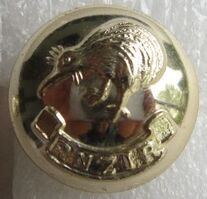
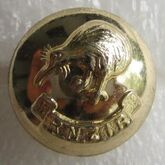
|
|
- Opposite: A large blazer badge to the New Zealand Regiment, with Kings Crown. Maker marked to back to "Gold Lacemen & Embroiderers, A R Fabb Bros Ltd, Maidenhead, Berks".
- Above: A Queens crown, enamel and gilt brass veterans association badge to the New Zealand Regiment. It has a "II" to base, which I presume signifies the 2nd Battalion. This may have had a button-hole fitting to back, but now has two lugs, soldered in a East/West configuration. No maker mark. |
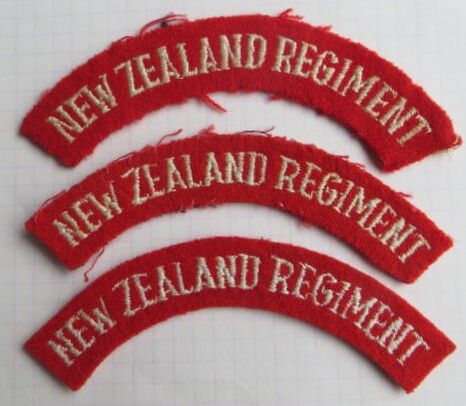
- Above: The standard post 1961 issued shoulder title to the New Zealand Regiment in White letters on a Post Office Red background.
- Opposite: Post 1964 shoulder titles to the Royal New Zealand Infantry Regiment (R.N.Z.I.R). The 4 title show variations in wear and tear, hence the colours, but there are also differences in letters and size. In 1973 a 2nd battalion was added to the 1st Battalion of the Royal New Zealand Infantry Regiment. It was to be designated the 2/1st Battalion of the Royal New Zealand Infantry Regiment and is based at Burnham, in the South Island of New Zealand. 1st Battalion base is at Linton Camp, outside Palmerston North, in the North Island of New Zealand. In 2013 the 6 Territorial Force Battalions were merged to 3 to form Reserve battalions fo the 1st and 2/1st Battalions of the Royal New Zealand Infantry Regiment. 1st Battalion (1 RNZIR) – Regular 2/1st Battalion (2/1 RNZIR) – Regular 2nd/4th Battalion (2/4 RNZIR) – Reserve 3rd/6th Battalion (3/6 RNZIR) – Reserve 5th/7th Battalion (5/7 RNZIR) – Reserve |
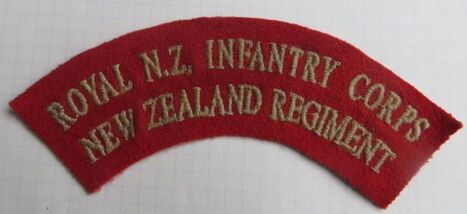
- Above: Made, but not issued. A two titled shoulder title to the Royal New Zealand Infantry Corps, New Zealand Regiment. These were made around 1964 when all other existing Infantry Regiments became part of the New Zealand Regiment. It is also when the New Zealand Regiment received its "Royal" Prefix.
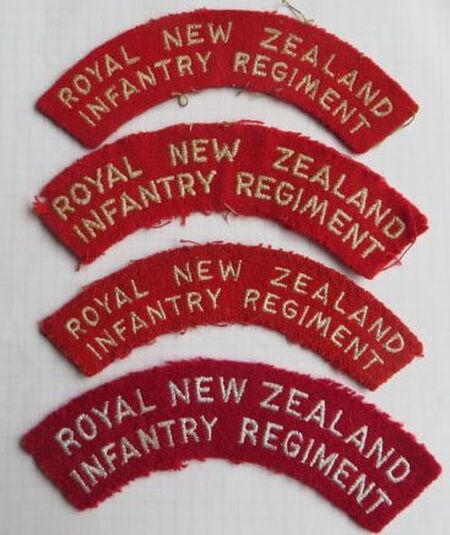
|
Fakes & Forgeries
Below is a fake or reproduction cap badge to the New Zealand Regiment (with Queens crown).
- Big give-away is this badge should be just silver tone. It was never issued in brass or brass tone. The faker has gone to the trouble to try and town down the gilt colour, but its still not right.
- To back is stippled, with some material faults and holes. But in general is not far off the original
- Two small copper lugs, brazed on.
- Size 41mm by 37.5mm.
|
|
|
|
WW2 Home Guard Badges
During WW2, New Zealand looked to defend its shores against possible invasion from Japan. Many of the veterans from WW1 re-enlisted to do their bit again, but were by this stage in their late 40's, early 50's.
To old to be sent overseas, they instead formed the New Zealand National Military Reserve or local Home Guard Units.
Some of the old Soldiers had served in the New Zealand Rifle Brigade during WW1. So some of the Home Guard units adopted their old badge in WW2 as homage to their old unit.
Motto: KIA MATARA (Be watchful).
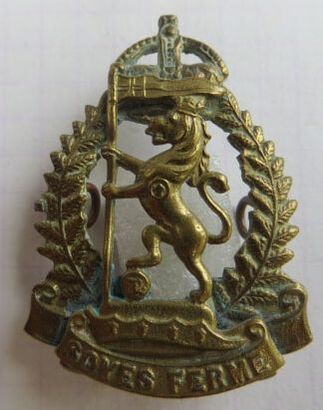
- Above: A WW2 New Zealand Onwards badge frame, with a WW1 New Zealand Rifle Brigade Cap (or Collar - worn as either) badge worn by some Home Guard units. The lugs to back of the NZRB badge have been removed. The Onwards badge has two copper wire looped lugs. No maker mark.
|

- Above: A similar WW2 New Zealand Onwards badge frame, with a WW1 New Zealand Rifle Brigade Cap badge worn by some Home Guard units. Slight variations in the Lion to center, with a straight pennant to top. The Onwards badge has two thick copper looped lugs to back. No maker mark.
|

- Above Left: - The standard New Zealand Home Guard Cap badge in gilt brass. Two copper wire looped lugs to back, but no maker mark.
- Above Right: A less common version of the New Zealand Home Guard badge. This has been cut down, with the two interconnecting bars removed. Gilt brass, with copper wire looped lugs. No maker mark. |
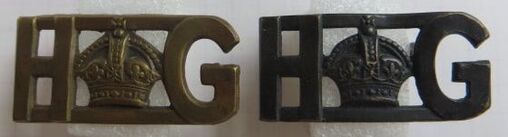
- Above: Same again, but this time maker marked. Both have copper wire loops to back. One in gilt brass, the other in darkened brass. Both have the maker mark of "M & K, W" or Mayer and Kean, Wellington. to back of top bar.
|
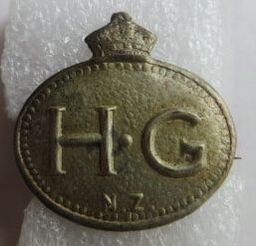
- Opposite: A WW2 era New Zealand Home Guard pin or lapel badge in white metal. I presume this is to signify a persons membership to the organisation while in Civilian dress. A brooch fitting to back. No maker mark.
Shoulder Titles.
New Zealand Forces have always worn a form of unit or national shoulder title, either in brass or cloth. During WW1 it was proposed that the 1st NZEF wore a National title, much like the Australian forces. This wasn't widely adopted, and the NZR , NZMR and Corps titles carried on being worn. These national titles do though exist in metal.
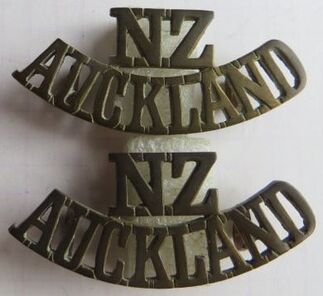
- Opposite: A rare pair of "Battalion" shoulder titles to the Auckland Battalion.
Made up of companies from the 3rd (Auckland), 6th (Hauraki), 15th (North Auckland), 16th (Waikato) Infantry Regiments.
These Battalion strength units formed the "Main Body" of the 1st New Zealand Expeditionary Force (1stNZEF) which left in October 1914.
Titles to the NZ/Wellington, NZ/Canterbury and NZ/Otago Battalions also exist but are rare and command high prices.
Two D shaped copper looped lugs to back. No maker mark. Size 22mm by 50mm.
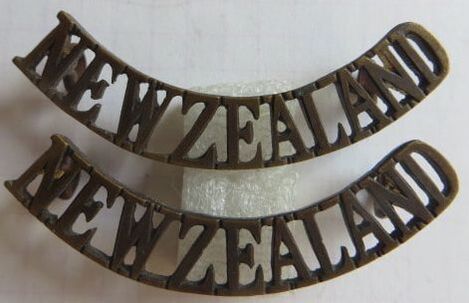
- Above: A pair of darkened brass, NEW ZEALAND Officer shoulder titles. Both have two D shaped copper looped lugs to back, but no maker mark. Size 9mm by 52mm.
|
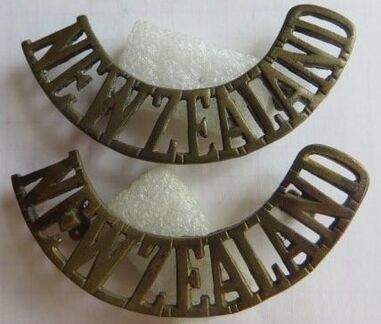
- Above Top: A gilt brass national shoulder title. Two ribbon type copper looped lugs to back, with the maker mark of "TIPTAFT B'HAM". Size 13mm by 56mm.
- Above Bottom: A gilt brass national shoulder title. Two D shaped copper looped lugs to back, with the maker mark of "J R GAUNT LONDON". Size 13mm by 57mm. |
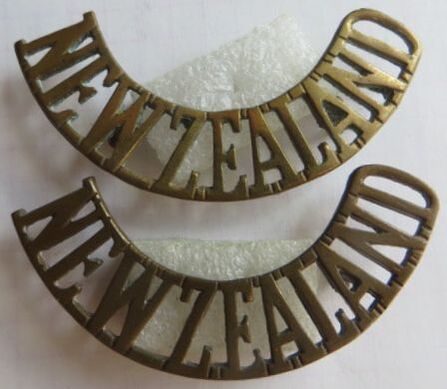
|
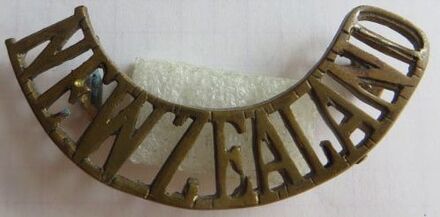
- Opposite: A gilt brass pair of national shoulder title. Two ribbon type copper looped lugs to back, but no maker mark. Likely Tiptaft. Size 13mm by 56mm.
- Above: A gilt brass national shoulder title. Two hex type brass lugs to back, but no maker mark. Size 13mm by 56mm. |
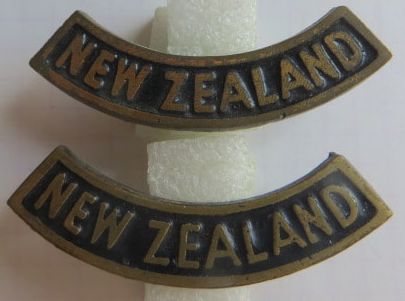
- Opposite: New Zealand National shoulder titles in cast Brass with a blackened (paint) background. Two flat brass loops have been cast or attached to the back of each. Not much information is available on these other than inferences that these are probably private purchase items from the middle east.
Some have referred that they date from WW1, while others state WW2.
Sold by enterprising Egyptians to NZ troops stationed there or passing through?
Size 11mm by 52mm.
There are other countries titles, including "AUSTRALIA", which command huge prices.
Some have referred that they date from WW1, while others state WW2.
Sold by enterprising Egyptians to NZ troops stationed there or passing through?
Size 11mm by 52mm.
There are other countries titles, including "AUSTRALIA", which command huge prices.
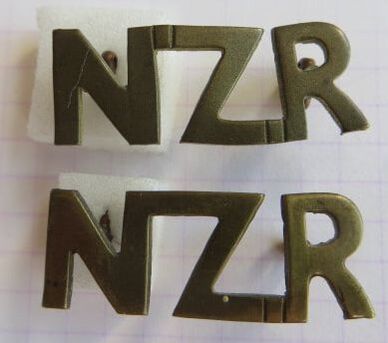
- Above: A Volunteer or Pre-WW1 pair of shoulder titles to the New Zealand Rifles. D shaped copper looped lugs to back, but no maker mark.
|
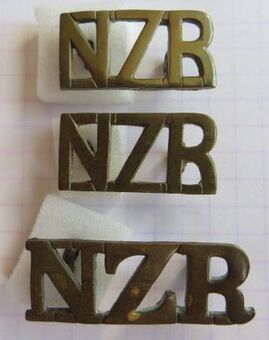
- Above: Again a Volunteer or Pre-WW1 selection of shoulder titles to the New Zealand Rifles. The top are a matching pair, while the bottom is slightly larger and different design. All have copper looped lugs to back and no maker mark.
|
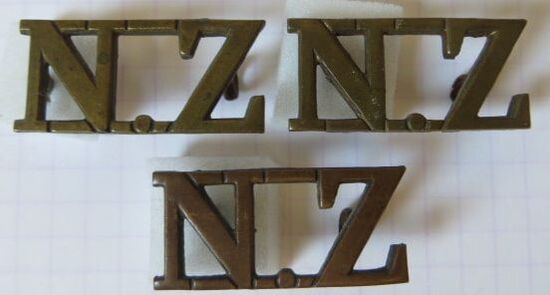
- Above: Three National titles in brass. Notably they have a large "dot" between the N and Z. Top left and bottom are maker marked to back to "Tiptaft Bham". Purpose unknown.
|
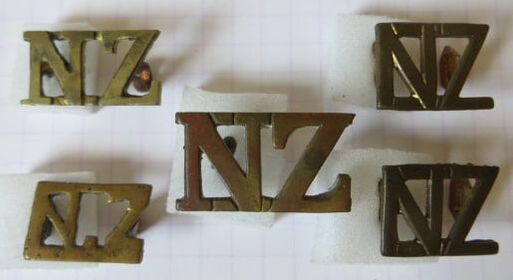
- Above: A selection of "NZ" national titles. Top left has brass lugs, while bottom left is cast brass. Center has D shaped lugs to back, while the right pair have hex type brass lugs to back. Purpose unknown.
|
The following is a selection of the curved New Zealand Rifles (N.Z.R) title. Much variation, as this title was worn prior to WW1 and well into the 1930's.
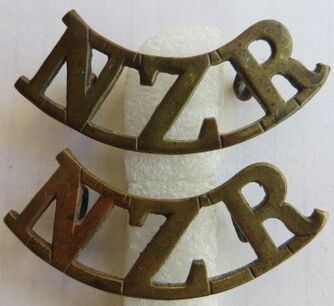
- Above Top: A brass NZR shoulder title with two copper D shaped lugs to back. No maker mark.
- Above Base: A brass NZR shoulder title with two copper D shaped lugs to back. Maker mark to "TIFTAFT". |
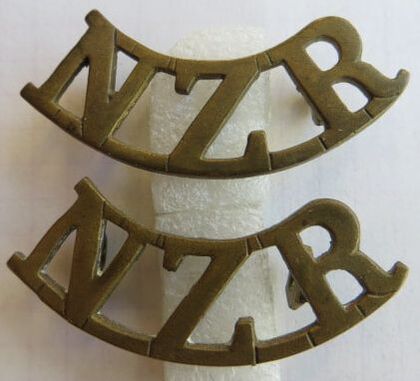
- Above: A matching pair of brass NZR shoulder titles. Both have two hex type brass lugs to back. Maker marked to "J R Gaunt London".
|
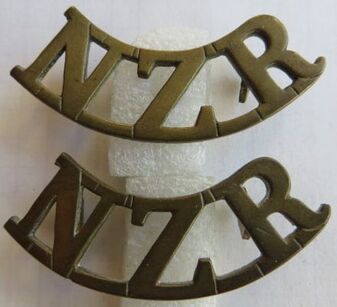
- Above: A matching pair of brass NZR shoulder titles. Both have two hex type brass lugs to back. Not maker marked, but likely J R Gaunt of London. They sometimes didn't mark their badges.
|
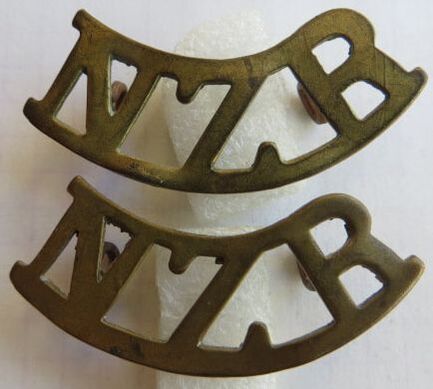
- Above: A locally made pair of brass NZR shoulder titles. These look hand cut, with both having two copper wire loops to back. Note there are no lines to front, to delimit the letters. No maker mark.
|
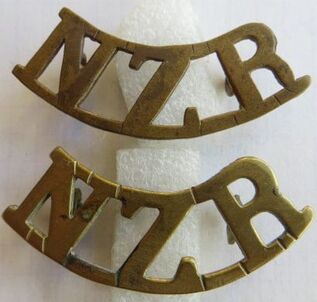
- Above Top: A brass NZR shoulder title with two brass wire lugs to back. No maker mark.
- Above Base: A brass NZR shoulder title with two thin hex type lugs to back. No maker mark. |
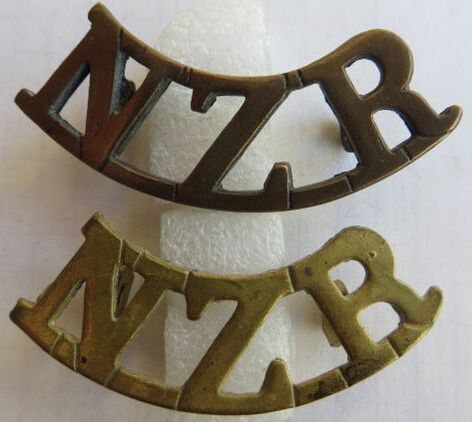
- Above Top: A brass NZR shoulder title with two long intergrated lugs to back. No maker mark.
- Above Base: A brass NZR shoulder title with two hex type brass lugs to back. No maker mark. |
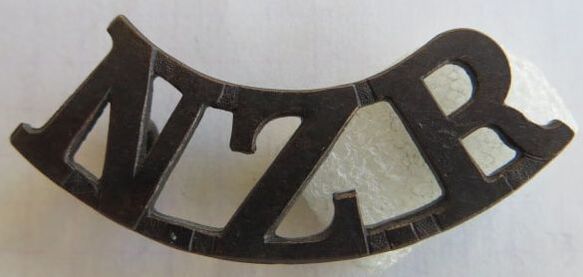
- Above: A darkened bronze NZR shoulder title with two copper D shaped lugs to back. Maker marked to "Stokes & Sons". Note the stippling to berween the letters on the frame. A feature of this maker.
|
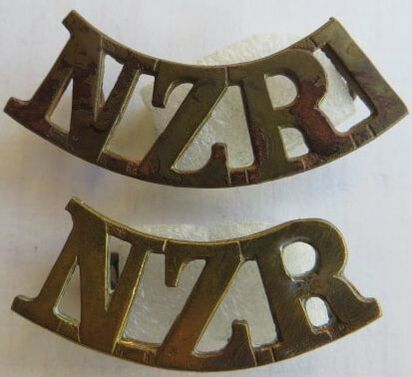
- Above: A pair of New Zealand Rifle Brigade (NZRB) shoulder titles in brass, which have been modified.
Top: Has had its :B" modified, but still keeping the looped lug to back. Base: |
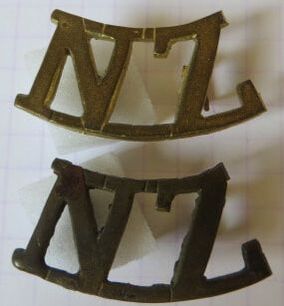
- Above: A cropped or cut pair of titles made from possibly the above "NZR" titles, but have the R removed. One lug has also been re-attached to the back of the Z. Both have two hex type brass lugs to back. Purpose unknown.
|
From WW2, New Zealand overseas serving forces used a cloth National shoulder title. These were well into the 1980's, where-ever New Zealand Troops were deployed.
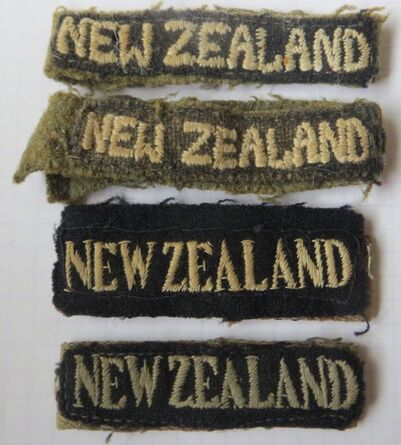
More Variations:
- Opposite Top: A sew-on type national title with a black hessian backing cloth which has had a tan ribbon loop added to back. - Opposite 2nd Row: A title with large white New Zealand letters on a black background, which has been sewn onto a light khaki material loop. Sadly mothed to front. - Opposite 3rd Row: A embroidered white lettered shoulder title on black material backing, which is also sewn into a loop. - Opposite Bottom Row: Same again, but narrower and different style of lettering. 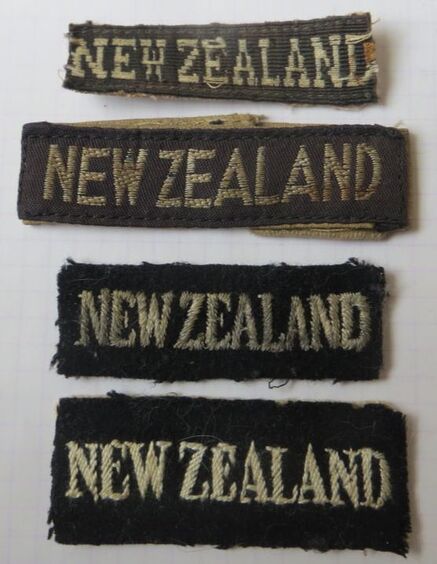
- Opposite Top Row: A embroidered white thread on black background sew-on type national shoulder title. Dark material backing. - Opposite 2nd and 3rd Rows: A near matching pair of embroidered white thread on black background sew-on type national shoulder title. Dark material backing. - Opposite Bottom Row: A embroidered white thread on black background sew-on type national shoulder title. Light hessian material backing. 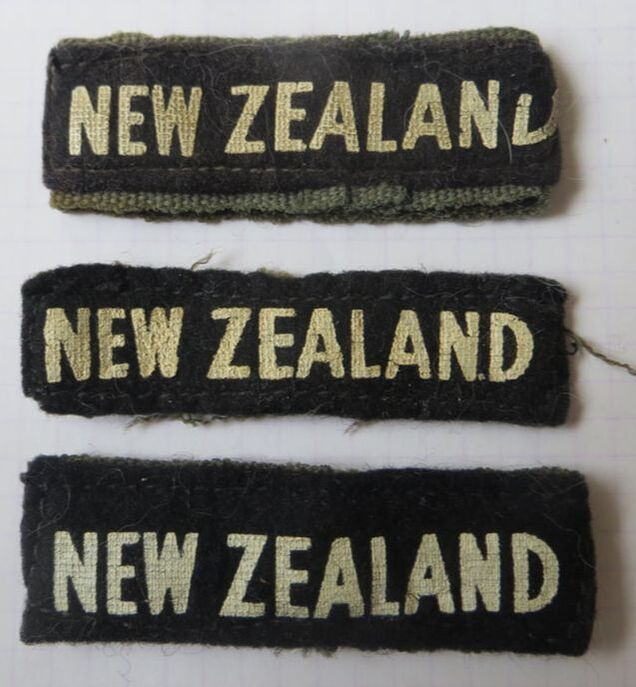
|
- Opposite Top and 2nd Row: A pair of early embroidered "slip-on" shoulder titles mounted on a loop of khaki wool material. These were designed to be worn over the shoulder strap of the battle dress, and literately "slipped-on".
- Opposite 3rd Row: A embroidered national title on black background, mounted on a light tan material loop. - Opposite Bottom Row: A embroidered national title on black background, mounted on a light khaki material loop. 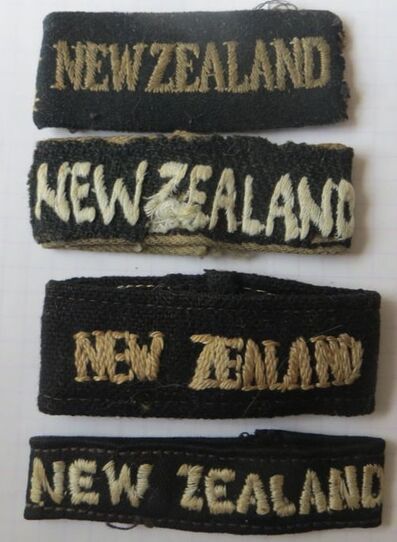
- Opposite Top Row: A woven style White and Black threaded national shoulder title, possibly just a sew on. Backed on light tan material. - Opposite 2nd Row: A larger woven style White and Black threaded national shoulder title, sewn onto a light khaki loop. - Opposite 3rd Row: A embroidered white thread on black background sew-on type national shoulder title. Dark material backing. - Opposite Bottom Row: A embroidered white thread on black background sew-on type national shoulder title. White hessian backing material. 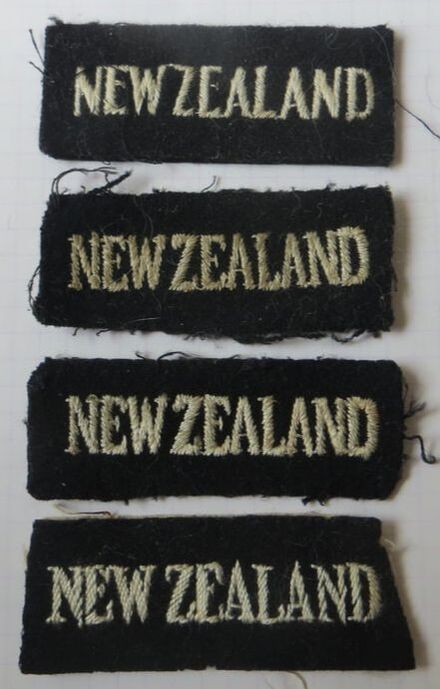
As WW2 progressed, New Zealand experimented with ways of making the titles easier to produce.
- Opposite Top Row: A printed slip-on national shoulder titles on a dark khaki ribbon. - Opposite Middle Row: A printed slip-on national shoulder titles on a dark khaki ribbon. Loop to back has been clipped off. - Opposite Bottom Row: A printed slip-on national shoulder titles on a dark khaki ribbon. |
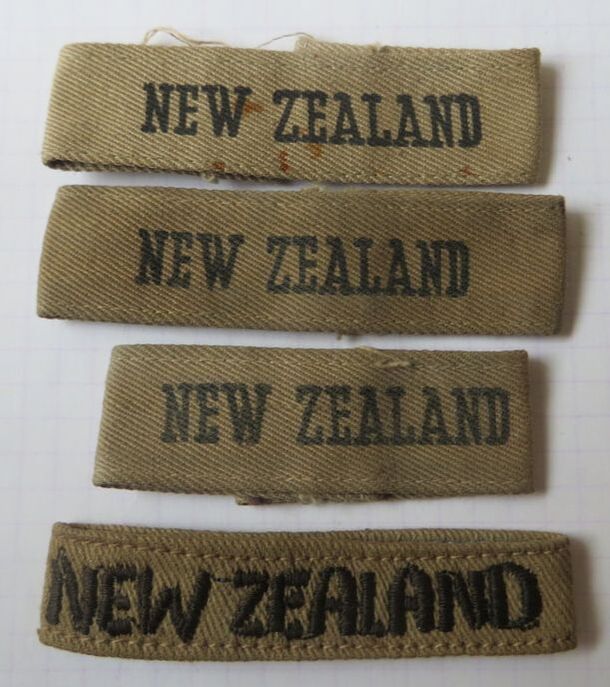
- Above: Four New Zealand Army issue Pacific theater of war national shoulder title. Black NZ letters either printed or embroidered on a light khaki material.
- Opposite: A matching pair of Silver bullion thread New Zealand shoulder titles. The bullion thread is sewn onto a black wool type cloth, which is then stitched onto ribbon like loops. Some oxidation to bullion finish and also some mothing to low title.
|
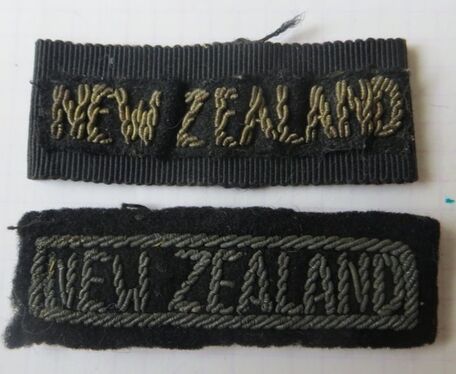
- Above: Two private purchase National slip-on shoulder titles in different styles. The "New Zealand" is in Silver Bullion thread. These were bought by Kiwi troops in Italy during WW2, to add a bit of "bling" to their uniforms. Sadly the bottom title has oxidised with age.
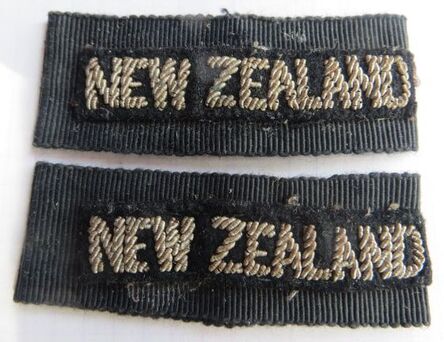
|
Shoulder Numbers
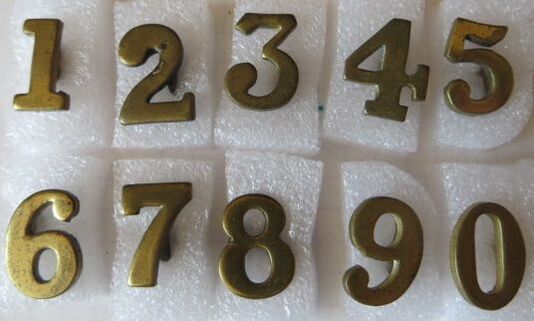
In 1911, The New Zealand Army adopted a numbered system for their 16 (soon to be 17 in 1914) Infantry and 12 Mounted Rifles Regiments.
A 15mm gilt brass number was worn on each shoulder strap on a mans tunic, positioned above the shoulder title of either N.Z.R or N.Z.M.R. - Above, a complete set of 15mm Gilt brass shoulder strap numbers. All have a single hex type brass lug to the back, except for the 8, which has had a second added at a later date. Note the "6" or "9" can be used as either. - Right Top and Bottom: These numbers were pushed through the shoulder strap material and supported under the back of the strap with a small oval backing plate, which also spaced the numbers correctly if the Regiment has a double digit number. Example here is to the 12th (Nelson) Infantry or 12th (Otago) Mounted Rifles Regiment. |
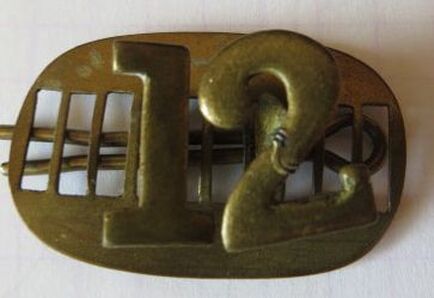
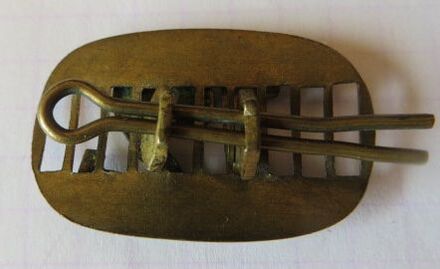
|
New Zealand Forces Button.
The New Zealand Forces button was universally adopted in 1911 by all the newly created Infantry, Mounted Rifles and some Corps. The pattern is still used today in a anodised aluminium format by some Corps. This section covers some of the various makers of this widely used button.
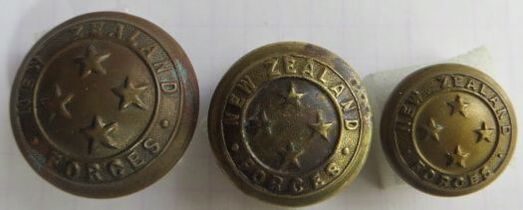
- Opposite Left: A gilt brass, 25mm fixed shank button to the New Zealand Forces. This is maker marked to "VAN STAVEREN, WELLINGTON".
- Opposite Center:A gilt brass, 21mm fixed shank button to the New Zealand Forces. This is maker marked to "VAN STAVEREN, WELLINGTON".
- Opposite Right: A gilt brass, 17mm fixed shank button to the New Zealand Forces. This is maker marked to "VAN STAVEREN, WELLINGTON".
- Opposite Center:A gilt brass, 21mm fixed shank button to the New Zealand Forces. This is maker marked to "VAN STAVEREN, WELLINGTON".
- Opposite Right: A gilt brass, 17mm fixed shank button to the New Zealand Forces. This is maker marked to "VAN STAVEREN, WELLINGTON".
Herman van Staveren (1849-1930) was the Rabbi of Wellington from 1877 until his death. He had a family of 13 children, with three of his sons opening Van Staveren Bros. Limited in 1905. The firm finally closed in the 1980’s.
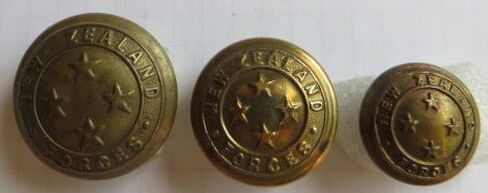
- Above Left: A gilt brass, fixed shank 25mm button to the New Zealand Forces. Maker marked to back to "STOKES & SONS, MELBOURNE".
- Above Center: A gilt brass, fixed shank 21mm button to the New Zealand Forces. Maker marked to back to "STOKES & SONS, MELB". - Above Right: A gilt brass, fixed shank 17mm button to the New Zealand Forces. Maker marked to back to "STOKES & SONS". |
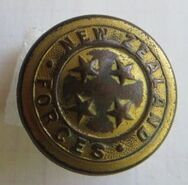
- Above: A 21mm gilt brass button to the New Zealand Forces. Extra gilt applied to front.
|
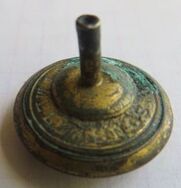
- Above: The back of the same 21mm gilt brass button. Screw attachment for Officers shoulder strap? Maker marked to back to "STOKES & SONS, MELB".
|
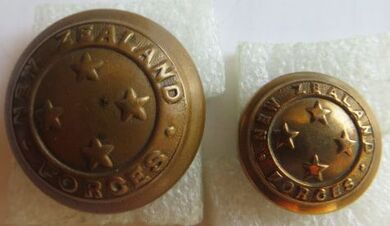
- Above Left: A 25mm button to the New Zealand Forces. Fixed shank and nicely marked to "JENNSEN & Co LTD, LONDON". Jennsen used this mark from 1912 to 1924, when they amalgamated with J R Gaunt.
- Above Right: A 17.5mm button to the New Zealand Forces. Fixed shank and nicely marked to "JENNSEN & Co, LONDON". |
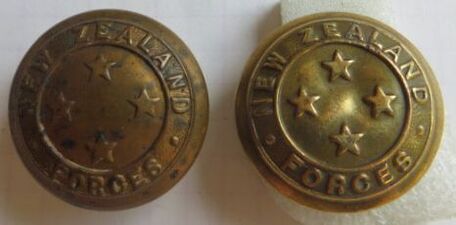
- Above Left: A gilt brass, flexible shank, 25mm button to the New Zealand Forces. Maker marked to "J W TIPTAFT & SON Ltd, BIRMINGHAM".
- Above Right: A gilt brass, fixed shank 25mm button to the New Zealand Forces. Maker marked to back to "B & P LTD BHAM"". Bent & Parker Limited (B & P) were bought out by Gaunt in 1924, like Jennsens & Co Ltd, opposite. |
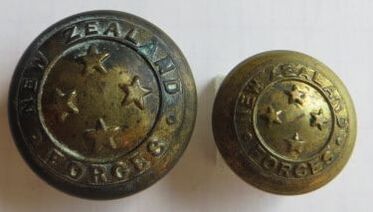
- Above Left: A gilt brass, fixed shank 25.5mm button to the New Zealand Forces. Maker marked to back to "E ARNFIELD & Co Ltd, BIRMINGHAM".
- Above Right: A gilt brass, fixed shank 19mm button to the New Zealand Forces. Maker marked to back to "ARNFIELD Ltd, BIRMINGHAM". |
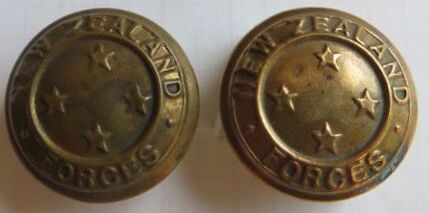
- Above Left: A gilt brass, flexible shank 24mm button to the New Zealand Forces. No maker mark.
- Above Right: A coppery gilt brass, flexible shank 24mm button to the New Zealand Forces. No maker mark. |
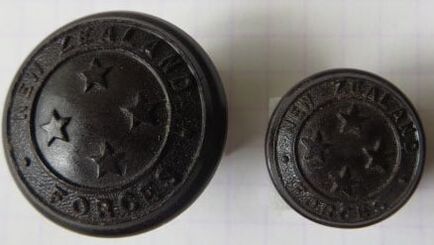
During WW2, Bakelite (a early form of plastic) was used for buttons in New Zealand to conserve the use of brass for other areas of War production. These appear to have only been worn in New Zealand and not overseas by active service soldiers.
- Opposite Left: A Bakelite, single piece (with integrated hole to back for sewing onto a tunic) in 24mm diameter. No maker mark. - Opposite Right: A similar Bakelite, single piece in 17mm diameter. No maker mark. - Opposite: A pair of 13mm Bakelite side hat buttons to the New Zealand Forces. See above for a full picture of the side hat. Intergrated lug to back, with no maker mark. |
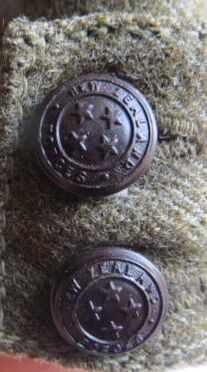
|
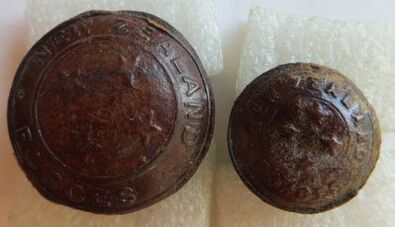
- Opposite Left: A darkened leather, 23mm button to the New Zealand Forces. Fixed shank, made from a loop of leather and nicely marked to "LIVINGSTONE, PAT 85347".
- Opposite Right: A darkened leather, 17mm button to the New Zealand Forces. Fixed shank, made from a loop of leather, with a faint maker mark of "LIVINGSTONE, PAT 85347".
Papers Past records adverts by "Livingstone Button Co" residing at 20a Riddiford St, Newtown, Wellington, looking for staff in March 1943, in the Evening Post. This possibly dates the buttons to at least WW2. They are not common, and I have handled 4 in the last 30 years. So maybe not a design which was popular and worn widely. Bakilite might have also become a more lasting alternative to leather at the time, when Brass was in short supply.
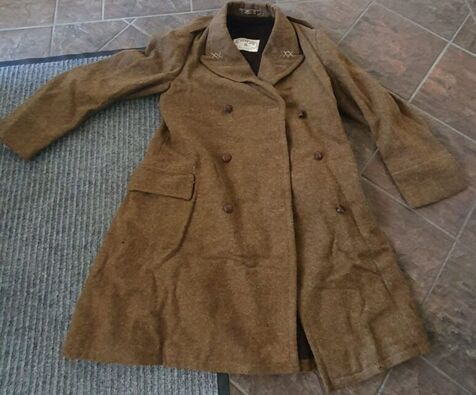
- Above: A date New Zealand made great coat with leather buttons attached. This has still the taylors stitching to the front of the lapels, to hold the collar down while it was being made (Trev Heighway Collection).
|
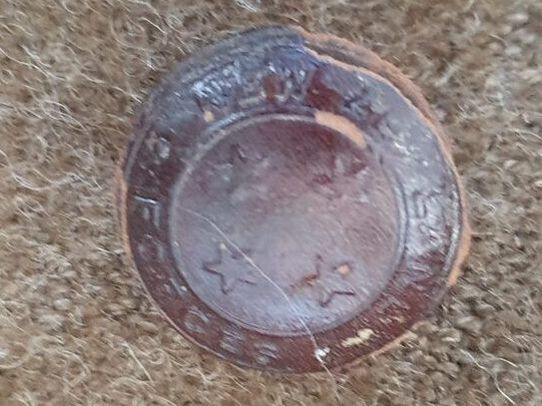
- Above: Attached to front are two rows of 3 large leather buttons. Two smaller buttons are on the shoulder boards (Trev Heighway Collection).
|
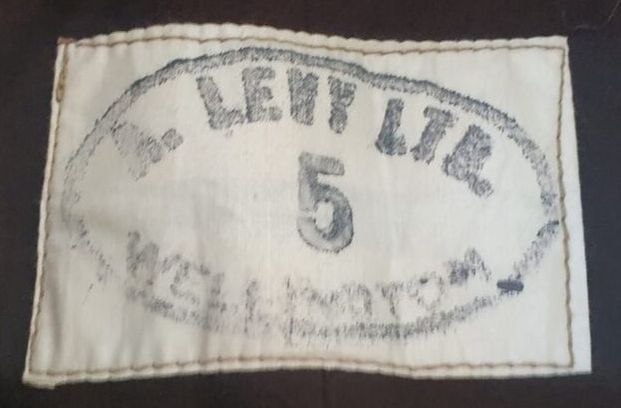
|

- Opposite & Above: Maker marked in two places to the cloth and button manufacturer "A. LEVY Ltd WELLINGTON" (Trev Heighway Collection).
|
J R Gaunt was by far the largest producer of New Zealand Forces buttons, producing from prior to WW1, through to the 1960's/70's.
They came in either fixed or flexible shank.
They came in either fixed or flexible shank.
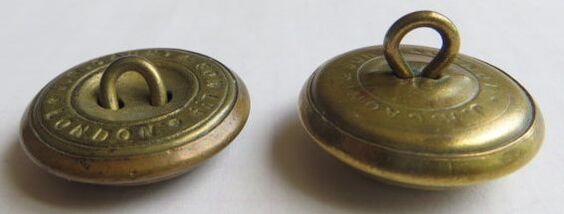
- Above: The back of two Gaunt made gilt brass New Zealand Forces Buttons. The left show's what is termed as a flexible shank, which is loose to back and allows movement between the tunic layers. The right is a example of a fixed shank, with no movement.
|
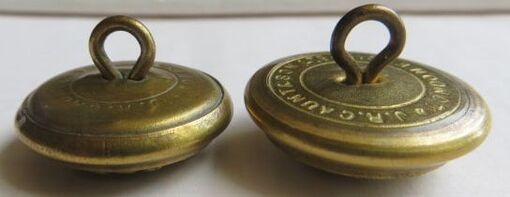
- Above: Gaunt experiment with the shape or form of the button as well. Type 1 (above left), is the more common type, with a rounded edge. Type 2 (above right) has a a pointed or angled edge, and is flat to back, as if to ensure that the button sits flat on the tunic fabric.
|

- Above Left: A 26mm, gilt brass type 2 button to the New Zealand Forces. Fixed shank to back, with the maker mark of "J R GAUNT & SON Ltd, LONDON, ENGld".
- Above Right: A 26mm, gilt brass type 2 button to the New Zealand Forces. Fixed shank to back, with the maker mark of "J R GAUNT & SON, LONDON". |
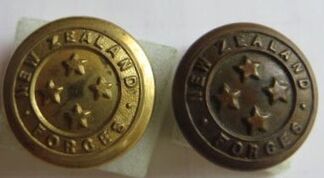
- Above Left: A 17.5mm, gilt brass type 2 button to the New Zealand Forces. Fixed shank to back, with the maker mark of "J R GAUNT & SON Ltd, LONDON, ENG".
- Above Right: A 17mm, darkened brass type 2 button to the New Zealand Forces. Fixed shank to back, with the maker mark of "J R GAUNT & SON, LONDON". |
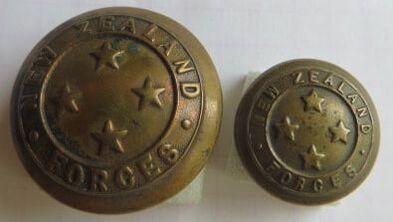
- Above Left: A 25mm, gilt brass type 1 button to the New Zealand Forces. Flexible shank to back, with the maker mark of "J R GAUNT & SON Ltd, LONDON".
- Above Right: A 17mm, gilt brass type 1 button to the New Zealand Forces. Flexible shank to back, with the maker mark of "J R GAUNT & SON Ltd, LONDON". |
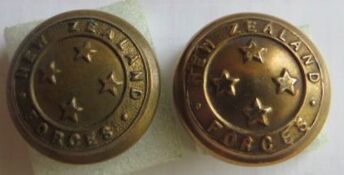
- Above Left: A 17mm, gilt brass type 1 button to the New Zealand Forces. Flexible shank to back, with the maker mark of "J R GAUNT & SON Ltd, LONDON". Note the stars to center are smaller.
- Above Right: A 17mm, coppery brass type 1 button to the New Zealand Forces. Flexible shank to back, with the maker mark of "J R GAUNT & SON, LONDON". |
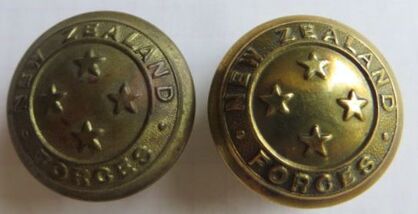
- Above Left: A 25mm, gilt brass type 1 button to the New Zealand Forces. Fixed shank to back, with the maker mark of "J R GAUNT & SON, LONDON".
- Above Right: A 24mm, gilt brass type 1 button to the New Zealand Forces. Fixed shank to back, with the maker mark of "J R GAUNT & SON, LONDON". |
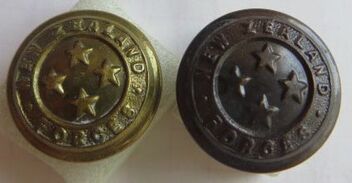
- Above Left: A 17mm, gilt brass type 1 button to the New Zealand Forces. Fixed shank to back, with the maker mark of "J R GAUNT & SON Ltd, LONDON, ENGd".
- Above Right: A 17mm, darkened brass type 1 button to the New Zealand Forces. Fixed shank to back, with the maker mark of "J R GAUNT & SON Ltd, LONDON, ENGd". |
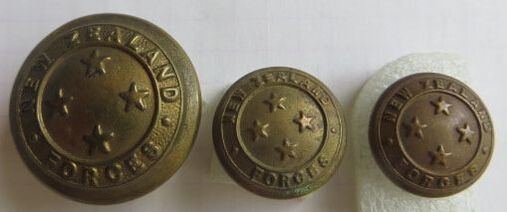
- Opposite Left: A gilt brass, fixed shank 25mm button to the New Zealand Forces. Maker marked to back to "BUTTONS LIMITED BIRMINGHAM".
- Opposite Center: A gilt brass, fixed shank 17.5mm button to the New Zealand Forces. Maker marked to back to "BUTTONS LIMITED B'HAM".
- Opposite Right: A gilt brass, flexible shank 16mm button to the New Zealand Forces. Maker marked to back to "SUPERB QUALITY".
- Opposite Center: A gilt brass, fixed shank 17.5mm button to the New Zealand Forces. Maker marked to back to "BUTTONS LIMITED B'HAM".
- Opposite Right: A gilt brass, flexible shank 16mm button to the New Zealand Forces. Maker marked to back to "SUPERB QUALITY".
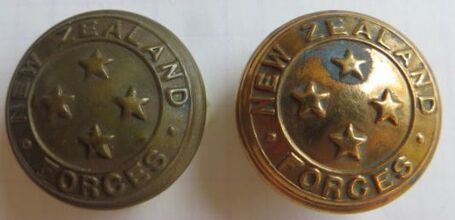
- Above Left: A gilt brass, flexible shank 24mm button to the New Zealand Forces. Maker marked to back to "WOOLLEY & Co (BIRMINGHAM) LIMd".
- Above Right: A coppery brass, flexible shank 24mm button to the New Zealand Forces. Maker marked to back to "WOOLLEY & Co (BIRMINGHAM) LIMd". |
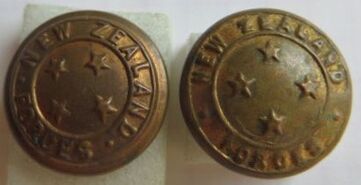
- Above Left: A gilt brass, flexible shank 17mm button to the New Zealand Forces. Maker marked to back to "WOOLLEY & Co (BIRMINGHAM) LIMd".
- Above Right: A gilt brass, flexible shank 17mm button to the New Zealand Forces. Maker marked to back to "WOOLLEY & Co BIRM LIMd". Note the difference in border compared to the left button border. |
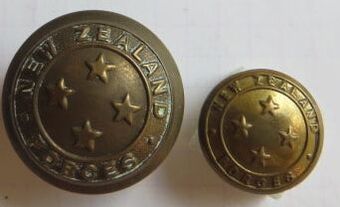
- Above Left: A gilt brass, fixed shank 25mm button to the New Zealand Forces. Maker marked to back to "MADE IN ENGLAND".
- Above Right: A gilt brass, flexible shank 17mm button to the New Zealand Forces. Maker marked to back to "Wm DOWLER & SONS Ltd, BIRMh". Not yet seen a large 25mm version of this makers button. |
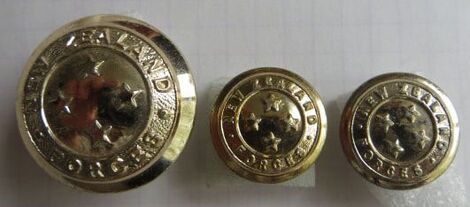
Modern New Zealand Forces buttons
- Above Left: A silver toned, anodised aluminium (with brass backing), 25.5mm New Zealand Forces button. Maker mark of "GAUNT, LONDON", in large letters to back. - Above Center: A gilt toned, anodised aluminium (with brass backing), 17mm New Zealand Forces button. Maker mark of "GAUNT, LONDON". - Above Right: A silver toned, anodised aluminium (with brass backing), 17mm New Zealand Forces button. Maker mark of "GAUNT, LONDON". |
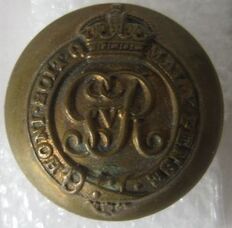
- Above: A 24mm British Officers Colonels and Brigadiers uniform button, which was also worn by NZ Officers of the same rank. George V cypher, its brass back, with fixed shank. Maker marked "BUTTONS LIMITED BIRMINGHAM".
|
Possible Other Makers
- There has been talk of "A Levy, Wellington" making New Zealand Forces buttons around WW1, but I have yet to see one.
- There has been talk of "A Levy, Wellington" making New Zealand Forces buttons around WW1, but I have yet to see one.
Officers Leather Private Purchase Button
The following is a complicated button, in that it seems to be associated with private purchase garments, such as Officers Greatcoats, and not with any Country, unit or Corps. Certainly it has been noted in WW1 on British officer uniforms, but I have also found these buttons in the effects of WW2 serving RNZA officers, and my Father, who was a British Army Officer in the 1970's, purchased and wore a 1/2 length Officers Greatcoat with a set of these buttons to front. I am told that certain WW2 era political organsations of Germany also wore these on their uniforms too.
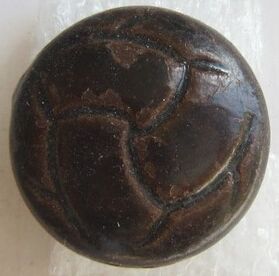
|
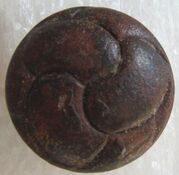
- Above & Opposite: A molded darkened leather button worn by Officers on private purchase items, such as Greatcoats from WW1 onwards. Opposite is 25mm, while above is 14mm. Both have a metal loop to back, but no maker mark.
|
Other sizes encountered (none are maker marked):
27mm, 23mm, 22mm, 21mm, 16mm
27mm, 23mm, 22mm, 21mm, 16mm
New Zealand Puggaree Colours.
Above is a chart of the colour bands or Puggaree's worn around the New Zealand Army's Lemon Squeezer or Slouch hat. These colours were adopted and evolved from 1911, until 1966, when the system was dropped. It was then re-introduced in 1994, but on a much limited scale.
The Puggaree is in the form of three bands of cloth, and vary in diameter, according to hat size. All were issued unmarked and undated. Usually they have a purple ink size (in inches), stamped on the inside of their hessian cloth backing. Sometimes a Soldier will mark it with his name or Service number.
There are as follows:
1. Khaki/Red/Khaki - Introduced 1912 and worn by the New Zealand Infantry, New Zealand Rifle Brigade, New Zealand Machine Gun Corps, New Zealand Pioneer Battalions.
2. Khaki/Green/Khaki - Introduced 1912 and worn by the New Zealand Mounted Rifles, Unposted Territorial Force Cadets and New Zealand Cycle Corps. Reintroduced in 1994 to be worn by Queen Alexandra's Mounted Rifles - RNZAC
3. Blue/Red/Blue - Introduced 1912 and worn by the New Zealand Artillery - RNZA and NZA.
4. Khaki/Dark Blue/Khaki - Introduced 1912 and worn by the New Zealand Engineers and New Zealand Corps of Signals (1st Pattern).
5. Khaki/Light Blue/Khaki - Introduced 1923 and worn by the New Zealand Corps of Signals (2nd Pattern).
6. Khaki/White/Light Blue/Khaki - Introduced 1935 and worn by the New Zealand Corps of Signals (3rd Pattern).
7. Light Blue/Dark Blue/Light Blue - Introduced 1939 and worn by the New Zealand Corps of Signals (4th Pattern).
8. Khaki/Maroon/Khaki - Introduced 1912 and worn by the New Zealand Veterinarian Corps.
9. Red/Dark Blue/Red - Introduced 1923 and worn by the New Zealand Ordnance Corps.
10. Black/Black/Black - Worn by unposted Regular Force Cadets, and in 1941 adopted by the New Zealand Armoured Corps.
11. Black/Khaki/Khaki/Black - Introduced in 1917 and worn by the New Zealand Chaplains Department (1st Pattern).
12. Purple/Purple/Purple - Introduced in the 1950's and worn by the New Zealand Chaplains Department (2nd Pattern).
13. Khaki/White/Khaki - Introduced in 1912 and worn by the New Zealand Army Service Corps.
14. Khaki/Yellow/Khaki - Introduced in 1923 (on paper only - research has shown that the Corps possibly had zero personnel, and it wasn't until WW2 that members were issued their Puggaree) and worn by the New Zealand Army Pay Corps.
15. Khaki/Cherry Red/Khaki - Introduced in 1912 and worn by the New Zealand Medical Corps.
16. Red/Red/Red - Introduced in 1912 and worn by a number of Units, New Zealand Permanent Staff, Coronation Contingent (1953), New Zealand Honor Guard (from 1977).
17. Red/Green/Red - Worn by the New Zealand Electrical & Mechanical Engineers (2nd Pattern - they wore the New Zealand Ordnance Corps patten initially).
18. Dark Blue/Yellow (thin)/Red - Worn by the New Zealand Electrical & Mechanical Engineers (3rd Pattern).
19. Green/Green/Green - Introduced in 1941 and worn by New Zealand War Correspondents.
20. White/White/White - Introduced in 1915 and worn by New Zealand Officer Cadet Training Units, also worn in 1941 by Home Guard Traffic Control Units in 1942.
21. Green/Khaki/Green - Worn by the New Zealand Dental Corps (1st Pattern).
22. Dark Blue/Peacock Green/Dark Blue - Worn by the New Zealand Dental Corps (2nd Pattern).
23. Khaki/Black/Khaki - Introduced in 1917 and worn by the Home Service personnel of the New Zealand Expeditionary Force.
24. Dark Blue/Light Blue/Dark Blue - Worn by the New Zealand Education Corps.
25. Blue/Blue/Blue - Worn by the New Zealand Provost Corps.
26. Dark Blue/White/Dark Blue - Introduced in March 1918 and worn by the Y.M.C.A (1st Pattern).
27. Black/White/Black - Introduced in 1941 and worn by the Y.M.C.A (2nd Pattern - yet to see evidence that this was worn, photo's so far show WW2 Y.M.C.A personnel just wearing New Zealand Infantry Pugs).
28. Red/Khaki/Red - Worn by NZ Senior Cadet Officers - 1911 to 1921, Training Cadets at Threntham Camp from 1927, Unposted Regular Service Recruits from 1932 until 1950 and troops stationed on Fanning Island during WW2.
29. Khaki/Khaki/Khaki - Initially worn by the New Zealand Rifle Brigade, before they then adopted the Infantry coloured Puggaree of Khaki/Red/Khaki. Worn also by Regular Force Cadets from 1949, with black diamond patches to either side.