New Zealand Infantry Reinforcement Drafts from World War 1
A unique chapter in New Zealand Army badge history, is that of the World War 1 Reinforcement draft badge's.
It only existed between 1915 and 1918, and was purely a private purchase item, coming out of the pocket of the soldier who served in a particular draft, and were furnished by enterprising private Jewelers who set up shop in and around the training camps which sprang up throughout NZ due to her commitments to WW1.
It only existed between 1915 and 1918, and was purely a private purchase item, coming out of the pocket of the soldier who served in a particular draft, and were furnished by enterprising private Jewelers who set up shop in and around the training camps which sprang up throughout NZ due to her commitments to WW1.
|
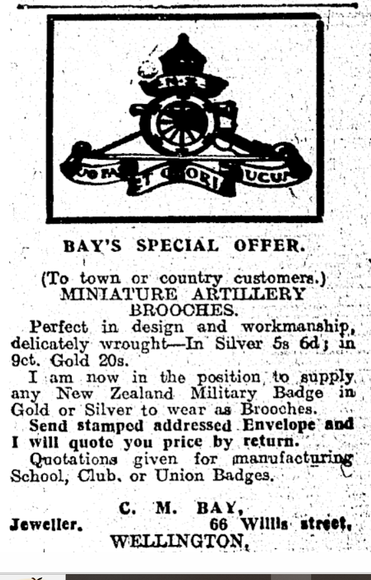
- Opposite: A advert for C M Bay for brooches in the form of Army badges (Paperspast Nelson Evening Mail 3 March 1917, Page 1
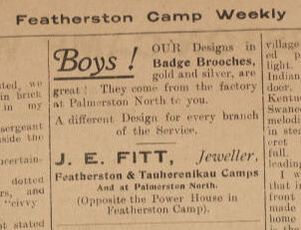
- Above: A advert from the Featherston Camp Weekly newspaper, which started in July 1918 to document camp life. Above jeweller "J. E. Fitt" advertises his Badge Brooches to the Soldiers training (Auckland Libraries Heritage Collections Featherston Camp Weekly, Page 6 Vol 1 No 1, 5th July 1918). |
The badge was to be worn only in New Zealand, and was often discarded once the soldier left its shores. Many were retained though, and swapped/traded for other items and badges once the Kiwi got to his destination with other Allied soldiers. Others were given to loved ones, either while the solder was training, or after, when they had gone oversea, as both a memento, but also proudly worn to show that their Husband, Brother or Son was doing his bit.
Many of these "given" badges had their lugs cut off and a brooch fitting attached, some where silver or gilt washed to enhance their appearance. Others where made in silver and gold and sold specifically as Sweetheart badges, and worn by the loved one as a piece of jewellery.
Badges could also be bought by members of the public at the time, and were retailed though high street Jewelers shops, many of which had representation also at the biggest training camps (Trentham and Featherston).
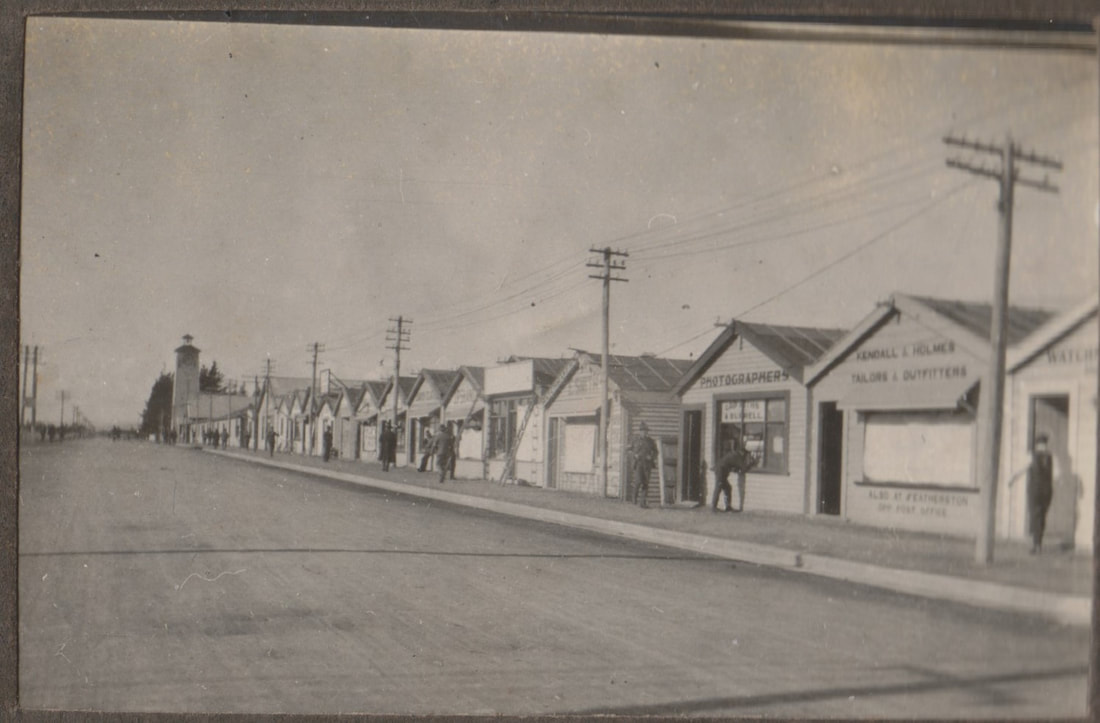
- Above: A small photograph, taken of Trentham Camp High street, showing the shops which sprung up around the camps in WW1 to selling anything a Soldier needed while training. The first shop is just readable, which says "Kendall & Holmes, Taylors & Outfitters", then under the window it says "Also at Featherston, Ops Post Office", which refers to the Featherston Training Camp some 35km away.
|
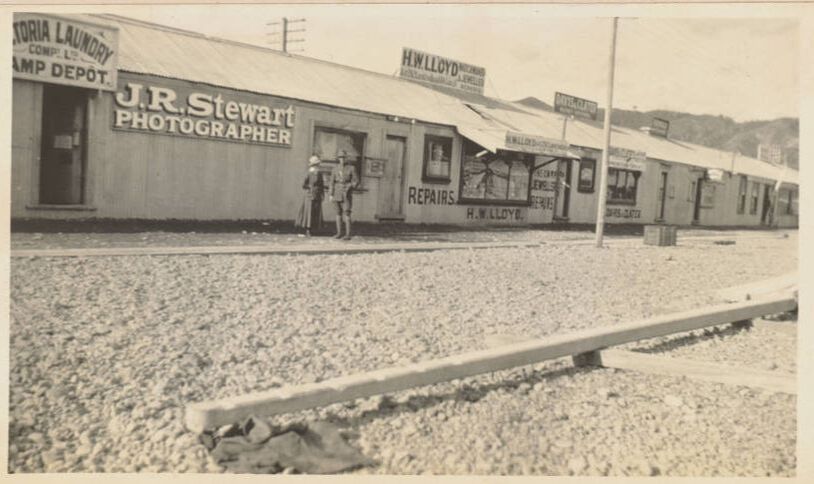
- Above: A similar photo, this time part of the Featherston Camp High Street. Notably there is "H W Llyod, The Camp Jeweler", with a number of signs saying "Repairs". Directly in front is "J R Stewart, Photographer" and "Victoria Laundry Company Ltd, Camp Depot" (Auckland Libraries Heritage Collections 1677-ALB332-41-08).
|
New Zealand's primary training camp was at Trentham, in the Hutt Valley, about 33km North East from Wellington. It was established in October 1914 as a central training camp for all recruits. Initially it was a canvas camp for some 2000 men, but by January 1915, the Government had decided to construct hutments for some 120 officers and 3500 men, along with a few other buildings such as a military hospital. Work began in March, but overcrowding and wet weather delayed its progress.
With new waves of recruits continuing to arrive at camp, numbers were pushed from some 4000 men in January 1915 to 7000 in May 1915.
This placed a huge strain on the camp’s basic facilities, causing eventually an outbreak of respiratory diseases, measles, and cerebro-spinal meningitis that hit the camp between May and July 1915, overwhelmed the camp’s medical facilities and killed 27 recruits.
Medical authorities called for the camp’s evacuation on 9 July 1915, with the recruits relocating to overflow camps at Waikanae (on the coast north of Wellington), Rangiotu (17 km southwest of Palmerston North), Maymorn (5 km north-east of Upper Hutt), and Tauherenikau (between Featherston and Greytown, in southern Wairarapa).
A commission of inquiry blamed the outbreak on poor hygiene and overcrowding.
Featherston was selected in July 1915 as a new camp to take the overflow from Trentham and also act as a staging camp to "finish-off" collective training of recruits. Situated approximately 65km North-East from Wellington it was connected via railway to it, Trentham and New Zealand's capital (Wellington).
The 16-week infantry training program began with three weeks of recruits’ drill and physical training at Trentham, followed by four weeks, mostly spent at Featherston, of drill (from squad to platoon levels), physical training, bayonet-fighting, elementary musketry, individual training, and elementary night training. Final leave was in the ninth and tenth weeks, followed by platoon and company drill, more night operations, physical training and bayonet-fighting, and advanced musketry. The other units (NZMR, ASC, MGC etc) shared many of these elements, but split off into more specialised training after their basic drill and musketry work was complete.
More advanced training would then take place in England, in places like Sling, Brockton, Grantham, Aldershot and Bournemouth to flesh out the men’s understanding of current conditions on the Western Front.
In general, men for the following units trained at the mentioned Camps in New Zealand:
- Avondale - (est Oct 1914 to Mar 1915 & Oct 1915 to Dec 1915) - Tunneling Corps, at Auckland
- Narrow Neck Camp - (est June 1915) - Maori, Pacific Islanders, at Auckland
- Awapuni Camp - (est Sept 1915) - Medical Reinforcements at Palmerston North
- Trentham Camp (est Oct 1914) - All drafts of Reinforcements as some stage as well as Engineers Reinforcements.
- Featherston Camp (est Jan 1916) - advance training for Mounted Rifles, Signallers, Artillery, Machine-Gun specialists, and the Army Service Corps
- Papawai Camp - served the needs of the units requiring advanced musketry and machine-gun training
- Tauherenikau - (est July 1915) - Nov 1917 the "C1" camp was established to train/prepare soldiers who just fell short of the requirements to be sent overseas.
- Rangiotu - (est June 1915)
- Waikanae - (est June to Aug 1915 Only)
- Maymorn - (est Oct 1915 to Jan 1916 Only)
- All recruits trained at Trentham Camp between October 1914 and July 1915. But the Infantry load was then split between Trentham and Featherston Camps from January 1916 onwards.
In terms of statistics, in 1914 New Zealand worked to maintain a total of 4062 infantrymen on active service through a flow of reinforcement drafts, but by 1918 this number had more than tripled to 14,371 men in the field.
Much of the above information was taken from this excellent reference on the "New Zealand History" website - Featherston Military Training Camp and the First World War, 1915–27 by historian Tim Shoebridge (2011) can be downloaded here:
nzhistory.govt.nz/files/documents/featherston-camp-high-res.pdf
Infantry Reinforcement badges followed the post 1911 New Zealand Army's four district system, with:
A Company - Auckland District - covering from the middle to the top of the North Island of NZ.
B Company - Wellington District - covering from the middle to lower half of the North Island of NZ.
C Company - Canterbury District - covering from the middle to the top half of the South Island of NZ.
D Company - Otago District - covering from the middle to the lower half of the South Island and including Stewart Island.
These Company letters will become important when discussing the early Infantry Reinforcement badges, which were generally used up to the 17th Infantry Reinforcement Draft, as they appear on the front of the badge to signify which Company the man belong to.
Basic threads through New Zealand Reinforcement badges are as follows
- Infantry Reinforcements always used A, B, C and D throughout the course of WW1, but
- Mounted Rifles trained separately from their Infantry counterparts and also used A, B, C, and D, along with E, F, G and H for their Squadron letters. So early badges could be worn either by Mounted Rifles or Infantry.
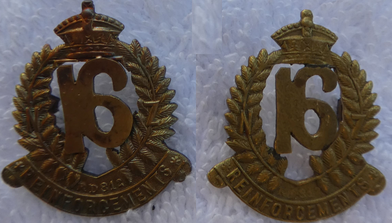
- 6th Reinforcements - I (Eye) was only used in this draft as a Company letter.
- 8th & 9th Reinforcements - E & F Companies were Rifle Brigade Reinforcements for the 1st and 2nd Battalion respectfully.
As these men were grouped and trained together, the NZ Army did make efforts with the Infantry, that if a man was from the Auckland area, he joined A Company, and that he was sent to a Auckland reserve regiment in the UK (for further training before France) and then attached to a Auckland Infantry Regiment in the field.
But this was not always possible, and with the New Zealand Rifle Brigade, all men were mixed across the 4 battalions.
Also, like today, some parts of New Zealand are more populated than other places, so Regiments did struggle to recruit solely from their geographical area (12th Nelson for example), and did rely on outside recruits to bolster their numbers.
A Company - Auckland District - covering from the middle to the top of the North Island of NZ.
B Company - Wellington District - covering from the middle to lower half of the North Island of NZ.
C Company - Canterbury District - covering from the middle to the top half of the South Island of NZ.
D Company - Otago District - covering from the middle to the lower half of the South Island and including Stewart Island.
These Company letters will become important when discussing the early Infantry Reinforcement badges, which were generally used up to the 17th Infantry Reinforcement Draft, as they appear on the front of the badge to signify which Company the man belong to.
Basic threads through New Zealand Reinforcement badges are as follows
- Infantry Reinforcements always used A, B, C and D throughout the course of WW1, but
- Mounted Rifles trained separately from their Infantry counterparts and also used A, B, C, and D, along with E, F, G and H for their Squadron letters. So early badges could be worn either by Mounted Rifles or Infantry.
- 6th Reinforcements - I (Eye) was only used in this draft as a Company letter.
- 8th & 9th Reinforcements - E & F Companies were Rifle Brigade Reinforcements for the 1st and 2nd Battalion respectfully.
As these men were grouped and trained together, the NZ Army did make efforts with the Infantry, that if a man was from the Auckland area, he joined A Company, and that he was sent to a Auckland reserve regiment in the UK (for further training before France) and then attached to a Auckland Infantry Regiment in the field.
But this was not always possible, and with the New Zealand Rifle Brigade, all men were mixed across the 4 battalions.
Also, like today, some parts of New Zealand are more populated than other places, so Regiments did struggle to recruit solely from their geographical area (12th Nelson for example), and did rely on outside recruits to bolster their numbers.
Early Infantry Reinforcement Drafts to the 6th
The main body of the New Zealand Expeditionary Force (NZEF) left New Zealand on the 15th of October 1914.
It consisted of:
New Zealand Infantry Brigade made up of:
- Headquarters - 4 Officers & 18 Other Ranks
- The 1st & 2nd Auckland Battalion - 33 Officers & 977 Other Ranks
- The 1st & 2nd Wellington Battalion - 33 Officers & 977 Other Ranks
- The 1st & 2nd Canterbury Battalion - 33 Officers & 977 Other Ranks
- The 1st & 2nd Otago Battalion - 33 Officers & 977 Other Ranks
The 1st Reinforcements left with the main body of the New Zealand Expeditionary Force (NZEF) on the 15th of October 1914.
It consisted of:
- The 1st & 2nd Auckland Battalion - 1 Officer & 99 Other Ranks
- The 1st & 2nd Wellington Battalion - 1 Officer & 99 Other Ranks
- The 1st & 2nd Canterbury Battalion - 1 Officer & 99 Other Ranks
- The 1st & 2nd Otago Battalion - 1 Officer & 99 Other Ranks
Vessels used from Wellington: Maunganui, Tahiti, Ruapehu, Orari, Limerick, Hawke's Bay, Arawa, Athenic - Wellington to Alexandria - 48 days duration.
Vessels used from Auckland: Star of India, Waimana - Auckland to Alexandria - 48 days duration.
The Main Body and 1st Reinforcements also had a Naval escort: HMS Minotaur, HMS Philomel, HMS Psyche, HMS Pyramus & HIJMS Ibuki.
The 2nd Reinforcements left NZ on the 14th of Dec 1914.
- Headquarters - 4 Other Ranks
- The 1st & 2nd Auckland Battalion - 4 Officers & 195 Other Ranks
- The 1st & 2nd Wellington Battalion - 4 Officers & 195 Other Ranks
- The 1st & 2nd Canterbury Battalion - 4 Officers & 195 Other Ranks
- The 1st & 2nd Otago Battalion - 4 Officers & 195 Other Ranks
Vessels used from Wellington: Verdala, Willochra, Knight of the Garter - Wellington to Suez - 46 days duration.
The 3rd Reinforcements left NZ on the 14th of Feb 1915.
- The 1st & 2nd Auckland Battalion - 8 Officers & 293 Other Ranks
- The 1st & 2nd Wellington Battalion - 7 Officers & 293 Other Ranks
- The 1st & 2nd Canterbury Battalion - 7 Officers & 293 Other Ranks
- The 1st & 2nd Otago Battalion - 7 Officers & 293 Other Ranks
Vessels used from Wellington: Maunganui, Tahiti, Aparima - Wellington to Suez - 40 days duration.
Both the 2nd and 3rd arrive in time for the landings at the cliffs and beaches of Gallipoli.
The 4th Reinforcements left NZ on the 17th of April 1915.
- The 1st & 2nd Auckland Battalion - 6 Officers & 291 Other Ranks
- The 1st & 2nd Wellington Battalion - 6 Officers & 291 Other Ranks
- The 1st & 2nd Canterbury Battalion - 6 Officers & 291 Other Ranks
- The 1st & 2nd Otago Battalion - 5 Officers & 291 Other Ranks
Vessels used from Wellington: Willochra, Knight Templar, Waitomo - Wellington to Suez - 38 days duration.
Subsequent drafts followed (and will be discussed below), with parts of the 7th and 8th participating in the final months on the peninsular and Gallipoli, before being held back and kept for the reorganisations in Egypt in April 1916 to then form the New Zealand and ANZAC Divisions.
Badges do exist for the 2nd, 3rd and 4th drafts, but are extremely scarce. They tend to be hand-cut, and maybe because of the crudeness of the early Training camps (initially tents before huts were created), where not widely available or popular.
Most early reinforcement drafts consisted of Territorials, who would have already seen regular service and training in New Zealand as part of its scheme. They would have also belonged to existing Regiments, who's badge they would have proudly worn into camp as they began their training, therefore they may also not have bought/participated in the wearing of a Reinforcement badge.
Pictures of the time tend to back this up.
It consisted of:
New Zealand Infantry Brigade made up of:
- Headquarters - 4 Officers & 18 Other Ranks
- The 1st & 2nd Auckland Battalion - 33 Officers & 977 Other Ranks
- The 1st & 2nd Wellington Battalion - 33 Officers & 977 Other Ranks
- The 1st & 2nd Canterbury Battalion - 33 Officers & 977 Other Ranks
- The 1st & 2nd Otago Battalion - 33 Officers & 977 Other Ranks
The 1st Reinforcements left with the main body of the New Zealand Expeditionary Force (NZEF) on the 15th of October 1914.
It consisted of:
- The 1st & 2nd Auckland Battalion - 1 Officer & 99 Other Ranks
- The 1st & 2nd Wellington Battalion - 1 Officer & 99 Other Ranks
- The 1st & 2nd Canterbury Battalion - 1 Officer & 99 Other Ranks
- The 1st & 2nd Otago Battalion - 1 Officer & 99 Other Ranks
Vessels used from Wellington: Maunganui, Tahiti, Ruapehu, Orari, Limerick, Hawke's Bay, Arawa, Athenic - Wellington to Alexandria - 48 days duration.
Vessels used from Auckland: Star of India, Waimana - Auckland to Alexandria - 48 days duration.
The Main Body and 1st Reinforcements also had a Naval escort: HMS Minotaur, HMS Philomel, HMS Psyche, HMS Pyramus & HIJMS Ibuki.
The 2nd Reinforcements left NZ on the 14th of Dec 1914.
- Headquarters - 4 Other Ranks
- The 1st & 2nd Auckland Battalion - 4 Officers & 195 Other Ranks
- The 1st & 2nd Wellington Battalion - 4 Officers & 195 Other Ranks
- The 1st & 2nd Canterbury Battalion - 4 Officers & 195 Other Ranks
- The 1st & 2nd Otago Battalion - 4 Officers & 195 Other Ranks
Vessels used from Wellington: Verdala, Willochra, Knight of the Garter - Wellington to Suez - 46 days duration.
The 3rd Reinforcements left NZ on the 14th of Feb 1915.
- The 1st & 2nd Auckland Battalion - 8 Officers & 293 Other Ranks
- The 1st & 2nd Wellington Battalion - 7 Officers & 293 Other Ranks
- The 1st & 2nd Canterbury Battalion - 7 Officers & 293 Other Ranks
- The 1st & 2nd Otago Battalion - 7 Officers & 293 Other Ranks
Vessels used from Wellington: Maunganui, Tahiti, Aparima - Wellington to Suez - 40 days duration.
Both the 2nd and 3rd arrive in time for the landings at the cliffs and beaches of Gallipoli.
The 4th Reinforcements left NZ on the 17th of April 1915.
- The 1st & 2nd Auckland Battalion - 6 Officers & 291 Other Ranks
- The 1st & 2nd Wellington Battalion - 6 Officers & 291 Other Ranks
- The 1st & 2nd Canterbury Battalion - 6 Officers & 291 Other Ranks
- The 1st & 2nd Otago Battalion - 5 Officers & 291 Other Ranks
Vessels used from Wellington: Willochra, Knight Templar, Waitomo - Wellington to Suez - 38 days duration.
Subsequent drafts followed (and will be discussed below), with parts of the 7th and 8th participating in the final months on the peninsular and Gallipoli, before being held back and kept for the reorganisations in Egypt in April 1916 to then form the New Zealand and ANZAC Divisions.
Badges do exist for the 2nd, 3rd and 4th drafts, but are extremely scarce. They tend to be hand-cut, and maybe because of the crudeness of the early Training camps (initially tents before huts were created), where not widely available or popular.
Most early reinforcement drafts consisted of Territorials, who would have already seen regular service and training in New Zealand as part of its scheme. They would have also belonged to existing Regiments, who's badge they would have proudly worn into camp as they began their training, therefore they may also not have bought/participated in the wearing of a Reinforcement badge.
Pictures of the time tend to back this up.
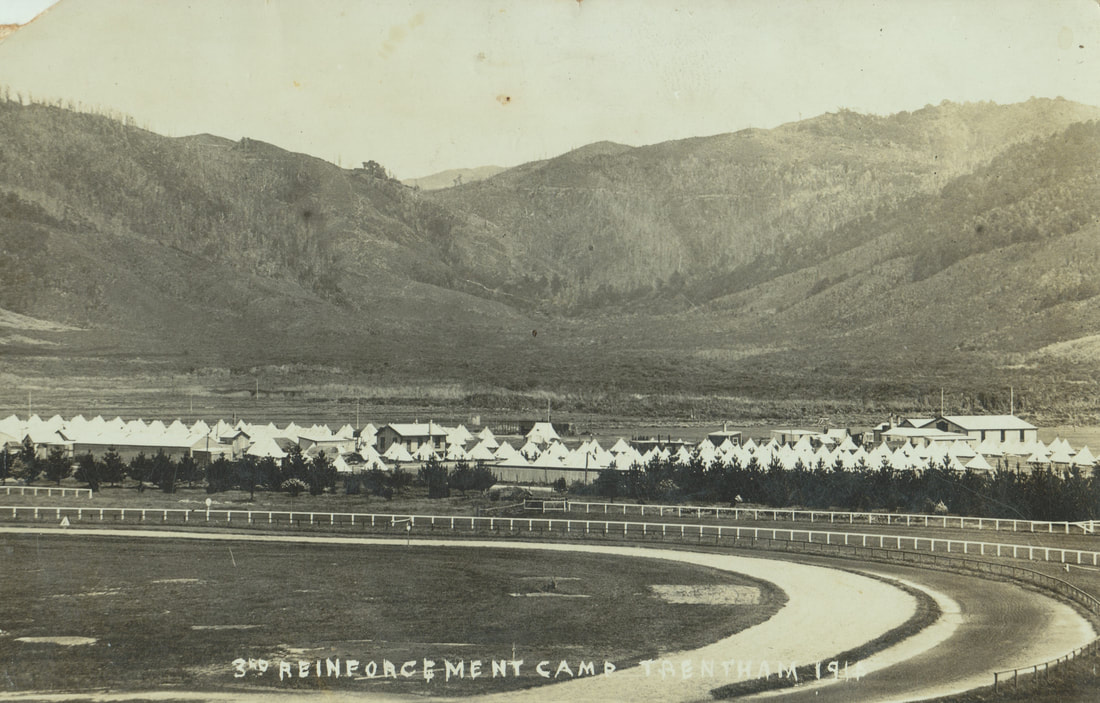
- Above: A postcard showing the 3rd Reinforcements Camp at Trentham, Upper Hutt, Wellington in 1914. This is a early image, as it show much of the camp as a tent City than anything. But this would soon change with wooden huts and barrack construction as thousands and thousands of Men and Women trained here during WW1 and later. It its still in use today as a NZ Defense force base.
|
- Above: The early gilt brass triple fern, with the bottom banner shown the Triple-Entente - France, England and Russia as the main powers on the Allied side at the beginning of WW1. This example has no lugs. Above the "C" in France is the maker initials of "CB" or Cecil Bay. There is also the year of "1914". Size 31mm by 42mm.
|
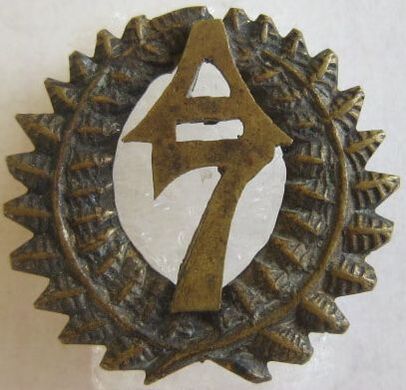
- Above: A two piece, gilt brass C Company, 5th Reinforcement Cap badge to the Canterbury Area. A solid back frame with a separate letter/number attached. Copper wire looped lugs to back. Size 32mm by 31mm.
|
The triple Fern badge above has been accepted as one of the first badges worn, with the bottom banner shown the Triple-Entente, France, England and Russia as the main powers on the Allied side at the beginning of WW1.
As time went by, and Training camps established themselves with facilities, the manufacture of badges also advanced, and the start of the frame, with a hand-cut number and letter gain popularity and prevalence.
Dates of Departure from NZ:
The 5th Reinforcements left NZ on the 13th of June 1915.
- Headquarters - 2 Other Ranks
- The 1st & 2nd Auckland Battalion - 6 Officers & 298 Other Ranks
- The 1st & 2nd Wellington Battalion - 7 Officers & 294 Other Ranks
- The 1st & 2nd Canterbury Battalion - 6 Officers & 297 Other Ranks
- The 1st & 2nd Otago Battalion - 7 Officers & 293 Other Ranks
Vessels used from Wellington: Maunganui, Tahiti, Aparima - Wellington to Suez - 39 days duration.
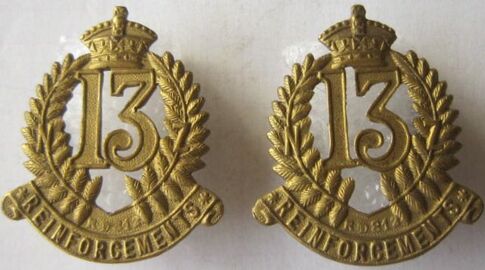
6th Infantry Reinforcements
|
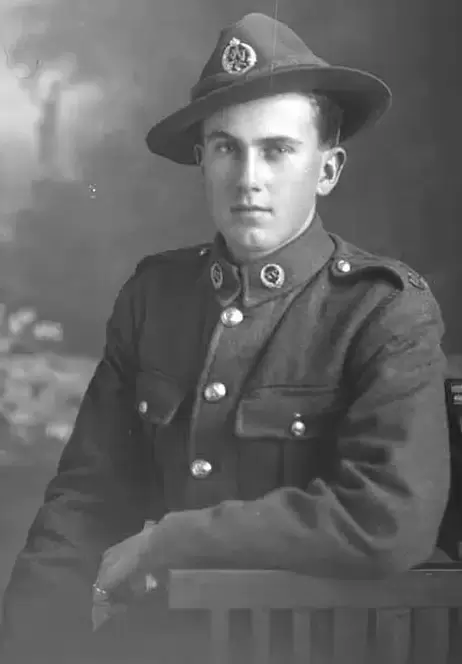
- Above: A two piece, gilt brass A Company, 6th Reinforcement Cap badge to the Auckland Area. A solid back frame with a separate letter/number attached. Copper wire looped lugs to back. Size 33mm by 31mm.
|
|
Dates of Departure from NZ:
The majority of the 6th Reinforcements left NZ on the 11th of Aug 1915.
- The 1st & 2nd Auckland Battalion - 7 Officers & 268 Other Ranks
- The 1st & 2nd Wellington Battalion - 7 Officers & 278 Other Ranks
- The 1st & 2nd Canterbury Battalion - 5 Officers & 275 Other Ranks
- The 1st & 2nd Otago Battalion - 6 Officers & 276 Other Ranks
Vessels used from Wellington: Willochra and Tofua - Wellington to Suez - 36 days duration.
The balance of the remaining 6th Reinforcements left NZ on the 16th of Sept 1915 with the 2nd Maori Contingent and advanced party for the 1st & 2nd Battalions of the New Zealand Rifle Brigade.
- The 1st & 2nd Auckland Battalion - 1 Officers & 5 Other Ranks
- The 1st & 2nd Wellington Battalion - 3 Other Ranks
- The 1st & 2nd Canterbury Battalion - 1 Other Ranks
- The 1st & 2nd Otago Battalion - 11 Other Ranks
Vessel used from Wellington: Waitemata - Wellington to Suez - 38 days duration.
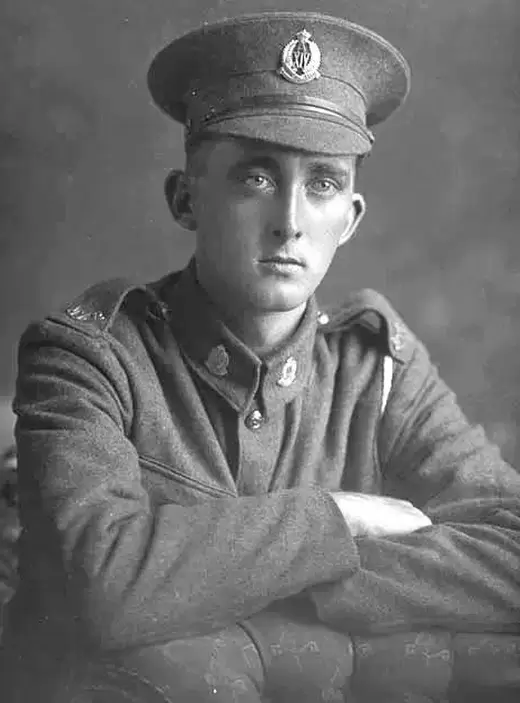
7th Infantry Reinforcements
|
- Above: A gilt brass, two piece triple fern Cap or Collar badge. A "1" sweated on to the front of the frame. Two hex type brass lugs to back, with no maker mark. Size 27mm by 37mm.
|
- Above: A gilt brass, two piece triple fern Cap or Collar badge. A "2" sweated on to the front of the frame. Two hex type brass lugs to back, with no maker mark. Size 27mm by 37mm.
|
- Above: A gilt brass with silver wash, two piece triple fern Cap or Collar badge. A "3" sweated on to the front of the frame. Two hex type brass lugs to back, with no maker mark. Size 27mm by 37mm.
|
The above were once toted as the Reinforcement badges to the 1st, 2nd and 3rd Reinforcements.
In reality no one (yet) has found a picture of them being worn.
What is more likely is that even right at the beginning of the Reinforcement badge phenomenon there were collectors.
The 1st to 3rd left very quickly from New Zealand, with the 1st leaving with the Main Body in October 1914.
Many of these chaps were Territorials, issued with, and already wearing their unit badges.
But this left a hole in the sequence for the collector to fill.
Enterprising Jewelers probably step in and made these badges to order, so that collectors could have a representation of the 1st to the 3rd, even though, very few if any were worn.
A picture has been discovered of a D Company, 7th Reinforcement soldier wearing this above frame, but with NO number to its center. He wears two, as Collar badges.
A warning, these used to command huge prices, but have come down dramatically in price in recent years.
The originals (they were made during WW1) are die stamped, gilt brass, but there are now a number of sandcast copies currently being sold (as reproductions) on the market.
These "made to order" badge are not the only ones. There are a number, and care needs to be taken to study the frame types and when they were worn and to also compare them to photographic evidence of the time.
|
- Above: A two piece, gilt brass A Company, 7th Reinforcement Cap badge to the Auckland Area. A solid back frame with a separate letter/number attached. Brooch fitting to back. Size 32mm by 31mm.
|
- Above: A two piece, gilt brass A Company 7th Reinforcement Cap badge to the Auckland Area. This has the "N" and "Z" highlighted in circles on the wreath . Separate letter/number to center. Two thread posts added to back. No maker mark and size 37mm by 35mm.
|
- Above: A two piece, gilt brass A Company, 7th Reinforcement Collar badge to the Auckland Area. A slightly different solid back frame with a separate letter/number attached. Two copper wire looped lugs to back. Size 25mm by 26mm.
|
|
- Above: A two piece, gilt brass B Company, 7th Reinforcement Cap badge to the Wellington Area. A solid back frame with a separate letter/number attached. Brooch fitting to back. Size 32mm by 31mm.
|
- Above: A two piece, gilt brass B Company 7th Reinforcement Cap badge to the Wellington Area. This has the "N" and "Z" highlighted in circles on the wreath . Separate letter/number to center. Brooch fitting to back. No maker mark and size 37mm by 35mm.
|
- Above: A hand-cut, semi convex C Company 7th Reinforcement Cap badge to the Canterbury Area. Frame with a separate letter/number attached to center (image from the internet).
|
|
- Above: A two piece, gilt brass C Company, 7th Reinforcement Cap badge to the Canterbury Area. A solid back frame with a separate letter/number attached. Two copper looped lugs to back. Size 33mm by 33mm.
|
|
Dates of Departure from NZ:
The 7th Reinforcements left NZ on the 9th of Oct 1915.
- The 1st & 2nd Auckland Battalion - 7 Officers & 273 Other Ranks
- The 1st & 2nd Wellington Battalion - 7 Officers & 271 Other Ranks
- The 1st & 2nd Canterbury Battalion - 7 Officers & 272 Other Ranks
- The 1st & 2nd Otago Battalion - 7 Officers & 274 Other Ranks
Vessels used from Wellington: Maunganui, Tahiti, Aparima, Navua and Warrimoo - Wellington to Suez - 36 to 41 days duration.
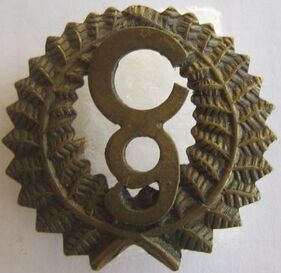
8th Infantry Reinforcements
A selection of gilt brass Cap badges to the 8th Infantry. The infantry used the Company letters A, B, C and D.
|
- Above: A hand-cut, semi convex A Company 8th Reinforcement Cap badge to the Auckland Area. Frame with a separate letter/number attached to center. Two hex type brass lugs to back. No maker mark and size 37mm by 36mm.
|
- Above: A die stamped, gilt brass A Company 8th Reinforcement Cap badge to the Auckland Area. Semi-solid to back, with a separate letter/number attached to center. Two copper wire lugs to back. No maker mark and size 33mm by 32mm.
|
- Above: A two piece, gilt brass A Company, 8th Reinforcement Cap badge to the Auckland Area. A die stamped frame with a separate letter/number attached. Copper wire looped to back. Size 35mm by 36mm.
|
|
- Above: A two piece, gilt brass Cap badge to A Company, 8th Reinforcements to the Auckland Area. This has the "N", "Z" and "R" to base of frame. Separate letter/number to center. Hex type brass lugs to back, but no maker mark. Size 37mm by 36mm.
|
- Above: A die-stamped frame, semi convex B Company 8th Reinforcement Cap badge to the Wellington Area. Frame with a separate letter/number attached to center. Two hex type brass lugs to back. No maker mark and size 37mm by 36mm.
|
- Above: A die stamped, gilt brass B Company 8th Reinforcement Cap badge to the Auckland Area. Semi-solid to back, with a separate letter/number attached to center. Two brass wire lugs to back. No maker mark and size 33mm by 32mm.
|
|
- Above: A two piece, gilt brass B Company, 8th Reinforcement Cap badge to the Wellington Area. A solid back frame with a separate letter/number attached. Brooch fitting to back. Size 33mm by 33mm.
|
- Above: A two piece, gilt brass Cap badge to B Company, 8th Reinforcements to the Wellington Area. This has the "N", "Z" and "R" to base of frame. Separate letter/number to center. Hex type brass lugs to back, but no maker mark. Size 37mm by 36mm.
|
- Above: A two piece, gilt brass Cap badge to C Company, 8th Reinforcements to the Canterbury Area. This has the "N", "Z" and "R" to base of frame. Separate letter/number to center. Hex type brass lugs to back, but no maker mark. Size 37mm by 36mm.
|
|
- Above: A hand-cut, semi convex D Company 8th Reinforcement Cap badge to the Otago Area. Frame with a separate letter/number attached to center. Two hex type brass lugs to back. No maker mark and size 38mm by 36mm.
|
|
Dates of Departure from NZ:
The 8th Reinforcements left NZ on the 14th of Nov 1915.
- Headquarters - 3 Other Ranks
- The 1st & 2nd Auckland Battalion - 7 Officers & 289 Other Ranks
- The 1st & 2nd Wellington Battalion - 7 Officers & 278 Other Ranks
- The 1st & 2nd Canterbury Battalion - 7 Officers & 278 Other Ranks
- The 1st & 2nd Otago Battalion - 7 Officers & 284 Other Ranks
Vessels used from Wellington: Willochra and Tofua - Wellington to Suez - 35 days duration.
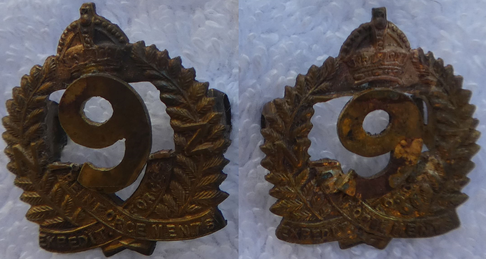
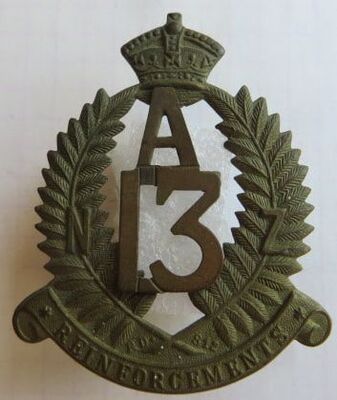
9th Infantry Reinforcements
A group of gilt brass Cap and Collar badges to the 9th Infantry Reinforcements. The infantry used A, B, C and D in this draft.
|
|
- Opposite: A two piece, gilt brass A Company, 9th Reinforcement Cap badge to the Auckland Area. A die stamped frame with a separate letter/number attached. Copper wire looped to back. Size 35mm by 36mm.
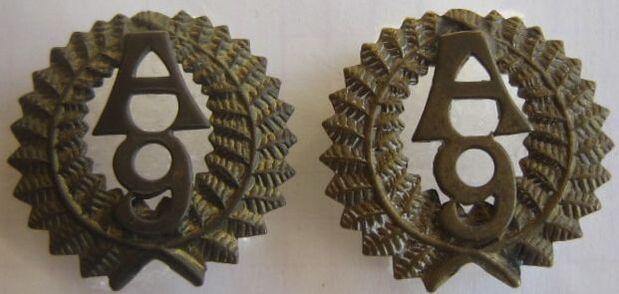
- Above: A pair of two piece, gilt brass A Company, 9th Reinforcement Collar badges to the Auckland Area. Copper wire looped lugs to back. No maker mark and size 28mm by 28mm. |
|
- Above: A two piece, gilt brass Cap badge to A Company, 9th Reinforcements to the Auckland Area. This has the "N", "Z" and "R" to base of frame. Separate letter/number to center. Hex type brass lugs to back, but no maker mark. Size 37mm by 36mm.
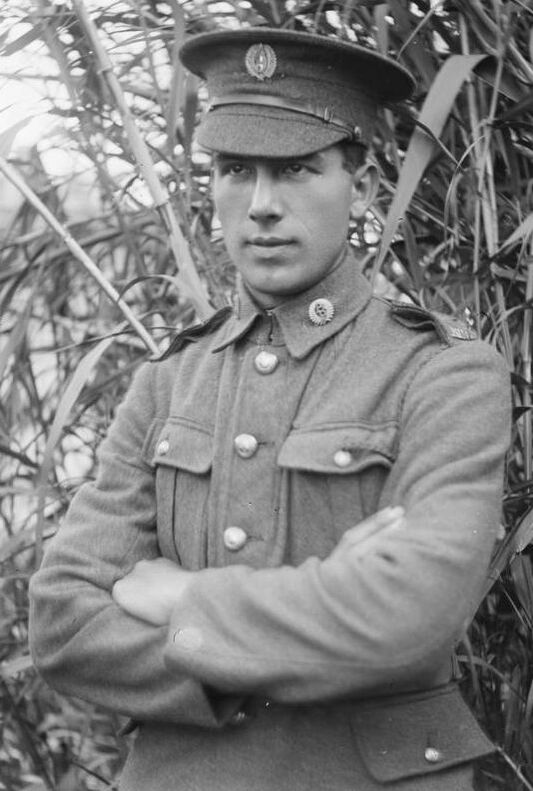
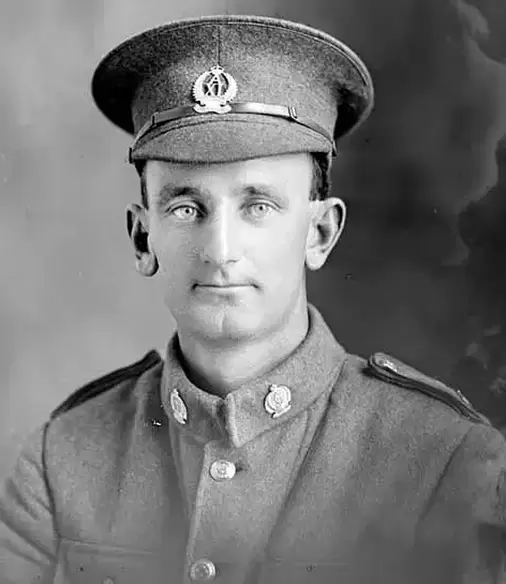
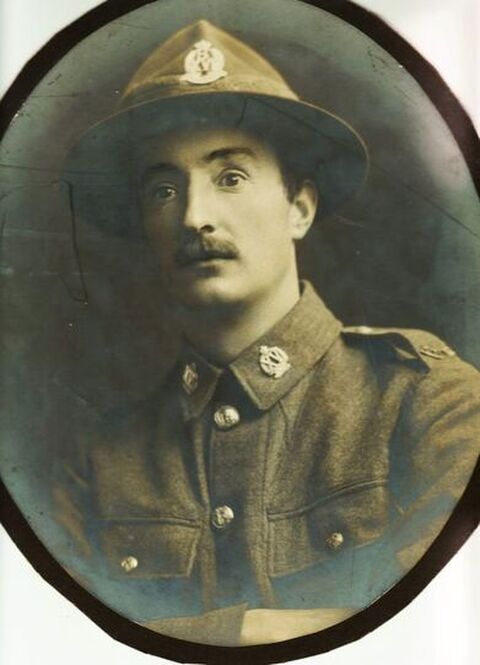
- Above Right: A superb image of a soldier wearing a A Company, 9th Reinforcement Cap and Collar badge set. The Collars match the above top examples, while the Cap badge is likely the one above, with "R" to bottom and "N" and "Z" in wreath, but its hard to make out ( Auckland Libraries Heritage Collections 1836-092). |
|
|
- Above: A two piece, gilt brass A Company 9th Reinforcement Cap badge to the Auckland Area. This has the "N" and "Z" highlighted in circles on the wreath . Separate letter/number to center. Two hex type brass lugs to back. No maker mark and size 37mm by 35mm. (image from the internet).
|
- Above: A two piece, gilt brass B Company, 9th Reinforcement Cap badge to the Wellington Area. A die stamped frame with a separate letter/number attached. Copper wire looped to back. Size 35mm by 36mm.
|
- Above: A two piece, gilt brass Cap badge to B Company, 9th Reinforcements to the Wellington Area. This has the "N", "Z" and "R" to base of frame. Separate letter/number to center. Hex type brass lugs to back, but no maker mark. Size 37mm by 36mm.
|
|
- Above: A two piece, gilt brass B Company 9th Reinforcement Cap badge to the Wellington Area. This has the "N" and "Z" highlighted in circles on the wreath . Separate letter/number to center. Two hex type brass lugs to back. No maker mark and size 37mm by 35mm.
|
- Above: A two piece, gilt brass C Company, 9th Reinforcement Cap badge to the Canterbury Area. A die stamped frame with a separate letter/number attached. Copper wire looped to back. Size 35mm by 36mm.
|
- Above: A two piece, gilt brass C Company, 9th Reinforcement Collar badge to the Canterbury Area. Copper wire looped lugs to back. No maker mark and size 28mm by 28mm.
|
|
- Above: A two piece, gilt brass Cap badge to C Company, 9th Reinforcements to the Canterbury Area. This has the "N", "Z" and "R" to base of frame. Separate letter/number to center. Hex type brass lugs to back, but no maker mark. Size 37mm by 36mm.
|
|
|
- Above: A two piece, gilt brass Cap badge to D Company, 9th Reinforcements to the Otago Area. This has the "N", "Z" and "R" to base of frame. Separate letter/number to center. A brooch fitting to back, but no maker mark. Size 37mm by 36mm.
|
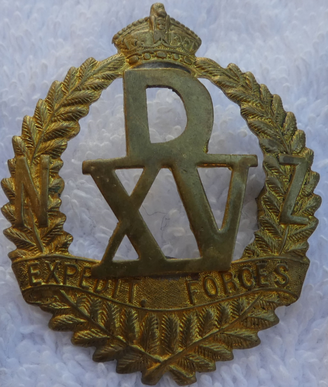
- Above: A two piece, gilt brass D Company, 9th Reinforcement Cap badge to the Otago Area. Convex frame with "EXPEDIT. FORCE" to lower banner, and "N" and "Z" to wreath. Two hex type brass lugs to back. No maker mark and size 46mm by 38mm (Ian Hamilton Collection).
|
|
- Above: A matching pair of brass collar badge to the 9th Reinforcements. Both have a hex type brass set of lugs to back. These are single piece, die-stamped, with no maker mark. Size 30mm by 26mm.
|
- Above: A matching pair of 2 piece, gilt brass Collar badges to the 9th Reinforcements. Hex type brass lugs to back, with large crown and small "NZ" to wreath (Ian Hamilton Collection).
|
Dates of Departure from NZ:
The 9th Reinforcements left NZ on the 9th of Jan 1916.
- Headquarters - 3 Other Ranks
- The 1st & 2nd Auckland Battalion - 8 Officers & 315 Other Ranks
- The 1st & 2nd Wellington Battalion - 6 Officers & 313 Other Ranks
- The 1st & 2nd Canterbury Battalion - 5 Officers & 318 Other Ranks
- The 1st & 2nd Otago Battalion - 6 Officers & 300 Other Ranks
Vessels used from Wellington: Maunganui, Tahiti and Warrimoo - Wellington to Suez - 29 to 32 days duration.
10th Infantry Reinforcements
The following is a selection of badges to the 10th Reinforcements. Company letters A, B, C and D were used for the Infantry.
|
- Above: A two piece, gilt brass Cap badge to A Company, 10th Reinforcements to the Auckland Area. This has the "N", "Z" and "R" to base of frame. Separate letter/number to center. Hex type brass lugs to back, but no maker mark. Size 37mm by 36mm.
|
- Above: A two piece, gilt brass A Company, 10th Reinforcement Cap badge to the Auckland Area. Large frame, with the fern wreath tips meeting at the middle of the crown to top. The badge has a brooch fitting to back. No maker mark and size 47mm by 39mm.
|
- Above: A two piece, gilt brass B Company 10th Reinforcement Cap badge to the Wellington Area. This has the "N" and "Z" highlighted in circles on the wreath . Separate letter/number to center. Two hex type brass lugs to back. No maker mark and size 37mm by 35mm.
|
|
- Above: A two piece, gilt brass Cap badge to B Company, 10th Reinforcements to the Wellington Area. This has the "N", "Z" and "R" to base of frame. Separate letter/number to center. Hex type brass lugs to back, but no maker mark. Size 37mm by 36mm.
|
- Above: A two piece, gilt brass Cap badge to C Company, 10th Reinforcements to the Canterbury Area. This has the "N", "Z" and "R" to base of frame. Separate letter/number to center. Hex type brass lugs to back, but no maker mark. Size 37mm by 36mm.
|
- Above: A two piece, gilt brass C Company, 10th Reinforcement Cap badge to the Canterbury Area. Large frame, with the fern wreath tips meeting at the middle of the crown to top. The badge has two brass hex type lugs to back. No maker mark and size 47mm by 39mm.
|
|
- Above: A two piece, gilt brass C Company, 10th Reinforcement Cap Badge to the Canterbury Area. Convex frame with "NZ EXPEDIT. FORCE" to lower banner. Two hex type brass lugs to back. No maker mark and size 47mm by 37mm.
|
- Above: A two piece, gilt brass Cap badge to C Company, 10th Reinforcements to the Otago Area. This has the "N", "Z" and "R" to base of frame. Separate letter/number to center. Hex type brass lugs to back, but no maker mark. Size 37mm by 36mm.
|
- Above: A two piece, gilt brass D Company, 10th Reinforcement Cap badge to the Otago Area. Large frame, with the fern wreath tips meeting at the middle of the crown to top. The badge has two brass hex type lugs to back. No maker mark and size 47mm by 39mm.
|
|
|
- Above: A pair of two piece brass collar badge to the 10th Reinforcements. These have a separate "10" attached to center. Both have two hex type brass lugs to back, with no maker mark. Note the large crown to top and small "NZ" to wreath. Size 29mm by 26mm.
|
- Above: A two piece, gilt brass D Company, 10th Reinforcement Cap Badge to the Otago Area. Convex frame with "EXPEDIT. FORCE" to lower banner, and "N" and "Z" to wreath. Two hex type brass lugs to back. No maker mark and size 46mm by 38mm.
|
- Above: A pair of single piece, solid backed brass Collar badges to the 10th Reinforcements. Both have two hex type brass set of lugs to back, but no maker mark. "NEW ZEALAND EXPEDIT. FORCES" to base banner. Size 30mm by 26mm.
|
|
Dates of Departure from NZ:
The 10th Reinforcements left NZ on the 11th of Mar 1916.
- Headquarters - 2 Other Ranks
- The 1st & 2nd Auckland Battalion - 5 Officers & 187 Other Ranks
- The 1st & 2nd Wellington Battalion - 5 Officers & 184 Other Ranks
- The 1st & 2nd Canterbury Battalion - 5 Officers & 184 Other Ranks
- The 1st & 2nd Otago Battalion - 5 Officers & 204 Other Ranks
Vessels used from Wellington: Willochra and Tofua - Wellington to Suez - 35 days duration.
11th Infantry Reinforcements
A selection of 11th Infantry Reinforcements Badges. The Company letters A, B, C, D, J and K were used for this draft for Infantry.
|
- Above: A single piece, gilt brass Cap badges to A Company, 11th Reinforcement to the Auckland Area. Large framed badge, with "REINFORCEMENTS, NZ, EXPEDY FORCES" to banner. It also comes in a non-void version. No maker mark with two wire loops to back. Size 48mm by 38mm.
|
- Above: A image of 12/4178 James Stephen Gall who started his service on the 14th of Dec 1915 as part of A Company, 11th Reinforcements. He wears the above A/11th Cap badge to his Hat, and non-void A/11th Collar badges below (image from the Auckland Libraries).
|
- Above: A pair of gilt brass Collar badges to A Company, 11th Reinforcement for the Auckland Area. Non-void, with "REINFORCEMENTS, NZ, EXPEDY FORCES" to banner. Copper wire loops to back with no maker mark. Size 33mm by 28mm.
- Opposite: The original front die for the above collars in hardened steel. This is approximately 50mm in diameter, which fits the size of the collars. No maker mark, but note the "46" or "48" in white paint to front (image from the internet). |
|
|
- Above: A two piece, gilt brass Cap badge to A Company, 11th Reinforcements to the Auckland Area. This has the "N", "Z" and "R" to base of frame. Separate letter/number to center. Hex type brass lugs to back, but no maker mark. Size 37mm by 35mm.
|
- Above: A two piece, gilt brass A Company, 11th Reinforcement Cap badge to the Auckland Area. Large frame, with the fern wreath tips meeting at the middle of the crown to top. The badge has two hex type brass lugs to back. No maker mark and size 47mm by 39mm.
|
- Above: A two piece, A Company, 11th Reinforcement Cap badge to the Auckland Area. Convex frame with "REINFORCEMENTS" to lower banner, and "N" and "Z" to wreath. Two hex type brass lugs to back. Size 47mm by 38mm.
|
|
- Above: A two piece, gilt brass B Company, 11th Reinforcement Cap badge to the Wellington Area. Large frame, with the fern wreath tips meeting at the base of the crown to top. RD or Registered Design number "RD812" to front base. Two hex type brass lugs to back and size 52mm by 42mm.
|
|

|
- Above: A two piece, gilt brass Cap badge to C Company, 11th Reinforcements to the Canterbury Area. This has the "N", "Z" and "R" to base of frame. Separate letter/number to center. Hex type brass lugs to back, but no maker mark. Size 37mm by 35mm.
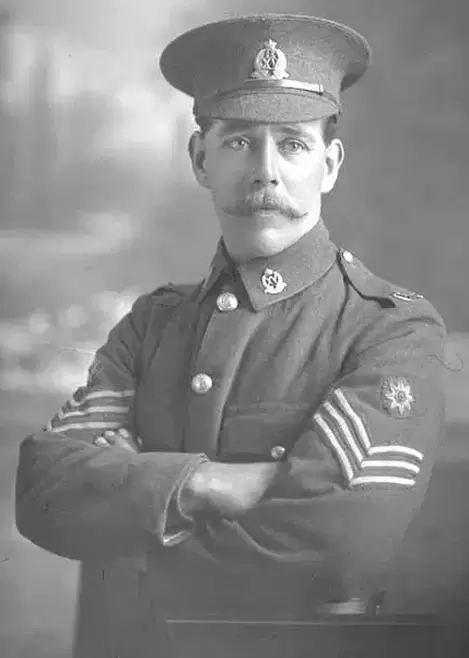
- Opposite: A unamed image of a Sergeant in C Company, 11th Reinforcements, which looks to be about to embark from New Zealand, overseas. He wears a large two piece C/11th gilt brass Cap badge, where the fern wreath tips touch the middle of the crown. There is also a "NZR" curved brass shoulder title on his shoulder board (Auckland Libraries). |
|
- Above: A two piece, semi-solid, copper C Company, 11th Reinforcement Cap badge to the Canterbury Area. With a separate letter/number attached to center, this badge is very oxidised overall and with just one copper wire looped lug remaining. No maker mark and size 32mm by 31mm, which may indicate a Collar.
|
|
|
- Above: A two piece, gilt brass D Company, 11th Reinforcement Cap badge to the Otago Area. Large frame, with the fern wreath tips meeting at the middle of the crown to top. The badge has two hex type brass lugs to back. No maker mark and size 47mm by 39mm.
|
|
|
- Above: A pair of single piece, gilt brass generic Collar badges to the 11th Reinforcements in Roman numerals. Looped brass lugs to back, with no maker mark. Size 31mm by 27mm.
|
- Above: A two piece, gilt brass pair of generic Collar badges to the 11th Reinforcements. Separate "11" soldered to a base frame. Hex brass lugs to back. Note this has the larger crown to top, but smaller "NZ" to wreath. Size 30mm by 26mm.
|
RD or Registered Design number "RD812" was to Harry Gustav Mayer & Francis Douglas Kean (Artistic Engineers and Die Seters), trading as Mayer & Kean, 4 Willis Street, Wellington, N.Z. on the 6th of December 1915.
Dates of Departure from NZ:
The 11th Reinforcements left NZ on the 2nd of April 1916.
From the 11th Reinforcements, New Zealand Army records combine the total men which make up the Reinforcement draft to the Infantry with the New Zealand Rifle Brigade as one figure, as follows:
- The 11th Draft consisted of 48 Officers and 1766 Other ranks.
Vessels used from Wellington: Maunganui and Tahiti - Wellington to Suez - 35 days duration.
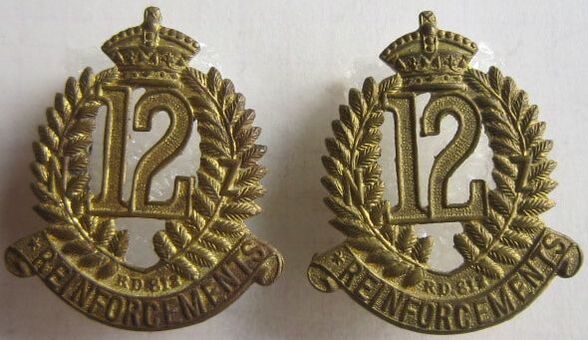
12th Infantry Reinforcements
A selection of badges to the 12th Infantry Reinforcements. Company letters A, B, C and D were used, in this draft J Company was used for the Wellington Infantry Regiments Reinforcements
|
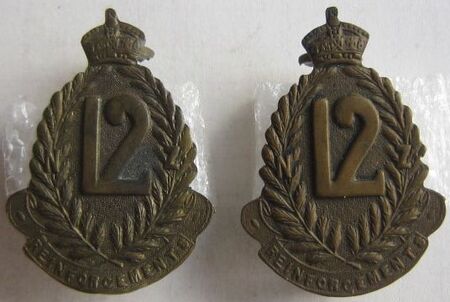
- Above: A two piece, gilt brass Cap badge to the 12th Reinforcements. No maker mark and with two copper wire looped lugs to back. Size 43mm by 34mm.
|
|

|
- Above: A two piece, A Company 12th Reinforcement Cap Badge to the Auckland Area. Convex frame with "REINFORCEMENTS" to lower banner, and "N" and "Z" to wreath. Two hex type brass lugs to back. Size 47mm by 38mm.
|
- Above: A image of 11421 Private Victor William Cunningham, who started his service on the 11th of Jan 1916 with A Company, 12th Reinforcements. He is wearing a large, flat A/12 Cap badge, where the wreath tips touch the middle of the crown (see above, right, first row of this section). To his collars are two 12th Collar badges in gilt brass (Image from Auckland Cenotaph).
|
- Above: A two piece, gilt brass B Company, 12th Reinforcement Cap badge to the Wellington Area. Large frame, with the fern wreath tips meeting at the middle of the crown to top. The badge has two hex type brass lugs to back. No maker mark and size 47mm by 39mm.
|
|
- Above: A two piece, gilt brass B Company, 12th Reinforcement Cap badge to the Wellington Area. Convex frame with "NZ EXPEDIT. FORCE" to lower banner. Two hex type brass lugs to back. No maker mark and size 47mm by 37mm.
|
|
|
- Above: A two piece, Silver D Company, 12th Reinforcement Cap badge to the Otago Area. Large frame, with the fern wreath tips meeting at the base of the crown to top. RD or Registered Design number "RD812" to front base. Brooch fitting to back and size 52mm by 42mm.
|
|
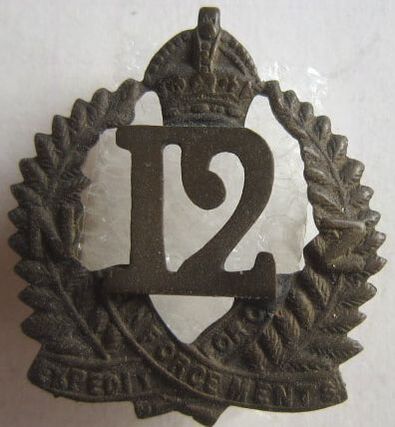
- Above: A rare frame type to D Company, 12th Reinforcements for the Otago Area. Two piece, with separate letter/number to center, and with the words "NZ EXPEDITN. FRC". Seems to have been worn by the 12th only. Two wire looped lugs to back, with no maker mark and size 45mm by 42mm.
|
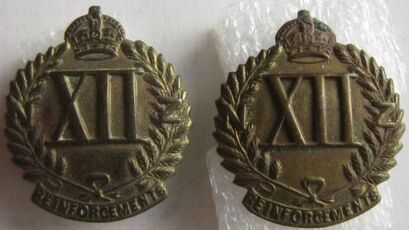
- Above: A pair of single piece, gilt brass Collar badges to the 12th Reinforcements. Both have brass type hex lugs to back. Note the "RD" or Registered Design number of "RD 812" to front. Size 32mm by 28mm.
|
- Above: A rare style of brass Collar badge, which seems to have only to be worn by the 12th Reinforcements. Both have two hex type brass lugs to back in a North/South configuration. Both are are one piece, with no maker mark. Size 34mm by 24mm.
|
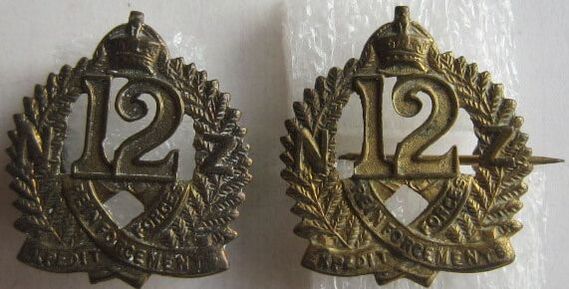
- Above: A pair of single piece, gilt brass Collars badges to the 12th Reinforcements. Void to center, one has hex type brass lugs, while the other is brooched to back. No maker mark and size 30mm by 26mm.
|
|

|
- Above: A pair of two piece brass Collar badge to the 12th reinforcements, with separate number added to the frame (Ian Hamilton Collection).
|
- Above: A pair of single piece, gilt brass Collar badges to the 12th Reinforcements. Roman numerals to center. Hex type brass lugs to back to the collar on the left, while the right is brooch fitted. No maker mark. Size 31mm by 27mm.
|
RD or Registered Design number "RD812" was to Harry Gustav Mayer & Francis Douglas Kean (Artistic Engineers and Die Seters), trading as Mayer & Kean, 4 Willis Street, Wellington, N.Z. on the 6th of December 1915.
Dates of Departure from NZ:
- 12th Reinforcements left NZ on the 1st and 6th of May 1916.
- The 12th Draft consisted of 49 Officers and 1654 Other Ranks.
Vessels used from Wellington: Ulimaroa, Mokota and Navua - Wellington to Suez - 40 days duration.
- 12th Reinforcements left NZ on the 1st and 6th of May 1916.
- The 12th Draft consisted of 49 Officers and 1654 Other Ranks.
Vessels used from Wellington: Ulimaroa, Mokota and Navua - Wellington to Suez - 40 days duration.
13th Infantry Reinforcements
Badges to the 13th Infantry Reinforcement draft. They used the company letters A, B, C, D and J, with the last being a pool company used as both Infantry and Rifle Brigade Reinforcements.
|
- Above: A single piece, gilt brass Cap badge to the 13th Reinforcements. No maker mark and with two copper wire looped lugs to back. Size 44mm by 34mm.
|
- Above: A single piece, Silver Cap badge to the 13th Reinforcements. Stamped to back of "XIII" to "STERLING", and to base banner "STG.SILVER". Two hex type lugs to back and size 43mm by 34mm.
|
- Above: A two piece, gilt brass A Company, 13th Reinforcement Cap Badge to the Auckland Area. Large frame, with the fern wreath tips meeting at the base of the crown to top. RD or Registered Design number "RD812" to front base. Two hex type brass lugs to back and size 52mm by 42mm.
|
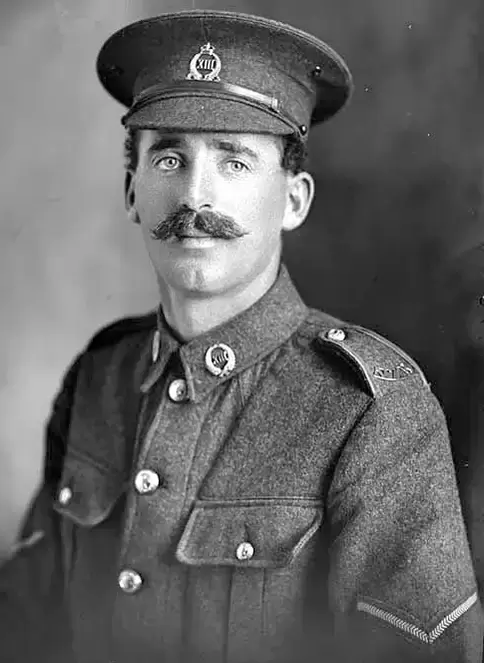
- Above: A image of 23999 Lance Corporal David Flynn, of A Company, 13th Reinforcements, who started his service on the 9th of Feb 1916. He is wearing the above "generic" 13th Reinforcement Cap badge, with similar, round 13th Collars. To his shoulder strap is a curved brass "NZR" shoulder title (image from the Auckland Cenotaph).
|
- Above: A striking sweethearts badges to a soldier in B Company, 13th Reinforcements to the Wellington Area. The center of the frame has had the letter/number removed, and attached via loops and a chain below. A small frame has then been inserted in the void. The solider is wearing a peaked Hat with the Cap and Collars to the 5th (Wellington) Infantry Regiment. Sadly unknown. Brooch fitting to back and size 66mm by 38mm.
|
|
- Above: A two piece, gilt brass B Company, 13th Reinforcement Cap badge to the Wellington Area. Large frame, with the fern wreath tips meeting at the middle of the crown to top. The badge has two copper wire lugs to back. No maker mark and size 47mm by 39mm.
|
- Above: A two piece, gilt brass C Company, 13th Reinforcement Cap Badge to the Canterbury Area. Large frame, with the fern wreath tips meeting at the base of the crown to top. RD or Registered Design number "RD812" to front base. Two hex type brass lugs to back and size 52mm by 43mm.
|
- Above: A two piece, gilt brass C Company, 13th Reinforcement Cap badge to the Canterbury Area. Large frame, with the fern wreath tips meeting at the middle of the crown to top. The badge has brass, hex type lugs to back. No maker mark and size 47mm by 39mm.
|
|
- Above: A two piece, gilt brass D Company, 13th Reinforcement Cap badge to the Otago Area. Large frame, with the fern wreath tips meeting at the middle of the crown to top. The badge has a brooch fitting to back. No maker mark and size 47mm by 39mm.
|
- Above: A similar D Company, 13th Reinforcement Cap badge to the Otago Area (Ian Hamilton Collection).
|
|
- Above: A pair of single piece, gilt brass Collar badges to the 13th Reinforcements. Very similar in the design of the 13th (North Canterbury and Westland) Infantry Regiment, but these are all brass and are missing the "I" at the base so only says "NZ" instead of "NZI" (for New Zealand Infantry). Copper wire looped lugs to back and size 31mm by 30mm.
|
- Above: A pair of single piece, generic Collars to the 13th Reinforcements. Hex type brass lugs to back and note the RD or Registered Design number of "RD812" to front. Size 32mm by 28mm.
|
|
- Above: A single piece, gilt brass Collar badge to the 13th Reinforcements. Hex type brass lugs to back, but no maker mark. Size 29mm by 26mm.
|
- Above: A two piece, gilt brass Collar badge to the 13th Reinforcements. Hex type brass lugs to back, with separate "13" hand-cut to center. No maker mark and size 29mm by 26mm.
|
- Above: A two piece, Silver badge to the 13th Reinforcements. Separate roman numerals on a die stamped frame. No maker marks and no silver mark either. A brooch fitting to back which is missing the pin. Size 34mm by 33mm.
|
RD or Registered Design number "RD812" was to Harry Gustav Mayer & Francis Douglas Kean (Artistic Engineers and Die Seters), trading as Mayer & Kean, 4 Willis Street, Wellington, N.Z. on the 6th of December 1915.
Dates of Departure from NZ:
The 13th Reinforcements left NZ on the 27th of May 1916.
- The 13th Draft consisted of 45 Officers and 1339 Other Ranks.
From the 13th Reinforcements onwards, there was no longer a need to ferry troops associated with the ANZAC and New Zealand Divisions via Suez, as both Divisions had moved to France. It meant that Mounted Rifle Reinforcements and their associated units would now leave on separate vessels for Suez and the Middle East, often, via Australia to take advantage of that countries reinforcement transports.
The 13th Reinforcements were at sea, when their route changed.
Vessels used from Wellington: Willochra and Tofua via Cape Good Hope - to Plymouth - 58 days duration.
14th Infantry Reinforcements
Badges to the 14th Reinforcements draft. They used the company letters A, B, C, D and J, with the last being a pool company used as both Infantry and Rifle Brigade Reinforcements.
|
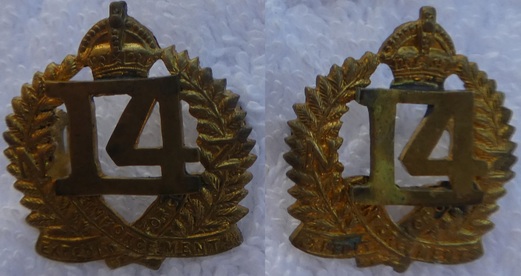
- Above: A single piece, A Company, 14th Reinforcement Cap badge to the Auckland Area. A rare frame type, as this was only used for this draft. The A over XIV is hand-cut out above the Kiwi. The work involved surely made this frame uneconomical to produce, so was short-lived. Two hex type lugs to back. Note the tip of the crown has been bent back. Size 47mm by 41mm.
|
|
|
- Above: A two piece, gilt brass B Company, 16th Reinforcement Cap Badge to the Wellington Area. Large frame, with the fern wreath tips meeting at the base of the crown to top. RD or Registered Design number "RD812" to front base. Two hex type brass lugs to back and size 52mm by 41.5mm.
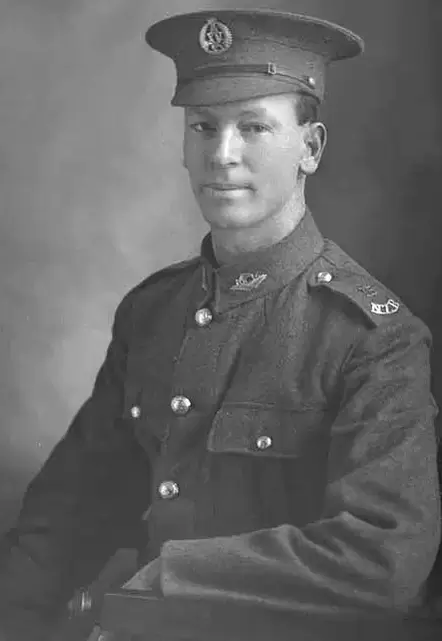
- Opposite: A image of 14480 Albert Robert Quintal, who was part of A Company, 14th Reinforcements. He wears a similar badge to the above, but with A/14 and 2 partly voided 14th Reinforcement Collars. A curved brass "NZR" is on either shoulder strap (image from Auckland Libraries). |
|
|
|
- Opposite: A two piece, B Company, 14th Reinforcement Cap Badge to the Wellington Area. Convex frame with "REINFORCEMENTS" to lower banner, and "N" and "Z" to wreath. Two hex type brass lugs to back. Size 48mm by 39mm.
- Above: A pair of single piece, gilt brass collar badges to B Company, 14th Reinforcements or the Wellington Area. These are actually badge centers, which have had 2 brass hex lugs attached to back in a North/South config. No maker mark and size 24mm by 25mm. |
|
- Above: A two piece, gilt brass C Company, 16th Reinforcement Cap Badge to the Canterbury Area. Large frame, with the fern wreath tips meeting at the base of the crown to top. RD or Registered Design number "RD812" to front base. Two hex type brass lugs to back and size 52mm by 42.5mm.
|
- Above: A two piece, gilt brass C Company, 14th Reinforcement Cap Badge to the Canterbury Area. Convex frame with "EXPEDIT. FORCE" to lower banner, and "N" and "Z" to wreath. Two hex type brass lugs to back. No maker mark and size 46mm by 38mm.
|
- Above: A two piece, C Company, 14th Reinforcement Cap Badge to the Canterbury Area. Convex frame with "REINFORCEMENTS" to lower banner, and "N" and "Z" to wreath. Two hex type brass lugs to back. Size 47mm by 37mm.
|
|
- Above: A two piece, gilt brass D Company, 14th Reinforcement Cap Badge to the Otago Area. Convex frame with "NZ EXPEDIT. FORCE" to lower banner. Two hex type brass lugs to back. No maker mark and size 46.5mm by 37mm.
|
- Above: A two piece, D Company, 14th Reinforcement Cap Badge to the Otago Area. Convex frame with "REINFORCEMENTS" to lower banner, and "N" and "Z" to wreath. Two hex type brass lugs to back. Size 48mm by 38mm.
|
- Above: A two piece, D Company, 14th Reinforcement Cap Badge to the Otago Area. Convex frame with "REINFORCEMENTS" to lower banner, and "N" and "Z" to wreath. Note the center is stamped, rather than hand cut. Brooched to back. Size 48mm by 38mm.
|
|
|
- Opposite: A two piece, gilt brass Cap badge to the J Company, 14th Reinforcements. Used as a pool draft to augment numbers for both the Infantry and NZRB. Hex type brass lugs to back(Ian Hamilton Collection).
- Above: A pair of single piece, semi-void, gilt brass Collar badges to the 14th Reinforcements. Two hex lugs to back and size 30mm by 28mm. |
|
- Above: A single piece, non-void, gilt brass Collar badge to the 14th Reinforcements. Two hex lugs to back and size 30mm by 28mm.
|
- Above: A single piece, non-void gilt brass Collar badge to the 14th Reinforcements. With two hex lugs to back, but no maker mark. Size 33mm by 28mm.
|
- Above: A pair of two piece, gilt brass collar badges to the 14th Reinforcements. Separate "14's" to center, with two hex lugs to back (Ian Hamilton Collection).
|
RD or Registered Design number "RD812" was to Harry Gustav Mayer & Francis Douglas Kean (Artistic Engineers and Die Seters), trading as Mayer & Kean, 4 Willis Street, Wellington, N.Z. on the 6th of December 1915.
Dates of Departure from NZ:
The 14th Reinforcements left NZ on the 26th of June 1916.
- The 14th Draft consisted of 43 Officers and 1650 Other Ranks.
Vessels used from Wellington: Maunganui and Tahiti via Cape Good Hope - to Plymouth - 59 days duration.
Dates of Departure from NZ:
The 14th Reinforcements left NZ on the 26th of June 1916.
- The 14th Draft consisted of 43 Officers and 1650 Other Ranks.
Vessels used from Wellington: Maunganui and Tahiti via Cape Good Hope - to Plymouth - 59 days duration.
15th Infantry Reinforcements
Badges to the 15th Reinforcement draft. They used the company letters A, B, C, D and J, with the last being a pool company used as both Infantry and Rifle Brigade Reinforcements.
|
- Above: A bi-metal, 2 piece, what appears as darkened brass frame with a white metal "XV" to center Cap badge to the 15th Reinforcements. Likely Officers, it has no maker mark to back, with two copper wire looped lugs. Overall toned to front (image from the internet).
- Opposite: A image of 18820 Private Bert Ernest Leydon, who was part of A Company, 15th Reinforcements. He is wearing a A/15th Cap badge with a pair of generic NZ and Kiwi over Ferns Collar badges. On his shoulder board is a "15" over a curved "NZR" (image from Auckland Libraries). |
|
- Above: A single piece, gilt brass (now toned) Cap badge to the 15th Reinforcements. No maker mark and with two copper wire looped lugs to back. Someone has added a piece of red cardboard as a backing. Kept as found and size 44mm by 34mm.
|
- Above: A "A" Company, 15th Reinforcements Cap badge in 2 piece gilt brass to the Auckland Area. Two copper looped lugs to back, with no maker mark. Size 43mm by 33mm.
|
- Above: A two piece, gilt brass A Company, 15th Reinforcement Cap Badge to the Auckland Area. Large frame, with the fern wreath tips meeting at the base of the crown to top. RD or Registered Design number "RD812" to front base. Two hex type brass lugs to back and size 50mm by 42mm (roughly, note tip of crown is bent back).
|
|
- Above: A two piece, gilt brass B Company, 15th Reinforcement Cap Badge to the Wellington Area. Large frame, with the fern wreath tips meeting at the base of the crown to top. RD or Registered Design number "RD812" to front base. Two hex type brass lugs to back and size 52mm by 42.5mm.
- Opposite: A image of 15647 Quartermaster Sergeant Richard Hart. He is wearing the above type B/15th Reinforcement Cap badge and a pair of 15th Collar badges. Sadly I can't make out his shoulder title (maybe NZASC, which the QMS were attached to in the Camps). To his shoulder he wears a QMS star above his Sergeants rank chevrons. |
|
- Above: A "B" Company, 15th Reinforcements Cap badge in 2 piece Stirling Silver to the Wellington Area. Two copper looped lugs to back, with "STG.SILVER" to back of crown. Size 43mm by 33mm.
|
|
- Above: A two piece, gilt brass D Company, 15th Reinforcement Cap Badge to the Otago Area. Convex frame with "EXPEDIT. FORCE" to lower banner, and "N" and "Z" to wreath. Two hex type brass lugs to back (Ian Hamilton).
|
- Above: A rare frame type to D Company, 15th Reinforcements to the Otago Area. Wide frame with "N.Z" to base and a Kiwi over the words "EXPEDIT. FORCE". Hex type lugs to back. Size 49mm by 42mm.
|
|
- Above: A rare frame type to J Company, 15th Reinforcements which was a pool draft for both the Infantry and NZRB. Wide frame with "N.Z" to base and a Kiwi over the words "EXPEDIT. FORCE". Hex type lugs to back. Size 49mm by 42mm.
- Opposite: A image of 17398 Alexander Edwin Forrest from J Company, 15th Reinforcements. He wears the above frame type with J/15 to its center on his Hat. Two rounded frame type 15th Collars badges (see below) are on his tunic, along with a brass curved shoulder title which I can't make out (image from Auckland Libraries). |
|
|
- Above: A pair of Collar badges to the 15th Reinforcements. They are single piece, gilt brass. The collar on the right was found under the floor boards of a house, which was being renovated in the North Island. Copper looped lugs to back to both. No maker mark and size 31mm by 28.5mm.
|
- Above: A pair of single piece, gilt brass collar badges to the 15th Reinforcements. Non-voided to center, with one which has two hex lugs to back, while the other is brooched. No maker mark and size 33mm by 28mm.
|
|
- Above Left: A single piece, gilt brass collar badges to the 15th Reinforcements. Die stamped, and voided to center, with two hex brass lugs to back. Lowe frame Type No. 7.
|
RD or Registered Design number "RD812" was to Harry Gustav Mayer & Francis Douglas Kean (Artistic Engineers and Die Seters), trading as Mayer & Kean, 4 Willis Street, Wellington, N.Z. on the 6th of December 1915.
Dates of Departure from NZ:
- 15th Reinforcements left NZ on the 26th & 29th of July 1916.
- The 15th Draft consisted of 47 Officers and 1613 Other Ranks.
Vessels used from Wellington: Waitemata and Ulimaroa via Cape Good Hope - to Plymouth - 66 days duration.
- Opposite: A two piece, gilt brass collar badge to the 15th Reinforcements. Two copper wire lugs to back with no maker mark. Size 32.5mm by 28mm.
16th Infantry Reinforcements
Badges to the 16th Infantry Reinforcements. They used the company letters A, B, C, D and J, with the last being a pool company used as both Infantry and Rifle Brigade Reinforcements.
|
- Above: A generic 16th Reinforcement Cap Badge. Large frame, with the fern wreath tips meeting at the base of the crown on top. RD or Registered Design number "RD812" to front base. Lowe frame Type No. 12.
|
|
|
- Above: A small Stirling Silver and Gold sweethearts badge to A Company, 16th Reinforcements. Brooch fitting to back, along with a mark of "9ct" to the back of the "A/XVI".
|
- Above: A two piece, gilt brass B Company, 16th Reinforcement Cap Badge to the Wellington Area. Large frame, with the fern wreath tips meeting at the base of the crown to top. RD or Registered Design number "RD812" to front base. Two hex type brass lugs to back and size 52.5mm by 43mm.
|
- Opposite: A large oval image of a Soldier wearing his Lemon Squeezer with the above left B/16th Reinforcement Cap badge for the Wellington Area being worn. His two collars are generic 2 piece 16th Reinforcement collars. Sadly the image is not named.
|
|
- Above: A "B" Company, 16th Reinforcements Cap badge in 2 piece gilt brass to the Wellington Area. Two copper looped lugs to back, with no maker mark. Size 43mm by 34mm.
|
- Above: A two piece, gilt brass C Company, 16th Reinforcement Cap Badge to the Canterbury Area. Large frame, with the fern wreath tips meeting at the base of the crown to top. RD or Registered Design number "RD812" to front base. Two hex type brass lugs to back and size 52mm by 43mm.
|
- Above: A "C" Company, 16th Reinforcements Cap badge in 2 piece gilt brass to the Canterbury Area. Brooch fitting to back, with no maker mark. Size 43mm by 33.5mm.
|
|
|
- Above & Opposite Right: Three single piece collar badges to D Company, 16th Reinforcements to the Otago Area. All are actually badge centers, which have had two hex type brass lugs attached to back. Note the opposite collar is non-voided to letter. Size 25.5mm by 27mm.
- Opposite Left: A two piece, gilt brass D Company, 16th Reinforcement Cap Badge to the Otago Area. Convex frame with "EXPEDIT. FORCE" to lower banner, and "N" and "Z" to wreath. Two hex type brass lugs to back. No maker mark and size 45mm by 36mm. |
|
- Above: A two piece, gilt brass J Company, 16th Reinforcement Cap Badge which was a pool draft for both the Infantry and NZRB. Large frame, with the fern wreath tips meeting at the base of the crown to top. RD or Registered Design number "RD812" to front base. Two hex type brass lugs to back and size 52mm by 42mm.
|
- Above: A "J" Company, 16th Reinforcements Cap badge in 2 piece gilt brass which was a pool draft for both the Infantry and NZRB. Brooch fitting to back, with no maker mark. Size 43mm by 34mm.
|
- Above: A two piece, gilt brass J Company, 16th Reinforcement Cap Badge which was a pool draft for both the Infantry and NZRB. Convex frame with "EXPEDIT. FORCE" to lower banner, and "N" and "Z" to wreath. Two hex type brass lugs to back. No maker mark and size 46mm by 37.5mm.
|
|
- Above: A rare frame type to J Company, 17th Reinforcements which was a pool draft for both the Infantry and NZRB. Wide frame with "N.Z" to base and a Kiwi over the words "EXPEDIT. FORCE". Hex type lugs to back. Size 49mm by 42mm.
|
- Above: A pair of 2 piece, gilt brass Collar badge to the 16th Reinforcements. Two hex lugs to back, with a RD or Registered Design of "RD812" to front (Ian Hamilton Collection).
|
- Above: A two piece, gilt brass Collar badge to the 16th Reinforcements. Two hex lugs to back, with a RD or Registered Design of "RD812" to front. Size 32mm by 28mm.
|
|
- Above: A pair of single piece, gilt brass Collar badges to the 16th Reinforcements. Non-void type, with two brass hex lugs to back to each. No maker mark and size 30mm by 26mm.
|
- Above: A pair of single piece, gilt brass collar badges to the 16th Reinforcements. Semi-void type, with two brass hex lugs to back to each. No maker mark and size 30mm by 26mm.
|
- Above: A single piece, gilt brass Collar badge to the 16th Reinforcements. Void, with two brass hex lugs to back. No maker mark and size 29mm by 26mm.
|
|
- Above: A pair of single piece, gilt brass collar badges to the 16th Reinforcements. Non-void type, with the left with two wire looped lugs, while the right has two hex lugs. No maker mark and size 33mm by 28mm.
|
- Above: A pair of single piece, gilt brass, semi-void Collar badges to the 16th Reinforcements. The one on the right has a brooch fitting to back, while the one on the left has two hex lugs to back. No maker marks to either and size 32mm by 28mm
|
RD or Registered Design number "RD812" was to Harry Gustav Mayer & Francis Douglas Kean (Artistic Engineers and Die Seters), trading as Mayer & Kean, 4 Willis Street, Wellington, N.Z. on the 6th of December 1915.
Dates of Departure from NZ:
- 16th Reinforcements left NZ on the 20th & 25th of Aug 1916.
- The 16th Draft consisted of 46 Officers and 1734 Other Ranks.
Vessels used from Wellington: Aparima, Mokota & Navua via Cape Good Hope - to Newport - 72 days duration.
Dates of Departure from NZ:
- 16th Reinforcements left NZ on the 20th & 25th of Aug 1916.
- The 16th Draft consisted of 46 Officers and 1734 Other Ranks.
Vessels used from Wellington: Aparima, Mokota & Navua via Cape Good Hope - to Newport - 72 days duration.
17th Infantry Reinforcements
Badges to the 17th Reinforcement draft. They used the company letters A, B, C, D and J, with the last being a pool company used as both Infantry and Rifle Brigade Reinforcements.
|
- Above: A single piece, gilt brass, die stamped Cap badge to A Company, 17th Reinforcements for the Auckland Area. Rounded frame, with "NZ" to ends of banner. A pair of hex type brass lugs to back, but no maker mark. Size 39mm by 34mm.
|
- Above: A rare frame type to B Company, 17th Reinforcements for the Wellington Area. Wide frame with "N.Z" to base and a Kiwi over the words "EXPEDIT. FORCE". Hex type lugs to back. Size 49mm by 42mm.
|
- Above: A single piece, gilt brass, die stamped Cap badge to B Company, 17th Reinforcements for the Wellington Area. Rounded frame, with "NZ" to ends of banner. A pair of hex type brass lugs to back, but no maker mark. Size 39mm by 34mm.
|
|
- Above: A "B" Company, 17th Reinforcements Cap badge in 2 piece brass to the Wellington Area. Two copper wire lugs to back, with no maker mark. Size 43mm by 34mm.
|
- Above: A single piece, gilt brass B Company, 17th Reinforcement Cap badge to the Wellington Area. With "NZ" to center, over lower banner, it has two hex type brass lugs to back. No maker mark and size 40mm by 34mm.
|
- Above: A earlier, two piece, gilt brass frame to B Company, 17th Reinforcement for the Wellington Area. It came in a Princess Mary tin with the medals of 25630 Private John Wood and his two brothers. This has the "N", "Z" and "R" to base of frame. Separate letter/number to center, with two hex type brass lugs to back. Size 38mm by 35.5mm.
|
- Above: A image of Lance Corporal Carr, who is wearing a A/XVII Cap badge and pair of Kiwi "head-down" 17th Reinforcement Collar badges (image from the Auckland Library).
|
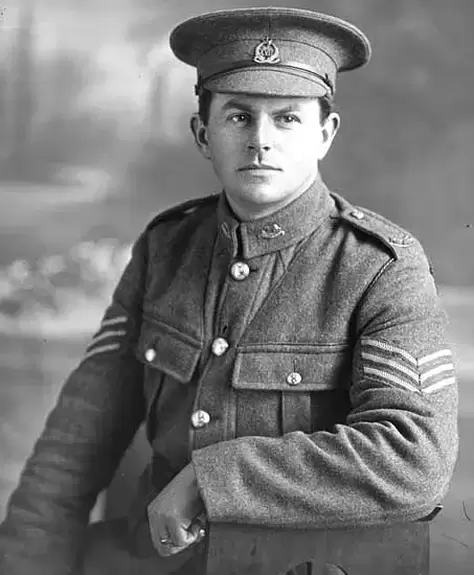
- Above: A possible image of 24323 Sergeant Norman Ashton, wearing a J/XVII Cap badge and pair of Kiwi "head-up" 17th Reinforcement Collar badges (image from the Auckland Library).
|
|
- Above: A two piece, darkened copper, die stamped Cap badge to C Company, 17th Reinforcements for the Canterbury Area. Rounded frame, with "NZ" to ends of banner. A pair of hex type brass lugs to back, but no maker mark. Size 39mm by 33mm.
|
- Above: A "C" Company, 17th Reinforcements Cap badge in 2 piece brass to the Canterbury Area. Two copper wire lugs to back, with no maker mark. Size 43mm by 34mm.
|
- Above: A single piece, gilt brass C Company, 17th Reinforcement Cap badge to the Canterbury Area. With "NZ" to center, over lower banner, it has two hex type brass lugs to back. No maker mark and size 40mm by 34mm.
|
|
- Above: A "D" Company, 17th Reinforcements Cap badge in 2 piece brass to the Otago Area. Two copper wire lugs to back, with no maker mark. Size 44mm by 34mm.
|
- Above: A single piece, gilt brass, die stamped Cap badge to D Company, 17th Reinforcements for the Otago Area. Rounded frame, with "NZ" to ends of banner. A pair of hex type brass lugs to back, but no maker mark. Size 39mm by 33mm.
|
- Above: A single piece, gilt brass, die stamped Cap badge to D Company, 17th Reinforcements for the Otago Area. Rounded frame, but with non-voided numbers, and "NZ" to ends of banner. A pair of hex type brass lugs to back, but no maker mark. Size 38.5mm by 34mm.
|
|
- Above: A Gold and Stirling Silver sweethearts badge to the J Company, 17th Reinforcement Company. Brooch fitting to back (Ian Hamilton collection).
|

- Above: A two piece, 17th Reinforcement Collar badge. Hand cut number to center with a faint RD or Registered Design number of "RD812" to front. Two hex type brass lugs to back and size 33mm by 28mm.
|
- Above: A three piece, 17th Reinforcement Collar badge. Hand cut numbers to center with no maker mark. Two hex type brass lugs to back and size 33mm by 28mm.
|
- Above: A pair of single piece, die stamped collar badges to the 17th Reinforcements. Note the crossed rifles above the roman numeral to center. One has copper wire lugs, while the other has brass wire lugs. Size 29mm by 27mm.
|
RD or Registered Design number "RD812" was to Harry Gustav Mayer & Francis Douglas Kean (Artistic Engineers and Die Seters), trading as Mayer & Kean, 4 Willis Street, Wellington, N.Z. on the 6th of December 1915.
Dates of Departure from NZ:
- 17th Reinforcements left NZ on the 24th & 26th of Sept 1916.
- The 17th Draft consisted of 39 Officers and 1883 Other Ranks.
Vessels used from Wellington: Devon and Pakeha via Cape Good Hope - to Plymouth - 58 days duration.
- Opposite: A generic Collar size badge to the 17th Reinforcements. Note the frame type appeared with the A 11th Reinforcements. It is two piece, with a separate "XVII" added to center (image from the internet.
The generic Badges - 17th Infantry Reinforcements & Others
The 17th Infantry Reinforcements seems to be the apex of the Reinforcement badge manufacturing during WW1. It is also the draft where we see the last of, in great quantities, of the letter/numbered frame type and the start of the more generic "patterned" or pictured badges.
|
- Above: A single piece, gilt brass Cap badge to the 17th Reinforcements. Note the voiding to center. Two copper wire looped lugs to back and no maker mark. Size 44mm by 38mm.
|
- Above: A single piece, gilt brass Cap badge to the 17th Reinforcements. Note the voiding, with the rifles having slings to center. Two stumps of where wire looped lugs were, and no maker mark. Size 43mm by 37mm.
|
- Above: A single piece, gilt brass Cap badge to the 17th Reinforcements. Note the voiding to above the crossed rifles. Two copper wire looped lugs to back and no maker mark. Size 44mm by 38mm.
|
|
- Above: A single piece, gilt brass Cap badge to the 17th Reinforcements. Non-voiding completely to center, and flat. Two copper wire looped lugs to back and no maker mark. Size 43mm by 37mm.
|
- Above: A single piece, gilt brass Cap badge to the 17th Reinforcements. Non-voiding completely to center, and convex. Two copper wire looped lugs to back and no maker mark. Size 43mm by 37mm.
|
This frame type appears around the 16th/17th Reinforcements. It is referred to as a generic 17th Reinforcement Cap badge, and has no number. But their are examples, where the frame was modified (center completely cut out) and used by reinforcement drafts, with separate numbers and letters attached to front (see the NZRB section on the website).
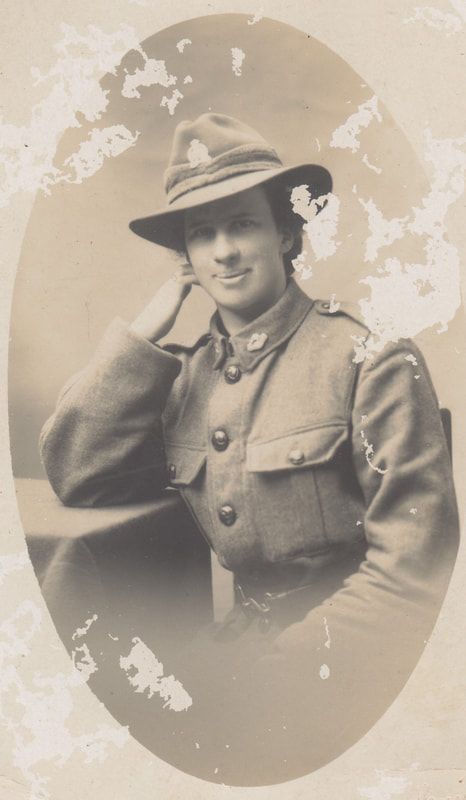
|
- Above: A front die to make the above badges in hardened steel. 79mm in diameter, it has no maker marks (image from the internet).
- Opposite: A very cool image of Lil Fisher, in a tunic and Hat, with what I think is a letter over number 17th Reinforcement Cap badge and certainly a pair of 17th Collars. These images of Women in uniform, were done during WW1 for their loved one, serving overseas, and sent to show that they were thinking of them. We do not know who Lil was sending this to, as the postcard back is empty, and it just has her name. |
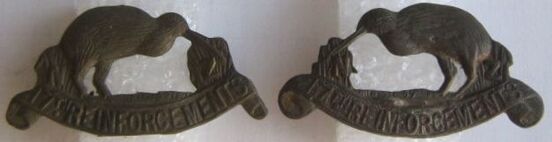
- Above: Generic opposing Collar badges to the 17th Reinforcements. These have a "RD" or Registered Design number of "RD859" just above the letters "ORC" in REINFORCEMENT. Two brass hex type lugs to back, and referred to as the "head up" Kiwi 17th Collars. Size 17mm by 33mm.
|
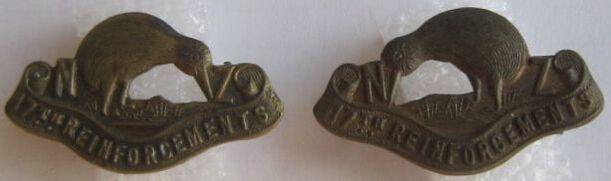
- Above: Another variation of generic Collar badges to the 17th Reinforcements. No maker mark to the badge, and with two copper wire looped lugs to back. These are referred to as the "head down" Kiwi type. Size 20mm by 34mm.
|
The following are generic Cap or Collar badges to the New Zealand Reinforcements which have no draft associated with them, but were worn by various men out of taste, and appear in photo's of the time.
|
- Above: A gilt brass Cap or Collar badge depicting a Kiwi over a fern, with the letters "NZ" either side. I have also seen this in Stirling Silver with a brooch fitting to back. This Cap badge has two copper wire looped lugs to back. No maker mark. Size 23mm by 48mm.
|
- Above: A opposing Kiwi over Rifle Collar badges pair with the words "N.Z. EXPY FCE" to lower banner. "RD" or Registered Design marked to "REGD 815" and "RD815" to back of Rifle. These seem to appear around the 10th Reinforcements and can be worn in either direction, i.e. Rifles facing forwards or backwards. Size 22mm by 44mm.
|
- Opposite: A pair of gilt brass, opposing Collars to the New Zealand Reinforcements. No specific draft associated with these, and they were sometimes also worn as a Cap Badge as well. Both have copper looped wire lugs to back. No maker mark. Size 30mm by 28mm.
RD or Registered Design number 815 is currently a unknown.
RD or Registered Design number 859 was to Arnold Binns (Jewelers), Trentham Camp on the 23rd of May 1916.
RD or Registered Design number 815 is currently a unknown.
RD or Registered Design number 859 was to Arnold Binns (Jewelers), Trentham Camp on the 23rd of May 1916.
18th Infantry Reinforcements
Badges to the 18th Reinforcement draft. They used the company letters A, B, C, D and J, with the last being a pool company used as both Infantry and Rifle Brigade Reinforcements.
|
- Above: A voided, gilt brass Cap badge to the 18th Reinforcements. Not maker marked and has two brass tangs or blades to back. Size 40mm by 48mm.
- Opposite: A image of Private Harrison of the 18th Reinforcements. He wears a Cap and Collar set in gilt brass to his hat and tunic. On his shoulder boards is a curved brass "N.Z.R" shoulder title (Auckland Library Collection). |
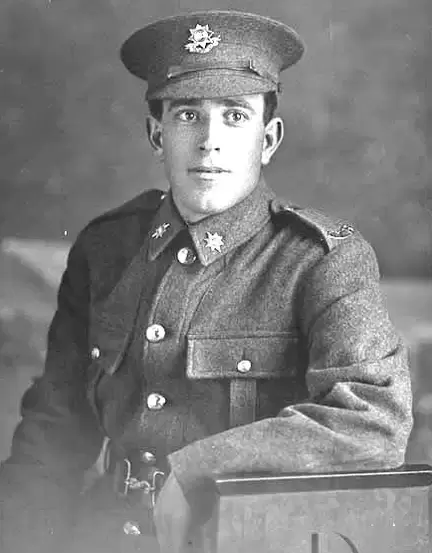
|
|
- Above: A gilt brass Cap badge to the 18th Reinforcements. Non-void, and the more common variety found. Note the large letters in the lower banner. No maker marked and has two brass hex lugs to back. Size 40.5mm by 49mm.
|
- Above: A slight variation to the 18th Reinforcements Cap Badge. Smaller letters to lower banner. This badge has been brooched, but only the hinge remains. No maker mark and size 41mm by 49mm.
|
Above: A single piece, Cap badge size Stirling Silver badge to the 18th Reinforcements. Brooched to back, with a hallmark of a "Lion", "J" and a "*" to the back of the lower banner. Size 41mm by 49mm.
|
|
- Above: Type 1 Collars badges to the 18th Reinforcements in gilt brass. Note the smaller "NZ" to center, and with copper wire lugs to back. No maker mark, and size 30.5mm by 25mm.
|
- Above: Type 2 Collars badges to the 18th Reinforcements in gilt brass. Note the longer central vertical ray, and large "NZ" to center. Two hex type brass lugs to back to each. No maker mark, and size 32mm by 25mm.
|
|
- Above: A Type 2 Collar badge to the 18th Reinforcements in gilt brass, which has been chrome plated. To back are two hex type brass lugs. No maker mark, and size 32mm by 25mm. Purpose is unknown, other than maybe for a band or just to bling up their badge.
|
- Above: A Stirling Silver badge to J Company, 18th J Reinforcements. This was a pool draft for either Infantry or New Zealand Rifle Brigade. Separate letter and numeral, hand-cut to center. To back is a brooch fitting and a small silver plaque behind the crown which has "ST. SIL.". The blue to base is a old marking paint, used by a collector to "mark" his badges. It has leaked around to front. Size 34mm by 30mm.
|
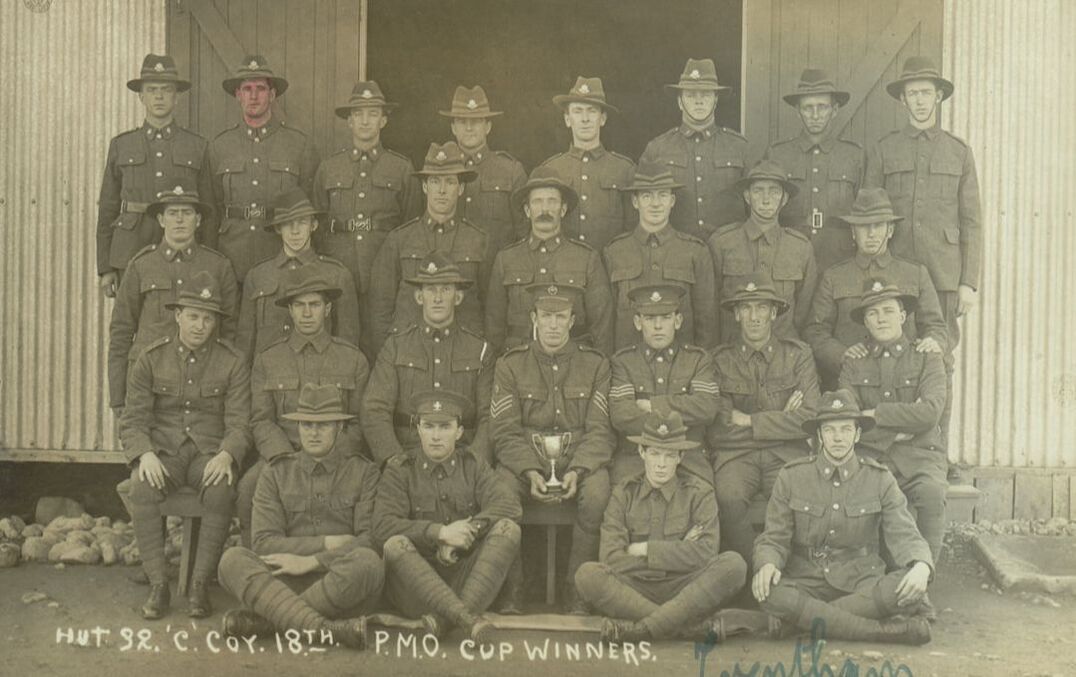
- Above: Hut 32, of C Company, 18th Infantry Reinforcements. They are apparently the P.M.O Cup winners at Trentham. The owner of the photo's is 29311 Pte. John Thomas Victor Snowden. He purchased a number of images of his time in both the 18th and 22nd (as a NCO) Reinforcements. He has coloured his face in each image, and is in the back row, 2nd from the left. John was from Riwaka, at the top of the South Island of New Zealand, and was to spend 2 years and 75 days overseas in France and on the Western Front. Most of the chaps are wearing 18th Reinforcement Cap and Collar badges. Note the center Sergeant, who is wearing a Camp Quartermaster (CQMS) Cap badge and a Quartermaster Star on his sleeve above his stripes. The chap to the left of him (seated on the ground) is wearing a 2nd (South Canterbury) Infantry Regiment Cap badge.
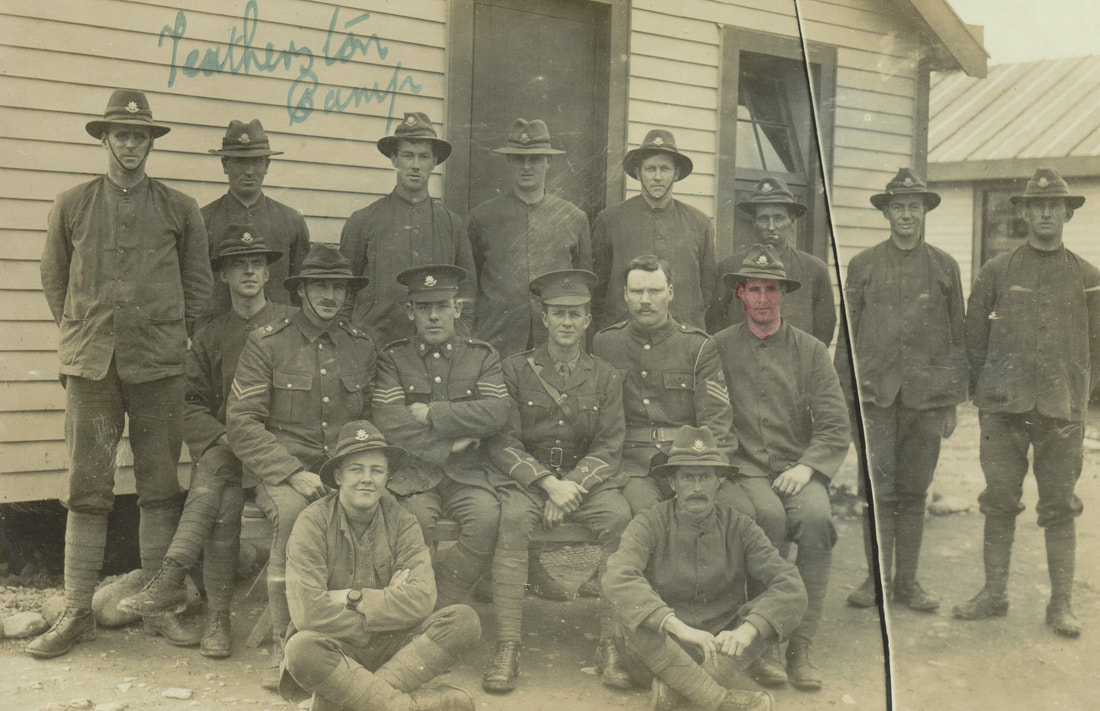
- Above: NCO's and a Officer at Featherston Camp. Again the majority are wearing 18th Cap and Collar badges. 29311 Pte. John Thomas Victor Snowden is again marked in the picture.
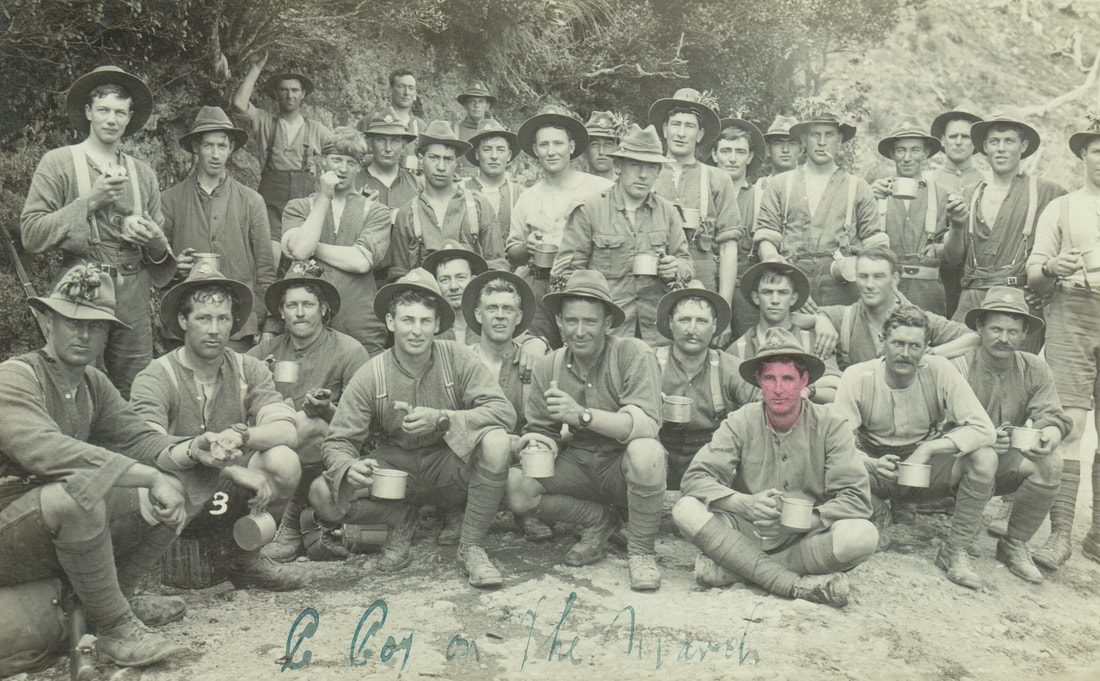
- Above: On the famous Rimutaka route march. Again members of C Coy, 18th Infantry Reinforcements pictured with a number who have their Cap Badge to their hats. 29311 Pte. John Thomas Victor Snowden is marked again. He would gain the rank of Lance Corporal with the 18th, and then on the 3rd of October 1918, was transferred to H Company, 22nd New Zealand Rifle Brigade Reinforcements. We will see more of him below.
Dates of Departure from NZ:
- 1st Draft - 18th Reinforcements left NZ on the 11th of Oct 1916.
- 2nd Draft - 18th Reinforcements left NZ on the 16th of Oct 1916.
- The 18th Draft consisted of 40 Officers and 1820 Other Ranks.
Vessels used from Wellington: Willochra and Tofua via Cape Good Hope - to Devonport - 77 days duration.
19th Infantry Reinforcements
Badges to the 19th Reinforcement draft. They used the company letters A, B, C, D and J, with the last being a pool company used as both Infantry and Rifle Brigade Reinforcements.
Motto: KIA TUPATO (Be cautious)
Motto: KIA TUPATO (Be cautious)
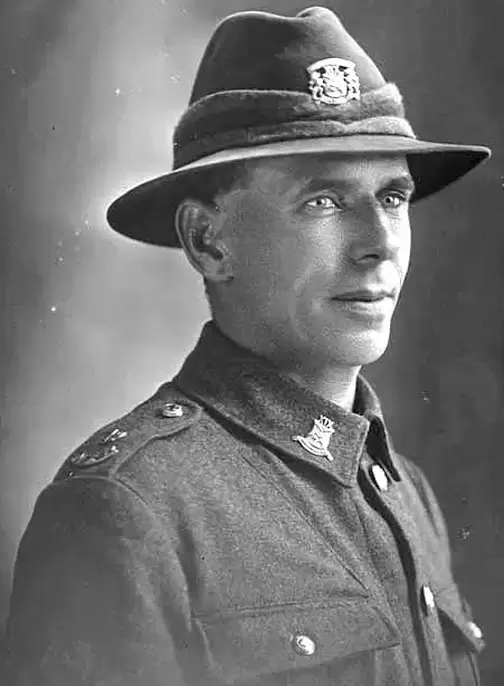
|
- Above: A gilt brass Cap Badge to the 19th Reinforcements draft. RD or Registered Design marked impressed to back to "RD874" (just below the "X"). To front, on the tip of the tongue is the letter "B" for Bock of Wellington. Two copper wire looped lugs to back. Size 36mm by 39.5mm.
- Opposite: A image of 31681 Cowper Millichamp Moore-Jones, who was part of A Company, 19th Reinforcements. He commenced his service on the 25th of July 1916, but was rejected, and discharged on the 16th of Sept 1916. Classed as C2, he was "fit" for NZ only service. Here he wears a gilt brass Cap and Collar set to the 19th, with a "19" and "NZR" to his shoulder strap (image from Auckland Cenotaph website). |
|
- Above Right: A darkened Cap Badge with better detail to front, to the 19th Reinforcements draft. To front, on the tip of the tongue is the letter "B" for Bock of Wellington. No RD number to back, with two copper wire looped lugs. Size 35mm by 40mm.
|
- Above: A "B" Company, 19th Reinforcements Cap badge in 2 piece brass to the Wellington Area. Brooch fitting to back, which has pin and hook missing. No maker mark and size 43mm by 34.5mm.
|
- Above: A unmarked Stirling Silver and Gold badge to the B Company, 19th Reinforcements, for the Wellington Area. Brooch fitting to back, and size 43mm by 34mm.
|
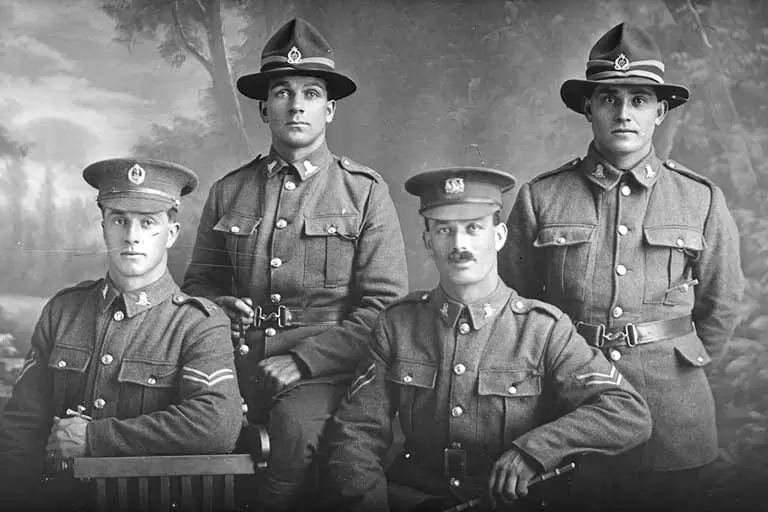
Opposite: A image of 4 members of the 19th Reinforcement draft. They wear a mixture of insignia. On the left (seated), is 31401 Corporal Henry Archibald Basil Cruller, of J Company, who was sadly killed in action in France on 12 October 1917 at the Battle of Passchendaele. On the right (standing) is 31407 Private Robert Henry Flavell, also of J Company.
Three have the letter over number Cap badge, while the Corporal with the mustashe has a standard 19th Reinforcement Cap badge. All wear the 19th Reinforcement Collar badge.
(image from Auckland Cenotaph website)
Three have the letter over number Cap badge, while the Corporal with the mustashe has a standard 19th Reinforcement Cap badge. All wear the 19th Reinforcement Collar badge.
(image from Auckland Cenotaph website)
|
- Above: A "C" Company, 19th Reinforcements Cap badge in 2 piece brass to the Canterbury Area. Two copper wire loops are to back. No maker mark and size 43mm by 34mm.
|
- Above: A unmarked Stirling Silver and Gold badge to the J Company, 19th Reinforcements. This was a pool draft, so a mix of Infantry and Rifle Brigade Reinforcements. Brooch fitting to back, but missing the pin. Size 43mm by 34mm.
|
|
- Above: A pair of matching Collar badges to the 19th Reinforcements. RD or Registered Design to back, top, near lug to "RD873". Both have two copper wire lugs in a North/South configuration. Size 30mm by 36mm.
|
- Above Left: A slight variation to the 19th Reinforcement Collar badge. Voided mouth and roman numerals at top, fretted out (opposed to just being drilled). Two copper looped lugs to back in a North/South configuration. No maker mark. Size 30mm by 35mm.
|
|
- Above: A thin gilt brass, (half size of Cap) badge to the 19th Reinforcements. Brooch fitting to back, but no maker mark. Size 29mm by 33mm (roughly).
|
- Above: A Stirling Silver (half sized Cap) badge to the 19th Reinforcements. Brooch fitting to back, but no maker or hallmark. Size 29.5mm by 33mm (roughly).
|
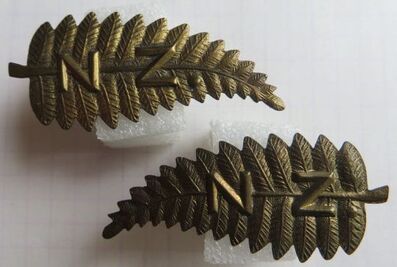
- Above: A pair opposing Fern leaf Collar badges. A image shows a chap of E Company, 19th Reinforcements wearing these. Two Copper wire looped lugs to back, with no maker mark. Size 21mm by 46mm.
|
RD or Registered Design number 873 was to Robert Robertson, Princes Street, Dunedin, N.Z. on the 27th of July 1916.
RD or Registered Design number 874 was to Arnold Binns (Jewelers), Trentham Camp, Trentham, N.Z. on the 31st of July 1916.
RD or Registered Design number 874 was to Arnold Binns (Jewelers), Trentham Camp, Trentham, N.Z. on the 31st of July 1916.
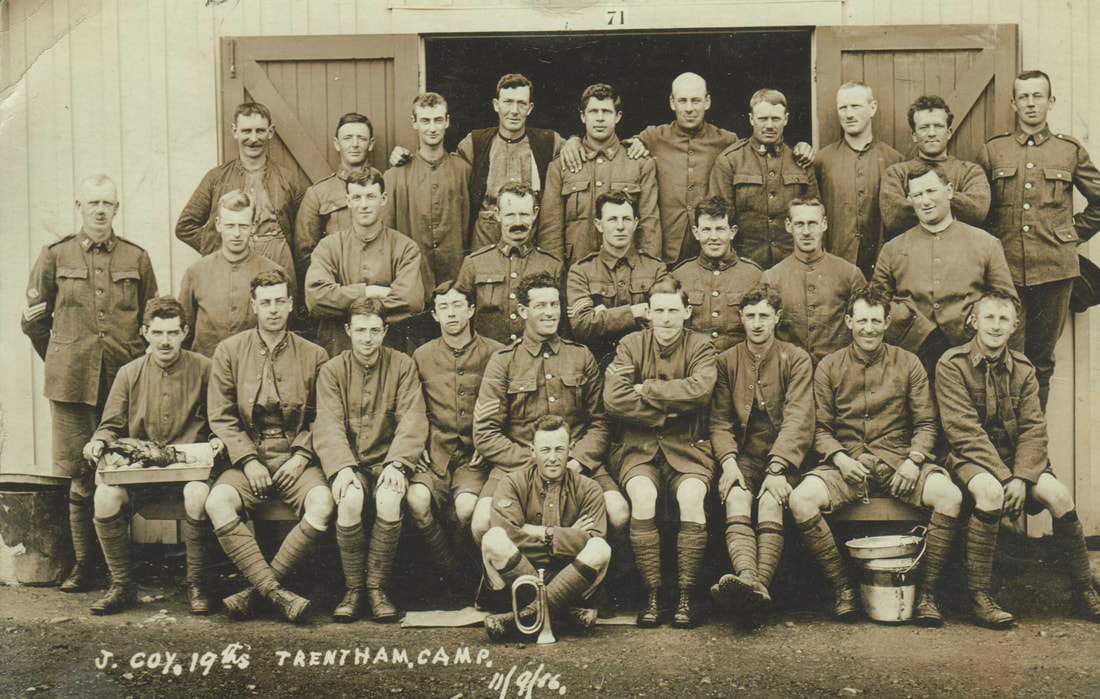
- Above: J Company. 19th Reinforcements on the 11th of September 1916. The owner of the photo was 32853 Pte. Robert Nelson Holmes, pictured in the back row, 4th from the left (wearing a dark waistcoat over his shirt). Hailing from Invercargill, Robert trained with the N.Z. Rifle Brigade Reinforcements, but ended up serving with the Auckland Infantry Regiment. He gained the rank of Staff Sergeant by the end of the conflicted and happily survived to return to New Zealand. Note the Bugler to front, with double Bugle badge to sleeve. The chap on the far left (sitting) seems to have that days lunch or dinner on his lap (a roast with potatoes). Some are wearing the 19th's Collar badges.
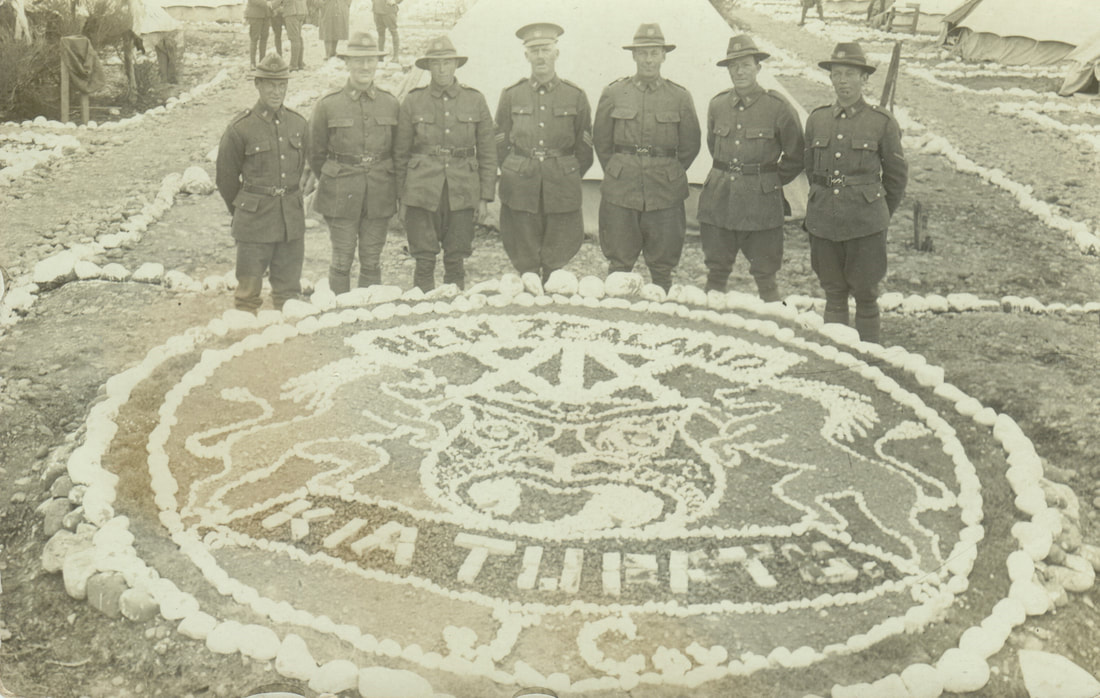
- Above: An elaborate mosaic in stones of the 19th Reinforcements Badge, in camp (see the tents behind in the background). 32853 Pte. Robert Nelson Holmes is pictured 2nd from the right, along with other members of J Company.
Dates of Departure from NZ:
- 19th Reinforcements left NZ on the 15th of Nov 1916.
- The 19th Draft consisted of 19 Officers and 1687 Other Ranks.
Vessels used from Wellington: Maunganui and Tahiti via Cape Good Hope - to Devonport - 74 days duration.
Dates of Departure from NZ:
- 19th Reinforcements left NZ on the 15th of Nov 1916.
- The 19th Draft consisted of 19 Officers and 1687 Other Ranks.
Vessels used from Wellington: Maunganui and Tahiti via Cape Good Hope - to Devonport - 74 days duration.
20th Infantry Reinforcements
Badges to the 20th Reinforcement draft. They used the company letters A, B, C, D, E and F as Infantry.
Motto: KOKIRI KIA MAIA (Attack with confidence)
Motto: KOKIRI KIA MAIA (Attack with confidence)
|
- Above: A single piece, gilt brass Cap badge to the 20th Reinforcements. No maker mark, and with two hex type brass lugs to back. Size 43mm by 49mm.
- Opposite: A photo of a Lance Corporal and his mates in A Coy, 20th Reinforcements. The "A" can just be seen on his shoulder boards, above the Number "20" and "NZR". Two wear the 20th Reinforcements Cap badge to their Lemon Squeezers, while 2 also have the non-void 20th Reinforcement Collars. |
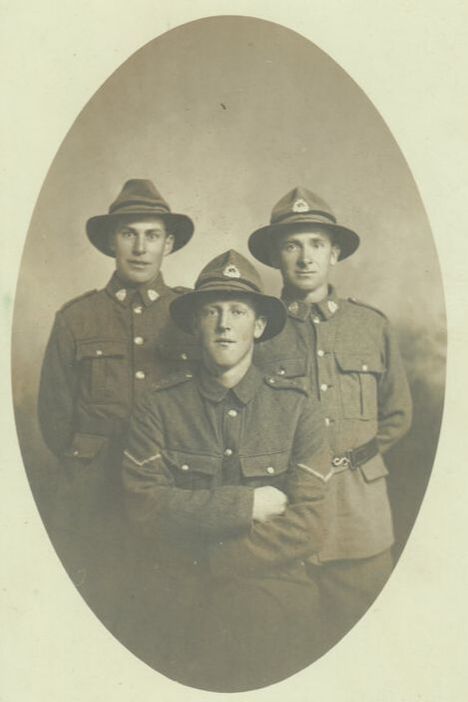
|
|
- Above: A matching pair of gilt brass "voided" 20th Reinforcement Collar badges. Both have two hex lugs to back and no maker mark. Size 33mm by 36mm.
|
- Above: A matching pair of gilt brass "non-voided" Collar badges to the 20th Reinforcements. Just a slight difference in tone to front, but both have two hex type brass lugs to back. No maker mark and size 33mm by 36mm.
|
|
- Above: A variation in Collar badge in gilt brass to the 20th Reinforcements. Note the Kings crown to top, and the "20" in an oval plaque at base. Two hex type brass lugs to back. No maker mark and size 36mm by 39mm.
|

- Above: A Silver (not marked) Collar size badge, with "voided" center to the 20th Reinforcements. Note the extra voiding to top of wreath, by crown. Brooch fitting to back and size 33mm by 36mm. This badge was in the effects of 38601 Pte. Stanley Amos Smart who started out in J Company 22nd Reinforcements.
|
- Opposite: A two piece, gilt brass Cap badge, to E Company, 20th Infantry Reinforcements. Note the 20th Draft used, A, B, C, D, E and F Companies. Two replacement copper looped lugs to back, but no maker mark. Size 43mm by 33.5mm.
Dates of Departure from NZ:
- 1st Draft - 20th Reinforcements left NZ on the 7th of Dec 1916.
- The Draft consisted of 12 Officers and 665 Other Ranks.
- 2nd Draft - 20th Reinforcements left NZ on the 30th of Dec 1916 & 2nd of Jan 1917.
- The Drafts consisted of 27 Officers and 932 Other Ranks.
Vessels used from Wellington: Port Lyttelton, Athenic and Opawa via Cape Good Hope - to Plymouth - 87 days duration.
21st Infantry Reinforcements
Badges to the 21st Reinforcement draft. They used the company letters A, B, C, D, E and F as Infantry.
- Above: A single piece, gilt brass Cap badge to the 21st Reinforcement draft. Clearly marked RD or Registered Design to "RD 894" to the scrolls to the lower banner. Two hex type brass lugs to back. There is a White Metal and Copper version of this badge. Size 32mm by 49mm.
|
- Above: The same sized badge, but in Stirling Silver to the 21st Reinforcement draft. Marked "Silver" vertically to back of tail, it has a brooch fitting to back. Again marked RD or Registered Design to "RD 894" to the scrolls to the lower banner. Size 32mm by 48mm (note wing tips are bent).
|
- Above: A near matching pair of Collar badges to the 21st Reinforcements in gilt brass. RD or Registered Design number "RD892" to back of tail. The left has it in raised letters/numbers, while the right has it stamped or "incured" to back. Two hex type brass lugs in a North/South configuration, and size 27mm by 26mm.
|

- Above: A non matching pair of Collar badges to the 21st Reinforcements in gilt brass. RD or Registered Design number "RD892" to back of tail only on the right, which is stamped or "incured". Note the beak is very long. The left is lead filled, and note it has a non-void area between legs and tail. Both have two hex type brass lugs in a North/South configuration, and size 27mm by 26mm.
|

- Opposite: A Collar badges to the 21st Reinforcements in gilt brass. RD or Registered Design number "RD892" to back of tail. This badge has a brooch fitting to back, and size 27mm by 26mm.
- Opposite: A image of 33837 Pte. Charles Ernest Cleveland who was part of A Company, 21st Reinforcements. He started his service on the 19th of Sept 1916 and was to spend 2 years and 256 days overseas, returning in 29th of Oct 1919. Charles is wearing a gilt brass Cap and Collar badge set to the 21st Reinforcements, as well as a "A" over "21" and a curved "NZR" on his shoulder strap (image from Auckland Cenotaph website). |
|
- Opposite: A Stirling Silver and Gold sweethearts badge to A Company, 21st Reinforcements. Brooch fitting to back, along with a mark of "9ct" to the back of the "A/XXI", and "STG. SILVER" to base of frame. Size 39mm by 33.5mm.
RD or Registered Design number 892 is unknown at this stage.
RD or Registered Design number 894 was to Mayer & Kean & H.J. Edgecumbe, 4 Willis Street, N.Z. Wellington, N.Z. on the 14th of September 1916.
Dates of Departure from NZ:
- 21st Reinforcements left NZ on the 19th & 21st of Jan 1917.
- The 21st Draft consisted of 37 Officers and 1764 Other Ranks.
Vessels used from Wellington: Waitemata & Ulmaroa via Cape Good Hope - to Plymouth - 68 days duration.
22nd Infantry Reinforcements
Badges to the 22nd Reinforcement draft. They used the company letters A, B, C, D, E and F as Infantry.
Motto: KIA MATARA (Be watchful)
Motto: KIA MATARA (Be watchful)
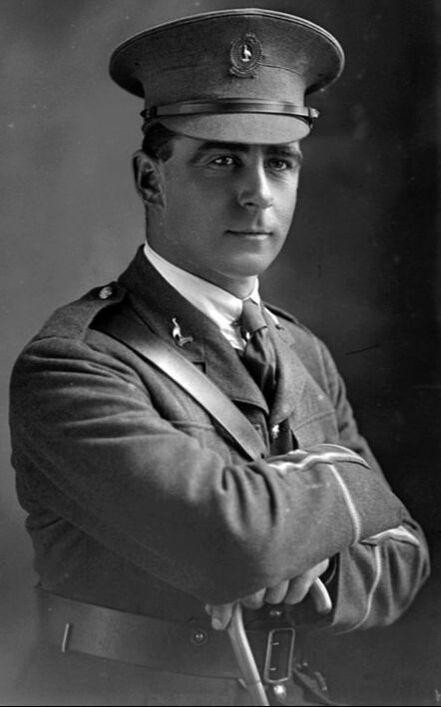
|
- Above: A Cap badge to the 22nd Reinforcements. In non-void darkened copper, it has two wire looped lugs to back. A RD or Registered Design numbered to "RD887" is just below "Z" to lower center. Size 48mm by 35mm.
- Opposite: A image of 26683 Lieutenant Alfred Sangster Reid wearing a bi-metal 22nd Reinforcement Cap badge with Silver or white metal Moa to center. His collar badges are also likely to be Silver (image from the Auckland Cenotaph). |
|
- Above: A Cap badge to the 22nd Reinforcements. In voided, darkened copper, it has two hex type lugs to back. A RD or Registered Design numbered to "RD887" is just below "Z" to lower center. Size 48mm by 35mm.
|
- Above: A Cap badge to the 22nd Reinforcements. In voided, gilt brass, it has two hex type lugs to back. A RD or Registered Design numbered to "RD887" is just below "Z" to lower center. Size 48mm by 35mm.
|
|
- Above : A B Company, 22nd Reinforcement Draft Cap badge to the Wellington Military District. Extra gilt finish has been applied to the two piece badge, which has a brooch fitting to back. No maker mark and size 43mm by 33mm.
|
- Above : A "C" Company, 22nd Reinforcement Draft Cap badge to the Canterbury Military District. A two piece badge, with two wire looped lugs to back. No maker mark and size 43mm by 33mm.
|
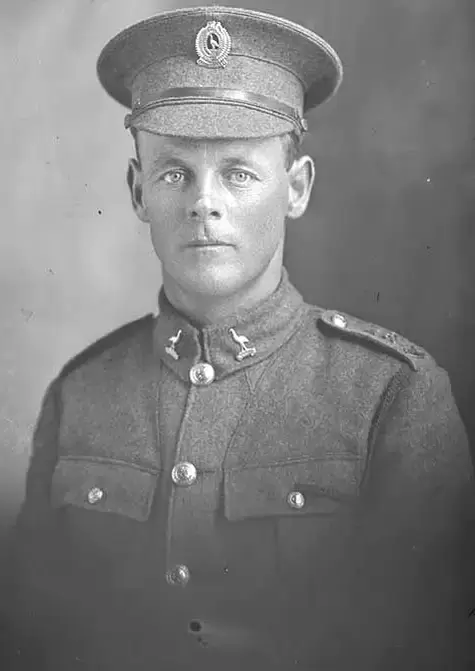
|
- Above: A small version of the 22nd Reinforcement Cap badge with the caption says is White Metal, but is likely Silver (Auckland Cenotaph website).
- Opposite: A image of 38349 Thomas Brownlee Clark, who was a member A Company, 22nd Reinforcements. He commenced his service on the 17th of Oct 1916, and was to spend 1 year and 333 days overseas. Here he is wearing his gilt brass Cap and Collar badge sent to the 22nd Reinforcements. To his shoulder strap he has a "A" over a "22" and a curved "NZR" shoulder title (image from Auckland Cenotaph website). |
RD or Registered Design number 887 was to Mayer & Kean (Engravers), Wellington, N.Z. on the 31st of August 1916.
RD or Registered Design number 888 is unknown at this stage.
Dates of Departure from NZ:
- 22nd Reinforcements left NZ on the 13th & 16th of Feb 1917.
- They consisted of 40 Officers and 1692 Other Ranks.
Vessels used from Wellington: Aparima, Mokoia and Navua via Cape Good Hope - to Devonport - 72 days duration.
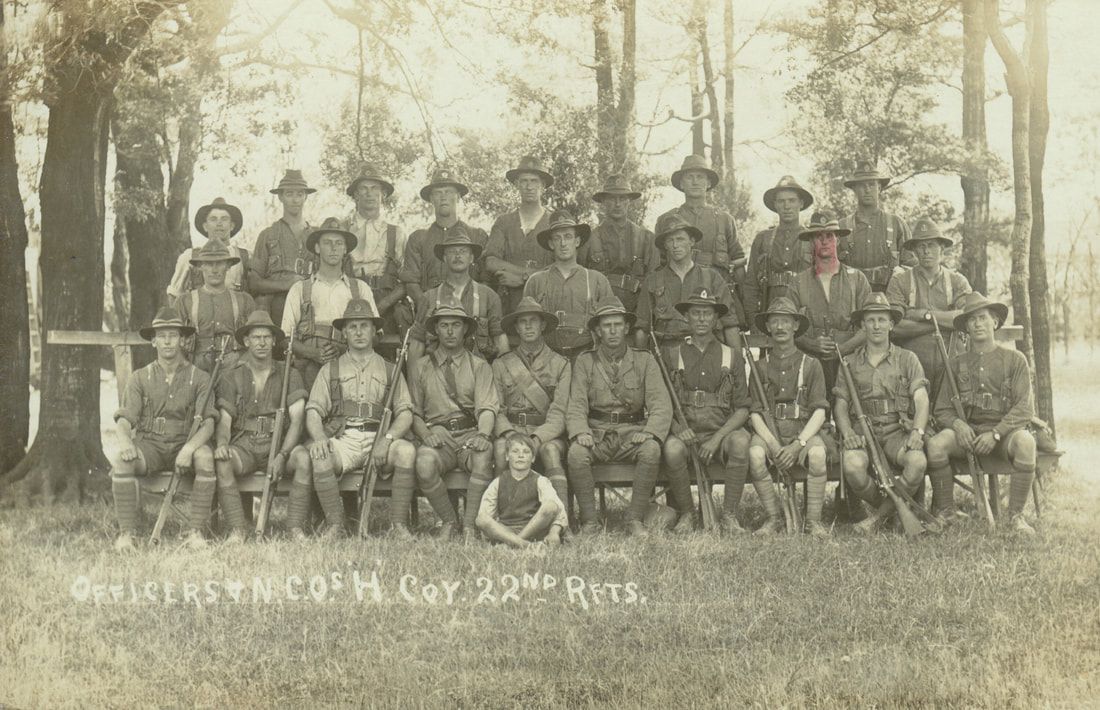
- Above: A postcard shot of the Officers and NCO's of H Company, 22nd New Zealand Rifle Brigade Reinforcements. Though reinforcements for the 4th Battalion of the NZRB, the majority of the men wear the 22nd Infantry Reinforcement badge above. This is again from the collection of 29311 John Thomas Victor Snowden, who by this stage is a Corporal in H Company, 22nd Reinforcements after transferring from C Company 18th Reinforcements while in New Zealand. He has again, highlighted himself, and is middle row, 2nd from the right.
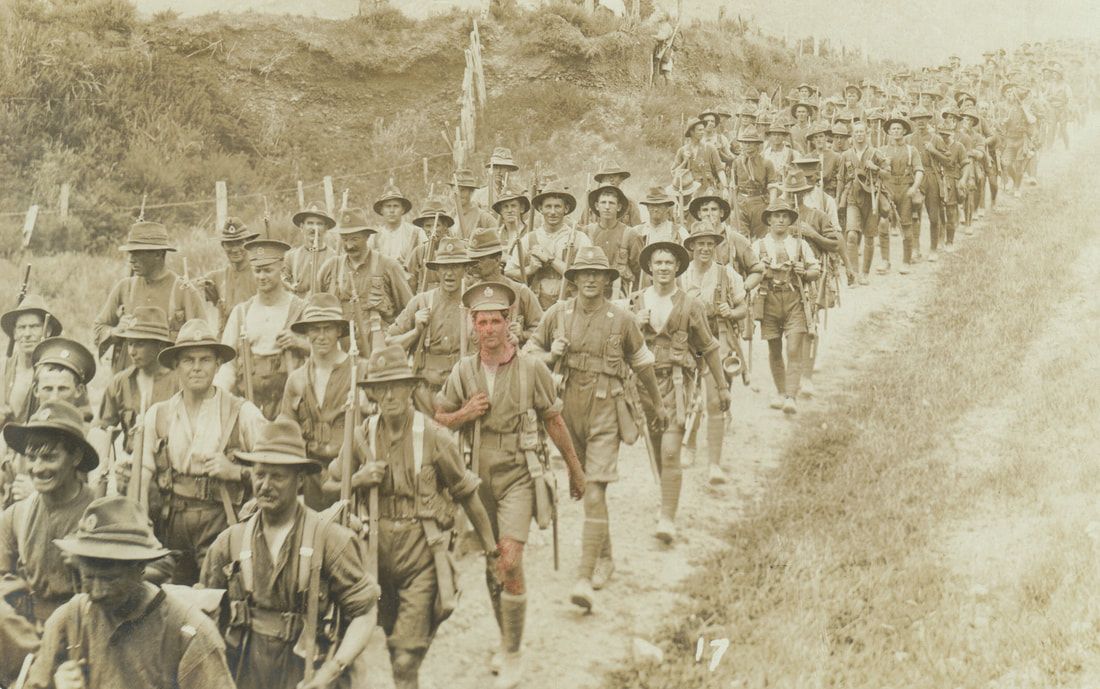
- Above: The following is a sequence of postcards taken while the 22nd Reinforcements completed their route march over the Rimutaka. 29311 John Snowden is again highlighted in the center of the picture. He is wearing a generic NZRB Cap badge, with the NZRB badge sweated onto a Reinforcement frame. All the other chaps around him are wearing the 22nd Reinforcement Cap Badge.
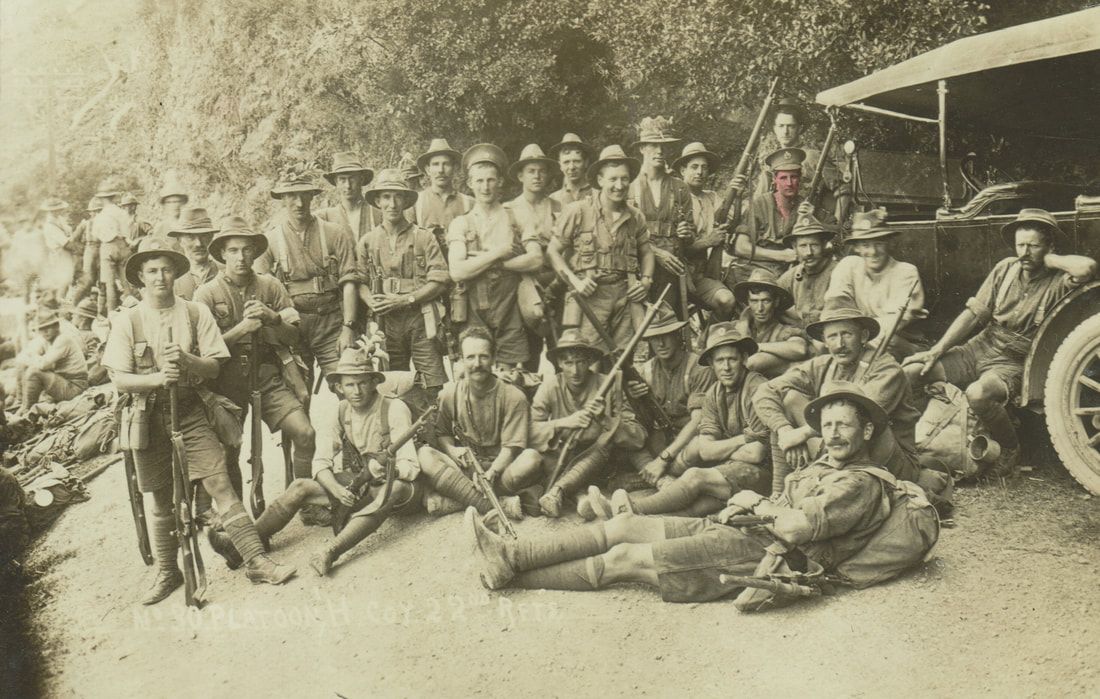
- Above: At rest, but with rifles ready. 29311 John Snowden is to the back of the picture, at the front of the car.
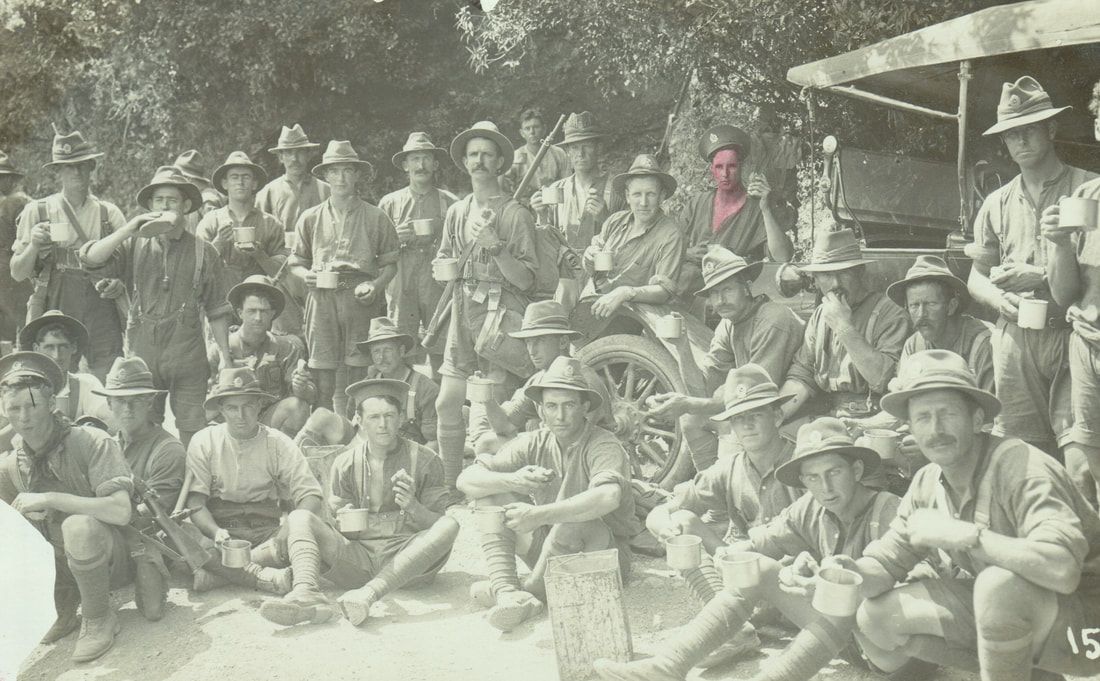
- Above: Similar picture, but this time holding cups and not rifles. 29311 John Snowden is in a similar position at the front of the car.
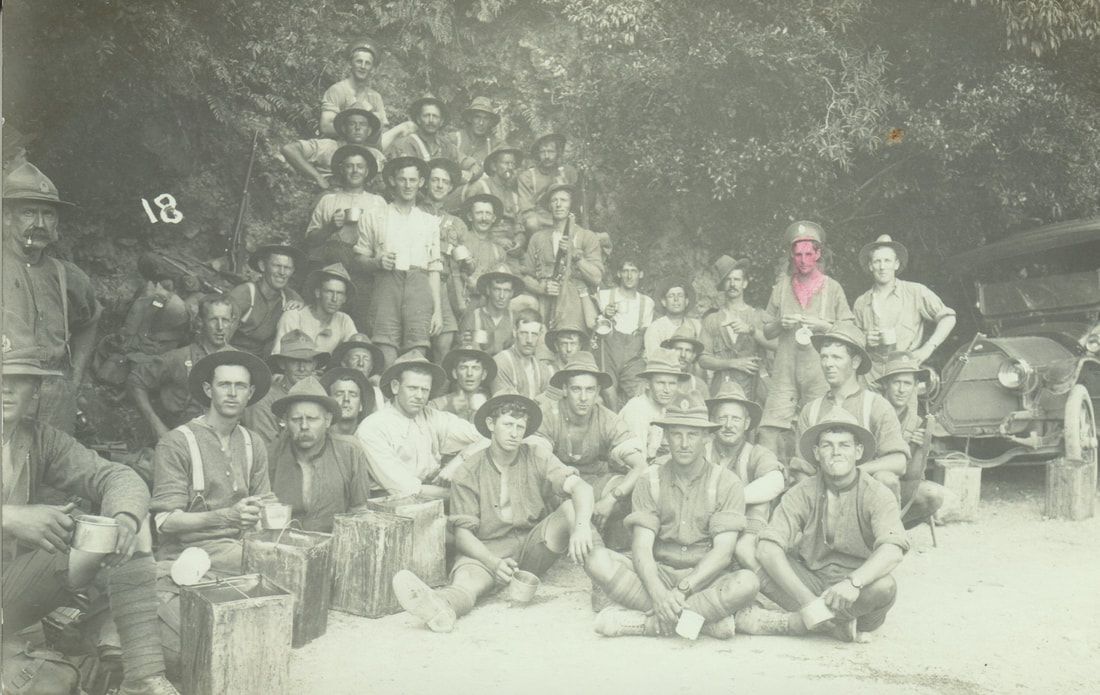
- Above: Starting to look a bit tired, with less smiles. 29311 John Snowden is standing to the right in the picture.
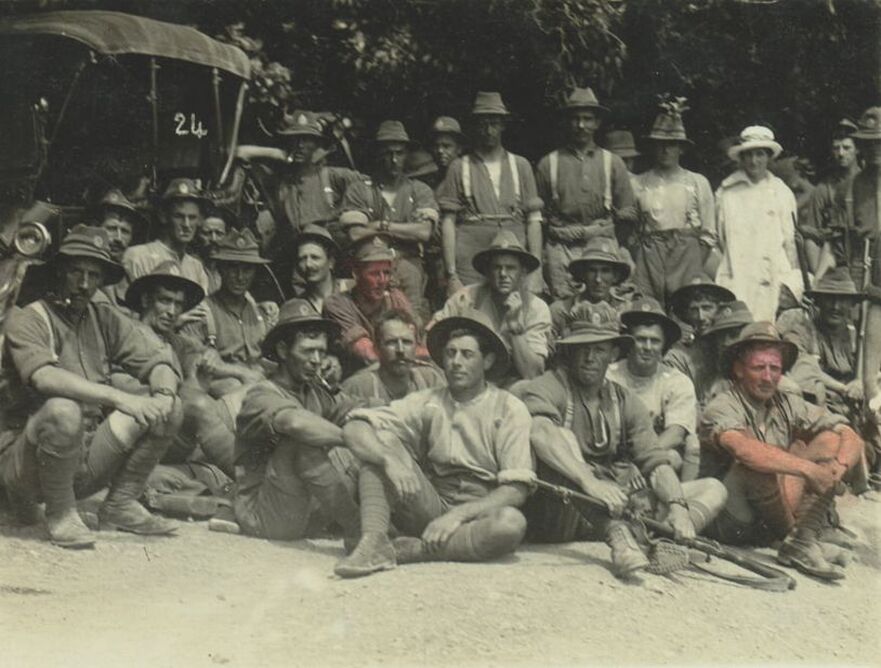
- Above: Another image of the 22nd at rest. These route matches attracted a lot of attention from the local civilian population, who came out to offer support and encouragement. There is a lady in white up the back. 29311 John Snowden is in the center of the picture. He did not record who the other man is, who is highlighted.
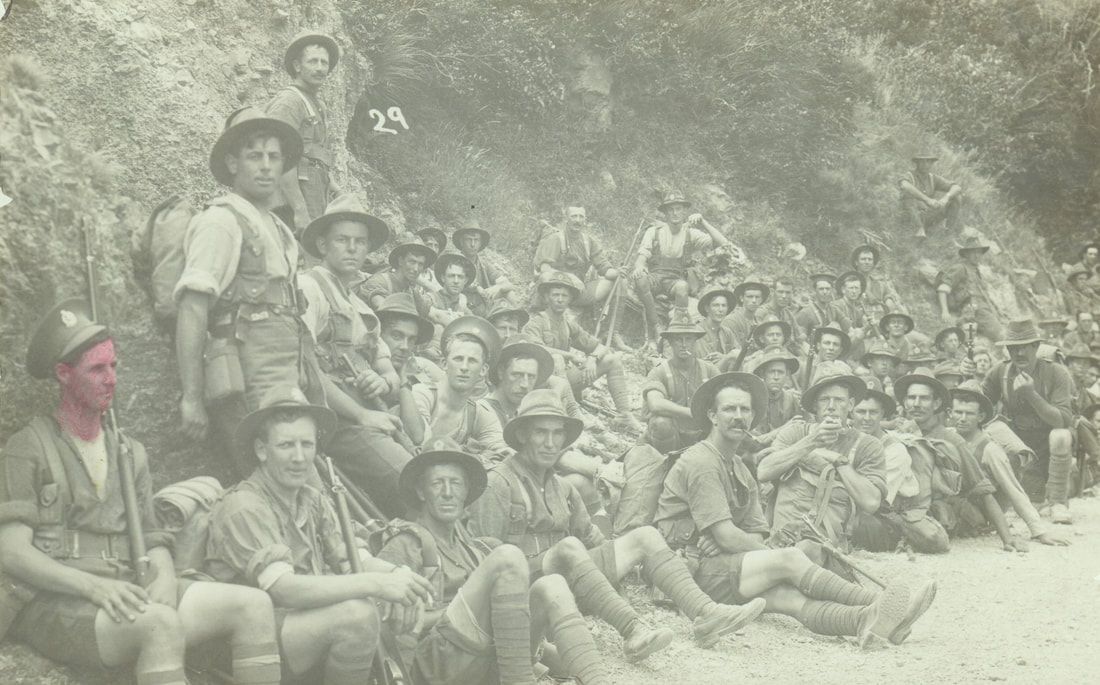
- Above: Hopefully getting towards the end of the march. John is looking tired like the rest of the 22nd, and is in the bottom left of the picture.
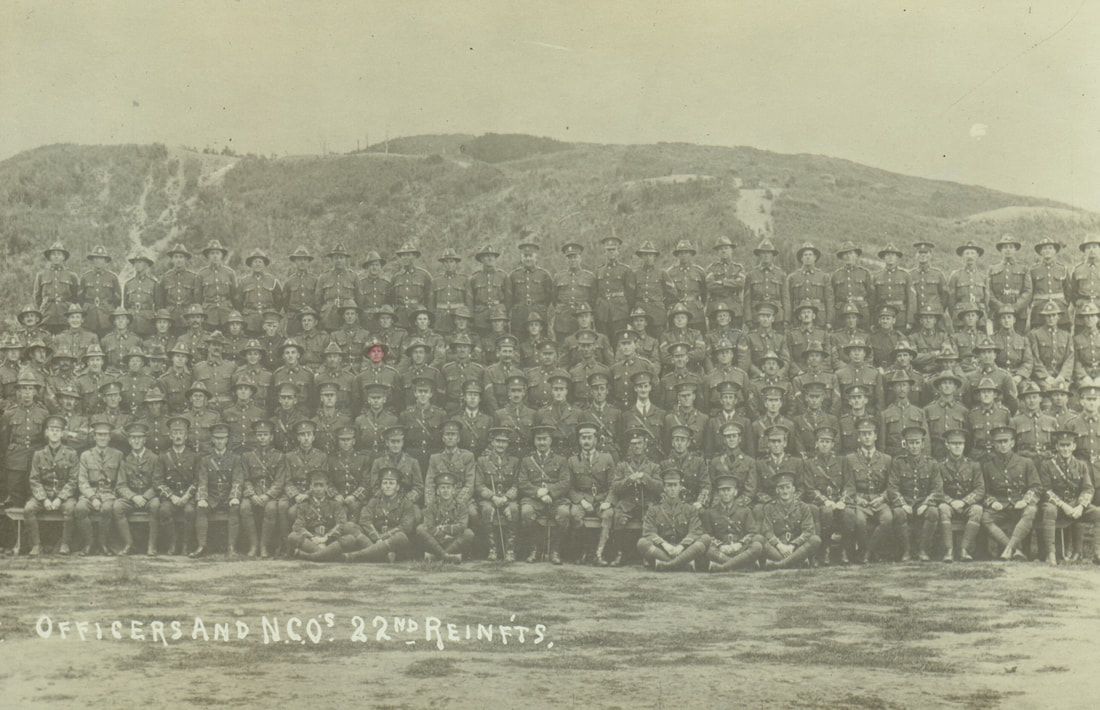
- Above: A superb postcard of all the Officer and NCO's of the 22nd Reinforcements Draft. It just shows the scale and numbers of men involved in these drafts. 29311 John Snowden has again highlighted where he is in the picture. John would be appointed Sergeant by the end of his time in H Company, 22nd Reinforcements. When he got to England, like all reinforcement promotions, he started again as Lance Corporal, eventually holding the rank of Temporary Warrant Officer 2nd Class. John was severely gassed in March 1918, but survived to return to duty and then New Zealand at the end of hostilities in early 1919.
23rd Infantry Reinforcements
Badges to the 23rd Reinforcement draft. They used the company letters A, B, C, D, E and F as Infantry.
Motto: AKE AKE (Forever and ever)
Motto: AKE AKE (Forever and ever)
|
- Above: A gilt brass Cap badge to the 23rd Reinforcements. This is RD or Registered Design marked to "RD899" just below the Maori Warriors right foot, to front. Two hex type lugs to back and size 41mm by 42mm.
- Opposite: A superb image possible showing a J G McGuire who is showing his 23rd Reio Cap and Collar badges (Auckland Libraries Heritage Collections 7003-171) |
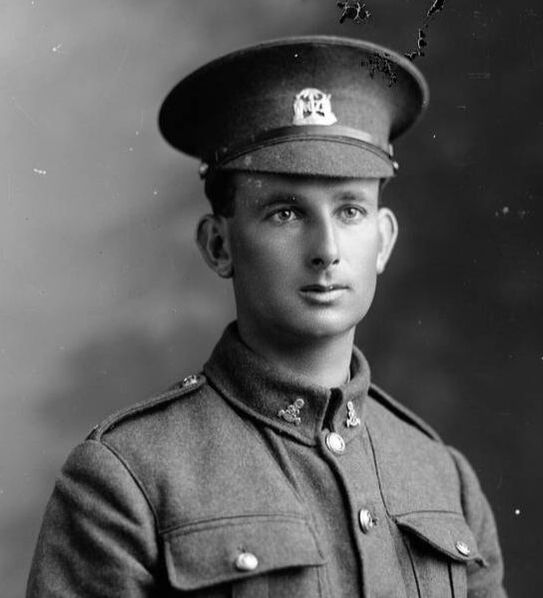
|
|
- Above: A matching opposing pair of gilt brass Collar badges to the 23rd Reinforcements. Note the Tiki's head leans to one side. The above right collar is RD marked to back of banner with "RD902". Both have hex type brass lugs to back. Size 25mm by 25mm.
|

- Above Left: A darkened coppery bronze Collar badge to the 23rd Reinforcements. This to, has two brass type hex lugs to back. Size 25mm by 25mm.
- Above Right: A gilt brass Collar badge to the 23rd Reinforcements. This has "RD902" stamped into the back, with two brass type hex lugs to back. Size 25mm by 25mm. |
|
- Above: The front die to make the opposite small Collar badge in the same design as the Cap. You can tell this, because the reverse of the RD or Registered Design number can just be seen at the bottom of the figures feet of "RD902". No maker mark and 50mm in diameter (image from the internet),
|
|
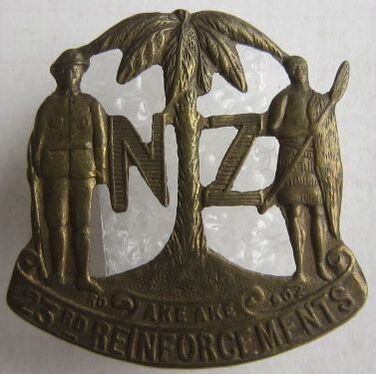
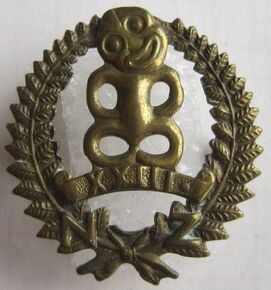
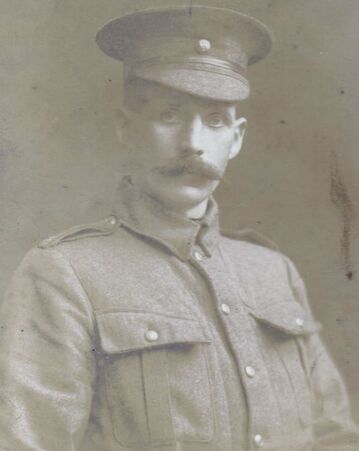
- Above: A image of 39866 Pte. John Joseph McDonald, who was a member of B Company, 23rd Reinforcements. What's nice about this image is John, like many of the Reinforcements of the time, is wearing very little insignia. On is shoulder straps is just the number "23", while on his Hat, he just sports a button. He was to spend 2 years and 41 days overseas in France and the Western Front, initially with the 9th Coy, 3rd Battalion of the Wellington Regiment. Towards the end of 1918, he joined the 1st Battalion of the New Zealand Entrenching Battalion. In May 1919, he returned to New Zealand.
|
- Above : A "B" Company, 23rd Reinforcement Draft Cap badge to the Wellington Area. By this stage, this type of frame was loosing its popularity compared to the pictured frames. So are scarce. Two copper wire loops to back, and size 44mm by 34mm.
|
RD or Registered Design number 899 is to Elden Kenneth Stuart Neill, 65 Hutt Road, Petone, N.Z. on the 4th of October 1916.
RD or Registered Design number 902 is to Elden Kenneth Stuart Neill, 65 Hutt Road, Petone, N.Z. on the 12th of October 1916.
Dates of Departure from NZ:
- 1st Draft - 23rd Reinforcements left NZ on the 14th of Mar 1917.
- The Draft consisted of 18 Officers and 871 Other Ranks.
- 2nd Draft - 23rd Reinforcements left NZ on the 3rd of April 1917.
- The Draft consisted of 22 Officers and 944 Other Ranks.
Vessels used from Wellington: Ruapehu and Corinthic via Cape Horn & Cape Town - to London - 70 days duration.
24th Infantry Reinforcements
Badges to the 24th Infantry Reinforcements depicting the iconic British Bulldog on their badges, this was also their mascot when training in New Zealand.
They used the company letters A, B, C, D, E and F as Infantry.
Motto: HOLDFAST
They used the company letters A, B, C, D, E and F as Infantry.
Motto: HOLDFAST
|
- Above: A "BOCK" made, gilt copper 24th Reinforcement Cap badge. It has the makers name to front, above the "H" in HOLDFAST, and between the curl of the end of upper banner. Below the H and T of the same banner is the RD or Registered Design number of "RD" and "922". Two hex type lugs to back, with a size of 43mm by 42mm.
|

|
- Above Right: A image of 44707 Samuel Edward Davis, who started his service on the 6th of Jan 1917 as part of A Company, 24th Reinforcements. He saw 1 year and 304 days overseas with both the Auckland and later, the Wellington Infantry Regiments. He is wearing a 24th Reinforcement Cap and Collar badge set. On his shoulder boards are a "A", "24" and a curved "NZR" (image from the Auckland Cenotaph website).
|
- Above: A darker, unmarked copper example, with slight differences in the detail to the 24th Reinforcements, most notably on the dogs chest. Two hex type lugs to back and size 44mm by 42mm.
- Opposite: A image of 44680 Erni Bond who was part of A Company, 24th Reinforcements. He was sadly killed in action on the 4th of Oct 1917 and is remembered on the Tyne Cot Memorial, Tyne Cot Cemetery, Zonnebeke, |
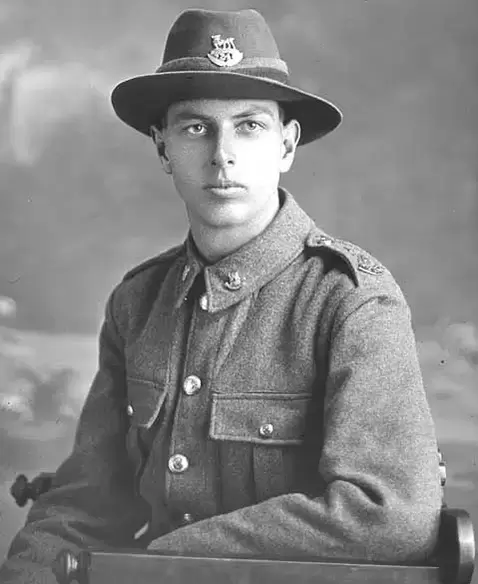
|
West-Vlaanderen, Belgium. He too is wearing a set of 24th Reinforcement Cap and Collar badges, with "A", "24" and "NZR" on his shoulder boards (image from the Auckland Cenotaph website).
The collars came in two types.
The collars came in two types.
|
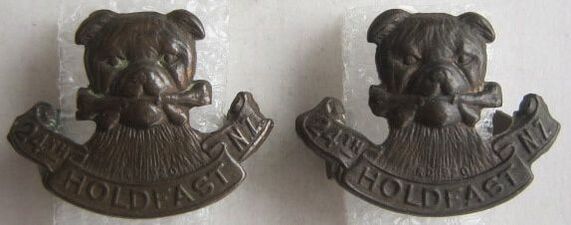
|
- Above: 1st type, and the most commonly found Collar badge type to the 24th Reinforcements, with the "bone" to the front of the mouth. The pair on the left have their two hex type lugs in a North/South configuration, while the right pair have their hex lugs in a East/West configuration. All have a faint RD or registered design mark of "RD920" to the center of the Dogs chest, just above the lower banner. Size 21mm by 27mm.
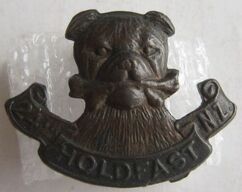
- Above: A 1st type collar badge to the 24th Reinforcements with no RD number to front, and a darkened lower banner. Two hex lugs to back in a North/South config. Size 21mm by 27mm.
|
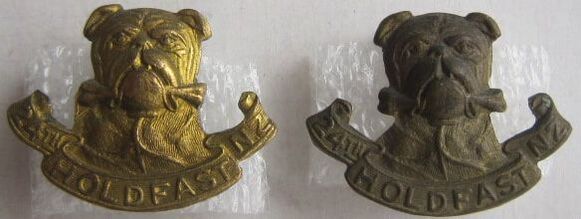
- Above: A pair of scarcer, gilt brass, 2nd type Collar badges to the 24th Reinforcements. The "bone" is at the back of the Dogs jaw, and note the extra detail to the Dogs chest. No RD number and two hex type lugs to back in a North/South configuration. Size 21mm by 27mm.
|
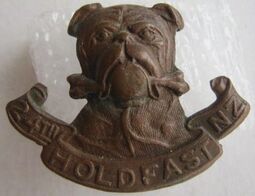
- Above: A unmarked copper version of the 2nd type Collar badge to the 24th Reinforcements. Lugs have been replaced to back, with a messy single loop. Size 21mm by 27mm.
|
RD or Registered Design number 920 is not known at this stage.
RD or Registered Design number 922 is to Captain F. Potter (Officer Commanding, A Company, 24th Reinforcements), Trentham Military Camp on the 24th of November 1916. Note someone has written across the entry "Certificate Not Issued 12/9/17".
Dates of Departure from NZ:
- 1st Draft - 24th Reinforcements left NZ on the 6th of April 1917.
- The Draft consisted of 21 Officers and 897 Other Ranks.
- 2nd Draft - 24th Reinforcements left NZ on the 26th of April 1917.
- The Draft consisted of 19 Officers and 927 Other Ranks.
Vessel used from Wellington:
- Devon via Cape Horn & Cape Town - to Plymouth - 80 days duration
- Pakeha via Cape Good Hope - to Devonport - 80 days duration
REINFORCEMENT BADGES - A TECHNICAL OFFENCE.
Taken from the Evening Post - Issue 20, 23rd January 1918, page 2
"A case of interest to manufacturing jewelers designers was considered before Mr. S. E. M'Carthy, S.M., at the Magistrate's Court today, when Arnold Ashworth Binns and Eldon K. S. Neil were charged with having, on or about 14th August 1917, falsely described "Holdfast" (the badge for the 24th Reinforcements), and 29th Reinforcement badge as registered in New Zealand.
Mr. P. W. Jackson appeared for Binns, and Neil was represented by Mr. F. E. Ward.
In outlining the case, Chief-Detective Boddam said that the badge for the 29th was stamped "Rd", but the lettering was so small that it was difficult to make out with a magnifying glass, let alone with the naked eye. The Holdfast badge produced was not branded as registered, but Binns admitted selling other badges of a like design, stamped. It appeared that the offence had been committed in ignorance, and a heavy penalty was not asked for.
Mr Jackson said that Binns had acted in the belief that the design was properly registered. Binns was a manufacturing jeweler, and Neil was his manager, and the firm had made badges for the reinforcements from the 19th draft onwards. The practice followed by the defendants was to make application to the registrar and to pay the required fee. A receipt was given, and the manufacturing of the badges was got on with. Later the registered number was supplied to the defendants, and a certificate was issued by the registrar. In the case in question, application was made and fees were paid,-and the defendants thought that the certificates would be issued in due course, but for some reason the Patent Office withheld them. The badges were required in a hurry, and the defendants took it for granted that the certificates would come to hand later, as they had done before. In conclusion, Mr. Jackson said that the offence was merely a technical one which did not call for more than a warning. Mr. Ward, for Neil, pleaded guilty, and added that Neil had left the employ of Binns in July and had sold no badges since that date.
The defendants were convicted and discharged. . ."
25th Infantry Reinforcements
Badges to the 25th Reinforcement draft. They used the company letters A, B, C, D, E and F as Infantry.
Motto: KIA TOA (Be brave)
Motto: KIA TOA (Be brave)
|
- Above: A single piece, gilt brass Cap badge to the 25th Reinforcements.
Two hex type brass lugs to back, with "RD" under the first "N" and "918" under the "D" in the lower banner. Size 42mm by 42mm - Opposite: A image of 46260 Lance Corporal Ernest Robert Baker who was a member of A Company, 25th Reinforcements. Ernest is wearing a gilt brass Cap and Collar badge set to the draft. On his shoulder board is the letter "A", "25" and a curved "NZR" shoulder title. You can see his New Zealand Forces 4 Stars buttons to his tunic, and he would also have some small one to the side of his peaked Cap.His single rank chevron can just be seen on his sleeve.Ernest started his service on the 9th of Dec 1916 and was to spend 1 year and 316 days overseas, being discharged in NZ on the 11th of April 1919 (Auckland Library Collection). |
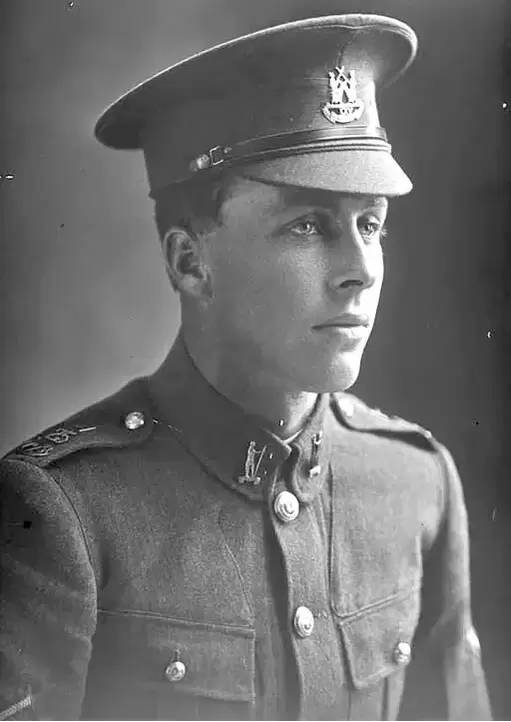
|
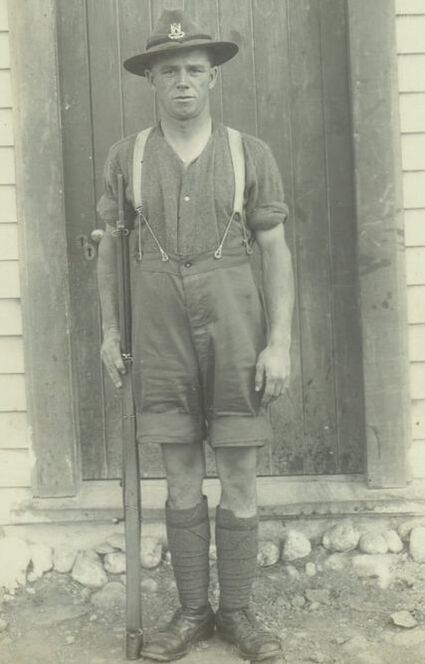
|
- Above: A pair of single piece, opposing, gilt brass Collar badges to the 25th Reinforcements. Registered Design number "RD" and "917" to the scroll ends of the lower banner. Two hex type, brass lugs to back in a North/South configuration. Size 35mm by 18mm.
- Opposite: A superb, full length shot of sadly of a unknown 25th Reinforcement chap in Camp in front of his hut. He also features in the other photo (below) and is kneeling down, front row, right. |
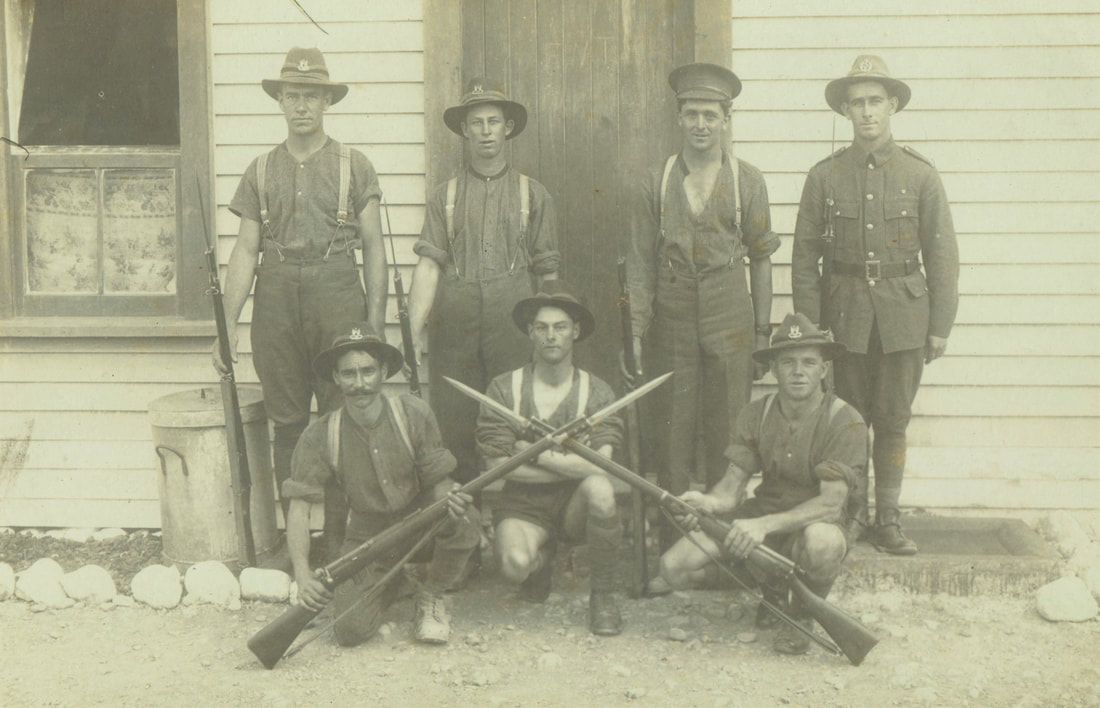
- Above: A group shot of 7 Infantry Reinforcements in Camp in New Zealand. Four of the above Soldiers are wearing the 25th Infantry Reio Cap. The Soldier to the top right, is wearing a different frame, with a Kiwi at its base and separate numbers/letter attached. Sadly I can't make it out.
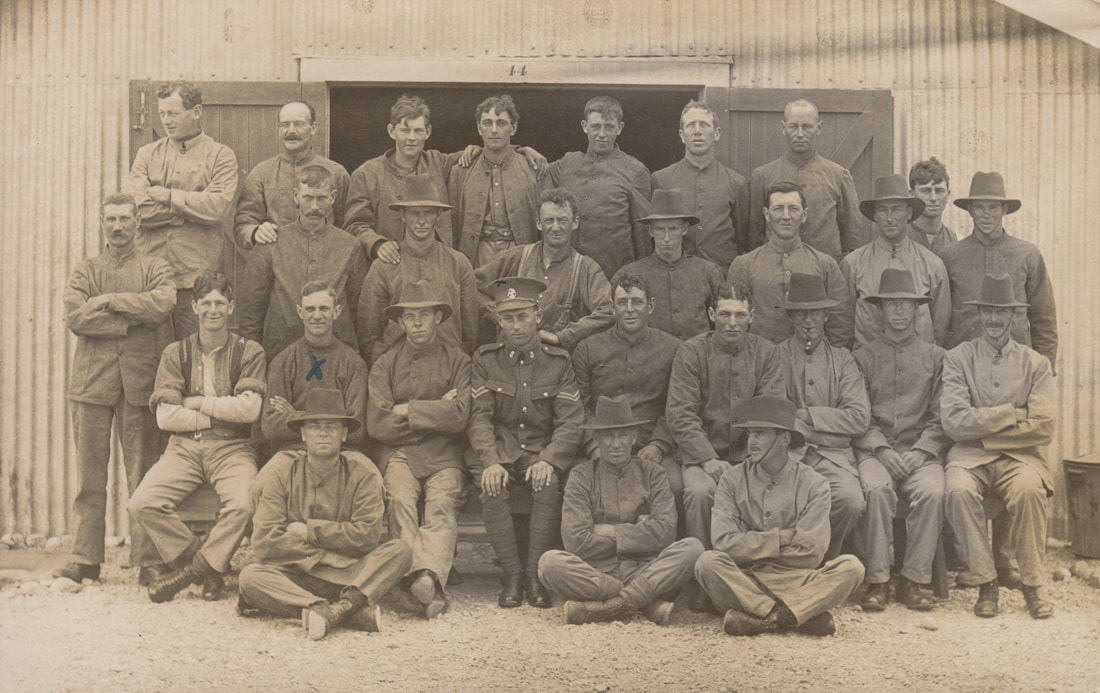
- Above: A group of 25th Reinforcements in Camp. Note the Corporal to center, with 5th (Wellington) Infantry Cap and Collar Badges. All others appear in fatigues, with no insignia to hats or uniforms. Seated, 2nd left (with blue cross on his chest) is 44364 Robert Leonard Gill, from Fielding. He trained as part of F Coy (infantry) 25th Reinforcements. He served 2 years 205 days overseas, and was severely wounded on the 24th of Jan 1918 with gunshot wounds to his head and left leg as part of the Otago Infantry Battalion on the Western front. Happily he survived the war, to sadly die of his injuries in 1949, in New Zealand.
- Opposite: A well polished and single piece, gilt brass Cap badge to the 25th Reinforcements. Brooched to back, but with the "RD" or Registered Design under the first "N" and "918" under the "D" in the lower banner. Size 42mm by 41mm.
RD or Registered Design number 917 was to Horace W Lloyd (Watchmaker & Jeweler), Lambton Quay, Wellington, N.Z. on the 17th of November 1916.
RD or Registered Design number 918 was to Horace W Lloyd (Watchmaker & Jeweler), Lambton Quay, Wellington, N.Z. on the 17th of November 1916.
Dates of Departure from NZ:
- 25th Reinforcements left NZ on the 26th of April 1917.
- The 25th Draft consisted of 38 Officers and 1816 Other Ranks.
Vessels used from Wellington: Tofua & Turakina via Cape Good Hope - to Plymouth - 85 days duration.
26th Infantry Reinforcements
Badges to the 26th Reinforcement draft. They used the company letters A, B, C, D, E and F as Infantry.
|
- Above: A bi-metal Cap badge in Silver or Silver plate and Copper to the 26th Reinforcements. Maker marked with a letter "B" in the silver center, just above the star in the banner. Under "NEW ZEALAND" is "RD" (on the left) and "930" (on the right). Two short copper looped lugs to back. Size 47mm by 38mm.
|
|
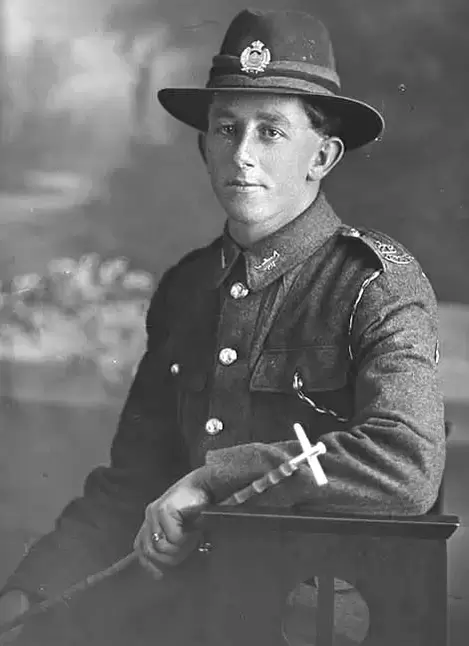
|
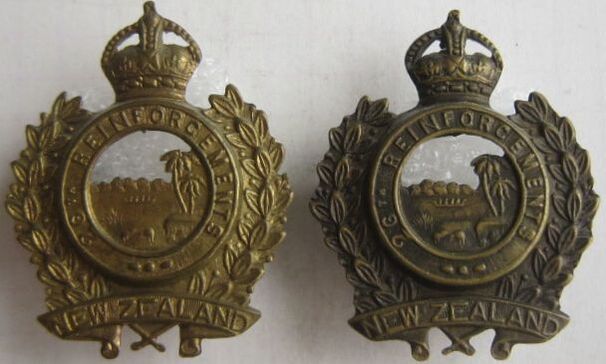
- Above: A pair of Brass collar badges to the 26th Reinforcements. Similar Lake scene as the Cap badge, but without the large mountain in the background, and addition of trees to one side. Not marked, and hex type, brass lugs to back. Size 38.5mm by 31mm.
- Opposite: A image of Private Hicks wearing a voided 26th Reinforcement Cap badge and a pair of "Canoe" Collars. To his shoulder strap looks to be the letter "J", over "26" and "NZR" (Auckland Libraries Heritage Collections). |
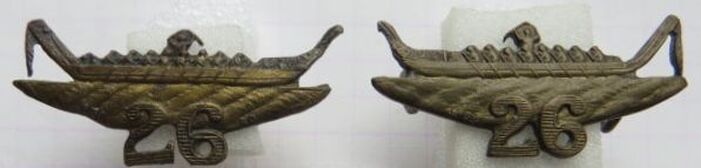
- Above: An opposing pair of Brass collar badge to the 26th Reinforcements. These are RD or Registered Design marked to the left of the "2" in "26" to "RD931". Both have copper looped wire lugs to back. Size 17mm by 35mm.
|
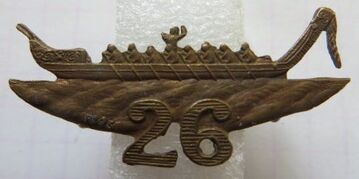
- Above: A variation to the brass collar badge to the 26th Reinforcements. RD or Registered Design marked, it has different detail and cutting out to top of badge. Long copper looped wire lugs to back. Size 16mm by 36mm.
|

- Opposite: A variation in design, with the Waka or Canoe over fern leaves and with "NZ" on the fonds. I have not seen the opposing side yet, so presume they were worn two of the same. Hex type brass lugs to back and size 17mm by 35mm.
RD or Registered Design numbers 930 and 931 are not known at this stage.
Dates of Departure from NZ:
- 1st Draft - 26th Reinforcements left NZ on the 9th of June 1917.
- The Draft consisted of 23 Officers and 1167 Other Ranks.
- 2nd Draft - 26th with part of the 27th Reinforcements left NZ on the 12th of June 1917.
- The Draft consisted of 35 Officers and 1728 Other Ranks.
Vessels used from Wellington:
- Willochra via Cape Good Hope - to Devonport - 66 days duration.
- Maunganui via Cape Good Hope - to Plymouth - 66 days duration.
- Tahiti via Cape Good Hope - to Plymouth - 66 days duration.
27th Infantry Reinforcements
Badges to the 27th Reinforcement draft. They used the company letters A, B, C, D, E and F as Infantry.
|
- Above: A scarce bi-metal version of the Cap badge in Silver (not marked) and Copper to the 27th Reinforcements. Registered Design (RD) marked at the base edge of the silver, and just above the "27" to "RD 936 & 937 RD". Two short copper looped lugs to back. Size 50mm by 46mm.
- Opposite: A image of 44193 Lieutenant Robert Witheford, here wearing a set of bi-metal Cap and Collar badges to the 27th Reinforcements. You can see the contrast in light off the Silver to the center of his Cap badge and also the Silver and copper of his Collar badges. A example of the Collar is further below (Image from the Auckland Cenotaph). |
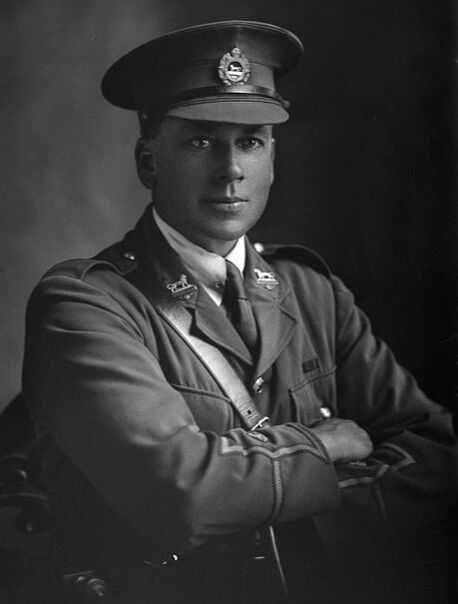
|
|
- Above: A gilt brass, single piece Cap badge to the 27th Reinforcements. Registered Design (RD) marked at the base edge of the ground the Lion is walking on, and just above the "27" to "RD 936 & 937 RD". Two copper looped lugs to back. Size 50mm by 46mm.
|
- Above: A variation in gilt brass of the Cap badge to the 27th Reinforcements. This has a non-void area around the Lion, possibly to guard against the tail of the lion snapping off/getting caught. Registered Design (RD) marked at the base edge of the ground the Lion is walking on, and just above the "27" to "RD 936 & 937 RD". Two brass hex type lugs to back and size 50mm by 45mm.
|
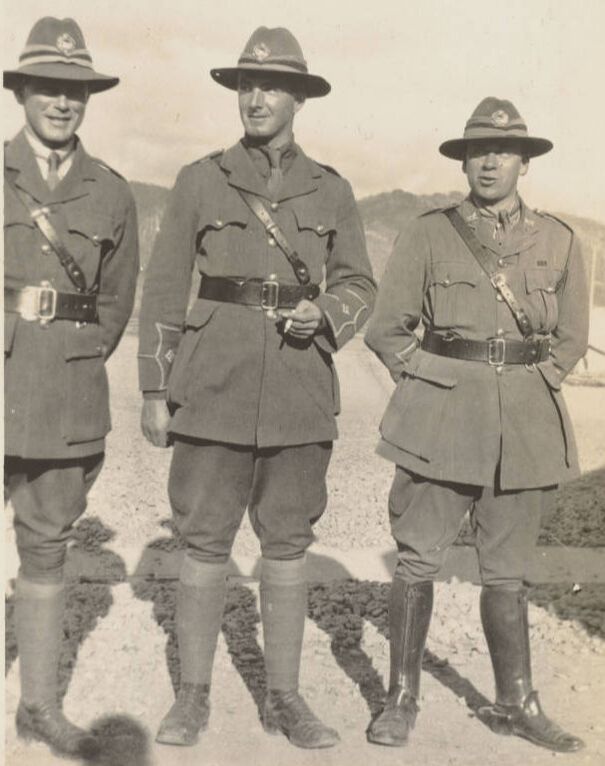
|
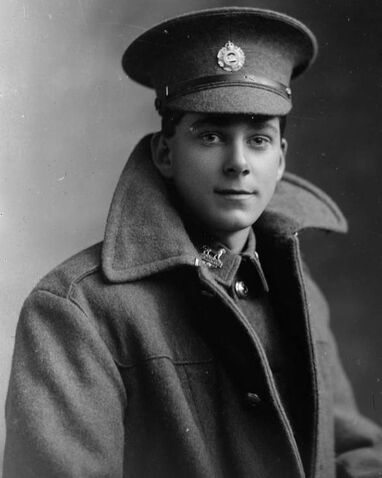
- Above: A superb image of a 27th Reinforcement. He is wearing the "Lion with Mountains" center to his badge, and you can just seen the distinctive top and bottom void on his badge. Likely a "Collar size badge (see below left), he also wears a pair of gilt brass collar badges (Auckland Libraries Heritage Collections 7003-265).
|
- Above: A snapshot of three Officers from the 27th Reinforcement Draft. All are resplendent with their 27th Reinforcement Cap badge on their slouch hats. Only one is wearing a pair of opposing collars (standing on the right). All wear their Sam Browne belts and cross-straps.
Only one sleeve rank can be seen, showing the central Officer having just one pip to his sleeve, so therefore a 2nd Lieutenant.
Note the officer on the right is also wearing spurs to his boots. I have cropped the top and bottom of this image (Auckland Libraries Heritage Collections 1677-ALB332-41-06).
|
- Above: A gilt brass collar badge to the 27th Reinforcements. Similar in design to the Cap, but with voiding also above the "27". No RD number or maker mark. Brass hex lugs to back and size 39.5mm by 34.5mm.
|
- Above: A gilt brass collar badge to the 27th Reinforcements. Similar in design to the above right Cap badge, with a semi-void center and mountain scene behind the Lion. No RD number or maker mark. Brass hex lugs to back and size 38.5mm by 34mm.
|
- Above : A gilt brass, opposing pair of Collar badges to the 27th Reinforcements. These are hard to find with their Lion's tails on. Usually snapped off with time and wear. Both are marked on lower left, and just above the "New Zealand" banner to "948 & 947 RC". Note this is the first mention of "RC" or Registered Copyright. Prior to these badges its "RD" or Registered Design. Copper wire looped lugs to back, with size 32.5mm by 33.5mm.
|
|
- Above: A bi-metal, copper, with upper Silver over-layed Collar badge to the 27th Reinforcements. Brooched to back, it has a faint "948 & 947 RC" to the left, above the word "New Zealand". There is also a "B" on the copper, just above the "27". Size 32.5mm by 34mm.
- Opposite: A front die for striking the 27th Reinforcements Collar badge (left when worn). This is a rare thing, as its shows a repair to the die. If you look closely at the center, hardened steel cylinder, it has three cracks in it, one to the top and bottom, and the other on the right side (vertical). |
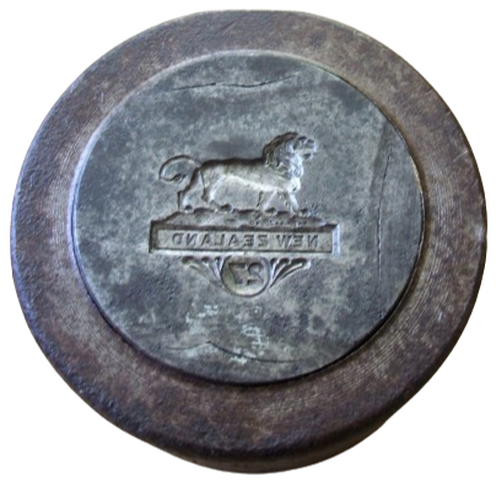
(continue) To strengthen, the manufacturer, has encased the die in another steel ring, in a effort to hold everything together and get a longer life out of the die. Size 89mm in diameter (including the extra ring (image from the internet).
|
|
- Above: A half size (compared to the Cap badge), Stirling Silver Sweethearts badge to the 27th Reinforcements. Brooch fitting to back and stamped "Stg. Silver" to back of just below the Lion. Size 32.5mm by 30.5mm.
|
- Above: A Stirling Silver and Gold sweethearts badge to A Company, 27th Reinforcements. Brooch fitting to back (missing pin), along with a mark of "9ct" to the back of the "B/XXVII", and a small Stirling Silver plaque to back of crown with "St. Sil." Size 40.5mm by 33mm.
|
RD or Registered Design number 936 is to Arnold Binns (Jeweler), Trentham Military Camp, Trentham N.Z. on the 23rd of January 1917.
RD or Registered Design number 937 is to Arnold Binns (Jeweler), Trentham Military Camp, Trentham N.Z. on the 23rd of January 1917.
RD or Registered Design number 947 is to Arnold Binns (Jeweler), Trentham Military Camp, Trentham N.Z. on the 6th of February 1917.
RD or Registered Design number 948 is to Arnold Binns (Jeweler), Trentham Military Camp, Trentham N.Z. on the 6th of February 1917.
Dates of Departure from NZ:
- 1st Draft - 27th Reinforcements - see above for details of the 26th Reinforcement Draft which was combined with part of the 27th).
- 2nd Draft - 27th Reinforcements left NZ on the 16th of July 1917.
- The Draft consisted of 16 Officers and 724 Other Ranks.
Vessels used from Wellington: Athenic via Cape Good Hope - to Liverpool - 63 days duration.
28th Infantry Reinforcements
Badges to the 28th Reinforcement draft. They used the company letters A, B, C, D, E and F as Infantry.
Motto: KIA KAHA KIA TOA (Be strong and brave)
Motto: KIA KAHA KIA TOA (Be strong and brave)
|
|
- Opposite: A scarce bi-metal Silver and Copper Cap badge to the 28th Reinforcement. RC (Registered Copyright) marked to "RC" and "938", above the "N" and "Z" in the lower banner. Two copper looped wire lugs to back. Size 48mm by 40mm.
- Above: A scarce darkened copper Collar badge to the 28th Reinforcements. It has two long tangs or brass strips to back in a East/West configuration. No maker mark and size 34mm by 25mm. |
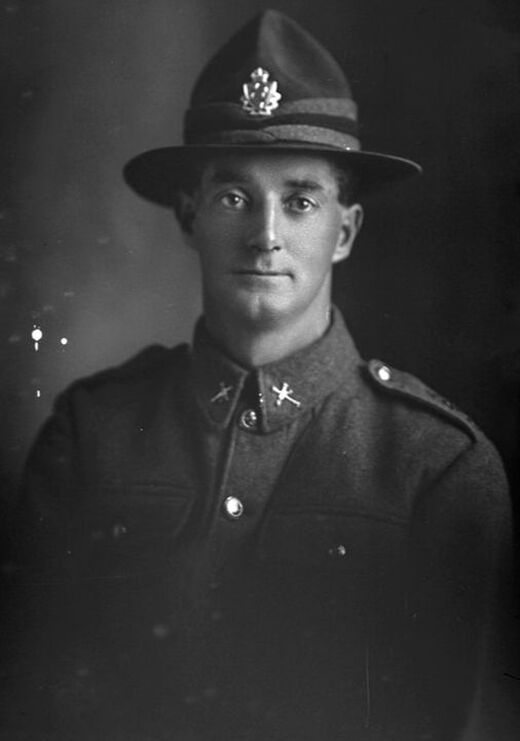
|
- Above: A gilt brass Cap badge to the 28th Reinforcements. RC or Registered Copyright marked of "RC" and "938", above the "N" and "Z" in the lower banner. Two copper looped wire lugs to back, with size 49mm by 40mm.
- Opposite: A image of 52259 Ernest Frederick McKinstry who started his service on the 27th of Jan 1917 with A Company, 28th Reinforcements. When arriving in France, he initially served with the Auckland Infantry Battalion, before transferring to the 3rd Battalion of the NZ Rifle Brigade. Sadly Ernest was killed in action on the 12th of Sept 1918 and is remembered on the Grevillers (New Zealand) Memorial, Grevillers British Cemetery, Pas-de-Calais, France. Ernest is wearing a 28th Cap and Collar set (image from the Auckland Cenotaph website). |
|
|
- Opposite: A variation to the Cap badge. Note the smaller stars to shield and voided crown. There also appears no RC mark, though the banner is well worn. Two copper looped wire lugs to back. Size 50mm by 39mm.
- Above: A pair of matching gilt brass Collar badge to the 28th Reinforcements. Smaller in design, with two wire lugs in a North/South configuration. No maker mark and size 35mm by 26.5mm. |

- Above: A pair of matching gilt brass Collar badge to the 28th Reinforcements. Slightly larger in design, with larger stars. Two wire lugs in a North/South configuration. No maker mark and size 36.5mm by 28mm.
- Opposite: A image of 52195 Stanley Percival Glynes, who started his service on the 10th of April 1917 as part of A Company 28th Reinforcements. He would spend 1 year and 164 days overseas on the Western Front, initially with the Auckland Infantry Battalion, and later with the 1st Battalion of the 3rd NZRB. Stanley is again wearing a set of 28th Cap and Collar badges. Note his Collars are worn more straight up and down (image from the Auckland Cenotaph website). |
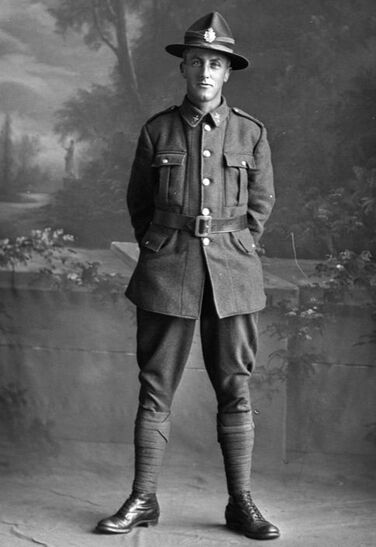
|
|
- Above: A Collar size, Stirling Silver Sweethearts badge to the 28th Reinforcements. Brooch fitting to back but no maker mark. Size 36mm by 28mm.
|
- Above: A small size (compared to the Cap badge), Stirling Silver Sweethearts badge to the 28th Reinforcements. Brooch fitting to back and stamped "Stg. Silver" to back of shield. Size 38mm by 33mm.
|
RC or Registered Copyright number 938 is to Arnold Binns (Jeweler), Trentham Military Camp, Trentham N.Z. on the 23rd of January 1917.
Dates of Departure from NZ:
- 1st Draft - 28th Reinforcements left NZ on the 14th of July 1917.
- The Draft consisted of 19 Officers and 893 Other Ranks.
- 2nd Draft - 28th Reinforcements left NZ on the 26th of July 1917.
- The Draft consisted of 19 Officers and 891 Other Ranks.
Vessels used from Wellington: Waitemata & Ulimaroa via Cape Good Hope - to Liverpool - 67 days duration.
29th Infantry Reinforcements
Badges to the 29th Reinforcement draft. They used the company letters A, B, C, D, E and F as Infantry.
Motto: AKE AKE KIA KAHA (Forever and ever be strong)
Motto: AKE AKE KIA KAHA (Forever and ever be strong)
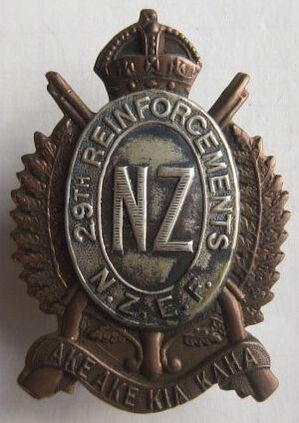
|
- Opposite & Above: A scarce bi-metal, Silver center with Copper frame Cap and Collar badge set to the 29th Reinforcements. Marked to the back of the all frames in center to "RD 959 & 960". To back are two copper wire looped lugs. Size 44mm by 30mm for Cap and 30.5mm by 23mm for Collars.
|
|
|
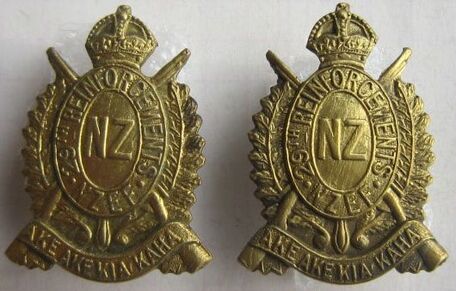
- Opposite & Above: A gilt brass Cap and Collar badge set to the 29th Reinforcements. No maker mark to back of the Cap, while both Collars have to center back "RD959 & 960". The Cap has two hex type brass lugs, while both Collars have Copper looped lugs. Note all are non-void. Size of Cap is 45mm by 32mm, and Collars 30.5mm by 22mm.
|
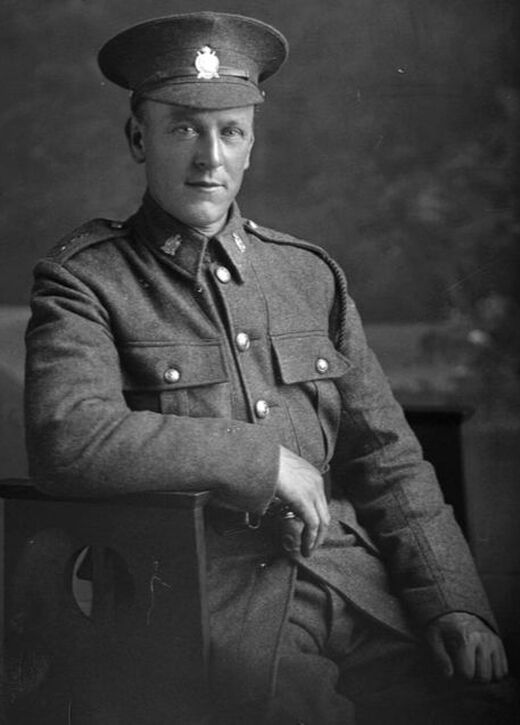
|
- Above: A gilt brass Cap badge to the 29th Reinforcements. No marks to back and with two hex type brass lugs. Note the voiding to the crown and between the badge center and lower banner. Size 45mm by 32mm.
- Opposite: A possible image of 56204 Walter Thomas Williams. Walter started his service on the 13th of March 1917, as part of F Coy, 29th Reinforcements. He then joined the 4th Company of the 2nd Battalion, Otago Regiment in France, but joined the 2nd NZ Entrenching Battalion on the 27th of March 1918. At some stage just after, he was captured by the Germans, and became a POW, sadly dying on the 4th of May 1918 of a cardiac arrest whilst in Germany. He is buried in Berlin South-Western Cemetery, Berlin, Germany. Walter is wearing the non-void Cap and Collar badges to the 29th. On his shoulder straps, he has a "F" and 2 x "29", one above the other (image from the Auckland Cenotaph website). |
|
|
- Opposite & Above: A voided gilt brass Cap and Collar badge set to the 29th Reinforcements. No mark to back, with two looped wire lugs to back of Cap, while the Collars have a mix of Copper wire looped lugs to the left badge in a East/West configuration, while the right has hex type brass lugs, in a North South configuration to back. Size of Cap 44mm by 30mm, and size of Collar 30.5mm by 22mm.
|
|
- Above: A single gilt brass collar badge to the 29th Reinforcements. Note the extra brass which has been left to the top. Possible to strengthen the rifle muzzles, which may have bent or maybe caught with wear. Two hex type brass lugs to back, and no maker mark. Size 31.5mm by 22.5mm.
- Opposite: A image of 56184 Wilfred George Pannill who started his service on the 31st of May 1917, as part of F Coy, 29th Reinforcements, and spent 1 year 53 days overseas. Like Walter (above), he too served with 2nd Battalion of the Otago Infantry Regiment in France, and was sadly serverly wounded, with a gunshot wound to the knee. He died aged 29 on the 20 November 1923 in Auckland. He is wearing the void type of collar badges to the 29th. We can't though see the front of his hat (image from the Auckland Cenotaph website)! |
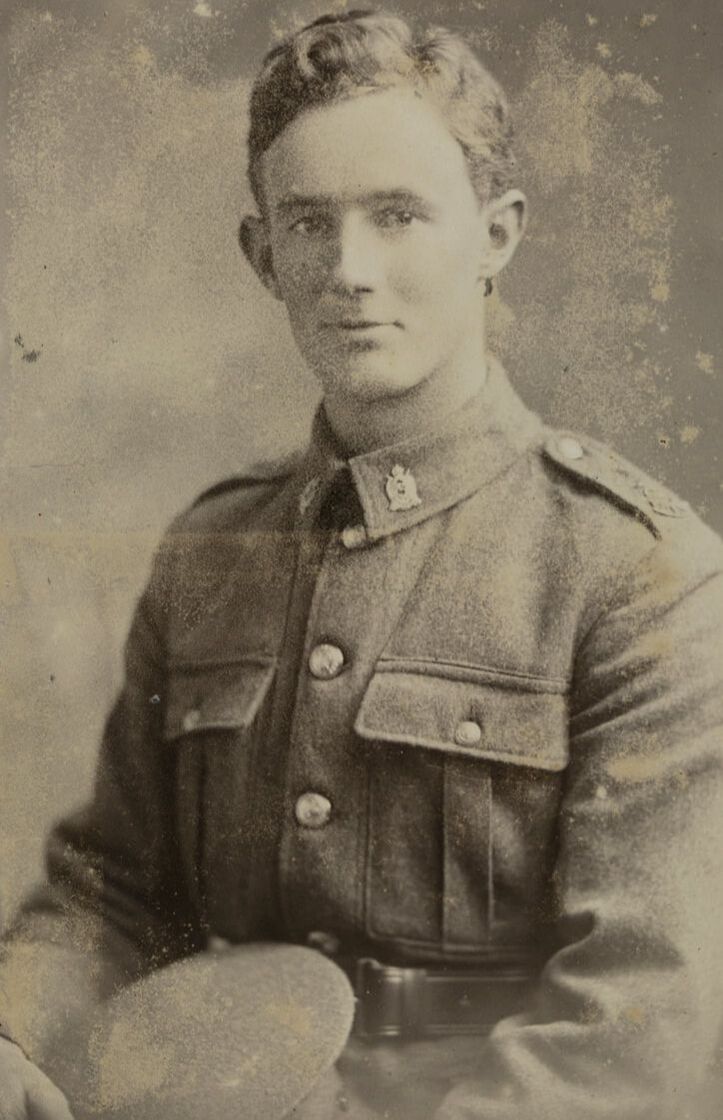
|
- Opposite: A Stirling Silver and Gold sweethearts badge to B Company, 29th Reinforcements. Brooch fitting to back, along with a mark of "9ct" to the back of the "B/XXIX", and a small Stirling Silver plaque to back of crown with "St. Sil." Size 40.5mm by 33mm.
RD or Registered Design numbers 959 and 960 are unknown, but see the 24th Reinforcements above. Likely Arnold Binns, Trentham Military Camp, Trentham N.Z. made some of them (as admitted in court case).
Dates of Departure from NZ:
- 1st Draft - 29th Reinforcements left NZ on the 13th & 15th of Aug 1917.
- The combined Drafts consisted of 28 Officers and 1347 Other Ranks.
- 2nd Draft - 29th Reinforcements (and 30th Reinforcements) left NZ on the 13th of Oct 1917.
Vessels used from Wellington: Mokoia & Ruahine via Panama - to Glasgow - 50 days duration.
30th Infantry Reinforcements
Badges to the 30th Reinforcement draft. They used the company letters A, B, C, D, E and F as Infantry.
1st Motto: AKE AKE KIA MAIA (Forever be brave)
2nd Motto: AKE AKE KIA MANA (Forever guard your honour)
1st Motto: AKE AKE KIA MAIA (Forever be brave)
2nd Motto: AKE AKE KIA MANA (Forever guard your honour)
|
- Above: A three piece, brass and white metal/Silver(?) Cap Badge to the 30th Reinforcements. Marked to front to "RD" and "961", which is in the folds of the separate overlayed banner and above "Ake Kia". To back are two thick copper wire looped lugs (image from the internet).
|
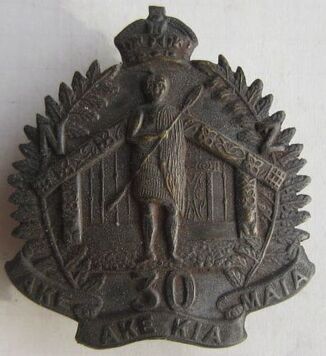
- Above: A single piece, solid bronzed Cap Badge to the 30th Reinforcements. Marked to front to "RD" and "961", which is in the folds of the lower banner and above "Ake Kia". To back are two thick copper wire looped lugs. Size 46mm by 41mm.
|
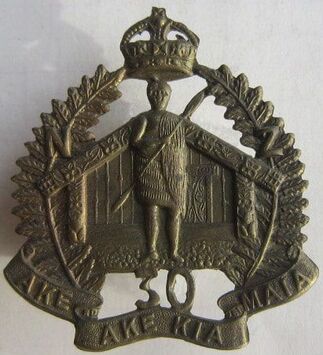
- Above: A single piece, gilt brass Cap Badge to the 30th Reinforcements. Marked to front to "RD" and "961", which is in the folds of the lower banner and above "Ake Kia". To back are two copper wire looped lugs. Size 47mm by 40mm.
|
At some stage the moto in the lower banner to the 30th Reinforcements Cap badge is changed from "Ake Ake Kia Maia" to "Ake Ake Kia Mana".
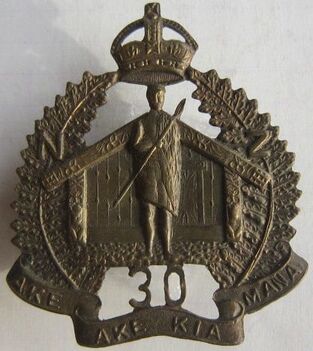
- Above: A gilt brass Cap badge to the 30th Reinforcements. It has a large voided crown, but no "RD" number to front. The lower banner has been modified crudely with the "I" in "Maia" modified to a "N". Hex type brass lugs to back. Size 48mm by 41mm.
|
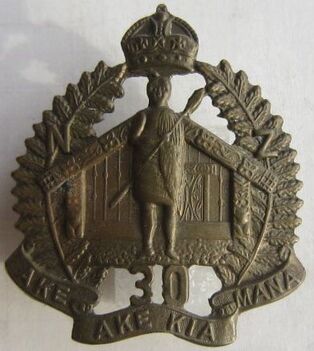
- Above: A gilt brass Cap badge to the 30th Reinforcements. It has a smaller, non-voided crown to top and a "RD" number to front, which reads "RD" and "961". The lower banner has larger letters and a perfectly formed "N" in "MANA". Copper wire loops to back. Note the "0" is non-void. Size 46mm by 40.5mm.
|
|
- Above: A pair of collar badges in Gilt brass to the 30th Reinforcement Draft. Though appearing similar to front, and with two copper looped lugs to back to each, the "RD" numbers to back, differ slightly.
- Above Left: Has "RD 961 & 962" stamped in raised letters to back. - Above Right: Has just "RD 962" to back. Size 24.5mm by 28mm. - Opposite: Three unknown soldiers in Camp in NZ as part of the 30th Reinforcements draft. All wear a example of the above Cap badges, while two also wear the Collars. Note two also have the 1888 Pat Bayonet with frog, hanging from their belts. |
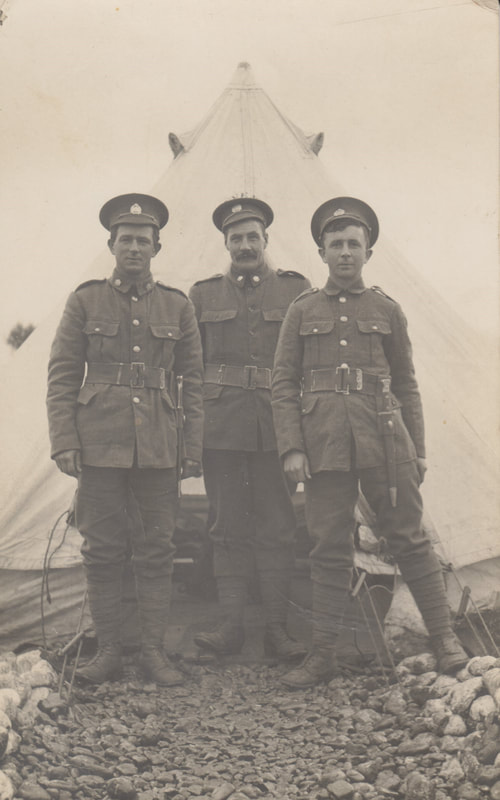
|
|
- Above: A Collar size, Stirling Silver sweethearts badge to the 30th Reinforcements. Brooch fitting to back, along with a mark of "Stg. Silver". Size 31.5mm by 27mm.
|
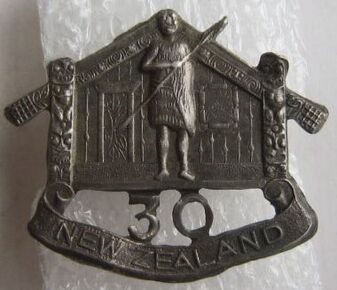
- Above: A Collar, in Stirling Silver as a sweethearts badge to the 30th Reinforcements. Brooch fitting to back, along with a mark of "Stg. Silver". Size 25mm by 29mm.
|
- Above: A Stirling Silver and Gold sweethearts badge to B Company, 30th Reinforcements. Brooch fitting to back, along with a mark of "9ct" to the back of the "B/XXX". Size 39mm by 35.5mm.
|
RD or Registered Design number 961 and 962 are unknown at this stage.
Dates of Departure from NZ:
- 30th Reinforcements (and some of the 29th) left NZ on the 13th of Oct 1917.
- The Draft consisted of 39 Officers and 1568 Other Ranks.
Vessels used from Wellington: Corinthic & Arawa via Panama - to Liverpool - 57 days duration.
- Opposite: A Stirling Silver and Gold sweethearts badge to C Company, 30th Reinforcements. Brooch fitting to back, along with a mark of "9ct" to the back of the "C/XXX". Size 39mm by 35.5mm.
31st Infantry Reinforcements
Badges to the 31st Reinforcement draft. They used the company letters A, B, C, D and E as Infantry.
Motto: WHAKATANGATA KIA KAHA (Act like a man, be strong).
Motto: WHAKATANGATA KIA KAHA (Act like a man, be strong).
|
|

- Opposite & Above: A thick, die struck, gilt brass Cap and Collar badge set to the 31st Reinforcements. This is the type with a thick line running through the "NZ" to top and extra vines to lower banner, around the motto of the draft. It is faintly marked "RD970" to the left of the "31" on Cap, and marked in the bottom folds of the banner to "RD" and "970", to both Collars. Two hex type brass lugs to back on each. Size of Cap 46mm by 44mm, and Collars 29.5mm by 21mm.
|
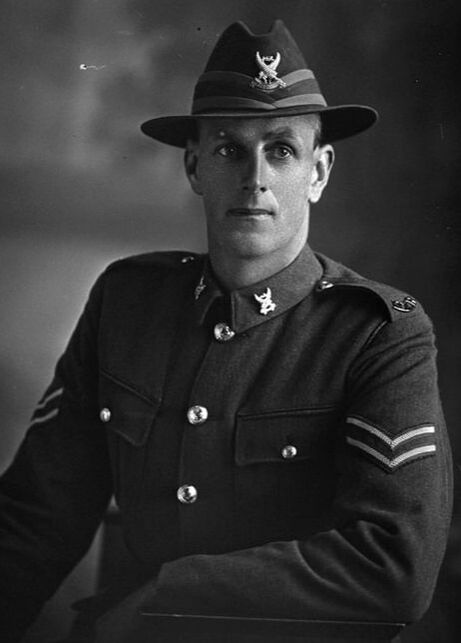
|
- Above: A Officers bi-metal darkened copper with separate white metal or silver banner to base, Collar badge to the 31st Reinforcements. Bar to base of "NZ", with the RD or Registered Design number "RD970" at base, on the banner furls on the silver or white metal. Two hex type lugs to back in a North South configuration. Size 29.5mm by 21mm.
- Opposite: A image of 52325 Edward John Hunter. Edward started his service on the 31st of Jan 1917, with E Coy of the 31st Reinforcements, and was to spend 1 year and 314 days overseas. He won the Military Medal in France with the 2nd Battalion of the Auckland Regiment. Note his Cap and Collar badges are with "Bar" behind the "NZ" to top. He just wears a "NZR" shoulder title and 4 star New Zealand Forces buttons (image from the Auckland Cenotaph website). |
|
|
- Opposite & Above: Again, a thick, die struck, gilt brass Cap and Collar badge set to the 31st Reinforcements. This is the type with no line running through the "NZ" to top and no vines to lower banner, around the motto of the draft. Note the two "dots: in the lower banner, either side. It is marked "RD970" to the left of the "31" on Cap, but there is no "RD" number to the front of the Collars. The Cap is brooch fitted to back, while the two Collars have hex type brass lugs to back. Size of Cap 43mm by 45mm, and Collars 29.5mm by 25mm.
|
RD or Registered Design number 970 was to H. R. Potter (Camp Commandant), Colonel, Trentham Camp on the 14th of May 1917.
Dates of Departure from NZ:
- 31st & 32nd Reinforcements left NZ on the 17th & 22nd of Nov 1917.
- The combined Draft consisted of 53 Officers and 2351 Other Ranks.
Vessels used from Wellington: Willochra, Managanui & Tahiti via Panama - to Liverpool - 49 days duration.
Dates of Departure from NZ:
- 31st & 32nd Reinforcements left NZ on the 17th & 22nd of Nov 1917.
- The combined Draft consisted of 53 Officers and 2351 Other Ranks.
Vessels used from Wellington: Willochra, Managanui & Tahiti via Panama - to Liverpool - 49 days duration.
32nd Infantry Reinforcements
Badges to the 32nd Reinforcement draft. They used the company letters A, B, C, D, E and F as Infantry.
These are the hardest pictorial Reinforcement badges to find, both the Cap (near impossible to find) and the Collars command high prices.
These are the hardest pictorial Reinforcement badges to find, both the Cap (near impossible to find) and the Collars command high prices.
|
- Above: A bi-metal Cap badge to the 32nd Reinforcements. It has a separate "32" in white metal soldered to center. Two copper wire looped lugs to back. It does have a "RD" number as the base of the South Island, but mine has been polished off. Size 47mm by 41mm.
|
- Above: Two different variations of the bi-metal Collar badge to the 32nd Reinforcements. They were NOT opposing, so two of the same collars were worn. Above right and center have a "977 RC" to the base of the South Island. Both have copper looped wire lugs to back. The above right Collar has the "topography" of New Zealand, in the form of the Southern Alps to the South Island, rivers and Stewart Island at the base. It has a "RD 977" just above the "32" disc on the center of the North Island. Hex type brass lugs to back. Size (with "32" horizontal) 32.5mm by 13.5mm (roughly)
|
|
|
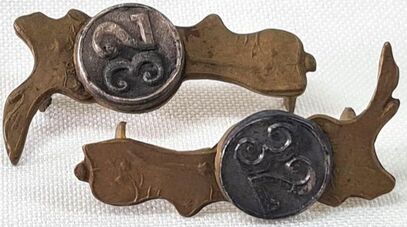
- Opposite & Above: A 32nd Reinforcement Cap and Collar badge set. Note all show the topography or relief of New Zealand to front surface, i.e. mountain ranges and also rivers. Also interesting is the Cap, which is three piece, with a separate New Zealand (and Silver or white metal "32" disc) sweated to a Fern leaf frame, which has the "NZ" letters. All have brass type hex lugs to back. "RD 977" can just be seen above the disc on the brass of the North Island (images from the internet).
|
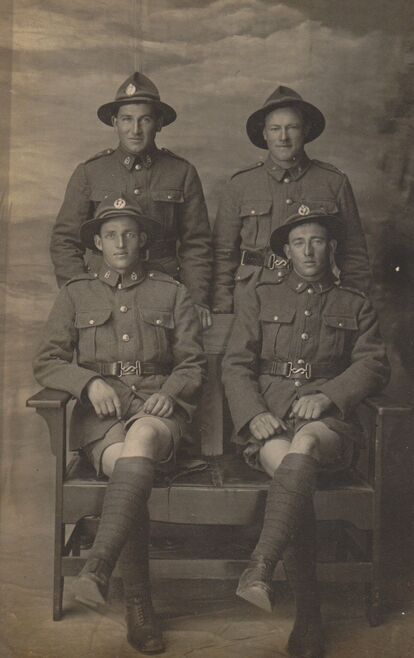
|
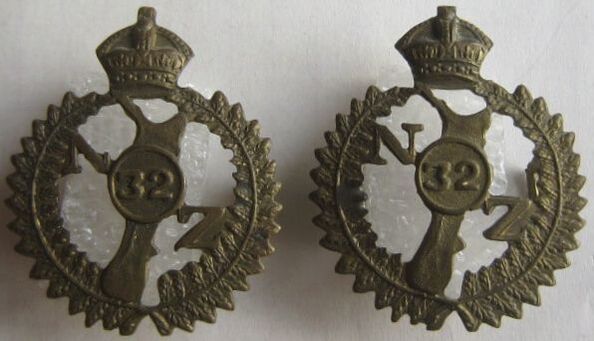
- Above: A variation of the 32nd Reinforcement Collar badge, in single piece gilt brass. These have hex type brass lugs to back. Note the left collar is missing the top leg in the "N". No maker mark. Size 35mm by 30mm.
- Opposite: Four 32nd Reinforcements from B Company (Wellington), with three wearing wearing their "32nd" Reinforcement Cap badges. Two are wearing their 32nd Collar badges. Note the other two are wearing early ONWARDS Collar badges. I can just see a "B" on the shoulder strap of the left, sitting chap. To back its addressed to "Ernie Rogers 4th November 1917. New Zealand" then "No. 64142 Private E Rogers., 32 Reinforcements, B. Company. 5 Platoon, C/o G.P.O., Wellington". But it does not indicate if one of these chaps is Ernie! |
RD or Registered Design number 977 was to Harry Rowland Potter, Reinforcement Camp Trentham on the 21st (or 22nd) of June 1917.
Dates of Departure from NZ:
- 32nd Reinforcements (see above and the 31st Reinforcements, which combined with the 32nd).
Dates of Departure from NZ:
- 32nd Reinforcements (see above and the 31st Reinforcements, which combined with the 32nd).
33rd Infantry Reinforcements
The 33rd Infantry Reinforcements were the last draft to have their own unique styled cap badge and collar.
They used the company letters A, B, C, D and E as Infantry.
The three Huia feathers comes in a different style to its top, either round, or like the below examples, with a flat or square top.
Motto: HUIA TATAU (Let us band together).
They used the company letters A, B, C, D and E as Infantry.
The three Huia feathers comes in a different style to its top, either round, or like the below examples, with a flat or square top.
Motto: HUIA TATAU (Let us band together).
|
- Above: A darkened brass Cap badge to the 33rd Infantry Reinforcements. It has had the darkened finished polished back, showing the feathers tips in white metal on a brass body. It has a RD number in the top left fold of the banner to "RD982". In the fold on the between the words "ZEALAND" and "TATAU" is the maker mark "Bock". Size 46mm by 42mm, with two hex type brass lugs to back.
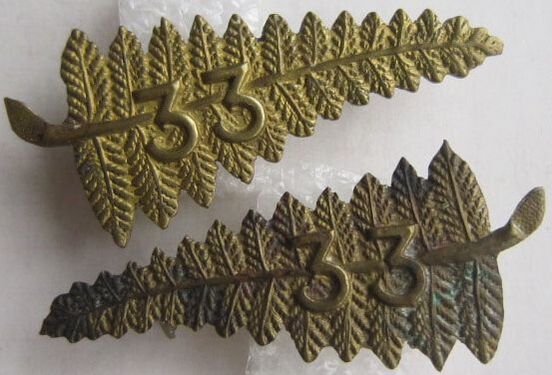
- Above: A pair of opposing Collar badges in gilt brass to the 33rd Reinforcements. Both have either brass wire looped lugs or like the Cap badge, flat brass hex type lugs. They are not maker marked. Size 22mm by 52mm.
|
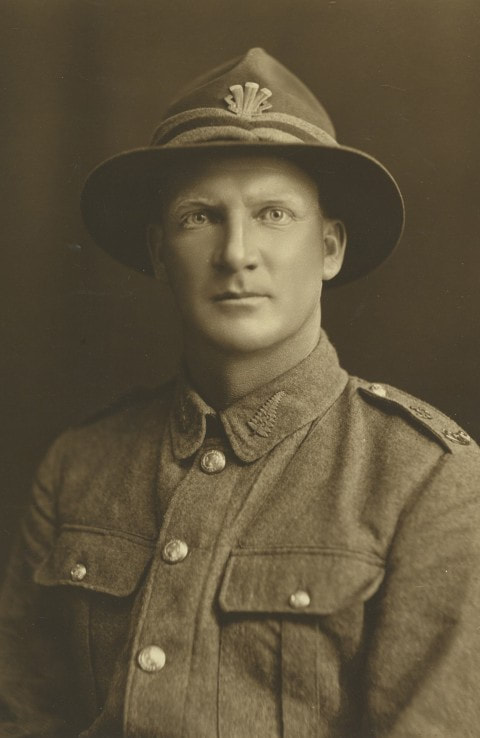
Above: A superb image of a 33rd Reinforcement, wearing both his Cap badge and Collars. On his shoulder straps, he has a "33" above a "NZR" title. His tunic has the "New Zealand Forces" buttons with the 4 stars to center. The image was found in the items to Corporal 43271 Alfred "Ernest" Kemp, and may possibly be a relative (Nigel Robson Collection).
|
|
|
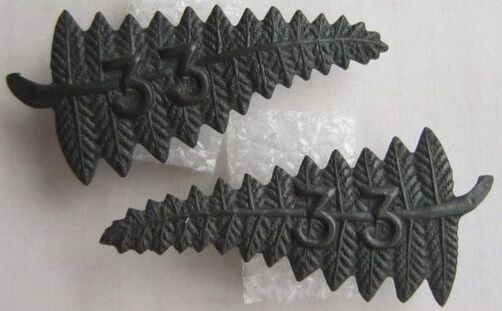
- Opposite & Above: A Cap and Collar badge set to the 33rd Reinforcements. The Cap badge is again, marked in the folds to front on the lower banner to "RD982" and "BOCK". Hex brass lugs to back of Cap badge and wire looped lugs to back of Collar badges. Size of Cap is 46mm by 41mm, and Collars are 23mm by 51mm.
|
- Opposite: A front steel die to the 33rd Reinforcements. The vendor stated that the die was 50mm in diameter, which would make it too small for a Cap badge. Maybe a intended silver sweethearts badge. No maker mark and note, no RD or registered design numbers to the banner folds either (image from the internet).
RD or Registered Design number 982 was to Harry Rowland Potter, Trentham N.Z., Commandant Reinforcement Camp on the 10th of August 1917.
Dates of Departure from NZ:
- 33rd Reinforcements left NZ on the 31st of Dec 1917.
- The Draft consisted of 22 Officers and 992 Other Ranks.
Vessels used from Wellington: Athenic via Panama - to Glasgow - 57 days duration.
34th Infantry Reinforcements & Beyond
The badge worn by the 34th Infantry Reinforcement was the last to be unique. Subsequent drafts used this same badge, whether it was out of economy or rather the Army prescribed its wear, this badge remained in use until the end of hostilities.
- 34th to 38th Reinforcements had A, B, C & D Companies.
- 39th and 40th Reinforcements had A, B, C & E Companies.
- 41st Reinforcements had E, F, J, & H Companies.
- 42nd Reinforcements had A, B, C & D Companies.
- 43rd Reinforcements had A, B & F Companies.
- 34th to 38th Reinforcements had A, B, C & D Companies.
- 39th and 40th Reinforcements had A, B, C & E Companies.
- 41st Reinforcements had E, F, J, & H Companies.
- 42nd Reinforcements had A, B, C & D Companies.
- 43rd Reinforcements had A, B & F Companies.
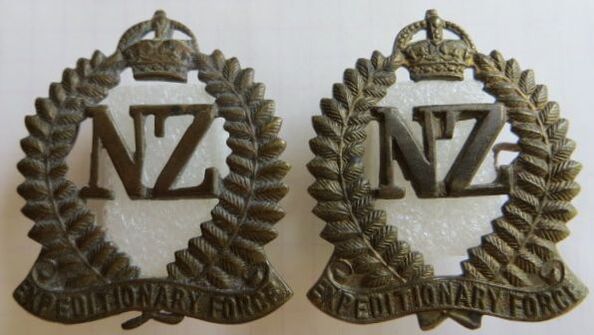
- Above: A near matching pair of Cap badges to the 34th and beyond Reinforcements. Both have similar strike to front, with just a slight difference in voiding between letters (top of NZ) and end of fern leaves. Both have copper wire looped lugs to back, with no maker mark.
|
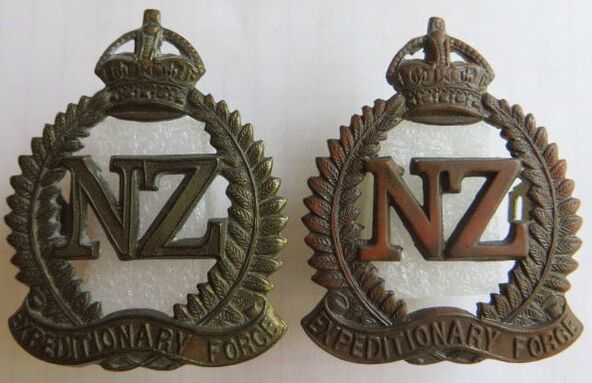
- Above: A matching pair of Cap badges to the 34th and beyond Reinforcements. Both are the same strike to front, with just the "N.Z" on the right Cap receiving extra polishing by the previous owner. Both have hex type brass lugs to back, with no maker mark.
|
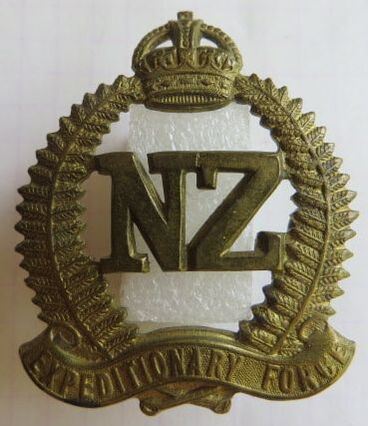
|
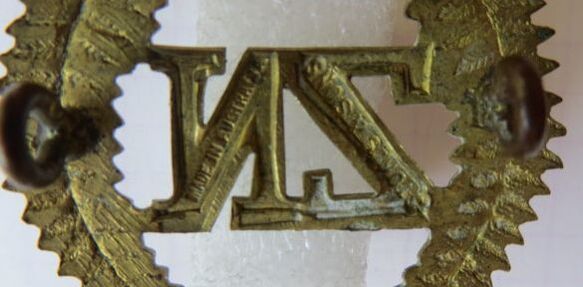
- Opposite & Above: A gilt brass Cap badge to the 34th and beyond Reinforcements. A unusual badge, with it being clearly maker marked to back, to center, to "Stokes & Sons" and "Made in Australia". Two thick copper looped lugs to back.
|
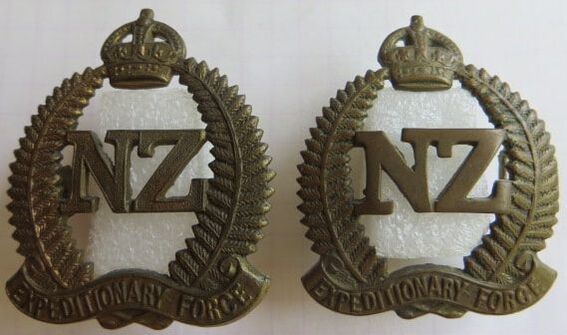
- Above: A matching pair of Cap badges to the 34th and beyond Reinforcements. Both are the same strike to front, with a more rounded frame, and just the "N.Z" on the right Cap receiving extra polishing by the previous owner. Both have hex type brass lugs to back, with no maker mark.
|
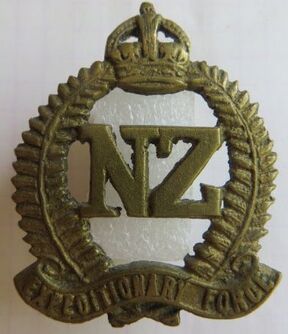
- Above: A cast brass Cap badge to the 34th and beyond Reinforcements. Sadly with no fixing to back, though it looks to have had a slider in the past, with a short copper stump to behind the crown to top back. No maker mark.
|
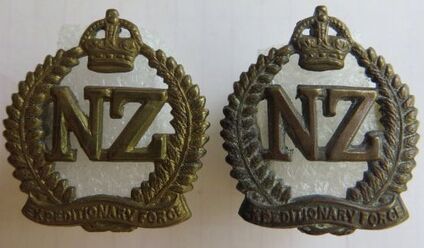
- Above: A strikingly different matching pair of Collar badges to the 34th and beyond Reinforcements. Slight different wear and tone to front. Note the rounded frame with rounded "NZ" to center. To back are two flat brass, hex lugs, with no maker mark.
|

- Above: A similar Collar badge to the 34th and beyond Reinforcements. Slight larger crown and thicker fern wreath. To back are two flat brass, hex lugs, with no maker mark.
|
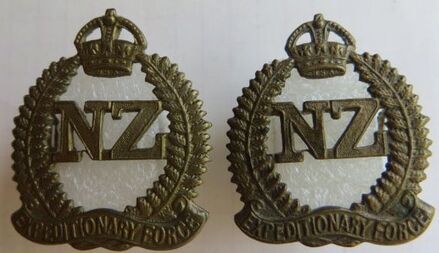
- Above: A matching pair of Collar badges to the 34th and beyond Reinforcements. Both have two flat brass hex lugs to back, with no maker mark.
|
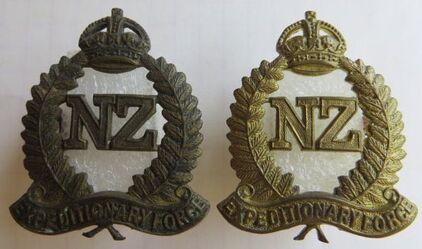
- Above: A matching pair of Collar badges to the 34th and beyond Reinforcements. Both have two copper thick wire looped lugs to back, with no maker mark. Note the stork ends below the bottom banner.
|
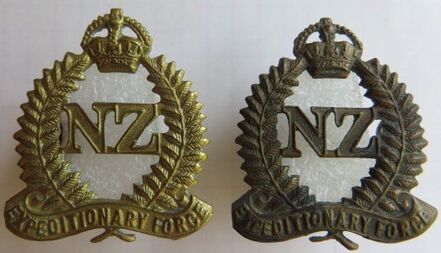
- Above: A matching pair of Collar badges to the 34th and beyond Reinforcements. Both have two copper wire looped lugs to back, with no maker mark. Note the top of the crown with the "beads" to top.
|
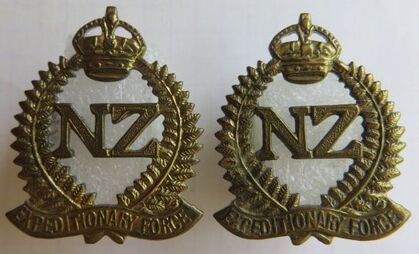
- Above: A matching pair of Collar badges to the 34th and beyond Reinforcements. Both have two copper wire looped lugs to back, with no maker mark.
|
Dates of Departure from NZ:
- 34th Reinforcements left NZ on the 8th of Feb 1918.
- The Draft consisted of 25 Officers and 818 Other Ranks.
Vessels used from Wellington: Ulimarua via Panama - to Plymouth - 49 days duration.
- Opposite: A Stirling Silver and Gold sweethearts badge to B Company, 34th Reinforcements. Brooch fitting to back, along with a mark of "9ct" to the back of the "B/XXXIV". Size 39mm by 35.5mm.
- 35th Reinforcements left NZ on the 3rd of Mar 1918.
- The Draft consisted of 25 Officers and 829 Other Ranks.
Vessels used from Wellington: Tofua, Ellenga & Marguerite to Suez - 38 days duration. Then to Marseilles, Le Havre and onto Southampton.
- 36th Reinforcements - left NZ on the 23rd of Apr & 2nd of May 1918.
- The Draft consisted of 28 Officers and 1068 Other Ranks.
Vessels used from Wellington: Willochra, Ormonde & Duchess of Argylle to Suez - 39 days duration. Then to Taranto, Cherbourg and onto Southampton.
- 37th Reinforcements - 1st Draft - left NZ on the 9th of May 1918.
- The Draft consisted of 23 Officers and 769 Other Ranks.
- 37th Reinforcements - 2nd Draft - left NZ on the 16th of May 1918.
- The Draft consisted of 9 Officers and 233 Other Ranks.
Vessels used from Wellington: Maunganui via Panama - to Liverpool - 55 days duration.
- 38th Reinforcements - left NZ on the 5th of June 1918
- The Draft consisted of 15 Officers and 711 Other Ranks.
Vessels used from Wellington: Remuera via Panama - to Liverpool - 57 days duration.
- 39th Reinforcements - left NZ on the 13th of June 1918.
- The Draft consisted of 12 Officers and 702 Other Ranks.
Vessels used from Wellington: Athenic via Panama - to Plymouth - 82 days duration.
- 40th Reinforcements - left NZ on the 10th of July 1918.
- The Draft consisted of 14 Officers and 952 Other Ranks.
Vessels used from Wellington: Tahiti via Cape Good Hope - to Plymouth - 64 days duration.
- 41st Reinforcements - left NZ on the 28th of July 1918.
- The Draft consisted of 13 Officers and 945 Other Ranks.
Vessels used from Wellington: Ulimaroa via Cape Good Hope - to London - 69 days duration.
- 42nd Reinforcements - left NZ on the 2nd of Aug 1918.
- The Draft consisted of 11 Officers and 808 Other Ranks.
Vessels used from Wellington: Tofua via Cape Good Hope - to London - 64 days duration.
- 43rd Reinforcements - 1st Draft - Ruahine - left NZ on the 18th of Aug 1918.
- The Draft consisted of 6 Officers and 246 Other Ranks.
Vessels used from Wellington: Ruahine via Cape Good Hope - to Tilbury - 73 days duration.
- 43rd Reinforcements - 2nd Draft - Matatua - left NZ on the 3rd of Oct 1918.
- The Draft consisted of 5 Officers and 371 Other Ranks.
Vessels used from Wellington: Matatua via Cape Good Hope - to London - 67 days duration.
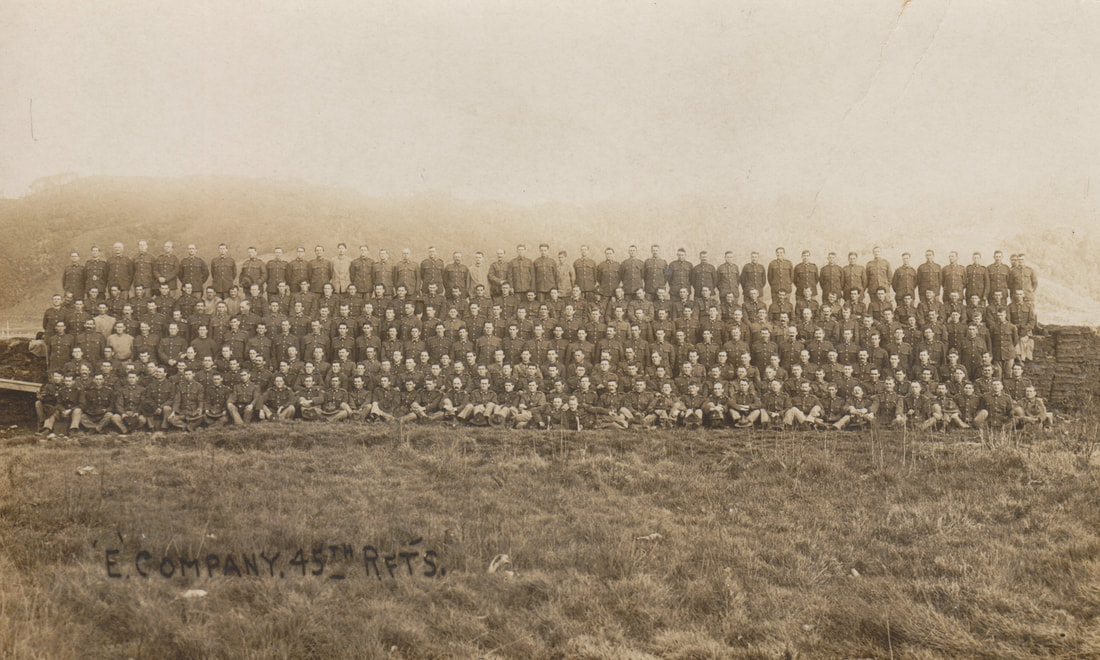
- Above: A large group photo of E Company, 45th Reinforcements. These guys would remain in New Zealand as they were still training when hostilities finished.
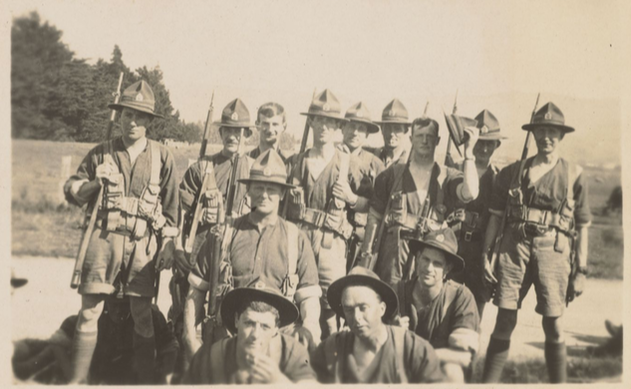
- Opposite: A small snapshot of a group of soldiers I presume on a march. It just has in pencil "D47" and I presume it shows members of D Company, 47th Infantry Reinforcements.
Note the webbing, rifles and Lemon Squeezer hats. All have the 34th Reio and beyond New Zealand Expeditionary Force Cap badge.
(D47th Reio Group photo Auckland Libraries Heritage Collections 1677-ALB332-40-04)
Note the webbing, rifles and Lemon Squeezer hats. All have the 34th Reio and beyond New Zealand Expeditionary Force Cap badge.
(D47th Reio Group photo Auckland Libraries Heritage Collections 1677-ALB332-40-04)
1,592 Officers and 65,518 Other Ranks were sent overseas from New Zealand during WW1.
137 Officers and 7,969 Other Ranks were still training in New Zealand on the 12th of November 1918.
Sweethearts badges still were produced for higher draft numbers beyond the 34th.
137 Officers and 7,969 Other Ranks were still training in New Zealand on the 12th of November 1918.
Sweethearts badges still were produced for higher draft numbers beyond the 34th.
|
- Above: A rose gold and silver sweethearts badge in the shape of a fern to the B Company, 37th Reinforcements, which would be for the Wellington Area. The 37th left New Zealand on the 9th and 16th of May 1918, in two different drafts. Brooch fitting to back, but no maker mark.
|
- Above: A Gold and Stirling Silver sweethearts badge to the 39th Reinforcements. The 39th left New Zealand on the 13th of June 1918. Two looped lugs have been added to back, with a mark of "Stg. Silver to back base of frame.
|
- Above: A late Sweethearts badge to G Company, 41st Reinforcements. Interestingly it written "XXXXI" usual roman numerals for 41 are written "XLI". 9ct Gold center on a Sterling Silver frame (Ian Hamilton collection).
|
|
- Above: A Collar size sweethearts badge in Stirling Silver and Gold (not marked) with banner engraved "MOTHER". Its shape is based on the 34th and onwards Reinforcement badge. Brooch fitting to back.
|

- Above Left: A Collar size sweethearts badge in Stirling Silver and Gold (not marked) and is based on the 34th and onwards Reinforcement badge. Brooch fitting to back with a stamp stating "Stg. Silver" to back of lower banner.
- Above Right: A WW1 shaped "Onwards" badge in gilt metal and enamel. Brooch fitting to back and the maker mark of "SSL" |
|
- Above: A Stirling Silver, brass and enamel Sweethearts badge with mother of Perl backing. Brooch fitting to back (missing pin) but no marker mark.
|
- Above Left: A Gold, with coloured stones brooched badge, commemorating ANZAC (Australian and New Zealand Army Corps). Formed in December 1914 in Egypt, it operated during the Gallipoli campaign. It disbanded in 1916, but the name was used again with the establishment of 1 ANZAC Corps and 2 ANZAC Corps, which fort on the Western Front. In November 1917, elements of the New Zealand Regiments in both Corps were removed to be solely part of the New Zealand Division.
- Above Right: A brass title, with safety pin soldered to back with the letters "A.N.Z.A.C". No maker mark. |
Unknowns
|
- Above: A Silver and Gold or Gold plate badge which looks similar to collars (worn in pairs) to Kiwi recuperating in the UK from Gallipoli in late 1915/early 1916. Due to size and clarity of the photo's its hard to confirm whether they are wearing to of these on their tunics. Brooch fitting to back, with no maker marks.
|
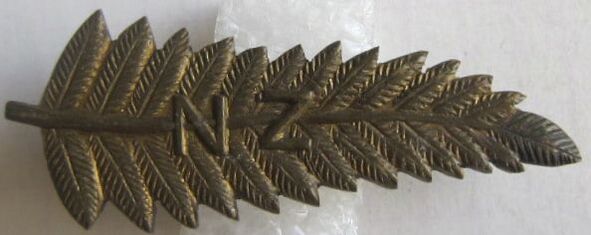
- Above: A large gilt brass fern with purpose yet unknown. Two looped lugs to back, with no maker mark. Size 19mm by 49mm.

- Above: A large gilt brass fern with purpose yet unknown. Brooch fitting to back, with no maker mark. Size 18mm by 47mm.
|
C1 Fit Badge.
As each man either signed up or was drafted for training during WW1 in one of the Reinforcement Camps in New Zealand, he had to undergo a medical examination. At the end of it, he was classified as either "fit" or as follows:
- A - Fit for active service beyond the seas.
- B1 - Fit for active service beyond the seas (after operation in camp or public hospital).
- B2 - Fit for active service beyond the seas (after recovery at home).
- C1 - Likely to become fit for active service after special training.
- C2 - Unfit for active service beyond the seas, but fit for service of some nature in New Zealand.
- D - Wholly unfit for any service whatsoever.
- Opposite: A C1 Reinforcement Cap badge, worn by those men classified to attend a special camp withing the Reinforcement Camps, for further training. Often it meant a case of feeding or fattening a chap up, for those underweight, while physical exercise for those underdeveloped/with narrow chests. I have not come across any other of the classifications having their own badge. There are period photographs of soldiers wearing these C1 badges on their hats.
Figures compiled at the end of WW1 showed that from 29th of Sept 1917 to the 12th Nov 1918:
- 7 187 soldiers reported to C1 Camp.
- 3 528 soldiers moved onto a Reinforcement draft after attending Camp.
- 2 899 soldiers were classed as C2 after attending Camp and were transferred to Home Service only.
- 330 soldiers were rejected again, from a Reinforcement draft after attending Camp.
- 760 soldiers were in C1 Camp on the 18th of November 1918.
Shoulder Letters and Numbers.
The following are a selection of letters and numbers worn by the Reinforcement drafts (if they wished and were prepared to pay) on their shoulder straps. By no means universally worn, with some not wearing anything on their straps at all.
Some of these letters may also be much much earlier as letters were worn by Field Artillery Companies of the NZ Artillery Volunteers, i.e. pre 1910.
Some of these letters may also be much much earlier as letters were worn by Field Artillery Companies of the NZ Artillery Volunteers, i.e. pre 1910.
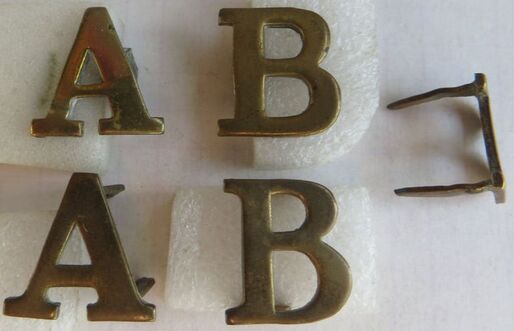
- Above: Brass "A" and "B" Company letters. Top "A" has just a single hex brass lug to back. Bottom "A", two brass hex type. Both are 15mm by 15mm. Top "B" has a single hex brass lug to back. Bottom "B" has two brass hex type. The "B" on the right (on its side) has two tangs to back. The two "B" with lugs are 15mm by 15mm/14mm. The "B" with tangs is 13mm by 12mm.
|
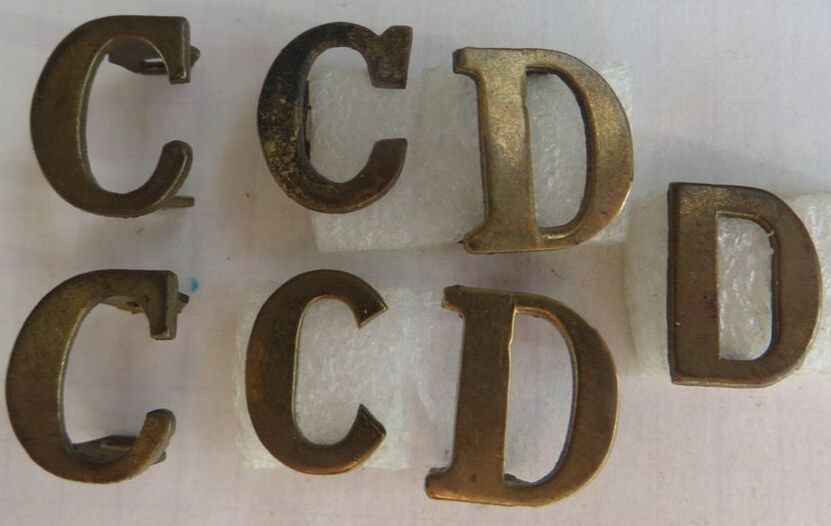
- Above: Brass "C" and "D" Company letters. Left top and bottom "C's" have two hex brass lug to back. 2nd left, top "C" has a single lug to back, while 2nd left bottom "C" has two tiny hex type brass lugs. All are 15mm by 13mm/14mm. Top and bottom "D" have two hex brass lug to back. Far right "D" also has two brass hex type to back, but are tiny. Size is 15mm by 13mm/10mm.
|
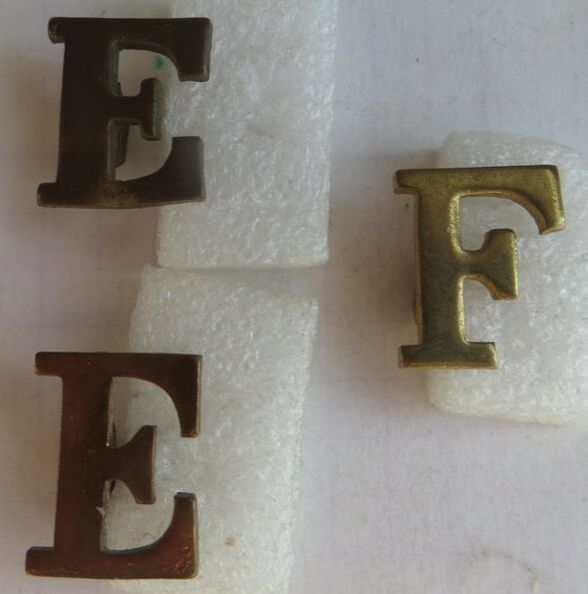
- Above: Brass "E" and "F" Company letters. Both "E's" have a single brass hex lug to back, with the top being 15mm by 13mm. Bottom "E" is 17mm by 13mm. The "F" has a single hex, brass lug to back and is 16mm by 13mm.
|

- Above: Brass "G" and "H" Company letters. Both left "G's" have a single brass hex lug to back, with both being 17mm by 15mm. The bottom right "G" has two copper looped lugs and is 15mm by 14mm. The "H" has two wire lug to back and is 15mm by 10mm.
|
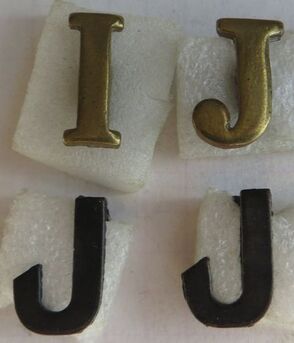
- Above: Brass "I" and "J" Company letters. The "I" has a single brass hex lug to back, being 16mm by 6mm. The top "J" also has a single brass lug and is 15mm by 12mm. The bottom darkened "J's" have two tiny hex lugs to back and are 15mm by 10mm. I presume for the NZRB.
|
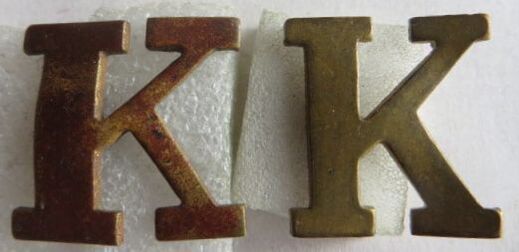
- Above: A pair of brass "K" Company letter. Both have a single brass hex lug to back. No maker mark and size being 20mm by 20mm.
Possibly British. |
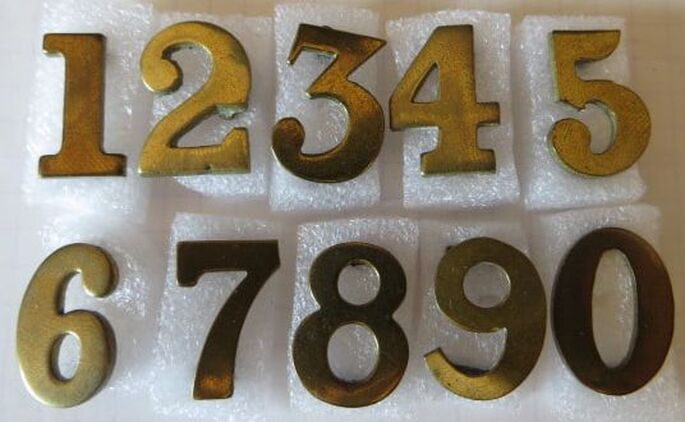
Some of the Reinforcement Draft numbers, worn separately under the above letters, on the Shoulder straps of the Tunic which the Reinforcement drafts wore while training. These are just over 19mm in height, so larger than the regular numbers adopted by the New Zealand Army. The "2" is cast brass, with a single lug, while the "9" has two hex type brass lugs to back. All others have a thick pair of copper looped lugs to back.
|

- Above: A selection of single piece shoulder strap letter/number combinations, with either two hex type lugs to back or looped lugs in a North/South configuration. This seems to be popular between the 7th to 13th Reinforcement drafts, and then there was a move to separate letter and number being worn. Size varies as these are hand-cut, but roughly 25 to 28mm high by 13 to 14mm wide. These of course are also used to the center of Reinforcement badge frames.
|
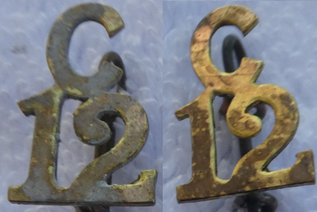
- Above: A pair of single piece, brass shoulder numbers to C Company, 12th Reinforcements. Two looped lugs to back in a North/South configuration (Ian Hamilton Collection).
|
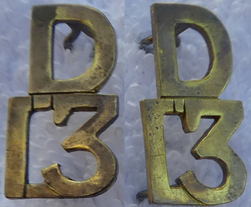
- Above: A pair of single piece, brass shoulder numbers to D Company, 13th Reinforcements. Two looped lugs to back in a North/South configuration (Ian Hamilton Collection).
|
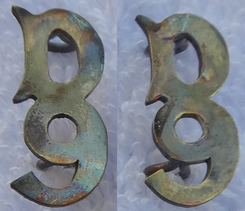
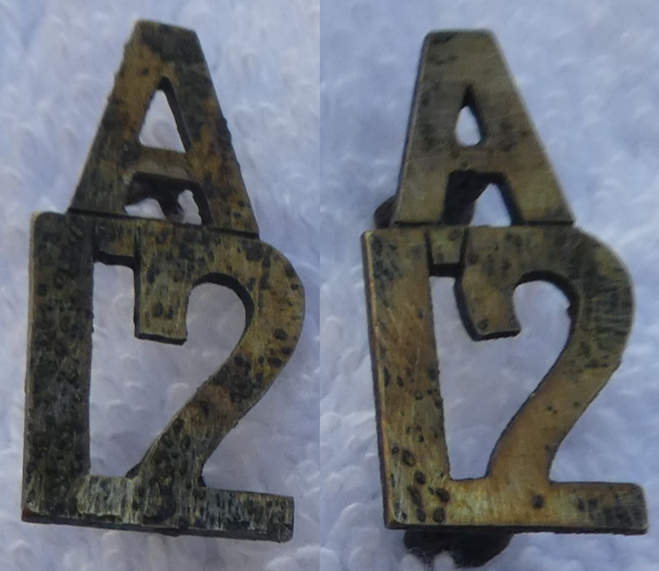
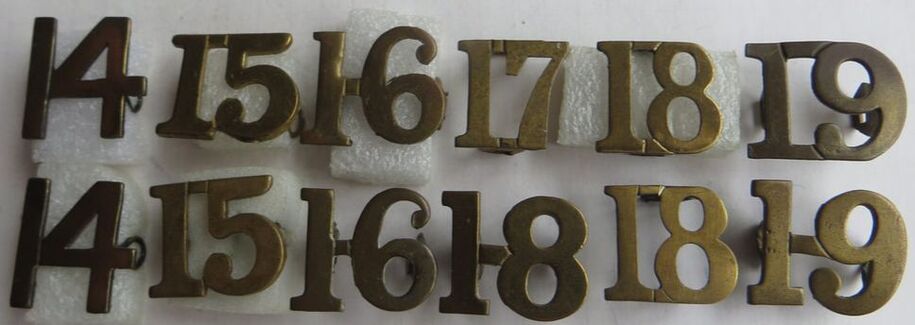
- Above: Gilt brass reinforcement shoulder numbers to the 14th to 19th drafts. All are one piece. All, except the 14th have two flat, hex type brass lugs to back. All are East/West configuration, except for the 17th and pair of 18th, which are in a North/South configuration. Size 17mm by 19mm to 24mm depending on the last number shape.
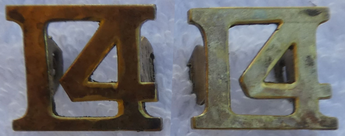
- Opposite: A pair of single piece, brass shoulder numbers to the 14th Reinforcements. Note the different style and connecting bar location to the above 14th's. Two hex type brass lugs to back in a East/West configuration (Ian Hamilton Collection).
|
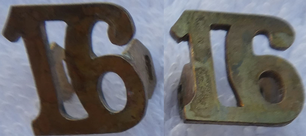
- Opposite: A pair of single piece, brass shoulder numbers to the 16th Reinforcements. Note the different style and connecting bar location to the above 16th's. Two hex type brass lugs to back in a East/West configuration (Ian Hamilton Collection).
|
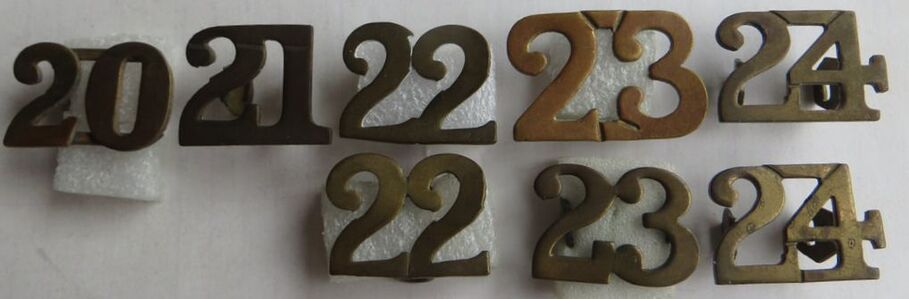
- Above: Gilt brass reinforcement shoulder numbers to the 20th to 24th drafts. All are one piece, except the 20th", which is a Stokes & Son's made. All have two flat, hex type brass lugs to back. All are East/West configuration except the oversized 23rd. The 20th Stokes has two looped lugs to back. Size 17mm by 19mm to 24mm depending on the last number shape.
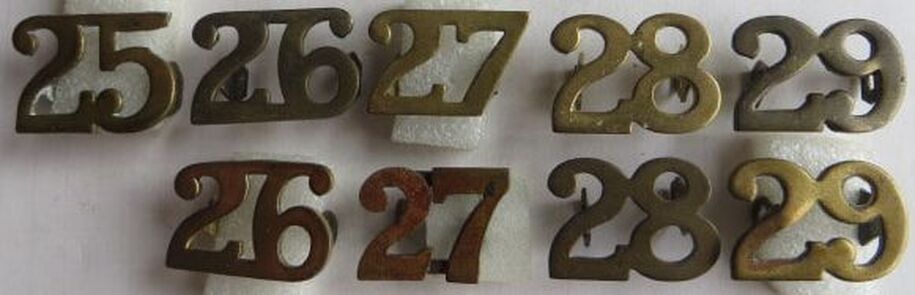
- Above: Gilt brass reinforcement shoulder numbers to the 25th to 29th drafts. All are one piece, except the bottom "27th", which is a Stokes & Son's made. All, except one 29th have two flat, hex type brass lugs to back. All are East/West configuration. The 27th Stokes has two looped lugs to back. Size 17mm by 19mm to 24mm depending on the last number shape.
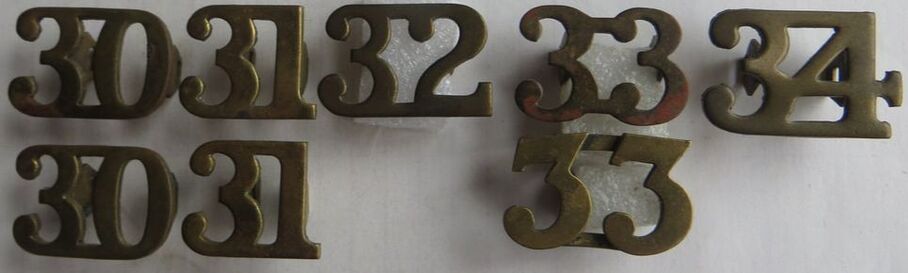
- Above: Gilt brass reinforcement shoulder numbers to the 30th to 34th drafts. All are one piece, except the "33rd", which is a Stokes & Son's made. All, except the 33rd have two flat, hex type brass lugs to back. All are East/West configuration. The 33rd Stokes has two looped lugs to back. Size 17mm by 19mm to 24mm depending on the last number shape.
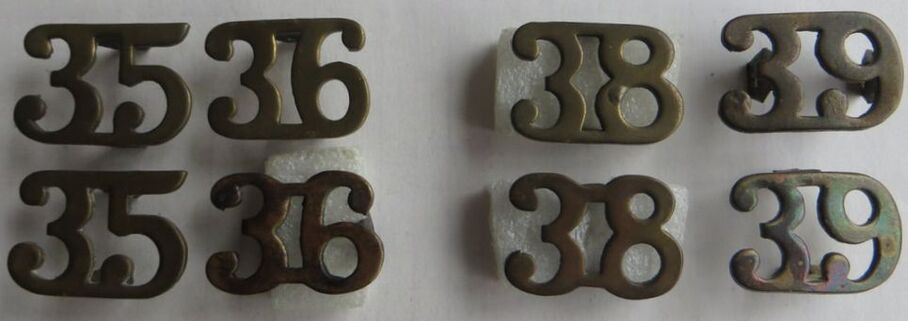
- Above: Gilt brass reinforcement shoulder numbers to the 35th to 39th drafts. All are one piece, with two flat, hex type brass lugs to back. All have them in a North/South configuration, except for one of the 36th and 39th. I am missing a 37th. Note the differences in patterns on the 36's and 38's. Size 17mm by 19mm to 24mm depending on the last number shape.
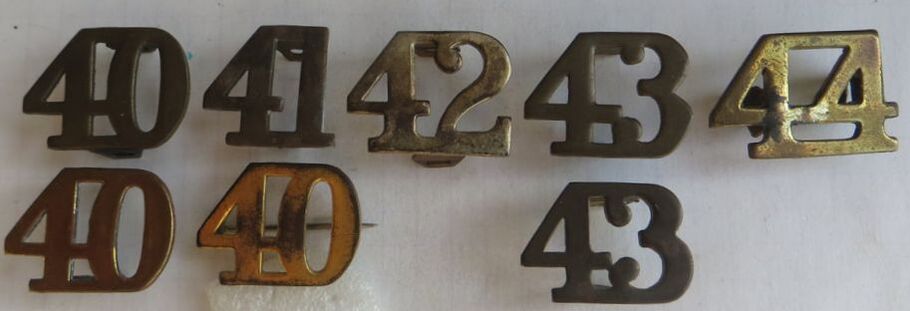
- Above: Gilt brass reinforcement shoulder numbers to the 40th to 44th drafts. All are one piece, with two flat, hex type brass lugs to back. All have them in a North/South configuration, except for the 44th. One of the 40th's is brooch fitted to back, and extra gilt applied, possibly used as a sweethearts badge. Size 17mm by 19mm to 24mm depending on the last number shape.
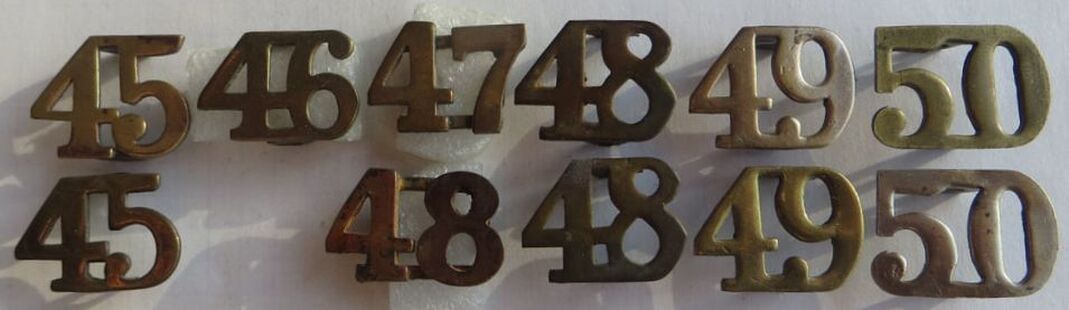
- Above: Gilt brass reinforcement shoulder numbers to the 45th to 50th drafts. All are one piece, with two flat, hex type brass lugs to back, except for the 47th and 48th, which are the Stokes & Son made titles. Lugs are in a North/South configuration, except for the 47th and 48th, which are thick copper wire loops in a East/West configuration. Size of the one piece are 17mm by 19mm to 24mm depending on the last number shape, while the Stokes and 16mm by 25mm, also depending on the last number shape.
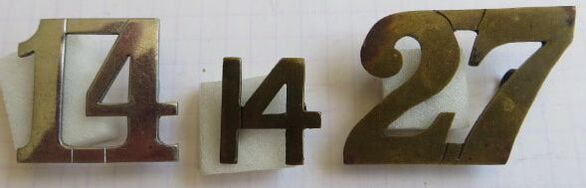
- Opposite: A pair of large numbers to the 14th and 27th Reinforcement drafts. Unsure what these are for, but the 14th is maker marked to the back to "Bock, Wellington", which is a WW1 New Zealand maker. The 14 is chromed, while the 27 is brass. Both are 26mm high. The 14 to center, is for scale and is the standard shoulder number size of 19mm high.
Reserves.
In late 1915, early 1916, Companies of Reserves were briefly established in New Zealand.
This seems to be due to the over-abundance of men training at the time, and the military events occurring overseas.
Already the focus of Gallipoli was waning, and instead the Military authorities were looking to move New Zealand forces to Europe, with the establishment of the New Zealand and ANZAC Divisions.
Reinforcements were held back, some sent to Egypt, while existing formations were built out and new ones established.
It looks like the "Reserves" were formed to keep the men training while the changes to New Zealand's Army structure took place.
The Infantry Reserve Companies were numbered from 1 to 4 (I'm missing No. 2), while a single 1st Mounted Rifle Reserve was formed.
Here are some examples of their badges.
|
- Above: A two piece, gilt brass Cap badge to the Infantry Reserves. This is a generic type, with no number. Two brass hex lugs to back, and note the RD or Registered Design number of "RD818" to center.
|
- Above: A two piece, silver Cap badge to the 1st Infantry Reserves. A brooch fitting to back, and note the RD or Registered Design number of "RD818" to center. No hallmark to back.
|
- Above: A two piece, gilt brass Cap badge to the 3rd Infantry Reserves. Two brass hex lugs to back, and note the RD or Registered Design number of "RD818" to center.
|
|
- Above: A two piece, gilt brass Cap badge to the 4th Infantry Reserves. This has had extra gilt applied and a brooch fitting to back. Note the RD or Registered Design number of "RD818" to center.
|
|
- Above & Opposite: A interesting image of a boy and girl dressed up in the uniform of a Soldier and Nurse. Note the boys Cap, which has a 4th Reserve Infantry Cap badge. Above is a larger image of the cap badge to front of the hat.
- Opposite: A opposing gilt brass Collar badge pair to the Reserves. The left has two hex lugs to the back, while the right has copper wire loops. Both have "RD818" to center. Note these are faked, and are cast instead of die stamped. The fakes also are one piece (lugs are part of the badge), so care needs to be taken.
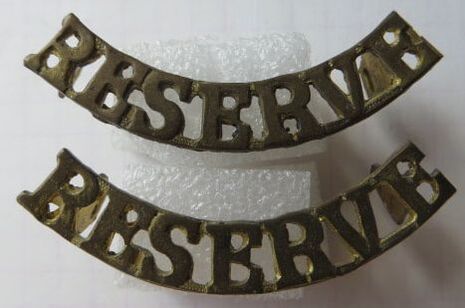
- Above: A cast pair of gilt brass shoulder titles to the Reserves. These have two brass hex lugs to the back of each. No maker mark.
- Opposite: A two piece, gilt brass Cap badge to the 1st Mounted Rifles Reserves. Two copper looped lugs to back in a north/south configuration. No maker mark. |
|
RD or Registered Design number 818 was to Montague Bay, Engraver & Jeweler, 66 Willis Street, Wellington, N.Z. on the 15th of December 1915.